240 gallon reef build
Posted 02/21/2012 at 08:29 PM by rixhater
This is my first blog or post. I am new to this so please forgive me for any errors i make with posting. I will try my best to learn this quickley.
I currently have a 90gallon mixed reef with only a few corals and a few fish. I have been wanted to upgrade and go to a larger tank for a long time and have not gone all out crazy with the 90 gallon because i knew i would be upgrading and didnt want to invest in a lot of equipment that would soon change. The 90 gallon has been running a little over a year now without any major issues. About a week or so ago i was scanning through craigslist and found what i thought was a tremendous deal. a 240 gallon acrylic tank, stand (unstaind), canopy(unstained), approx 70-90 gallon sump and a Reeflo external pump for $600. This sounded great to me since i wanted an unstaind stand and canopy to i could stain it the color i wanted. I also liked the sound of the tank being acrylic since i have heard many good things (also some bad) about how clear and big of a difference it is to have acrylic vs glass. so what the hell i'll try it.
As long as i am doing this right here are pics of the 90 gallon
[IMG]http://i1060.photobucket.com/albums/t448/rixhater/P2120301.jpg[/IMG]
[IMG]http://i1060.photobucket.com/albums/t448/rixhater/P2060278.jpg[/IMG]
[IMG]http://i1060.photobucket.com/albums/t448/rixhater/P2060276.jpg[/IMG]
[url]http://i1060.photobucket.com/albums/t448/rixhater/P2060269.jpg[/url]
I had to travel about an hour and a half to get the tank. When i got there the guy was nice and he had already made me aware that it has scratches that needed to be buffed out. I had read that this was easy to do and didnt mind. Obvisouly i didnt exspect to see a brand new tank for that price and i knew it would take some work. i purchased the tank and got it home. i brought my tools home and began planning and making a list of materials i would need to get this stand and canopy up to speed before i began to tackle the buffing issue.
[IMG]http://i1060.photobucket.com/albums/t448/rixhater/240%20gallon%20reef%20build/P2130314.jpg[/IMG]
[url]http://i1060.photobucket.com/albums/t448/rixhater/240%20gallon%20reef%20build/P2130313.jpg[/url]
Sorry this first one is so long i am just catching everyone up then they will be shorter, lol. The stand is 8 feet long with only 4 legs (2x4's) and 1 movable center brace (6x6). I did not feel comfortable with that much weight on only that little of wood.
[IMG]http://i1060.photobucket.com/albums/t448/rixhater/240%20gallon%20reef%20build/P2130310.jpg[/IMG]
Also all of the "L" brackets were rusty and falling apart. If you pushed on the stand and had alot of play in it. This made me nervous so more wood went on my list.
[IMG]http://i1060.photobucket.com/albums/t448/rixhater/240%20gallon%20reef%20build/P2120286.jpg[/IMG]
[IMG]http://i1060.photobucket.com/albums/t448/rixhater/240%20gallon%20reef%20build/P2120289.jpg[/IMG]
[IMG]http://i1060.photobucket.com/albums/t448/rixhater/240%20gallon%20reef%20build/P2120288.jpg[/IMG]
[IMG]http://i1060.photobucket.com/albums/t448/rixhater/240%20gallon%20reef%20build/P2130308.jpg[/IMG]
Just before purchasing this setup i had ordered some new equipment that started to arrive in the mail. I ordered a frag tank 18x18x6, 1" bulkheads so i could plumb it inline off one of the drains then into the sump, i ordered 2x 120watt high intensity LED pendats, Neptune apex aqua controller(display, base, module 2 w/salinity probe, energy bar 8). i only ordered 2 LED lights cause i was intending on putting them over the 90gallon till plans changed, lol.
I decided i wanted to take my time and do this stand right since i dont plan on braking this tank down anytime soon to redo anything. i decided i would rip out all the legs and replace with new 2x4's and "L" brackets. i also added 4 more legs. i now have the 4 corners and 2 more in front and 2 more in rear. i sanded down the base to get rid of some of the bad wood where water had been resting. I then lined the bottom of the tank with a PVC liner i got from home depot that was pretty thick. i then staind the stand with a mahogany color.
[IMG]http://i1060.photobucket.com/albums/t448/rixhater/240%20gallon%20reef%20build/P2170320.jpg[/IMG]
Total Comments 9
Comments
-

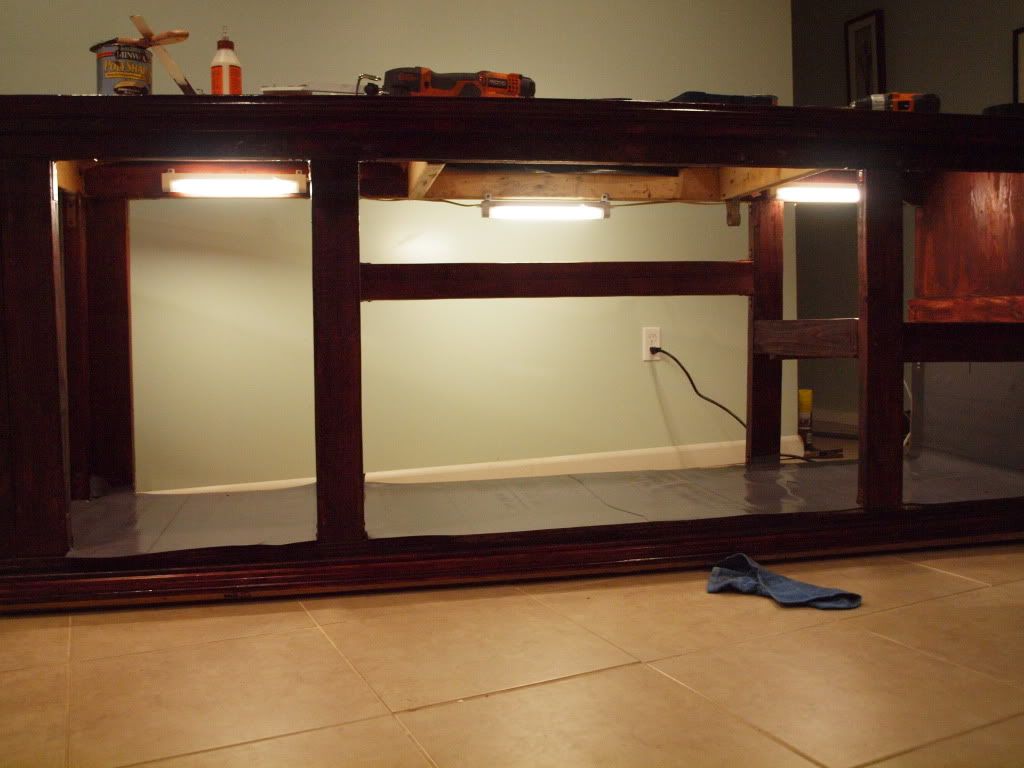

Since i had my Neptune system come in i decided i wanted to do something different and incorperate an electronics box into 1 end of the stand and seal it off. I was able to do this quite easily. i decided to do something different and i lined the inside of this box/cabinet with herculiner (the black rubber paint used for truck bed liners). I think it came out pretty cool.
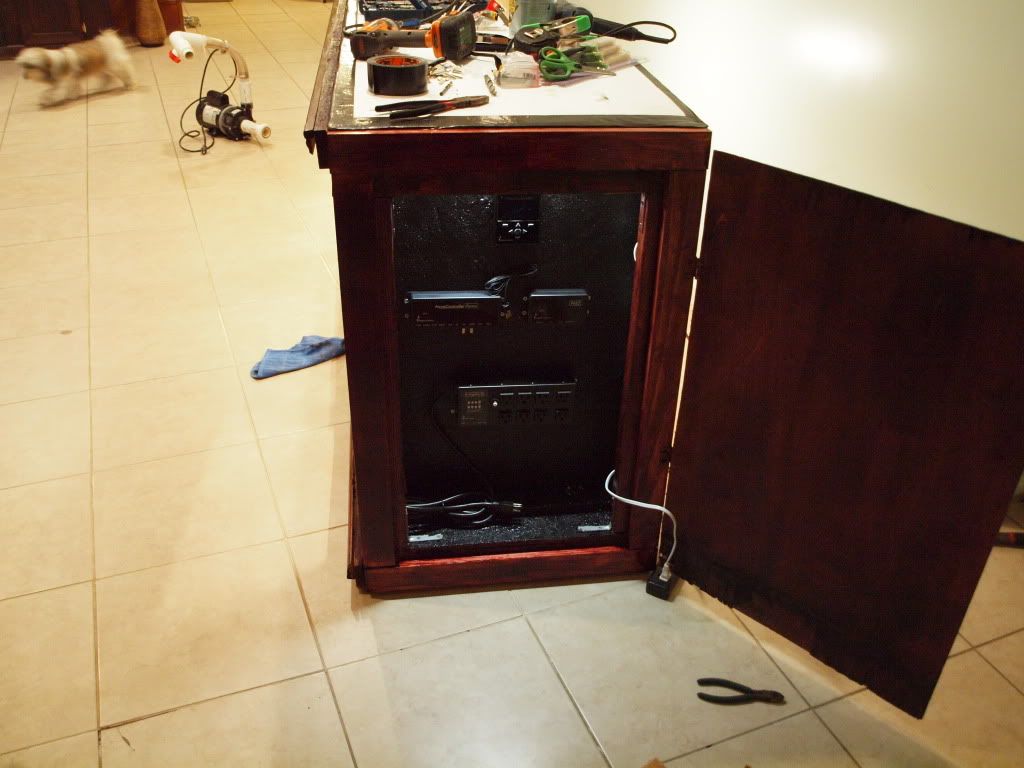

i then mounted the equipment into the box and then began running lights. i wanted sufficient lighting under the stand and in the electronics box for when i need to work. i ran 3-18"lights under the stand main section and 1-12" light in the electronics box. I didnt want to have to plug in or unplug anything everytime i needed light so i purchased a simple push button switch from home depot and wired all the lights to this switch. now i just press this button once and all 4 lights turn on and press it again and all lights go off. i will post a pic later since i dont have one at the moment. I am going to take a break and will continue with more information hopefully later tonight since i havent quite caught up yet but close.Posted 02/21/2012 at 08:38 PM by rixhater 
-
 i am pretty happy with the way the stand turned out and feel i only have some small fine tuning to do to it till it is complete. This past saturday i finally got some time off so i could attempt to get some more work done. i decided to take a break from cutting wood and staining since i was covered in stain already and look like i have some sort of weird skin disease. I figured i would give this buffing a shot and see really how easy it was.
i made the mistake of not planning ahead and having supplies ready and ended up waisting half of the day searching for supplies from auto parts stores, home depot and ace hardware. I purchased a 6" buffer and all supplies the youtube video and other members recommended. So i thought.... I must say i started buffing the tank in approx a 10" area that had several minor scratches but nothing major. I truly sucked. I found out quickly that it is indeed not as easy as some make it out to be. i have 600, 800,1000,1500 grit sandpaper, novas (i believe thats what its called) 3 step scratch remover, a decent buffer and i even went and got car scratch remover as recommender from a youtube video i watched. the guy in the video got his scratches out using sandpaper and buffing with the car scratch remover but not me. Now it wasn't all as bad as i am saying it did indeed clear of the acrylic very well and removed a lot of the scratches but i was unhappy since it still left several scratches. i even tried sanding some more and redoing that area and still i couldn't get the scratches to come out. i read that you determine if it is a big scratch by if you can feel it with your finger nail by scratching over it. i can feel it but barely i would still want to consider them minor but don't know why i can't get them out.
In frustration i sat back and took a break. It was at this time that i noticed something that i felt was very bad news. i never noticed it before but there was a crack and a section that was taken out of the tank.
In this photo you can see the back of the tank facing up. There is a large piece of acrylic used to fix a crack that was in the tank. I was told about this when i got the tank but spoke to a few people and i was assured that as long as it was fixed appropriately it is pretty reliable and acrylic does well repaired. (not my knowledge just what i was told). so i checked out that acrylic and it seemed pretty thick and covered well beyond where the original crack was. however what i didn't notice as that on the top side of the tank there was a crack. the crack starts where the left top side opening meets the center brace and runs to the back wall (approx 6" or so) you can then see that this is where the original cracked that was repaired lines up and most likely this crack had something to do with (not sure). This made me nervous so i began to look closely and also realized that the acrylic used for the repair was also starting with a small crack that lined up perfectly as a continuation of the top crack. i instantly started reading up on repairing acrylic tanks and whether or not it was truly worth it. During my reading i read an article that advised up the extreme importance of a solid top panel of the tank. More not good news is what i was thinking since on the opposite side of the tank the person i got the tank from cut out a nice size section of the tank. (seen below)

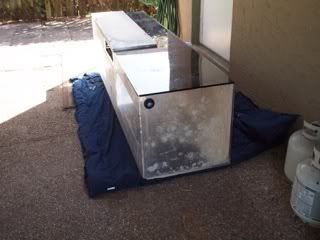
If you look to the right side of the pic you can see where a rectangle section was cut out. it is approx 8-10" long and goes all the way to the side of the tank. During my reading i read that it is not good if you don't have at least 3" of support on all sides of your top panel. i may have 3cm if I'm lucky.
I was very frustrated at this point and a little confused. I am still going to do the project and will not allow this to stop me. However it will make me change my plans and slow me down slightly. As of now this is pretty much where i am at. I don't think i am going to continue with the current tank i own because i don't entirely feel safe filling it up. I would hate to invest anymore time buffing it and getting it perfect filling it with live stock and then have a crack and have to breakdown the tank. I am now in the market for a 96x24x24 tank and have emailed multiple companies searching for a quote for a tank and shipping. Unfortunately none of them have responded and it has been 3 days. I emailed several companies requesting a quote and asking if i have the option to choose where my overflows are located. since i have built my stand and i am very happy with it i don't want to rip it apart again and would like to order a tank that will utilize the same overflow location so the pre drill holes line up with my current stand. that cut out in the current stand is pretty large and will allow for some alteration. I think i will still remain with acrylic.
In the meantime while i am waiting to hear from the tank manufactures. I received my frag tank in the mail tonight and will try and post pics tomorrow. It was ordered from Ebay and it is 18x18x6 acrylic with a black bottom. I got it for around $110 shipped. It seems pretty nice and feels solid. i am anxious to get it and the neptune system up and running but am delayed due to the tank issue. now i have parts, tools and equipment all over just waiting for a tank.
I am also thinking of ordering a new skimmer with the new tank. I want to invest in a good skimmer since i do believe it is an important part. i have read many posts of people going back and forth over what is better then something else and i was thinking of going with the Bubble King supermarin 200 or the vertex alpha 200 leaning more towards the alpha since i can't tell much of a difference other then 1 is cone and one is not also the alpha is a lot cheaper. I'm sure there maybe some huge difference so i apologize for my ignorance or lack of knowledge on the subject. If anyone has good suggestions on a protein skimmer or a good tank for the money i am open to suggestions or helpful input since i have not ordered either yet.Posted 02/21/2012 at 10:29 PM by rixhater 
-
 To my surprise i still have not received a return email from any of the companies that i emailed. Starting to think my email malfunctioned. If i don't hear anything by the weekend i will resend emails to companies.
Since i am going to have to wait a little while for the tank anyways i started researching DIY rock. I want to go with a different style with this tank then i did with previous tanks attempting to open it up a bit and possibly have a large free standing center rock (hopefully to cover with acro one day) and i feel the best way to do this and get the rocks in the best shapes for my aquascaping i will need to just make them myself. I will still use the 100+ pounds of live rock that i currently have but would like to create new rocks as well to complete the look i am going for. There are several talented people who made some really good DIY live rock videos on youtube as well as a lot of good advise from other RC members. I am going to get the materials and if i am able to free up time i may attempt some rock work this weekend. i will take pictures and post. Hopefully it will help someone else as many have helped me. As of now it seems as though the popular mix is oyster shell, aragonite sand, portland white cement gu10, water. Ill let you know how it turns out.Posted 02/23/2012 at 12:11 AM by rixhater 
-
 i never heard back from the companies i was looking to have build the acrylic tank. I guess they don't like money. So i decided to go with a much easier approach and order a 240 glass. the only down side in which i was attempting to avoid before was i will now have corner overflows when my stand is setup for 1 main center overflow. i will need to remove the electronics box that i built recut the holes for the overflows to pass thru and then i will redesign the electronics box around it once that is done. i don't want to do it till the tank is actually sitting on it. since i have to remove the electronics box i decided to go ahead and take out my new neptune apex system and just go ahead and install it on the 90 gallon and figure it all out now on a stable tank. Since i was going ahead and doing all this i pulled out my new LED pendants and decided to hook them up to the apex as well to truly see what this thing could do. I really like the system so far it is fairly easy to use. It comes with a disc that contains the manuals to the system and it is pretty detailed and is over 100 pages long (not all of it is needed unless you use every feature). I think is was a very good decision and i am glad i did it now. i wasn't to sure for the cost but now i am glad. It really saved me already. just so happens that as i was installing the unit my A/c in my house decided to be stupid and not work. I didn't realize it till i was done with the setup and i was sweating. i happened to program my heater, actinics, daytime lights before realizing my a/c was out. it was late and i had to work early so i went to bed not thinking much of it till midday the next day when my fiancé called and said the tank lights went off. i asked her what the display said temp was and she said 83. i had just so happen to set the temp feature with the lights. i set it for 82 degrees so if the water hits 82.1 it will automatically turn the lights off. i also set this feature with the heater but i have it set for if the tank hits 80 then it turns off. these aren't my final settings they were just quick messing around learning the system settings but even they came in helpful today. the tank is a little over 84 degrees now so hopefully this a/c kicks back into action tomorrow. I think i am going to look into a chiller for the 240 setup just in case, lol. The LED pendants also look great especially the actinics. i plan on taking pics to show before and after on some of the acro and other coral since there are a lot of threads talking about LED.
Posted 02/27/2012 at 10:53 PM by rixhater 
-
 if anyone is good with acrylic and lives in south florida i would be willing to make a good deal for the 240 (tank only) if your interested send me a PM
Posted 02/27/2012 at 10:54 PM by rixhater 
-
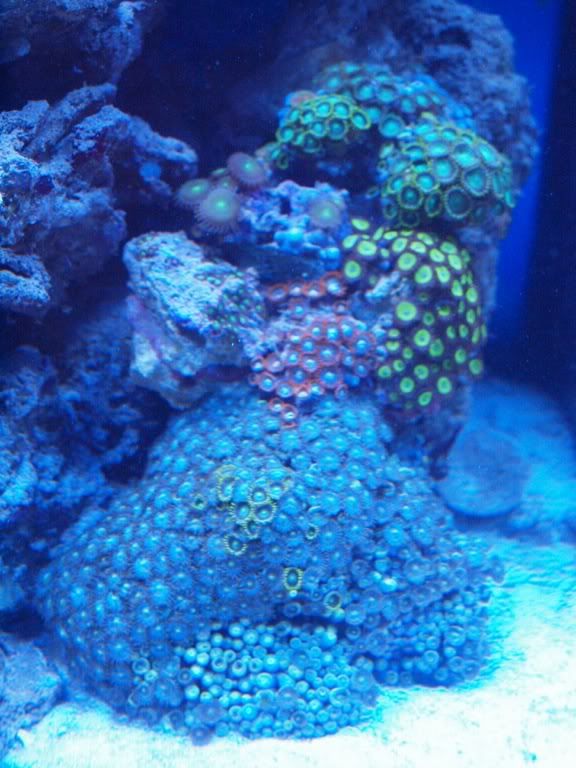
 So the A/c finally got fixed yesterday. Took a little longer then i originally expected and i was getting a bit nervous since i just put another $300 worth of coral into the tank and the temp went up to almost 85 degrees. It is back under control now and i have the LED's set up with the Apex controller and they look great. I was a bit nervous since i hear some people don't like them. Luckily they look good and i am happy. pictures below.

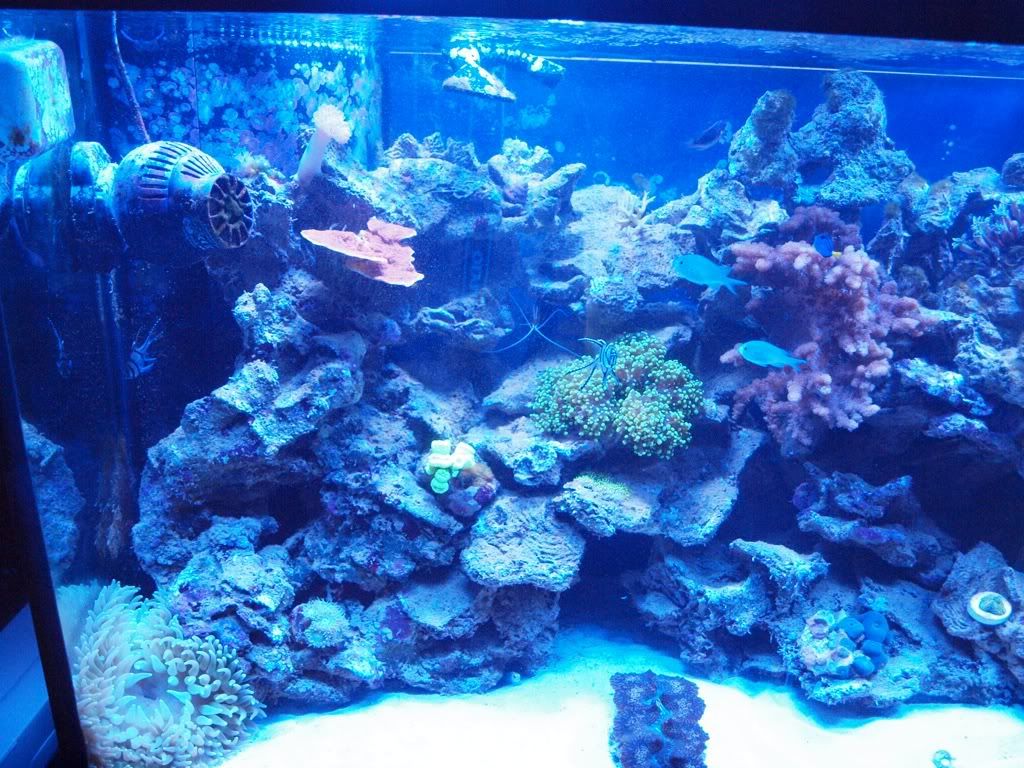
now i am getting ready to connect the apex to the computer and attempt a firmware update as suggested by some other very helpful RC members. Hopefully it will fix the freezing and glitching of my display unit. I would like to get it fixed and setup so that i can monitor from my laptop or phone. Even though i am having this issue i still really like this product and think it was a great purchase. the freezing and glitching has not affected any of my setting or timers only the display unit when i use it. Ill update everyone after i get the network issues figured out. I would like to thank the RC members who have helped me with these issues you guys are great.Posted 02/29/2012 at 10:06 PM by rixhater 
-
 ok i finally got my issues resolved with the apex network installation. A very special thanks to Russ in the neptune forum he was an amazingly helpful person. The unofficial users guide was actually incredibly detailed and walks you right thru all of the steps and got me very close last night but for some reason i did something stupid last night and for what ever reason i couldn't access my apex outside the network but russ got me back on point. so between messing with it last night and tonight i was able to get my apex set up outside my home network also set up email alert, text message alert and i got the android app set up on my phone. That app is actually pretty neat it keeps an update of your tanks parameters on a widget in the location of your choice. I think i should be able to order the new tank in the next couple of weeks. sorry for the delay.
Posted 03/03/2012 at 01:23 AM by rixhater 
Updated 03/03/2012 at 01:24 AM by rixhater (typo) -
 Been a little crazy lately with work and i havent been able to get any work done on the canopy. By the time ive been getting off work its a little too late for power tools so... ive just been working on the apex system and a few other minor things with the 90 gallon. As i mentioned before i set up the LED lights and they seem to be doing very well. i am actually very happy with the color it puts out. it seems to be between 14-20k appearance being a little closer to 14k. I also noticed i was able to move a few corals lower in the tank and them still open up good. I had trouble doing that when i was running the T5's. I finished with the netwroking friday night with the Apex and then decided today that i wanted to get rid of the ethernet cord that was running in my living room so i checked out the wireless options. i purchased the netgear WNCE2001 Univeral wireless internet adapter and began tackleing that. i was a little worried because the guides all advised that it wasnt that easy and a lot of people have difficulty in that area. i felt it went pretty smooth. my only issue was getting my outside network back up and running as well as my android app. This was handled by adjusting a setting in my firewall and now i am back up and running. i think this apex controller is one of the best purchases i have made for my tank. Also earlier i went by 2 LFS and picked up a few more things for the tank. blue sided fairy wrasse, flasher wrasse, lubbocks wrasse, blue dragon eye zoo's, watermelon zoo's, chili pepper monti, and a sunset monti. I also picked up a different dkh test kit and found my dkh was really low and started the first day of raising it slowly. hopefully with fixing this i will see a significant difference hopefully in growth.
Posted 03/04/2012 at 12:05 AM by rixhater 
-
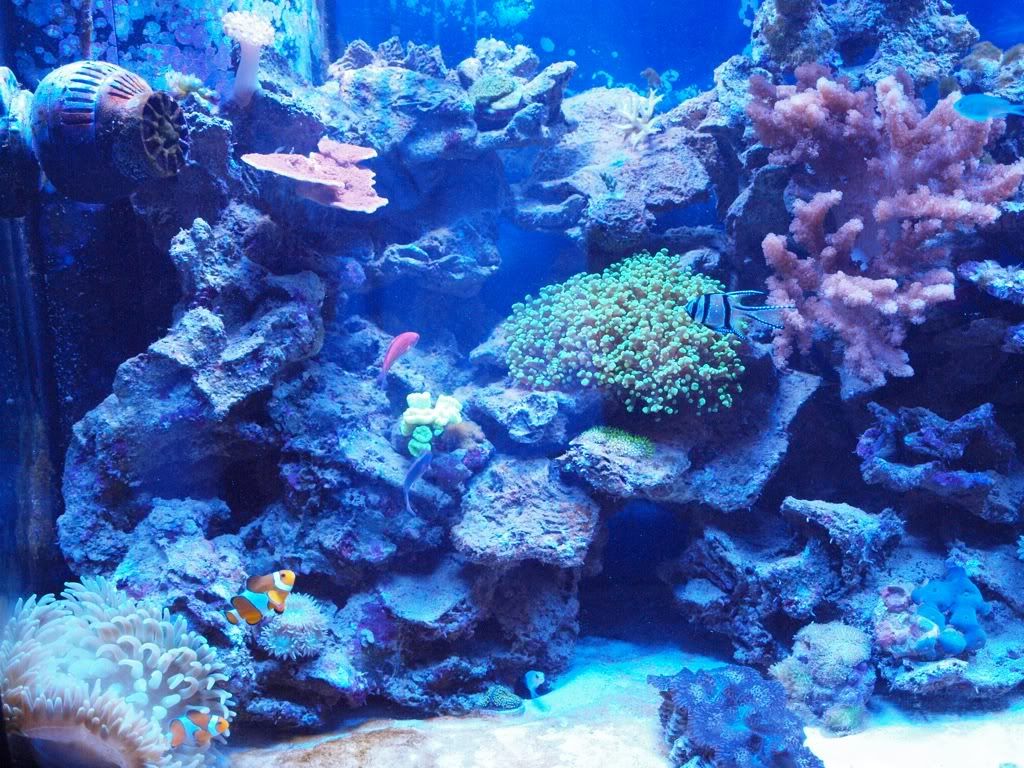
 pH is improving as well as the alk. all other test levels were good and some of the corals look a lot happier. Theres only a few days time lapse from the pic above and the pic in this post and the frogspawn and colt both are a lot more open now than they were then. now they open up all the way everyday.
Posted 03/06/2012 at 01:11 AM by rixhater 


