

|
 |
|
|
#101 |
|
Registered Member
Join Date: Mar 2011
Location: Calgary, Alberta
Posts: 146
|
update continued
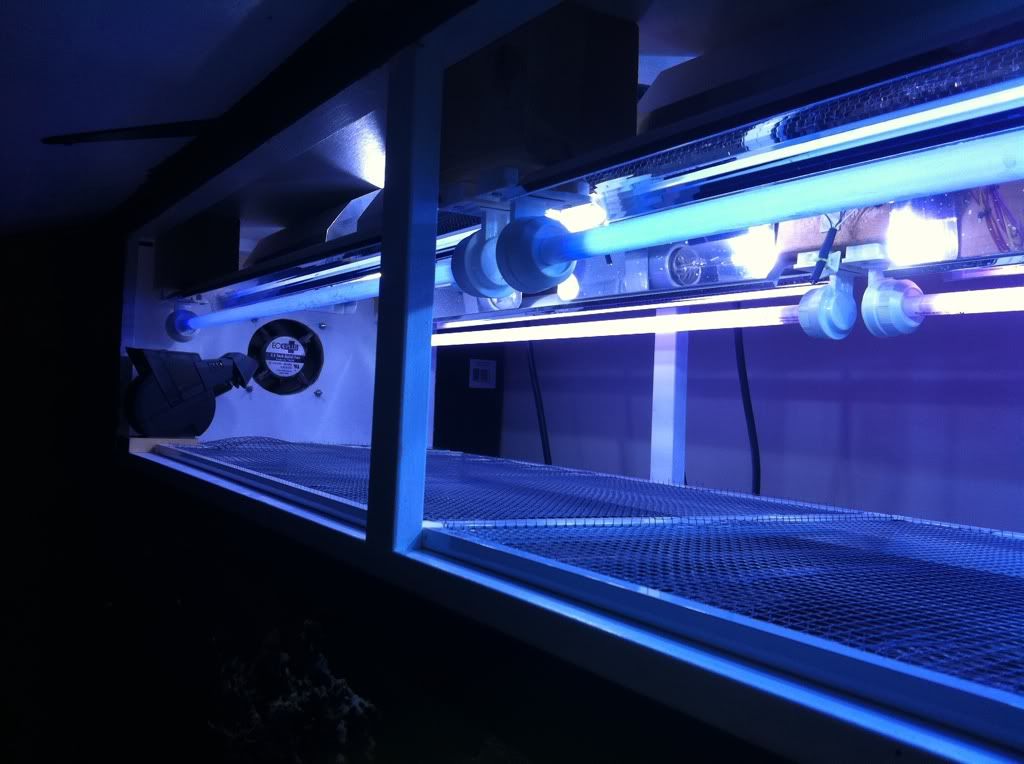
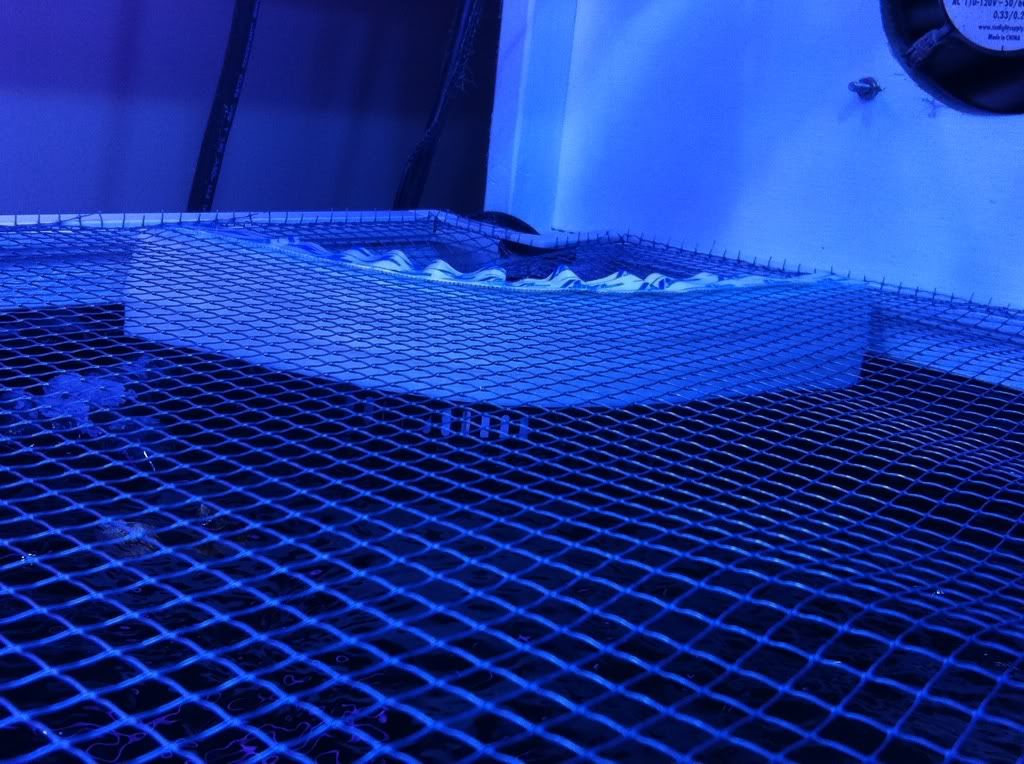
I also built a new top for the tank. I had lost one of my barletts anthias because she jumped through the eggcrate and landed on top where I found her dead. This top only has 1/4" holes so that shouldn't happen anymore! I also added some weather stripping velcrowed onto the mesh to prevent them from slipping into the overflow.
 
|
|
|

|
|
|
#102 |
|
Registered Member
Join Date: Dec 2007
Posts: 802
|
ABSOLUTELY AMAZING!
BTW, how old are you? You look kinda young in one of the first pictures if that was even you. It's good to see other youths taking in this wonderful hobby. |
|
|

|
|
|
#103 |
|
Registered Member
Join Date: Mar 2011
Location: Calgary, Alberta
Posts: 146
|
Thanks for the compliments! Im 22. The younger guy with my tank in one of the first pictures is my 19 year old brother who is just setting up his first tank. When I began this I was still 21 though. . . seems like yesterday haha
|
|
|

|
|
|
#104 |
|
Registered Member
Join Date: Aug 2011
Location: Alabama
Posts: 1,236
|
I love your tank I just got a 90 and am loving it
__________________
"He who changes the water also picks the fish." MrTuskfish David aka sandy (ask the loungers.) Current Tank Info: 600 gallon Green moray tank connected to 400 gallon shark pond. 90 gallon mixed reef |
|
|

|
|
|
#105 |
|
Registered Member
Join Date: Dec 2007
Posts: 802
|
Nice, I'm 20, set up my first tank about 3 years ago but its a neglected tank now full of aiptasia because I moved away for school and left the tank with my parents. All they do is replenish top off water, feed the 3 remaining fish, and re-prime the siphon overflow when needed. I do plan on returning to the hobby after I graduate, that is if I even graduate haha. I really like your plumbing set-up and how you have your fuge in a separate tank; I might use those as inspirations for my future system. But anyways, keep on updating, I'm loving this thread!
|
|
|

|
|
|
#106 |
|
Registered Member
Join Date: Jul 2011
Location: Farmville, VA
Posts: 1,184
|
Great update! Thanks!
I think I'm going to put some insulation under my brute now that's in my basement on the slab like you did... The concrete just sucks any heat right out of the container! |
|
|

|
|
|
#107 |
|
Registered Member
Join Date: Mar 2011
Location: Calgary, Alberta
Posts: 146
|
Video Update
|
|
|

|
|
|
#108 |
|
Registered Member
Join Date: Mar 2011
Location: Calgary, Alberta
Posts: 146
|
Update
Here are some zoa's! I lost a couple colonies to zoa pox and have been treating with Furan-2. All seems well. Here are a few pics of some of my new/old zoa's!
    
|
|
|

|
|
|
#109 |
|
Registered Member
Join Date: Jan 2012
Location: California
Posts: 320
|
Great build, congrats.
__________________
Be who you are and say what you feel, because those who mind don't matter, and those who matter don't mind. Current Tank Info: Work in Progress.. |
|
|

|
|
|
#110 |
|
Registered Member
Join Date: Aug 2011
Location: Albany, NY
Posts: 1,934
|
thought it was a bad thing to have brass fittings/hardware in/on the system?
GREAT BUILD BTW!
__________________
SALINITY NOW.... |
|
|

|
|
|
#111 |
|
Registered Member
Join Date: Dec 2011
Location: Edmonton, AB
Posts: 169
|
Hey! im 20 and stumbled across this thread, when i saw how old you were and the money you were spending I had a hunch that you might be in the same line of work as I am! Sure enough 'Power Engineer' as your occupation on your profile. Where in Calgary do you work? Im at Shell Scotford Upgrader just northeast of Edmonton..
Awesome tank btw! Similar to what I am starting to do with my 90G.
__________________
Wayne Rainforest of the Sea Current Tank Info: 105G Custom / 50G Custom Sump/ 6x54W ATI Powermodule/ CSC-250 Skimmer / WaterBlaster HY-5000 Return Pump /Neptune Apex /2x Vortech MP40es & Tunze 6065 |
|
|

|
|
|
#112 | |
|
Registered Member
Join Date: Mar 2011
Location: Calgary, Alberta
Posts: 146
|
Quote:
|
|
|
|

|
|
|
#113 | |
|
Registered Member
Join Date: Mar 2011
Location: Calgary, Alberta
Posts: 146
|
Quote:
|
|
|
|

|
|
|
#114 | |
|
Registered Member
Join Date: Aug 2011
Location: Albany, NY
Posts: 1,934
|
Quote:
__________________
SALINITY NOW.... |
|
|
|

|
|
|
#115 |
|
Resident Ninja
Join Date: Mar 2006
Location: Oshkosh, WI
Posts: 560
|
Lookin' good!

__________________
- SCOTT. Check out my homepage to see my build! Current Tank Info: 40B / Super Reef Octopus SRO2000INT / 35-gal. acrylic sump+refuge / 120W LED lighting / Water Blaster 3000 Return... IN PROGRESS! |
|
|

|
|
|
#116 | |
|
Registered Member
Join Date: Dec 2011
Location: Edmonton, AB
Posts: 169
|
Quote:
ill probably start a thread soon tho. 
__________________
Wayne Rainforest of the Sea Current Tank Info: 105G Custom / 50G Custom Sump/ 6x54W ATI Powermodule/ CSC-250 Skimmer / WaterBlaster HY-5000 Return Pump /Neptune Apex /2x Vortech MP40es & Tunze 6065 |
|
|
|

|
|
|
#117 |
|
Registered Member
Join Date: Mar 2011
Location: Calgary, Alberta
Posts: 146
|
In the next 6 weeks I will be doing some major changes to the tank. I have ordered a custom sump for under my stand. It measures 60"x18.5"x18" and will incorporate two 7" filter sock holders, a large skimmer chamber, and a good sized fuge. I will put a picture of the design from sketchup in the next few days. I will be pulling all of my old plumbing out from under the tank and redoing it all. The reason I am re-doing this is for two main reasons. One being that when I originally designed my sump I planned to not use filter socks. Now I use them religiously and really hate how cramped it is in my sump in order to change mine out. The other major reason is I have absolutely no room to work in my fuge. Because it is raised up higher than the sump I cannot fit my hand into it. This makes it extremely difficult to do any maintenance on it like trimming my cheato.
While I am re-doing my sump and plumbing I am going to drain the display tank half way. I will put my heaters into the display water along with my vortechs turned way down so my sand is not blown everywhere because of the low water level. I will also add a couple air stones and feed lightly. I have ordered a glass eurobrace for my tank which I will silicone on once the tank is half empty. I will remove the current black plastic brace that is on the tank now and put the eurobrace on. I will leave the tank half empty for 4 days to let the silicone cure. During this time I will work on plumbing in my new sump. I also plan on painting the inside of my stand white before adding the sump which is something I should have done originally. While waiting for the silicone to cure I will also be re-doing my lights. I will be taking my current four 250w spider reflector metal halides out and putting in three 250w LumenMax Elite reflectors. I will also be removing two of the four 39watt T5 lights I have in the canopy for supplemental lighting. With the larger LumenMax reflectors I can only fit two of the four T5's. I will also be replacing my fans that are currently in my canopy with something much quieter as they are extremely loud! The reason for adding the Eurobracing to the tank is so I can run 3 metal halides with good reflectors instead of 4 with crappy reflectors. Currently my tank has a 4" black plastic brace directly in the middle of the tank which is preventing me from running three 250's as I will not place one directly above this brace for obvious reasons. This will decrease the total power required to run the tank and also reduce the heat (four 250watts put out some mean heat on a 125g tank!). This is definitely going to be a big project but I am excited to get started on it. Im heading to Cuba for 2 weeks on sunday so ill be preparing to start all of this as soon as I get back!  
|
|
|

|
|
|
#118 |
|
Registered Member
Join Date: May 2011
Location: rome,ny
Posts: 1,151
|
nice.. keep us posted. have u consided led's for lighting?
|
|
|

|
|
|
#119 |
|
Registered Member
Join Date: Apr 2011
Location: Saskatoon, Canada
Posts: 97
|
Sounds like quite a project! Enjoy Cuba!
__________________
20Gal nano in the works http://reefcentral.com/forums/showthread.php?t=2094629 Current Tank Info: 20 gal nano with black occellarus and orange occelarus clown fish. Corals are green star polyp, duncan, candy cane, and pulsing xenia! |
|
|

|
|
|
#120 |
|
Registered Member
Join Date: Feb 2012
Location: calgary ab
Posts: 12
|
Wow nice job on the tank. Keep it up.
|
|
|

|
|
|
#121 |
|
Registered Member
Join Date: Jul 2011
Location: Farmville, VA
Posts: 1,184
|
Any updates? :-)
|
|
|

|
|
|
#122 |
|
Registered Member
Join Date: Mar 2011
Location: Calgary, Alberta
Posts: 146
|
Tank Disaster and Upgrade
Well A lot of things have happened since my last post. I went to CUBA for a 2 week vaccation with my girlfriend, Amanda, that was awesome. Did lots of snorkeling and had a blast. When I arrived home I found what was left of my tank. Im not sure exactly what happened but im thinking it was something like the skimmer overflowing. My roommate was feeding the fish but thats where her knowledge ends. She tried her best to keep things alive. The fish I lost are as follows: Foxface Rabbitfish, Purple Firefish, mated pair of Barletts Anthias, Mated pair of Squarespot Anthias, Naso Tang, Flame Angelfish. I also lost all of my coral except for a few zoanthids and a couple sps that seem to be making a comeback. Also one of my urchins and my coral banded shrimp did not make it. When I arrived home I began immediate waterchanges to try and keep the remaining fish alive. Here are a few pictures of the tank after 90 gallons of waterchanges:
  My Anthias RIP   After a week of chaos with starting a new job and trying to get the tank straightened out, I was frustrated and ready to start my upgrade I had planned. It was a crazy week but I managed to pull it off! I can tell you the tank looks SWEEEET now! For now here are some pictures as the upgrade was happening. I had the tank running half full with a cartridge filter for 4 days while I worked on the project. I stayed on top of waterchanges during this time in order to keep the water quality up for the fish who just went through so much the weeks prior.      
|
|
|

|
|
|
#123 |
|
Registered Member
Join Date: Mar 2011
Location: Calgary, Alberta
Posts: 146
|
continued
         
|
|
|

|
|
|
#124 |
|
Registered Member
Join Date: Mar 2011
Location: Calgary, Alberta
Posts: 146
|
continued
  Old Fans and Lights:  
|
|
|

|
|
|
#125 |
|
Registered Member
Join Date: Mar 2011
Location: Calgary, Alberta
Posts: 146
|
Update
My new fans and BRS order! These fans are completely silent unlike my previous ones. I just purchased two computer fans and wired them together.
  
|
|
|

|
 |
| Tags |
| 125, build, reef, stand |
| Thread Tools | |
|
|
 Similar Threads
|
||||
| Thread | Thread Starter | Forum | Replies | Last Post |
| New 55 Gallon Reef Aquarium Build | Coasterfrk | New to the Hobby | 116 | 03/31/2011 01:36 PM |
| 125 Gallon Reef Tank Build PICs & ?? | trent5501 | Do It Yourself |
15 | 02/15/2011 09:39 PM |
| 125 gallon reef tank build | trent5501 | Lighting, Filtration & Other Equipment | 2 | 02/14/2011 05:39 PM |
| My 125 Gallon reef build | Roblox84 | Do It Yourself |
20 | 12/02/2010 10:50 AM |
| 55 gallon tank build | jenreef | Reef Discussion | 8 | 06/14/2010 07:28 PM |