

|
 |
|
|
#1 |
|
Registered Member
Join Date: Jan 2012
Posts: 101
|
Looking for help aquascaping...
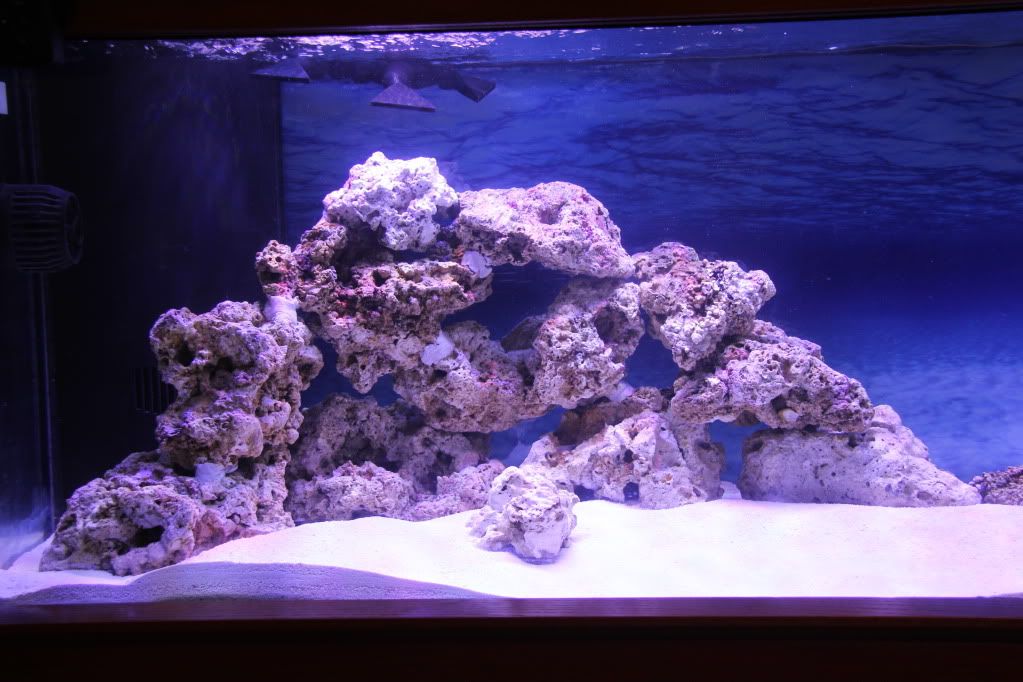
I'm hoping some of you experts can help me out. I've taken my first attempt at aquascaping my 220 gallon tank (72 L x 25 W x 29 H). I don't have the tank yet so I'm practicing in the garage. I've got something that I don't think is completely horrible, however it still just looks like a pile of rocks to me.
Can anyone point me to any articles with tips/tricks? Also, I'm wondering if there is too much rock in the aquascape? I'm using about 180-190 lbs of pukani from BRS. It almost feels like there may be too much rock and that is another reason I'm struggling. Appreciate any help! Thanks, Ian   |
|
|

|
|
|
#2 |
|
Dr. Reef at ur service
|
looks good to me.. only advice i can give u that i personally follow is that i keep the rock away from glass from all sides atleast 2" away. in case u have to clean aglae or grab something that fell.
__________________
Water Quality: NO3 0,Phos 0,Cal 440,Alk 7.5,Mag 1300 "Reef Fast, You Crash, Reef Slow, You Pass" Mike's Reef 3:16 Current Tank Info: 350g DT,95g sump, 50g Frag tank, 4800gph return 4x Sea swirls. 6x AI Vega Color. 200# Pukani rock, dual recirculating skimmer, Biopellet, GFO Carbon rx's, Cal rx. Closed loop. 1.5hp chiller, genesis renew. Apex & RKE |
|
|

|
|
|
#3 |
|
Registered Member
Join Date: Jan 2012
Posts: 101
|
Thanks, thats a good tip... Oh, I didn't mention that I'll have coral along with fish, so I guess the placement of the coral will craft the overall aquascape. The more I lookmat it though I feel like there is too much rock. Maybe too tall on the left hand side too. Probavly will only have 4-5 inches of water above the highest rock structure.
Ian |
|
|

|
|
|
#4 |
|
Registered Member
Join Date: Apr 2012
Location: Memphis 10
Posts: 1,098
|
If you want to form more of a flowing (opposed to a "pile") aquascape, with archways and caves, there are several ways of attaching and securing rock. There are plenty of options out there, but I used the rod method. I got some fiberglass rods from home depot in the form of driveway reflector markers.
When I built my current aquascape it was with rock from my prior tank, with corals attached, so it was pretty tricky. But, I started with the base and built my way up, level by level. I cut the rods to the desired length, drilled holes in the rock, and epoxied the rods in place. Then I visualized what rocks i wanted to place where. After that I measured the distance between certain rods, and drilled holes in the bottom of the rock according to the measurements. Even if it the holes didn't line up perfectly, the rods being slightly flexible were able to wedge in. After that it was just rinse and repeat. There are certainly other options, but this is what worked for me. Base Rock with rods.  Full structure on the first night... hard to see i know.  Tank @ 2 months.  Hope this helps 
__________________
If the spirit moves ya, let me groove ya Current Tank Info: 150g Starphire Pensinula SPS |
|
|

|
|
|
#5 |
|
Registered Member
Join Date: Apr 2011
Location: Los Gatos, CA
Posts: 224
|
I wouldn't trust that large spherical rock toward the LHS - it looks a little top heavy to me.
I also like the two island look with a diagonal canyon between the islands and a little height to each island. BRS has a couple of videos on their YouTube site about aquascaping that are a good starting point. Since you have the luxury of time - take it and play around with the scape until you get something _you_ like. There's just a couple of guidelines to bear in mind. Keep enough room between the rock and the tank wall to allow an algae scraper to get in-between them (you can use tape to mark your tank's footprint on the work surface). Also allow for reasonable flow through the scape.
__________________
We must recognize the dignity which all creatures possess, and we must respect it for as long as we have them in our charge. - "Coldwater Fish" by Roy Pinks Current Tank Info: 40B FOWLR w/ Eshopps R-100, Aquamaxx ConeS CO-1, Eheim 3000+ return, AquaticLife 4x39w HO T5s |
|
|

|
|
|
#6 |
|
Registered Member
Join Date: May 2012
Location: Southern Illinois
Posts: 165
|
Quote:
|
|
|

|
|
|
#7 |
|
Registered Member
Join Date: Apr 2011
Posts: 2,037
|
PLacing the larger rocks on the glass bottom and then building up from there. You can use epoxy and pvc to help secure. A rock slide could cause glass breakage. Also overhangs and caves or cubbys would be great as the fish like to find a spot to call home.
I used pvc to make a box and the placed rock on it , looks cool ,the fish like it and allows good water flow. |
|
|

|
|
|
#8 |
|
Registered Member
Join Date: Apr 2012
Posts: 79
|
Quote:
|
|
|

|
|
|
#9 |
|
Registered Member
Join Date: Apr 2012
Location: Memphis 10
Posts: 1,098
|
I used base rock for the bottom. Put the rock in place first, then surrounded it with sand, then added water. I filled the water gradually as I added each level. I had to keep adding water as some of the rock already had corals attached. It was a pretty griding task, took about 6 hours.
__________________
If the spirit moves ya, let me groove ya Current Tank Info: 150g Starphire Pensinula SPS |
|
|

|
|
|
#10 |
|
Registered Member
Join Date: Jan 2012
Posts: 101
|
Thanks for the feedback so far. I guess I do have the time to play around with it until I do get something that I like. I'll look into the rods and fastners to hold the rock together. Also, I read about people using mortar to hold the rocks together.
What types of mortar would I be able to use? Are there formulations at the local home depot/lowes that would work or do I need something specificly for aquarium use? -Ian |
|
|

|
|
|
#11 |
|
Registered Member
Join Date: Oct 2011
Location: Damascus, MD
Posts: 3,340
|
After seeing tanks with the eggcrate molded onto the back wall using shaped expanding foam, this is how I will set up my next tank. I will also drill the rocks to each other for better holding power. I made some mistakes just piling up rock with this tank and once it is in place, it is very hard to change it around.
__________________
125RR in-wall, 40B Sump, CS180 BM Skimmer, ATI 4x80 watt, eheim 1262, custom wrap around rock wall, ReefKeeper Elite 120g in-wall, 40B Sump, PC 54wx4, Jabao DC-6000 (full siphon), future seahorse t Current Tank Info: 125g, 120g, 2x40b sumps, ATI 4x80 T5HO |
|
|

|
|
|
#12 |
|
Registered Member
Join Date: Jan 2007
Location: Danville, IL
Posts: 1,918
|
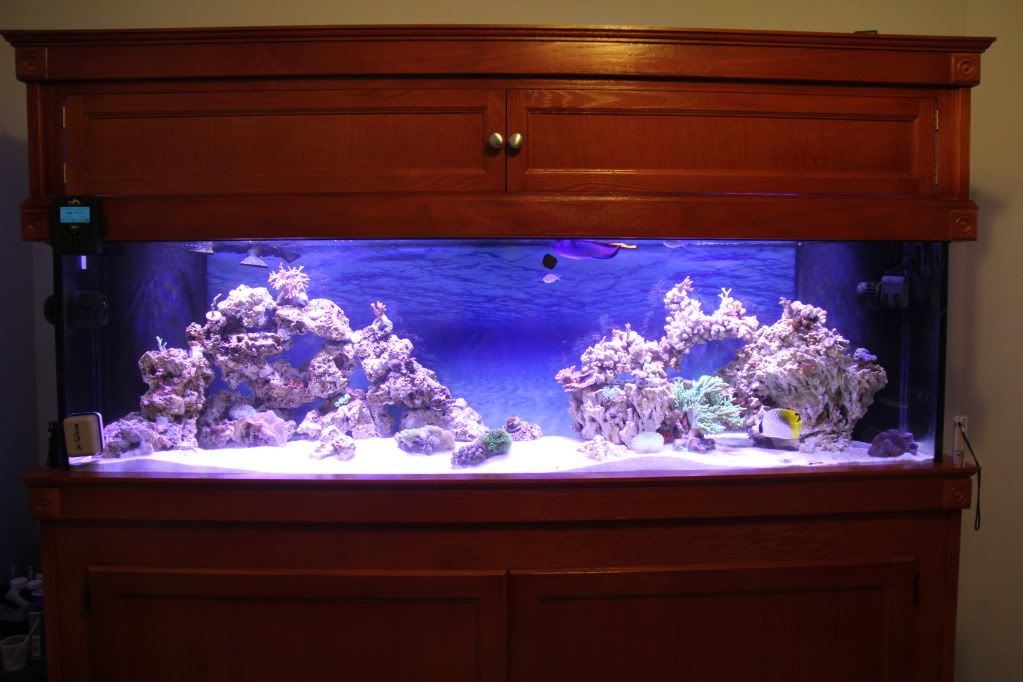
Here is a FTS of my new tank just finished about 1 1/2 months ago. I use BRS Pukani rocks on the right and Fiji rocks on the left. The nice thing about Pukani rocks is they are very light and you can easily shape it with common hand tool. The video from BRS shows you how to make the rock stand up on its own by using a hacksaw to make a flat base.
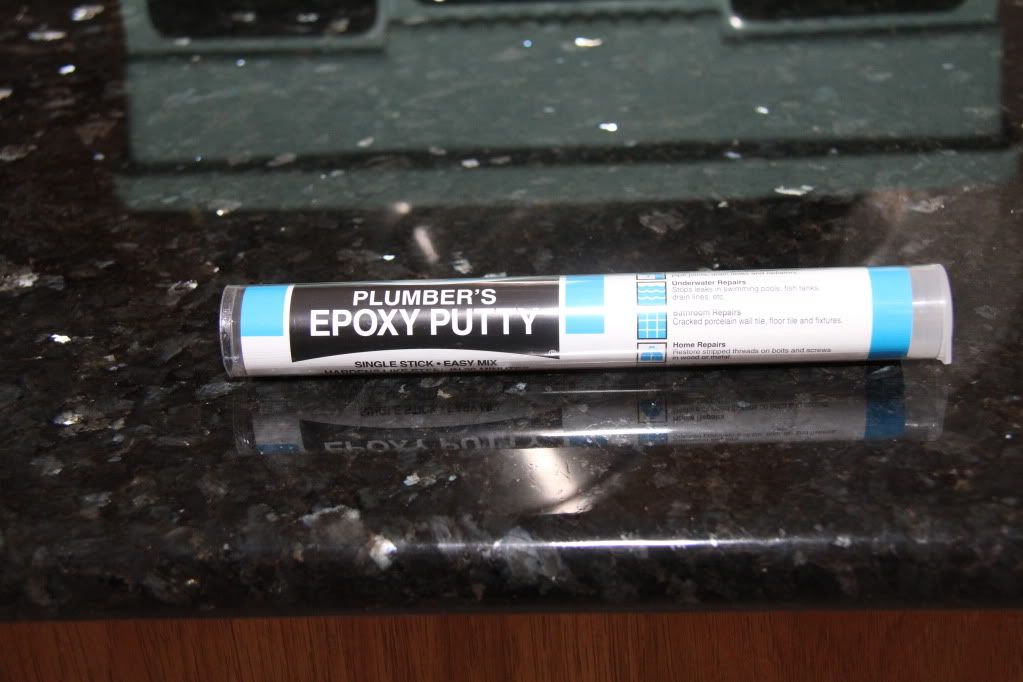
I used Plumber's epoxy Putty ($5) that I bought from a home center to secure the rocks. My tank is 125 gallons measured 72"x18"x22". I have about 80 lbs of Fiji rocks and 25 lbs of Pukani rocks in my tank as you see in the picture.    
__________________
Simon Mixed LPS and SPS corals Camera - Canon T2i with EF100mm 2.8f USM macro lens Current Tank Info: AG 92g corner tank and Marineland 125g, RKE controllers, Maxspect and Eshine LEDs, MP40WES, Jebo WP40 & WP25 |
|
|

|
|
|
#13 |
|
Registered Member
Join Date: Sep 2011
Location: New Jersey
Posts: 480
|
You need to have a vision of where you want to put your coral at, so you have a better idea have how to set your rocks. I don't know how many times I had to reconstruct my rocks. So I came with a game plan of how, and where/need to put my coral...I always love a mix reef, so I needed to incorporate all sps, lps, and softies in my 30g without harming them by to much or to little light, other corals stinging, to much or to little flow. So with my 24in 150w mh 2xt5 fixture, I place my sps high to mid of the tank, my monti's high, Toadstool mid to the side(so when it grows it won't interfere), frog spawn in the back away from the others but still noticeable, and still gets light, same goes for my colt when I get one, shrooms on rocks that are hard to place a frag, zoas on bottom where I can make a garden, plates and lps, and clams also on sandbed...Again this is the way I wanted it to be. Think of what types of coral you want, and it will help you some what of how to aqua scape your tank....good luck
|
|
|

|
|
|
#14 |
|
Registered Member
Join Date: Sep 2004
Location: Palmetto, FL
Posts: 689
|
read these. Both great articles.
http://www.reefsmagazine.com/forum/r...uascaping.html http://www.reefsmagazine.com/forum/r...-part-2-a.html |
|
|

|
|
|
#15 |
|
Registered Member
Join Date: Oct 2010
Posts: 51
|
Also you might want to check out a youtube video called coral pegging or something close to that i got my ideas off his aquascape.
__________________
Experience is what you get when you didn't get what you wanted. Current Tank Info: 180g DT -- 55g sump--40g frag |
|
|

|
|
|
#16 |
|
Registered Member
Join Date: Sep 2004
Location: Johns Island, SC
Posts: 2,021
|
I would just check out some of the builds on the Nano and large tank thread. A lot of builds with great pics of different tank looks. It really depends on what you like and what you think looks good. Build bridges, caves, cover the back wall or make several islands independent of each other. Have fun with it....Good Luck
__________________
"Do not float above me when I'm drowning in the abyss......float away from me.........float away" Current Tank Info: 54g Corner Reef Tank......and......5.5g Nano Reef Tank......and......20g Long Reef Tank.......and......27g Cube |
|
|

|
 |
| Thread Tools | |
|
|