
|
|
|
|||||||
 |
| Thread Tools |
 04/05/2012, 06:15 PM
|
#376 |
|
The "DIY Guy"
Join Date: Sep 2010
Posts: 453
|
fire in the hole!!!
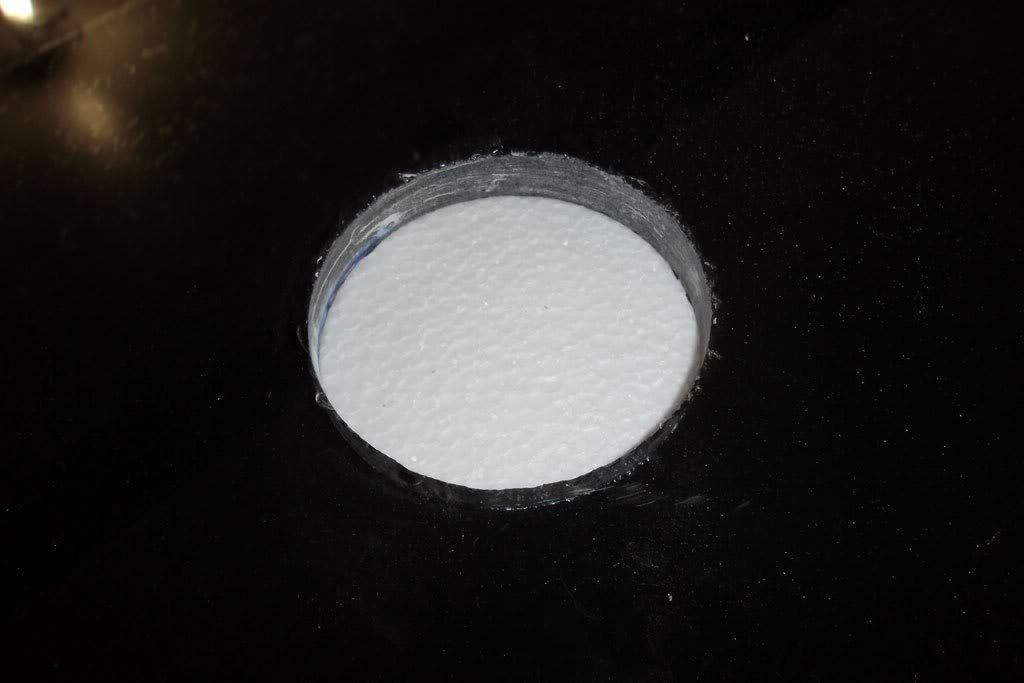
so... it is time to drill
 for goodness sake the bottom glass is so heavy...  ok stop to complain, it is time for new pics! ok stop to complain, it is time for new pics!blue lines mark the holes:  details:  another view - the big hole will be used on closed-loop inlet:  these are de sch80 bulkheads (pattern down here in BR)  as I don't have the "official tool" I decide to make this simple jig... shame on me...  detail:  drilling:   ... to be continued!
__________________
Euler NON DVCOR DVCO |

|

|
|
04/05/2012, 06:19 PM
|
#377 |
|
The "DIY Guy"
Join Date: Sep 2010
Posts: 453
|
1 out 10 finished:
  another four:   ..and finally:  10 holes for the both closed-loop: 
__________________
Euler NON DVCOR DVCO |
|
|
|
|
04/05/2012, 07:27 PM
|
#378 |
|
In-A-Gadda-Divita!
Join Date: Sep 2011
Location: Apache Junction, AZ - USA
Posts: 2,345
|
Cool!
How long did it take for each hole and how many holes per bit?
__________________
O|||||||O |
|
|
|
|
04/05/2012, 08:10 PM
|
#379 |
|
The "DIY Guy"
Join Date: Sep 2010
Posts: 453
|
it's very quick just 3 minutes for each hole. I got a video will try to show it here .
and about how many holes I have to say: no idea!  but after 20 holes the bit look like new one. but after 20 holes the bit look like new one.
__________________
Euler NON DVCOR DVCO |
|
|
|
|
04/06/2012, 05:35 AM
|
#380 |
|
The "DIY Guy"
Join Date: Sep 2010
Posts: 453
|
one more update before we dive into building the tank, this is the last time we can see all the surface of the counter top - see you in 10 years!
 these holes are perfectly aligned with those on bottom glass - the black vinyl roll will be used on the bottom glass - just for aesthetics.
__________________
Euler NON DVCOR DVCO |
|
|
|
|
04/06/2012, 06:58 AM
|
#381 |
|
Registered Member
Join Date: Apr 2009
Location: Netherlands
Posts: 74
|
As I said before Euler, the detailed way you are describing your progress is truly great. So many people should find something of use to them somewhere in your thread; I for sure did.
The picture you posted in my thread is realy amazing! I checked the link you gave on the shadowbox background project of Euromomtx out and it looks like something that isn't too tough to make but I'm not sure if I have the space to do that.... For sure something worthwhile looking at vs. just putting black foil. Thanks!!
__________________
Regards from the Netherlands, Hans Current Tank Info: In wall 240 Gallon tank: 71" x 27.5" x 29" - Sump: 55" x 15.7" x 15.7" - Deltec Skimmer AP702 - Red Dragon Pump 1'680G/h - Lightning: LED 510 W - 3x Tunze 6101 - Calcium reactor: Dastaco T3 - Profilux III |
|
|
|
|
04/06/2012, 04:38 PM
|
#382 |
|
Registered Member
Join Date: Feb 2009
Location: Lubbock, Tx
Posts: 3,165
|
are your holes in the stand the same size as the tank bottom?
i only ask, because you will need to be able to install the bulk heads (also, if there is a little more room just in case things to line up right. also, with a double top, its going to be hard to reach your hands in there to tighten the nuts on the bulkheads... Looks Good!!! (like mentioned above, the documentation is amazing....)
__________________
Its not just my tank, its OUR tank!!! :-) 240display, reef in progress Current Tank Info: 240 display, a few frags here and there. lots of fish, and lots of watching. (230 big screen getting re-sealed and going to add to the gallonage) My wife has no clue how addicted i really am..... |
|
|
|
|
04/08/2012, 01:27 PM
|
#383 | |
|
The "DIY Guy"
Join Date: Sep 2010
Posts: 453
|
Quote:
 I really like the look that he created - i wondering if I can make something like that! :L and you're are totally right about thinking twice before go to black foil  stay tunned I will update a ton of pics!
__________________
Euler NON DVCOR DVCO |
|
|
|
|
|
04/08/2012, 01:34 PM
|
#384 | |
|
The "DIY Guy"
Join Date: Sep 2010
Posts: 453
|
Quote:
 no, the holes in the stand are 3/8 (9mm) bigger then holes in the tank bottom and you're right, it is hard to reach the nuts but it is ok, I can do that.  tons of pic, stay tunned!
__________________
Euler NON DVCOR DVCO |
|
|
|
|
|
04/08/2012, 01:34 PM
|
#385 |
|
The "DIY Guy"
Join Date: Sep 2010
Posts: 453
|
it is time for tons of pictures!!! So many pics that I decide to open an payable account on photobucket who offers an amazing image hosting service!
Here you can see the styrofoam sheet that will hold the tank 5/8 thickness: 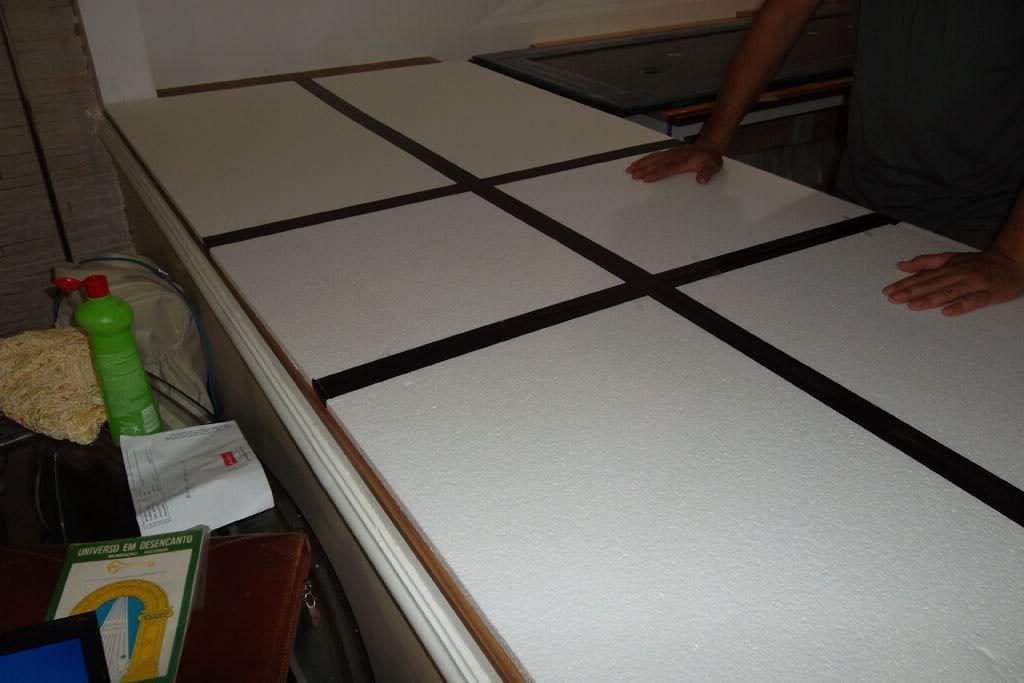
__________________
Euler NON DVCOR DVCO |
|
|
|
|
04/08/2012, 01:36 PM
|
#386 |
|
The "DIY Guy"
Join Date: Sep 2010
Posts: 453
|
Do you remember the black vinyl roll? I used on tank bottom just for aesthetics, this is the final result:
__________________
Euler NON DVCOR DVCO |
|
|
|
|
04/08/2012, 01:45 PM
|
#387 |
|
The "DIY Guy"
Join Date: Sep 2010
Posts: 453
|
a friend in need is a friend indeed!!!
As all you guys know, I really like DIYing everything but the fact is that there are some things you cant do it all, alone, by yourself
so, build a large tank is an example of these things and I decide to build it up on this easter holyday (here in BR) I know, I know regular people enjoy a three-day weekend with their relatives or in a beach with girlfriend, but exceptional friends help to build a LARGE TANK!!! I have to thanks a lot Allan (my brother in law who help me a lot in this project), Márcio a big friend who came with this hobby and Zeca a guy who knows nothing about reefing, but is my friend since I can remember!!! All right, Ladies and Gentlemen, Guys and Gals, no further ado here we go: 06h33 dawn patrol: Zeca get into my home just for a breakfast and help me with the first stage of building, we move the tanks front (starphire glass) to the workbench and tape all the borders. He could help me by 09h30AM after that hes travelling with his wife. Did you see how excited Zeca is! I really like this guy: 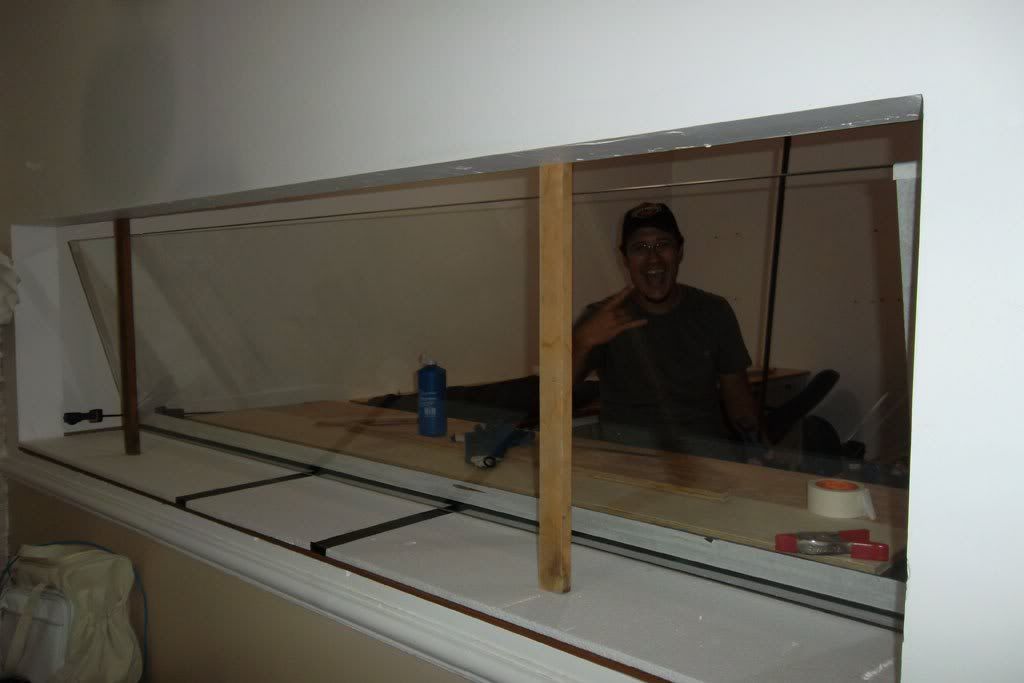 Overthere is can see Zeca holding the left tank corner: 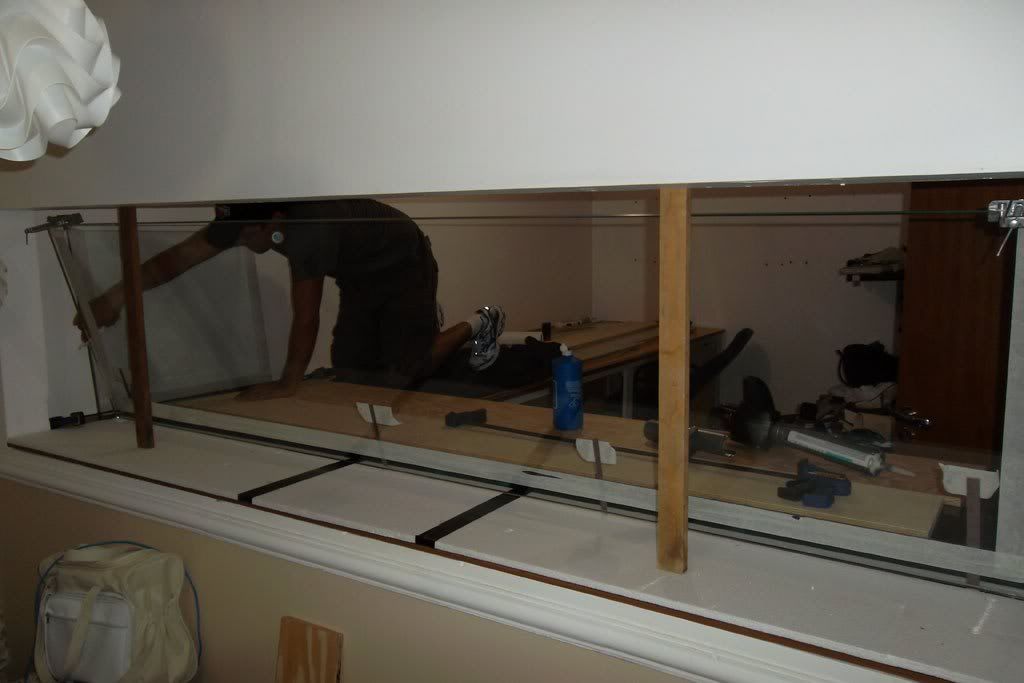 Here is he again! We define roles for each one, his is in charge of tank building, Is in charge to take pictures!!! 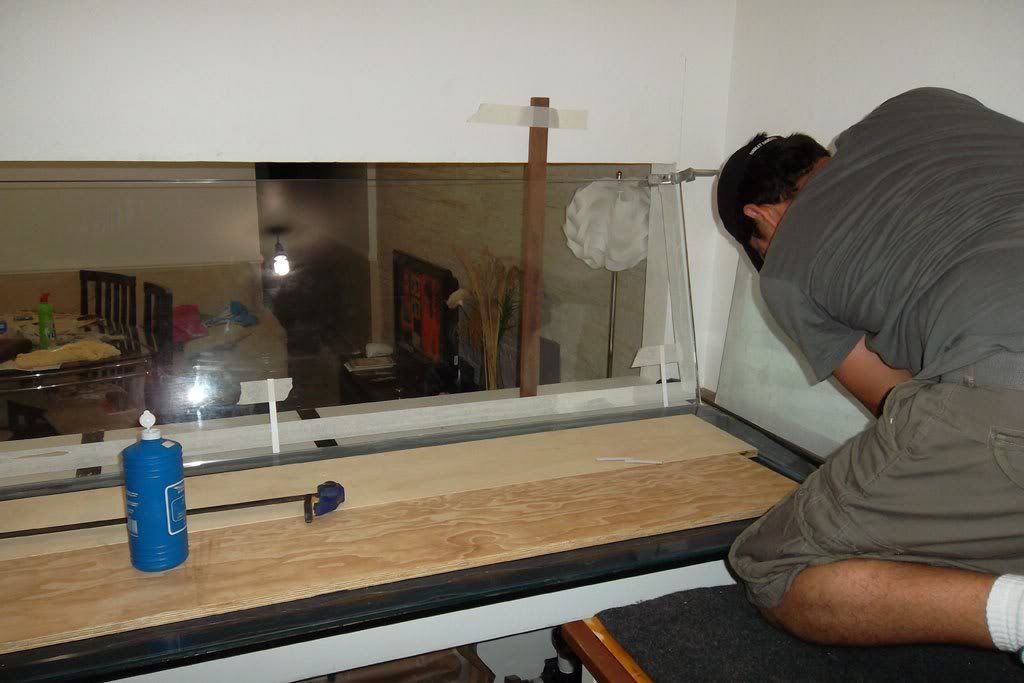 Ok, here is the strategy: first I passed the silicone on all tank front borders on the face not in the border (got it?), after that, I used an quick-grip clamp to hold the tank front on tank corners. Remarks: the face of tank front was glued on the border of tank bottom and tank corners BUT the tank corners was glued on the face of tank bottom, in other words, the tank corners are ON the tank bottom whereas the tank front is NOT. Right corner and clamp (Lowes / AceHardware):  Left Corner and clamp (Lowes / AceHardware) : 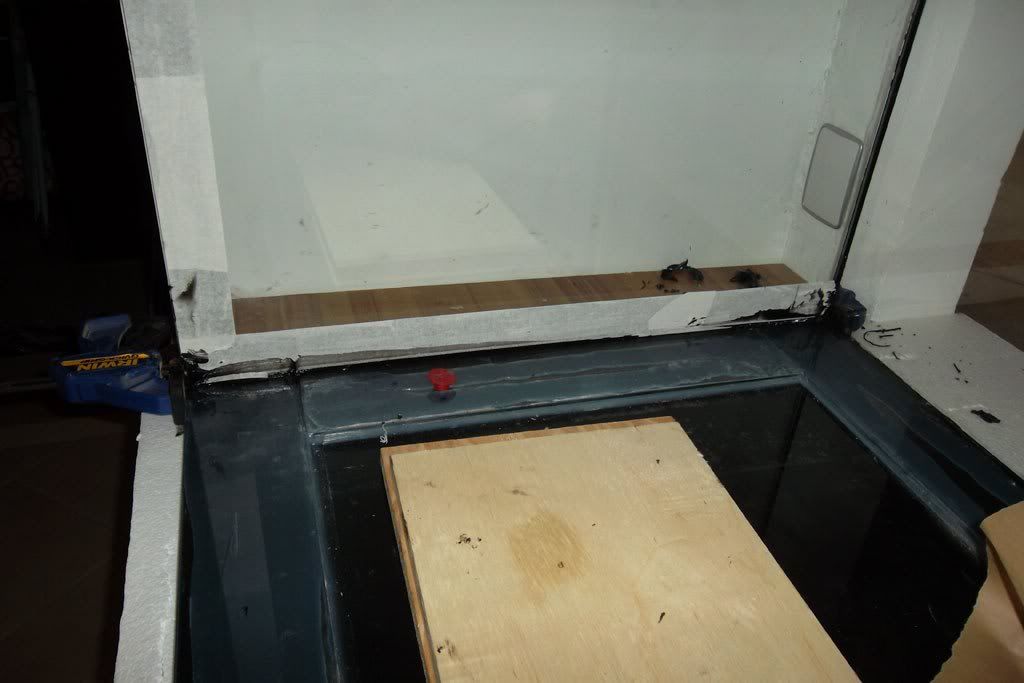 Detail: 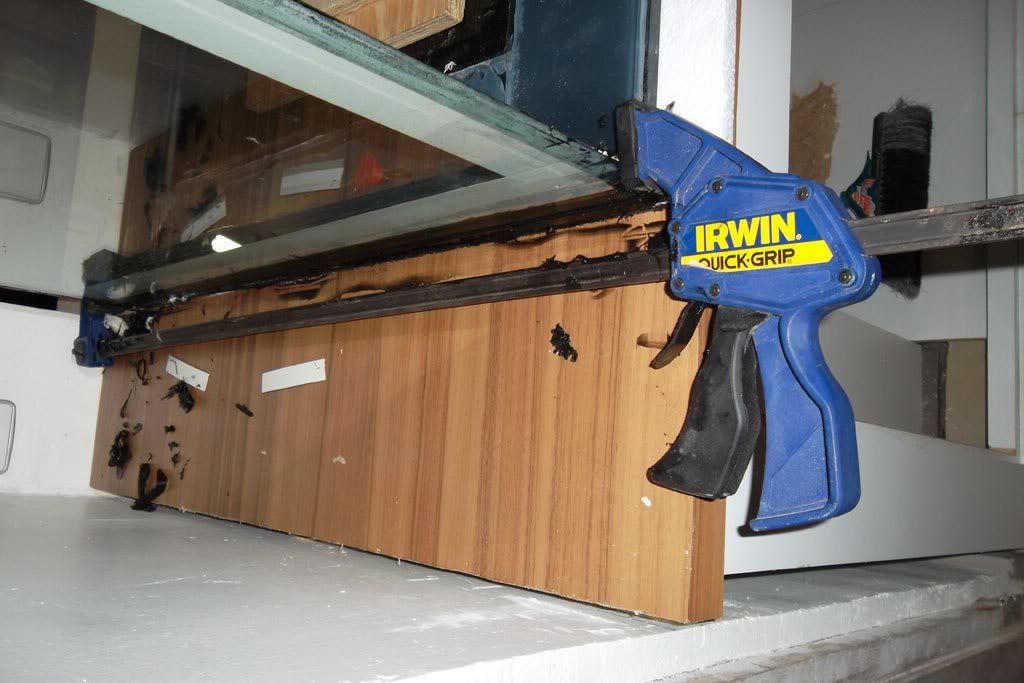 Front view: 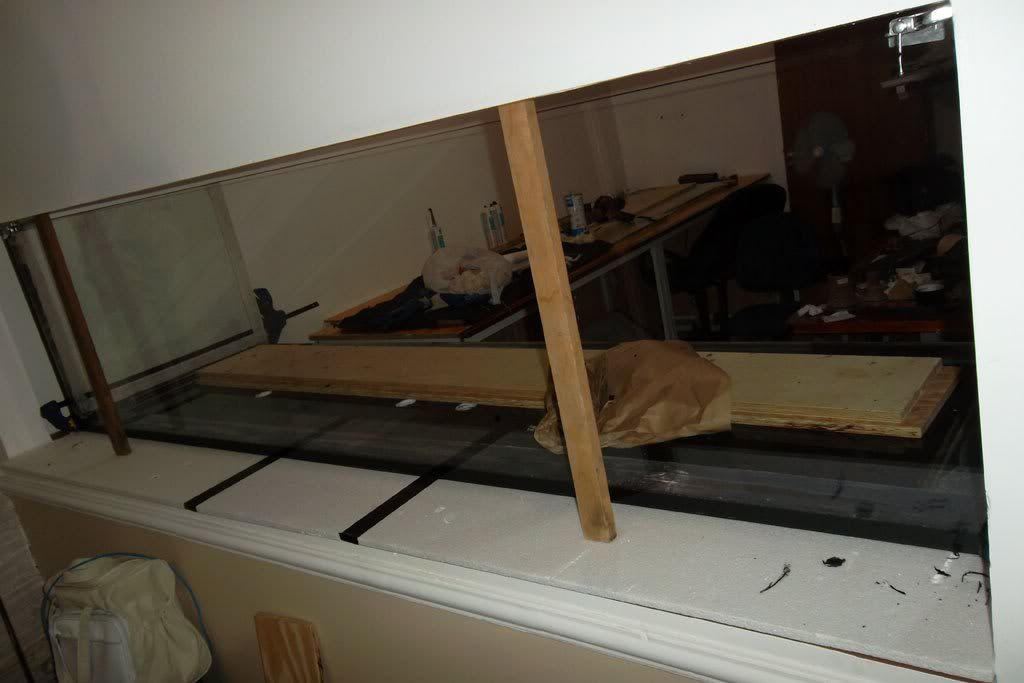 Another type of clamp corner clamp (homedepot) 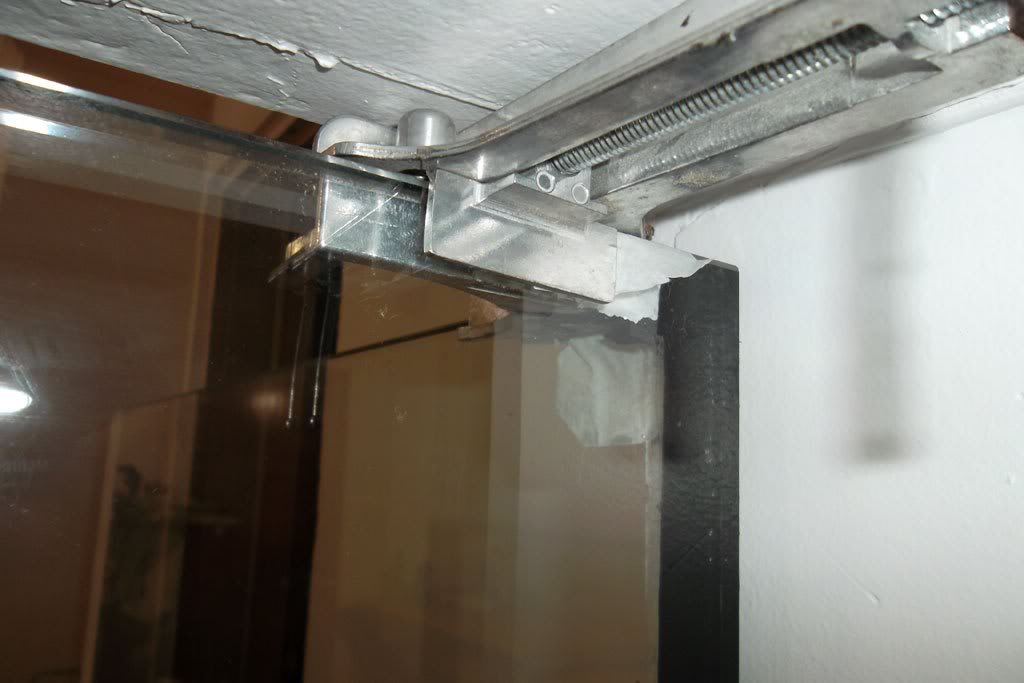
__________________
Euler NON DVCOR DVCO |
|
|
|
|
04/08/2012, 02:44 PM
|
#388 |
|
The "DIY Guy"
Join Date: Sep 2010
Posts: 453
|
09h43 AM: brother in law is around.
Zeca leaves at 09h15AM, I just organized some stuff and wait my brother in law to continue with the second phase tank back panel.My brother in law just delayed his trip with his girlfriend to provide me a little help. When he comes, here is what he saw: 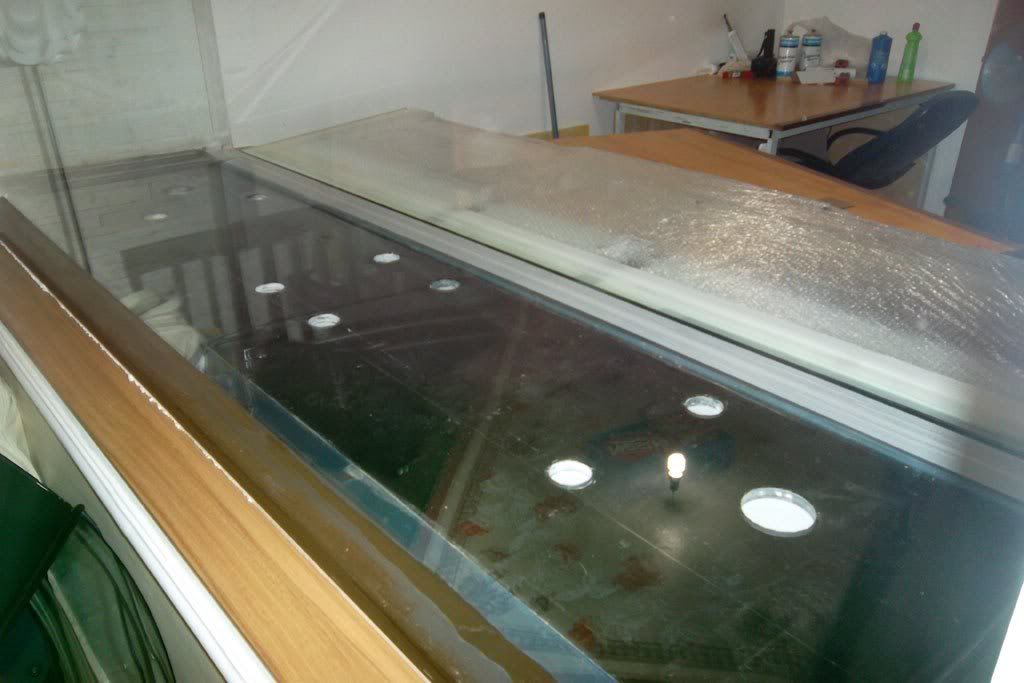 For all panels I used the bubble wrap to protect panel against undesirable silicone spots. Here you can see the tank back panel resting on workbench: 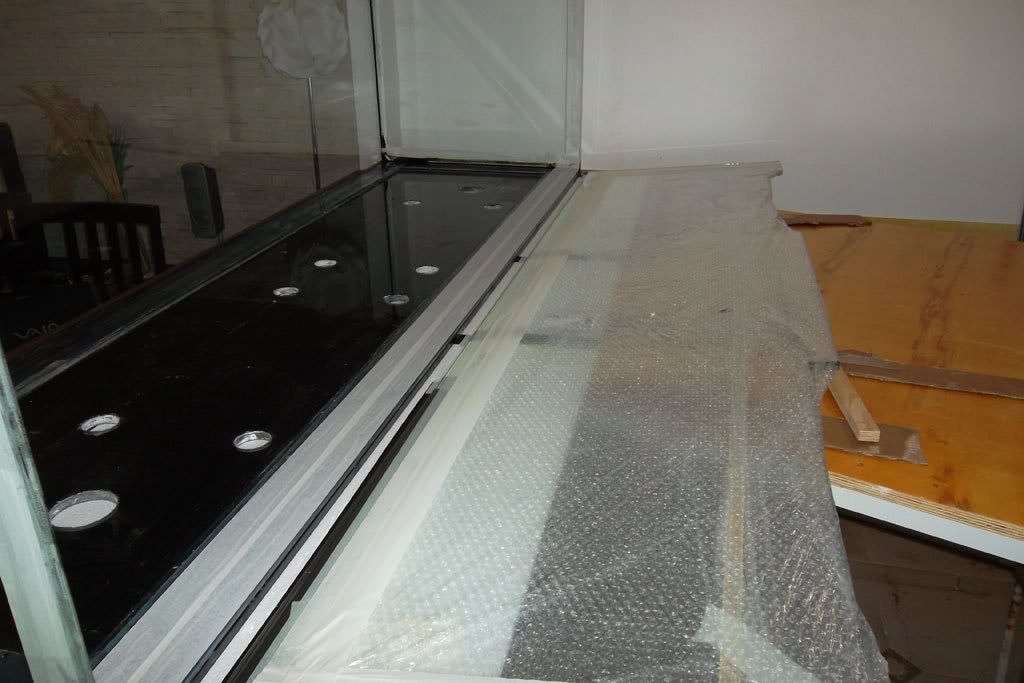 Details on borders tape, used to limit the silicon: 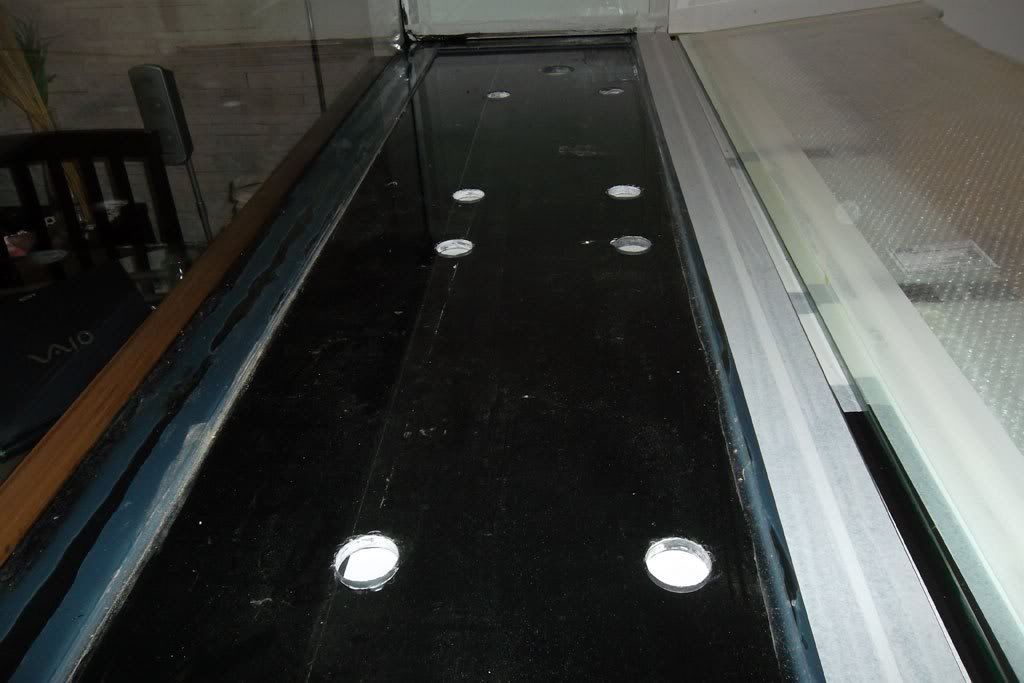 Another one: 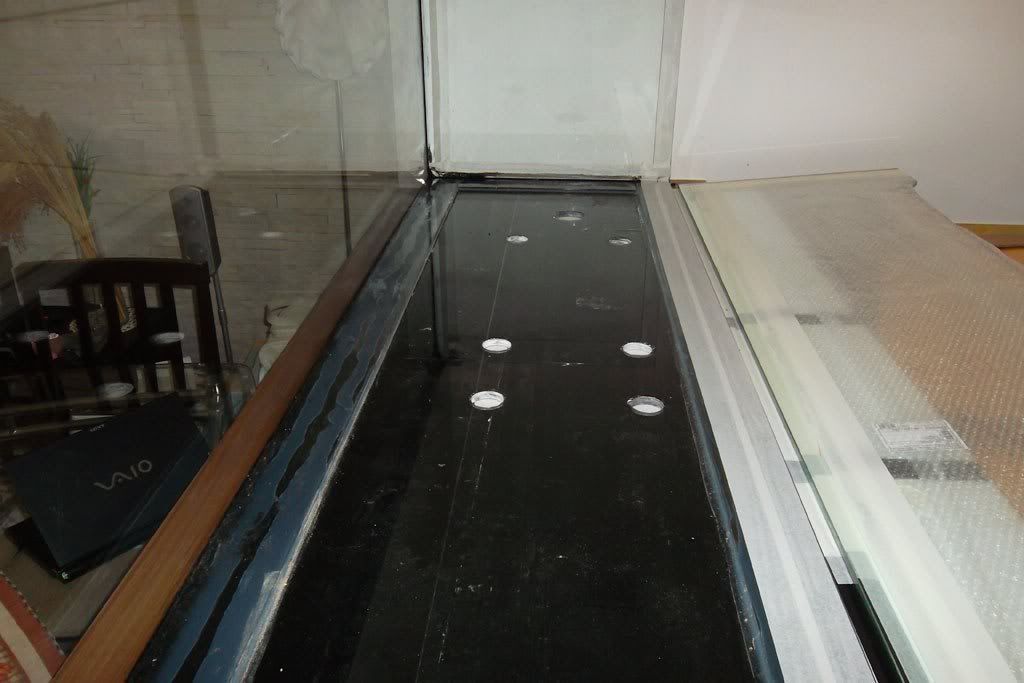 After glued the back panel we just remove the bubble wrap:  Another: 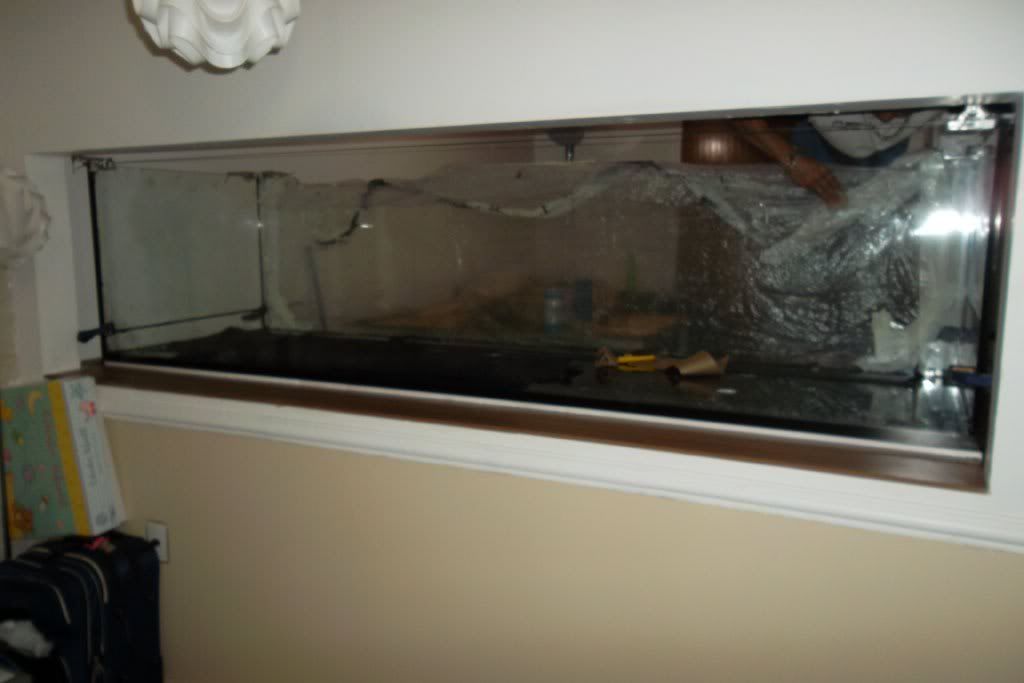 Ok, everything is going well diagonal conferred and this is time to glue the eurobraces. These yellowish pieces of wood and clamps just hold the brace on the right place: 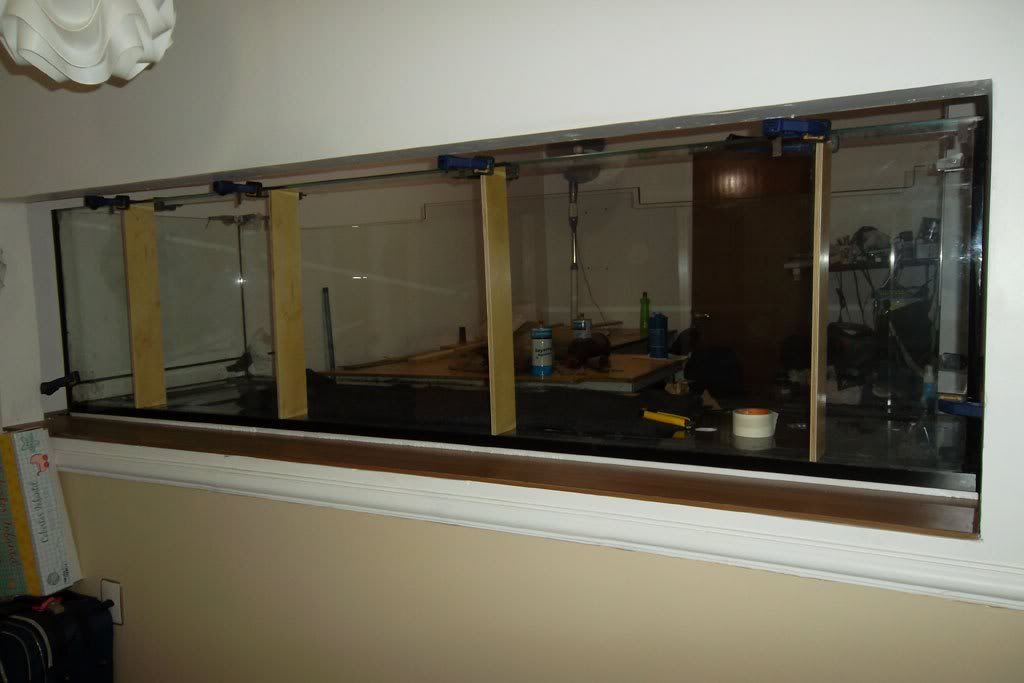 Detail: 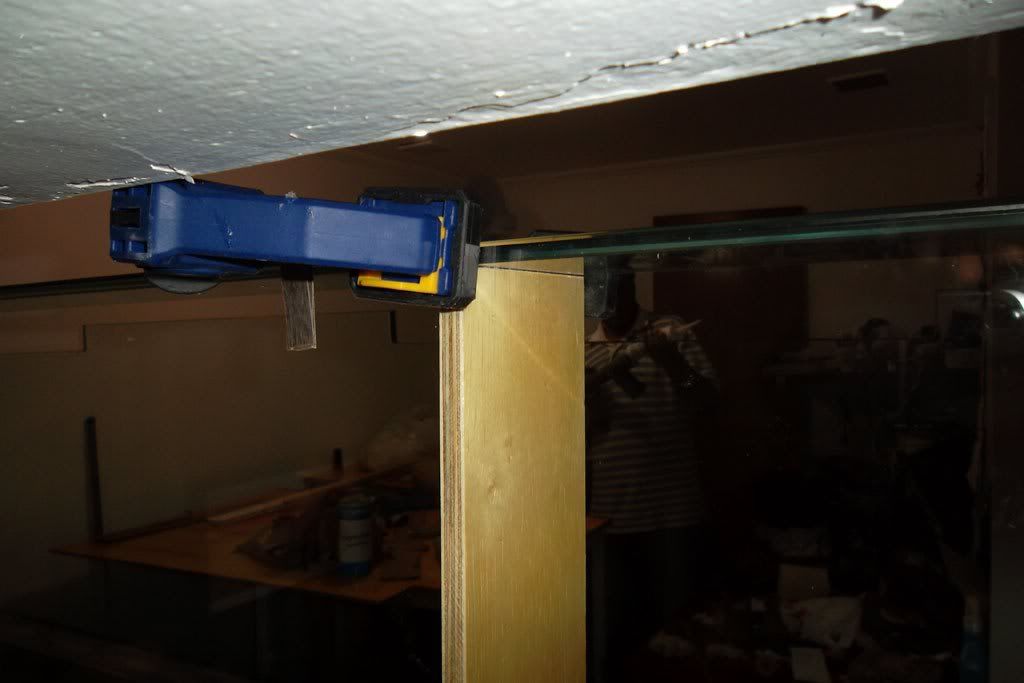 Another one: 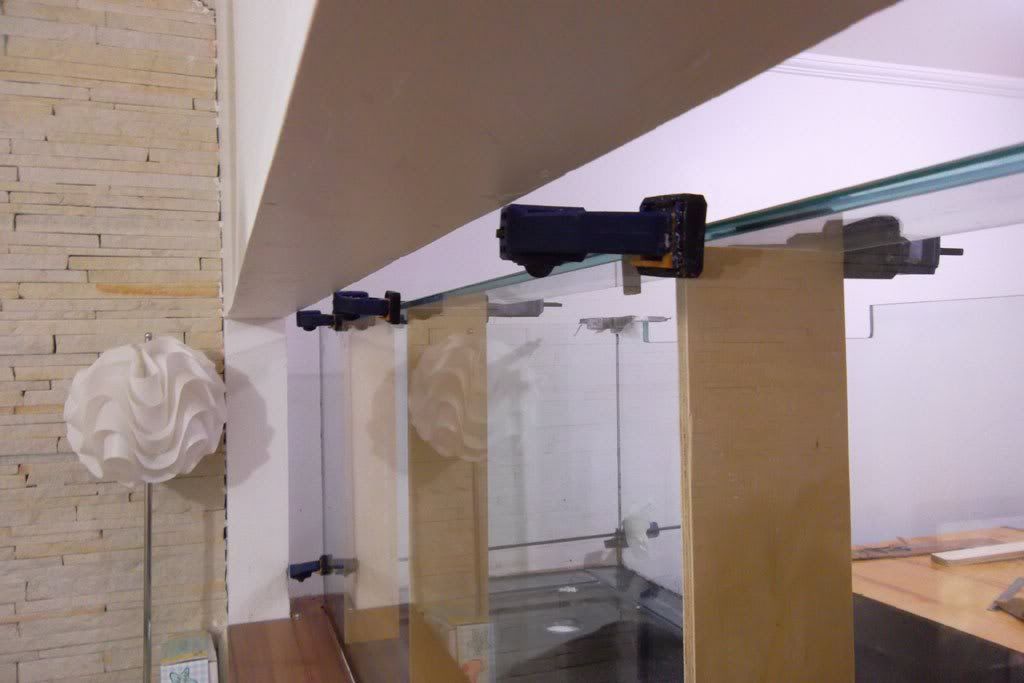 Another view: 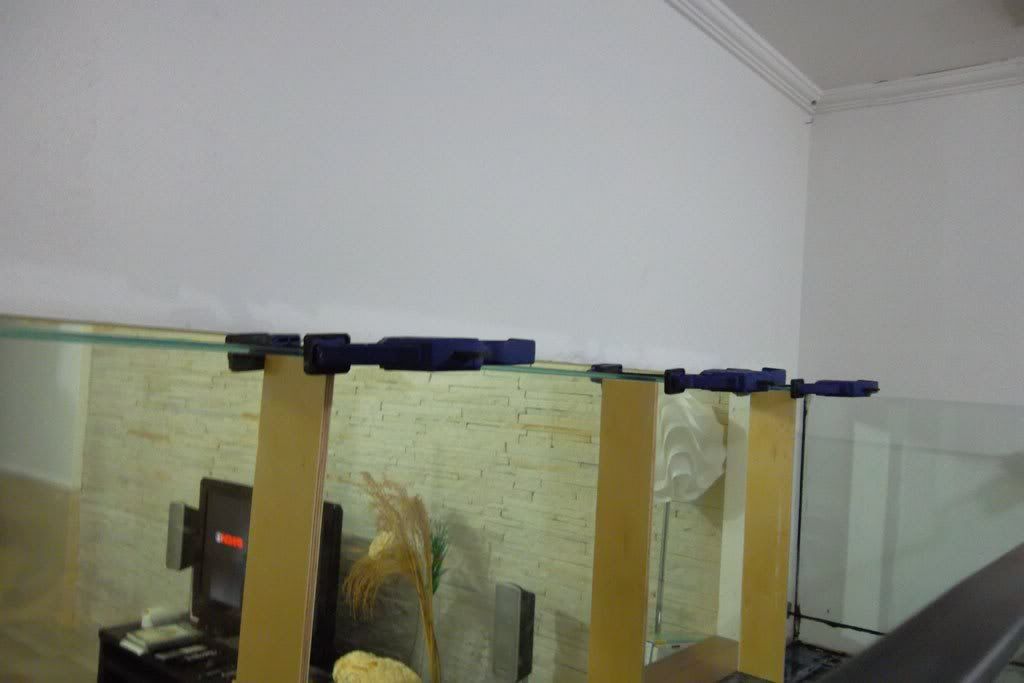
__________________
Euler NON DVCOR DVCO |
|
|
|
|
04/08/2012, 02:47 PM
|
#389 |
|
The "DIY Guy"
Join Date: Sep 2010
Posts: 453
|
11h25 AM: Reinforcements arrives!
My buddy Márcio just arrives in time to help me with the braces, at this point mu knees were killing me!!! As you guys know I was hit three times when I was young and nowadays Im paying the price Before passa the baton, silicon so to speak, I decide to finish this bracece: 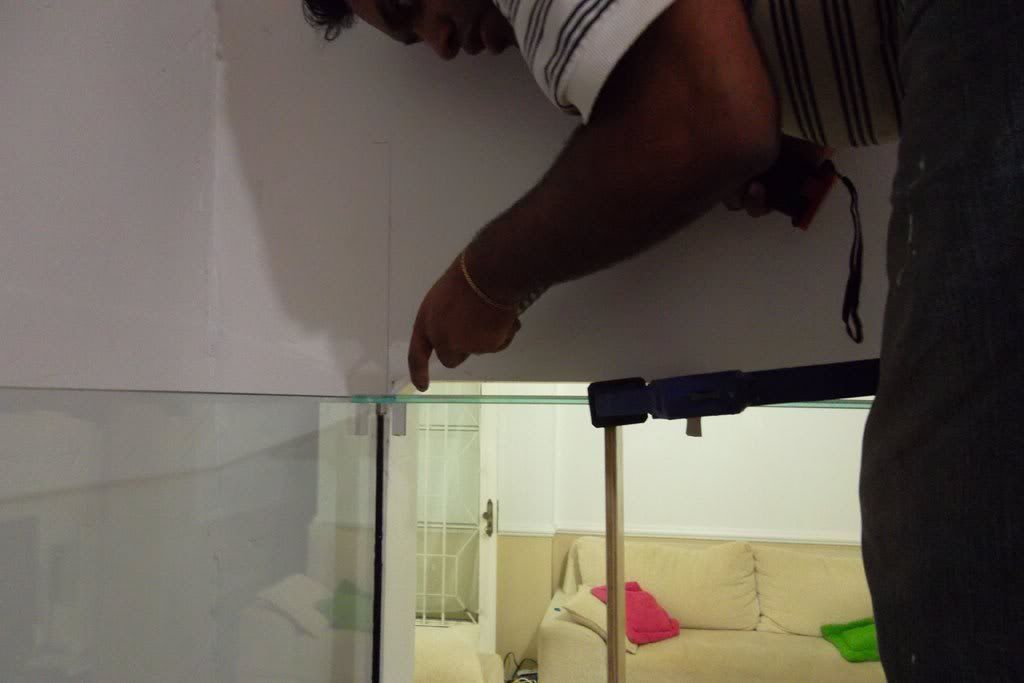 Can you see how silicone penetrates in the gap between the face of the front panel and the border of brace??? 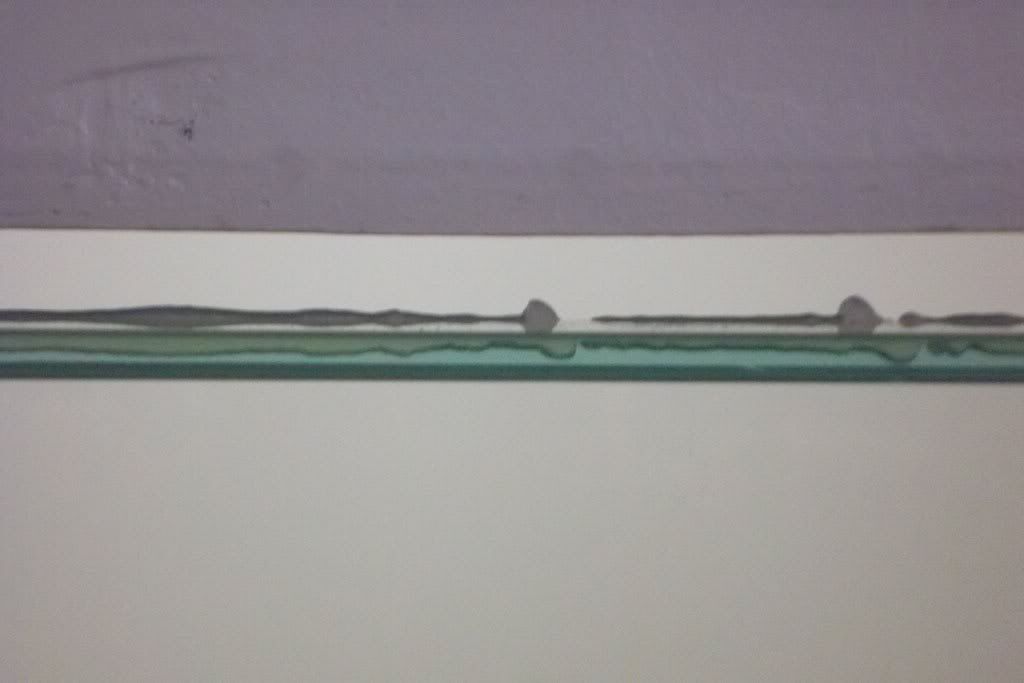 so I used my finger to push the silicone in the gap: 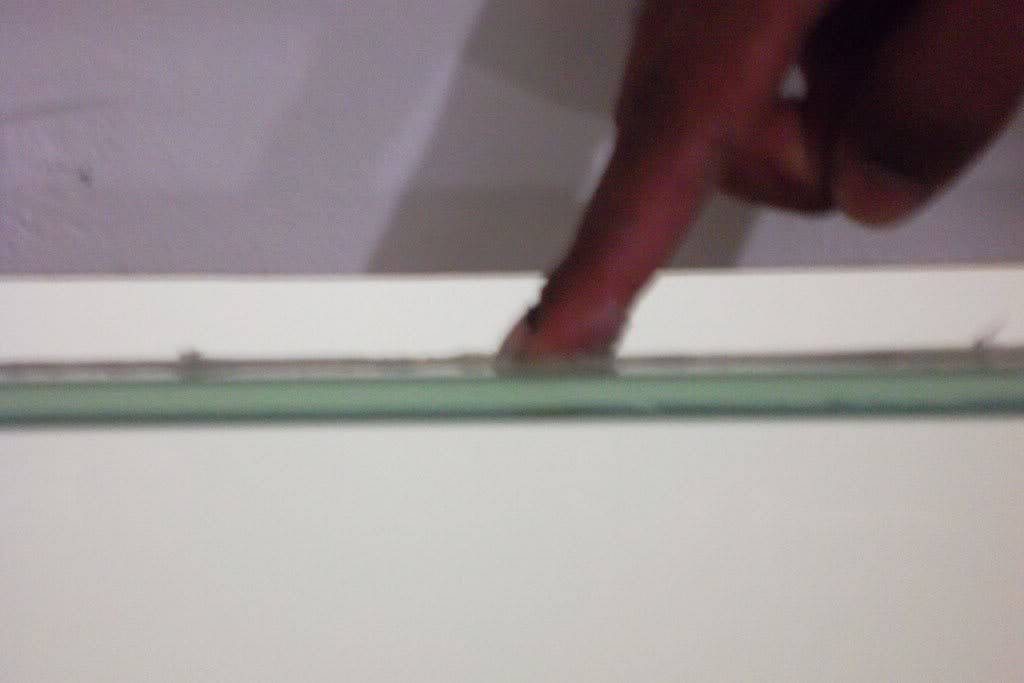 Thats me giving up  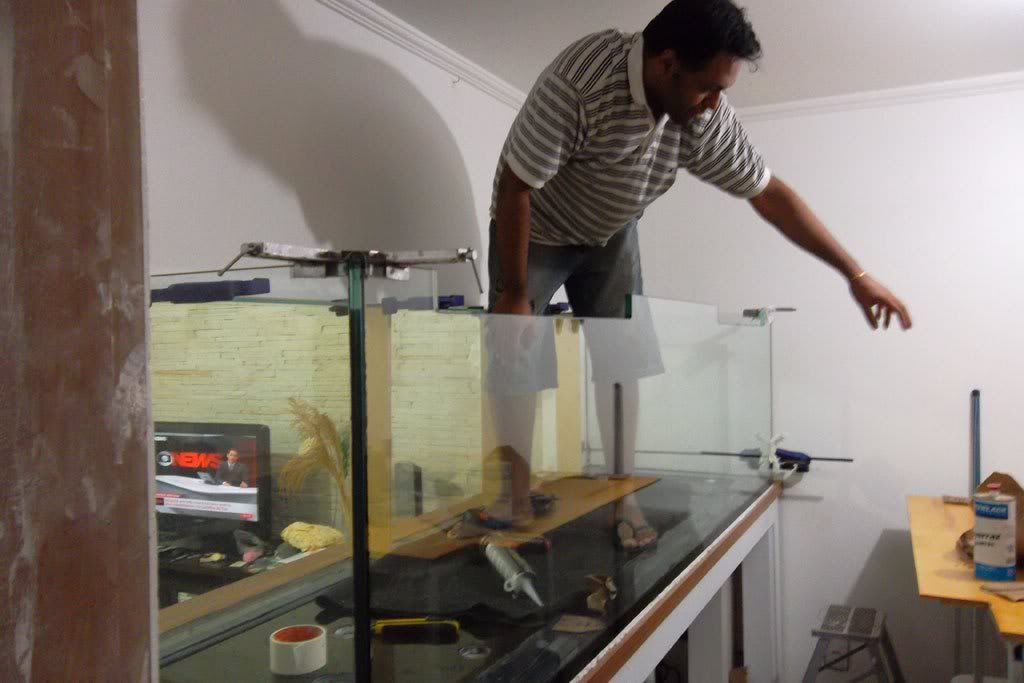 So Marcio can do his job his is a very very meticulous guy the final result is perfect: 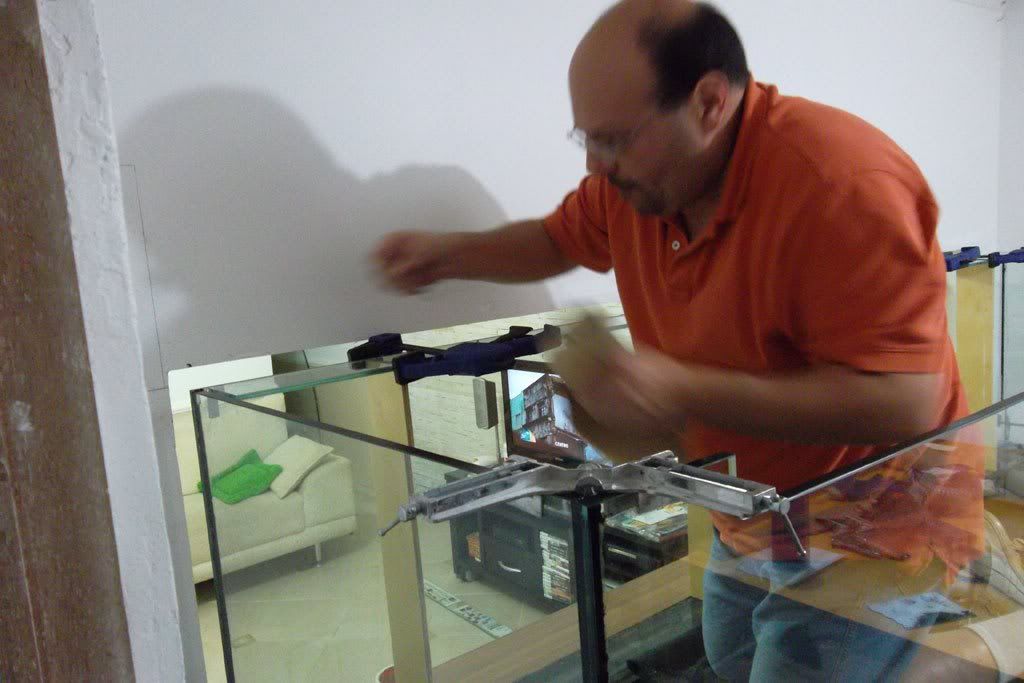 Another view: 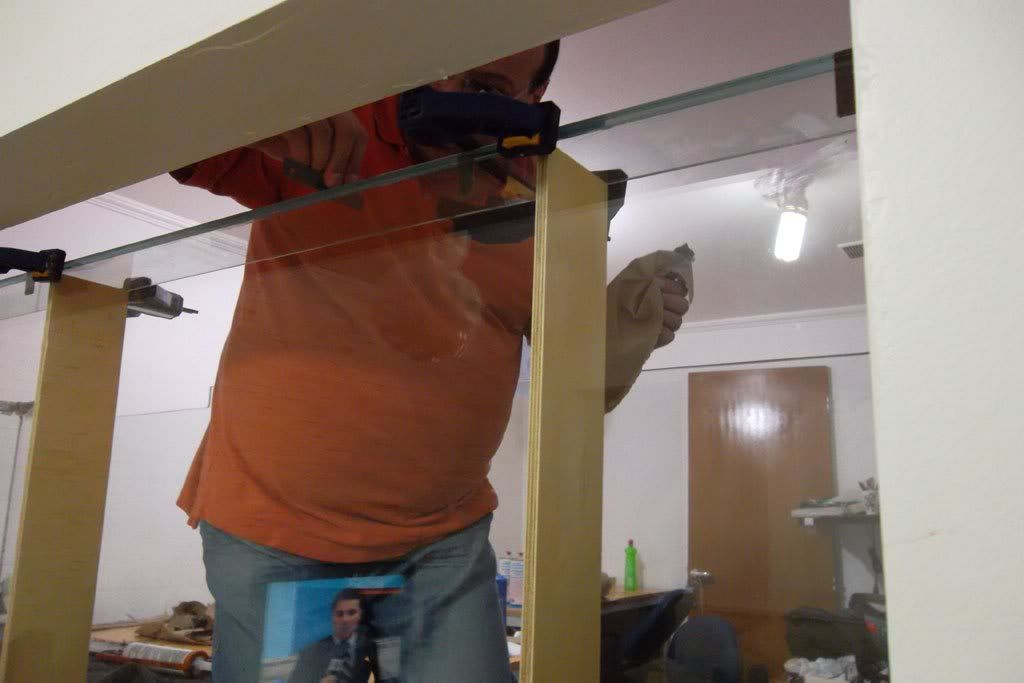 Details: 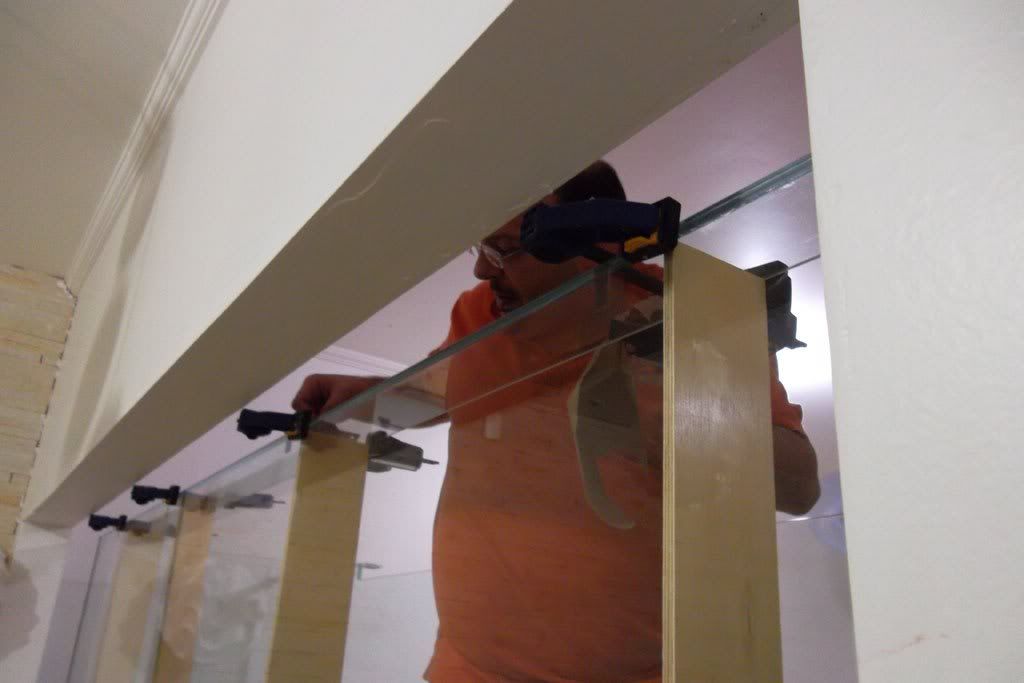 This is the brace used on the back panel: 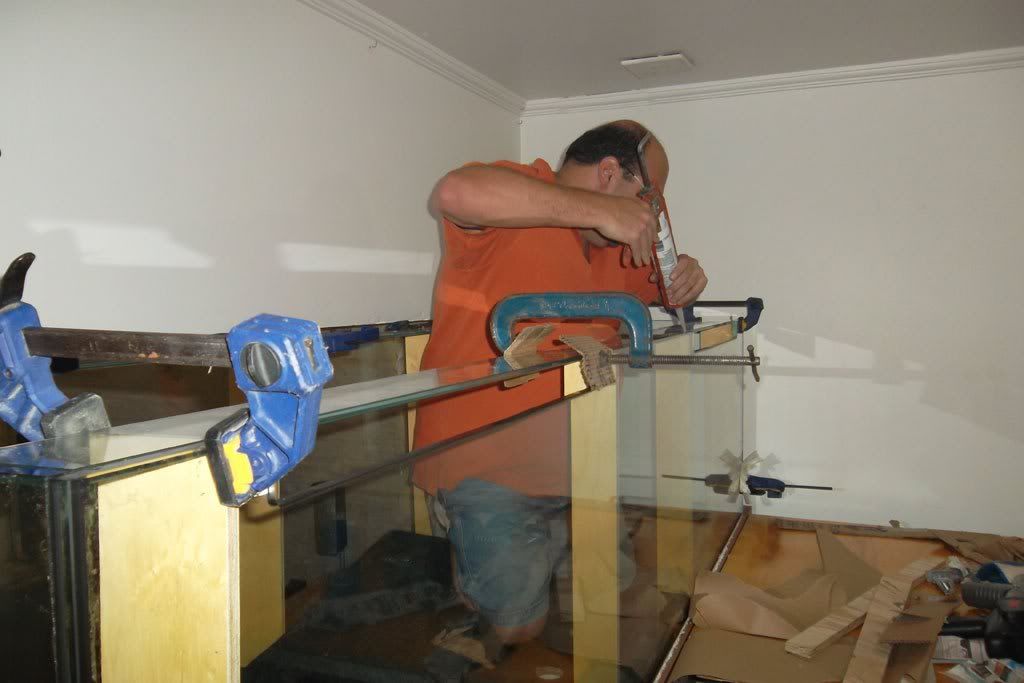 I really owe this guys what do you guys think: 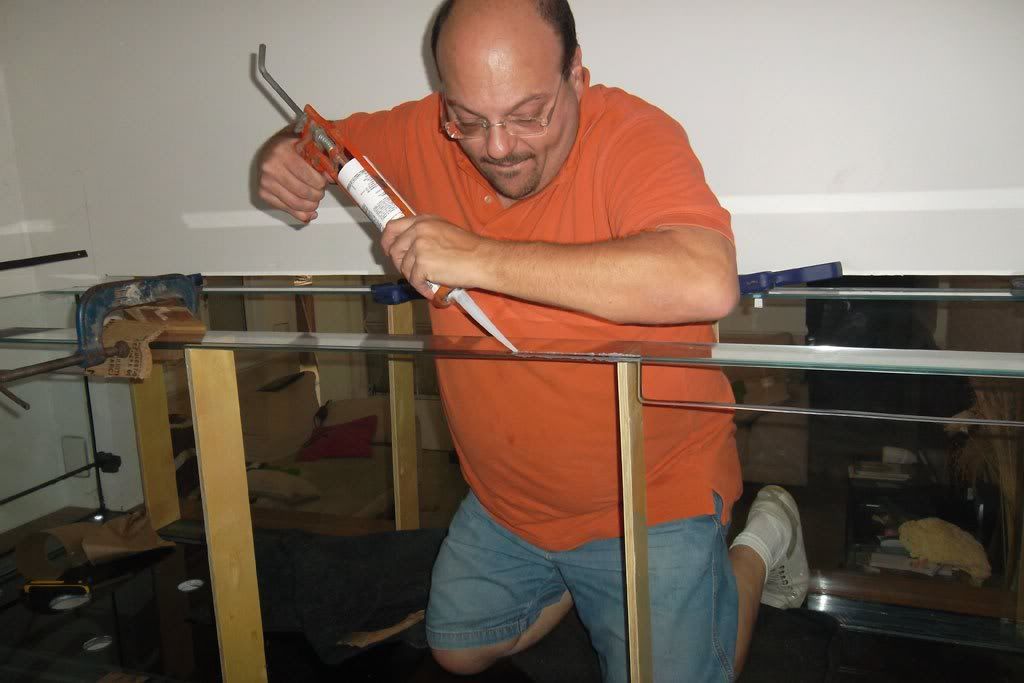
__________________
Euler NON DVCOR DVCO Last edited by Euler Kernighan; 04/08/2012 at 02:53 PM. |
|
|
|
|
04/08/2012, 02:49 PM
|
#390 |
|
The "DIY Guy"
Join Date: Sep 2010
Posts: 453
|
I almost forgot to tell you guys, to create a gap between the face of back panel and the border of the brace, I used a sandwich of laminate plastic this sandwich work like a spacer creating a 2.4mm gap can you see the white spacer in this pic:
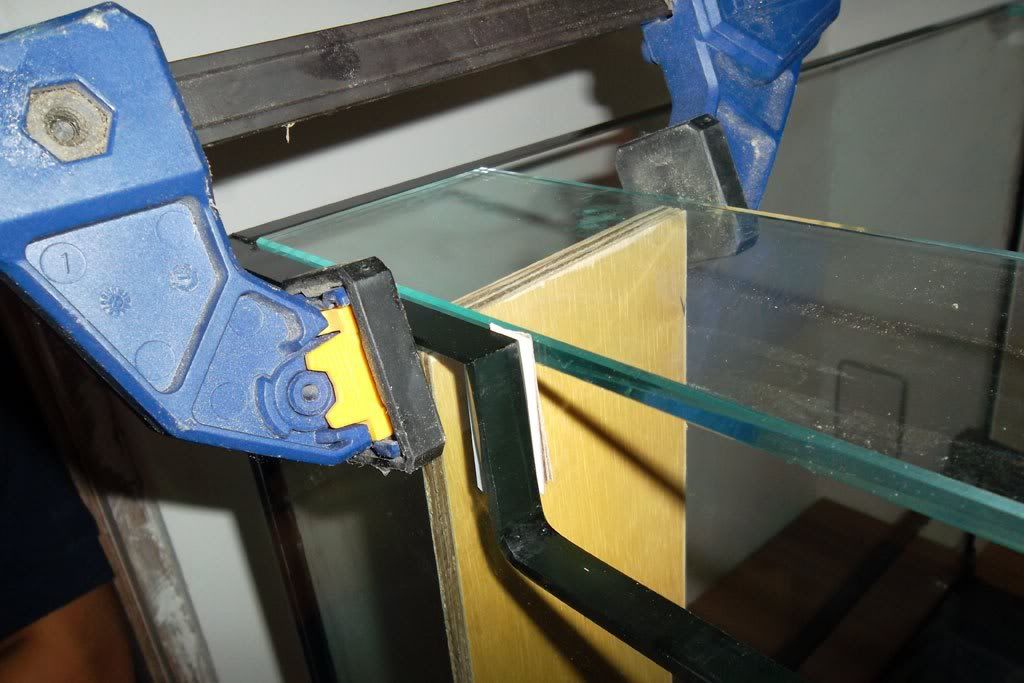 This is a good pic, you can see the silicone penetrating on gap created by the spacer: 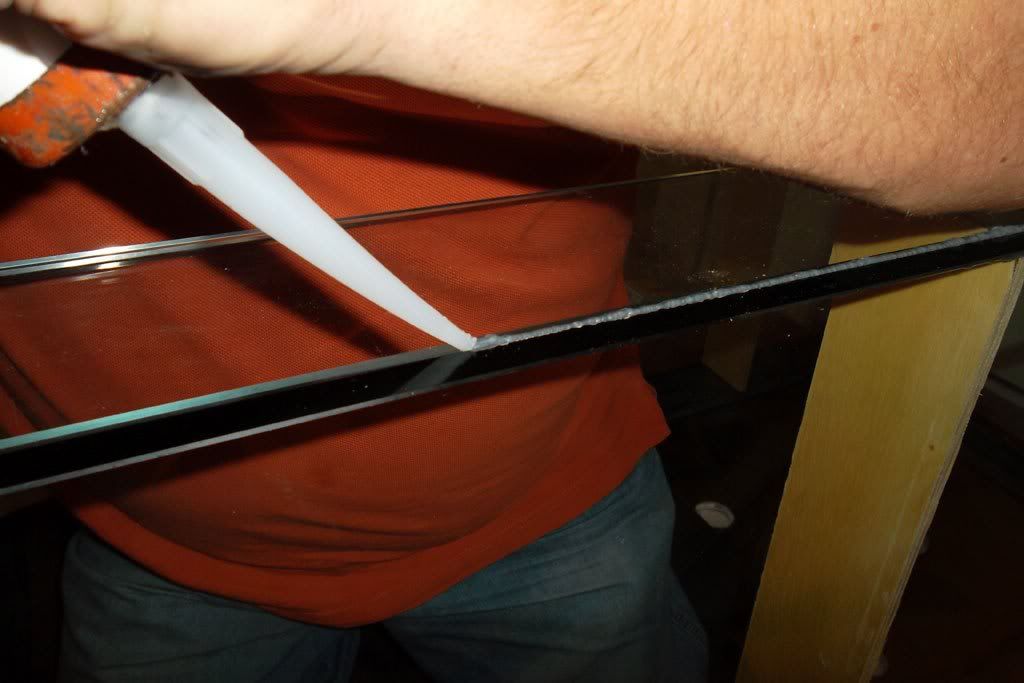 Another view: 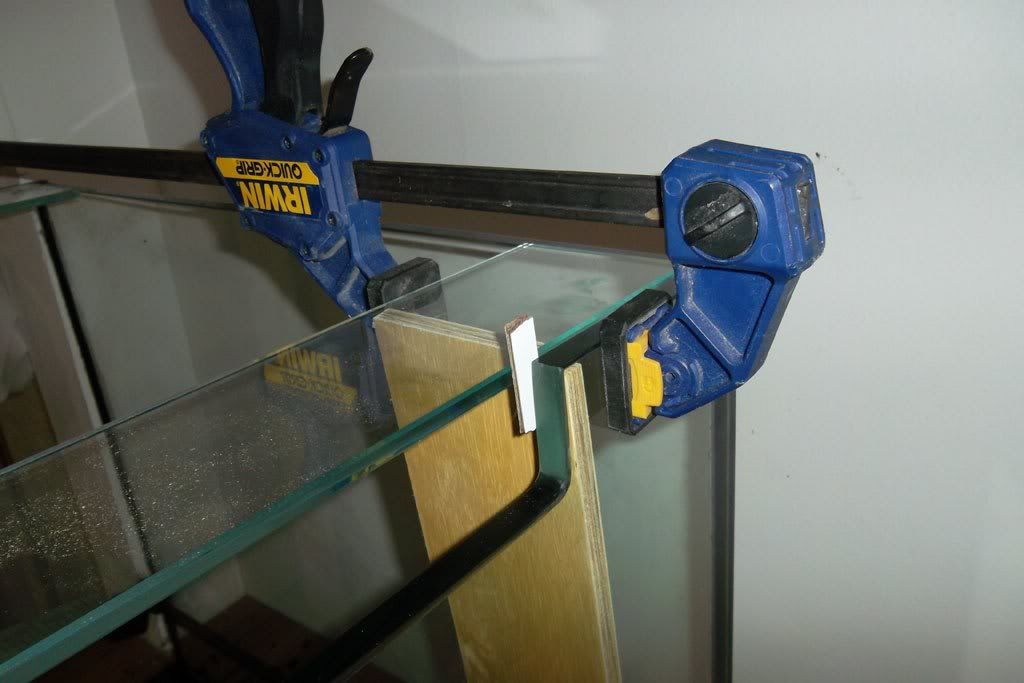 All right, after braces phase we finished the tank building it takes approximately 5 hours to build it up, after that we lunch and the guys could go to enjoy the holiday with their families. Allan (brother in law), Márcio e Zeca, I am in eternal debt to you guys!!! Thanks a lot my friends!   
__________________
Euler NON DVCOR DVCO |
|
|
|
|
04/08/2012, 02:50 PM
|
#391 |
|
The "DIY Guy"
Join Date: Sep 2010
Posts: 453
|
Five hour later, I decide to glue the second layer of baces – yeah, in this project I decide to double the eurobraces:
In this pic you can see the clamps (HomeDepot) holding the second brace on the right place: 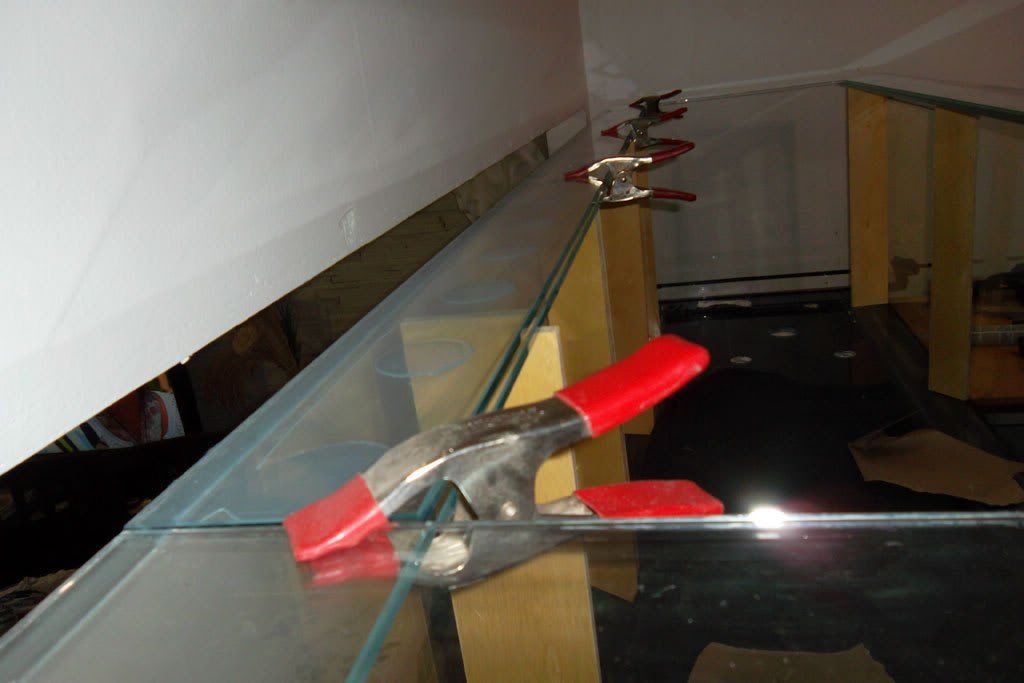 Another view: 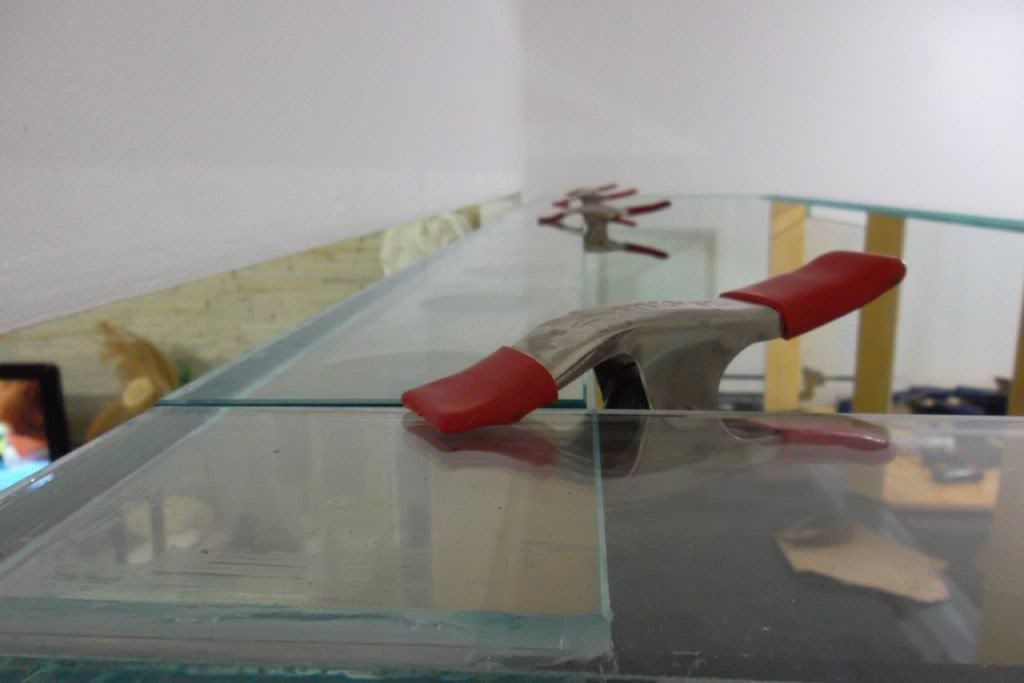 All braces glued: 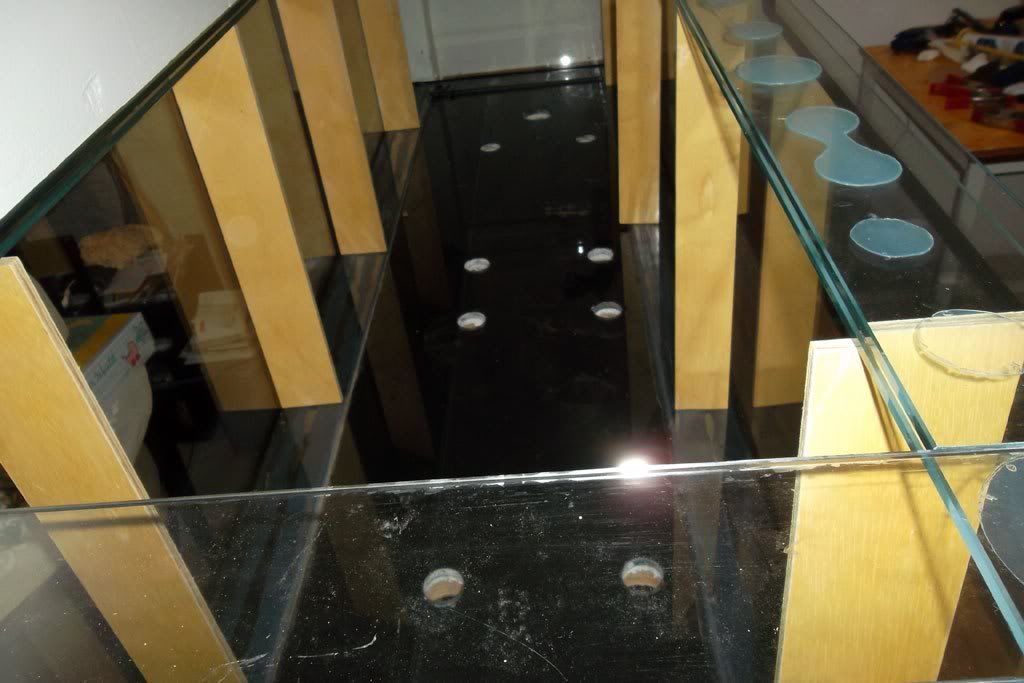 Another one: 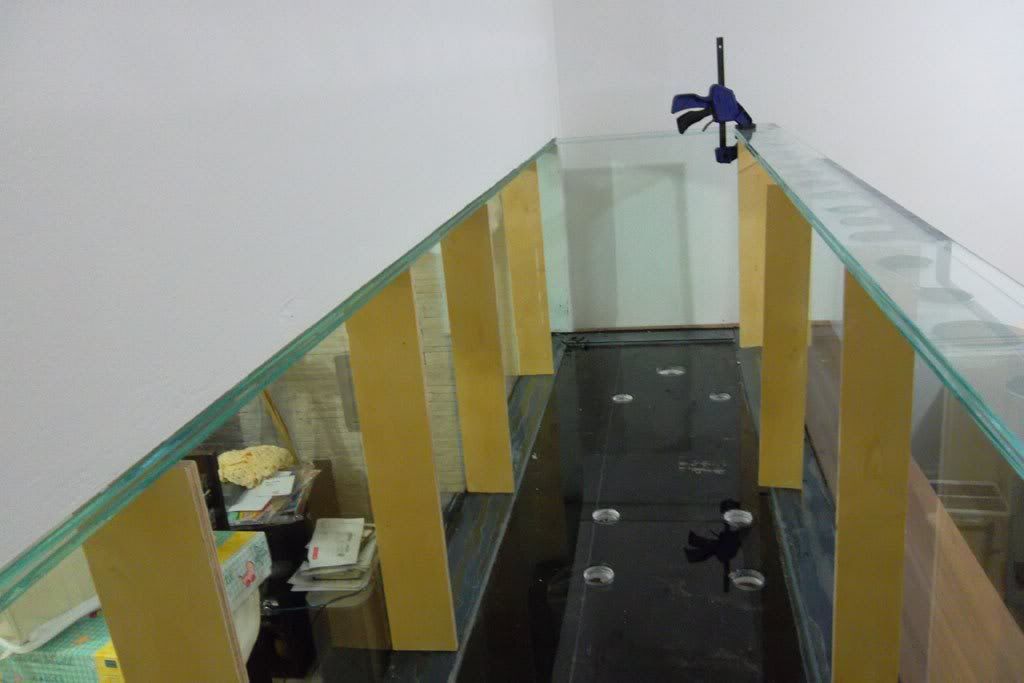 Front side - LEFT view: 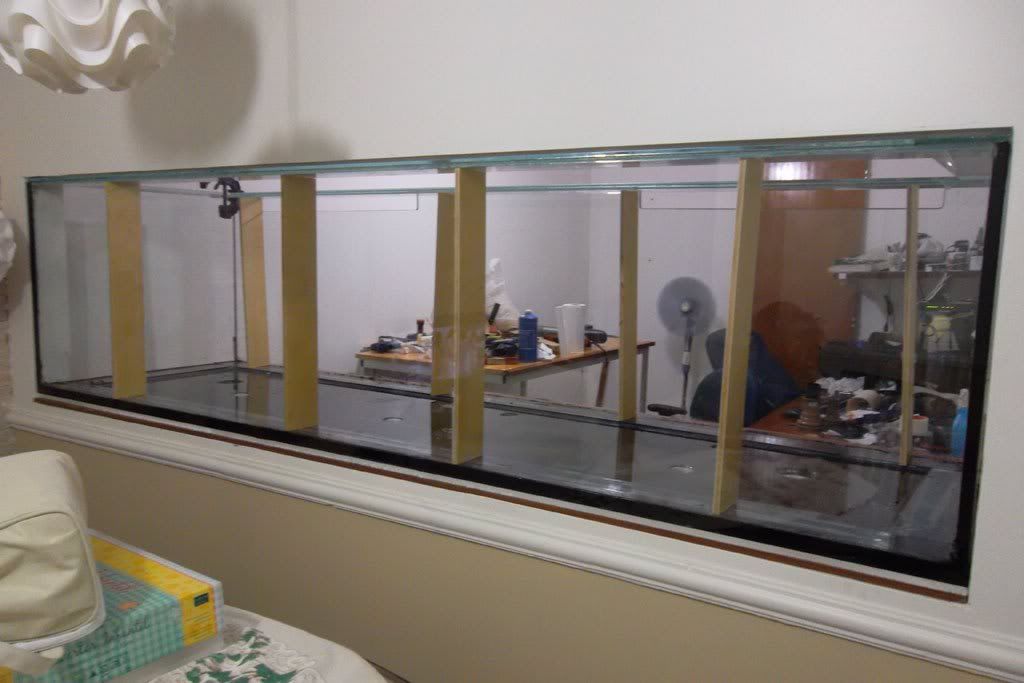 Front Side: RIGHT view: 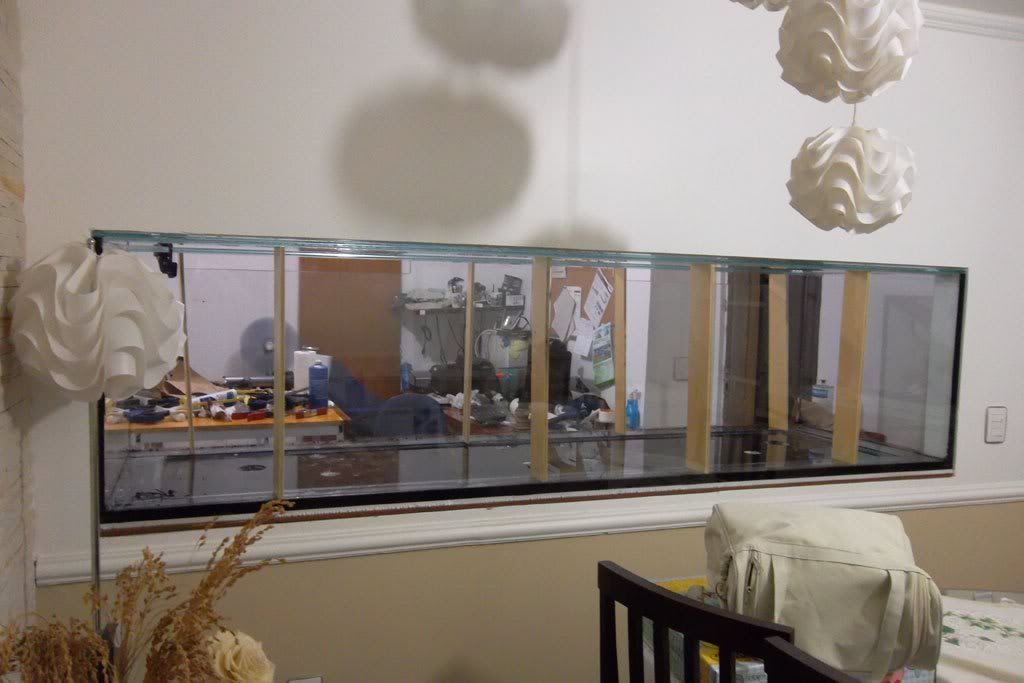 This is de back view, can you see the cutouts through which the water goes to the overflow box (not here yet) – this is how I planned my coast-to-coast overflow: 
__________________
Euler NON DVCOR DVCO |
|
|
|
|
04/08/2012, 06:57 PM
|
#392 |
|
Refugium pat.#D414,242
Join Date: Dec 2011
Posts: 844
|
Well done i will enjoy watching you plumb your close loop
 Also you have done a quality build all the way! Also you have done a quality build all the way!
__________________
Doctor "Aquatron" Mister "Spinner" 300 gallon TRUVU AquaSystem "Mod" w/ 150 gallon control center....... Build Thread: http://www.reefcentral.com/forums/showthread.php?t=2276765&highlight=300+dt+ |
|
|
|
|
04/09/2012, 07:31 AM
|
#393 |
|
The "DIY Guy"
Join Date: Sep 2010
Posts: 453
|
thank you my friend, i'm trying to do my best overhere! the plumbing will be a big nightmare, uh?
btw, I saw a picture of your closed-loop, are you using two reeflo hammerhead gold pumps? it is almost a rocket booster , uh???? 
__________________
Euler NON DVCOR DVCO |
|
|
|
|
04/09/2012, 07:44 AM
|
#394 |
|
Registered Member
Join Date: Aug 2007
Location: Georgetown, Tx
Posts: 1,016
|
Lookin great Euler!
|
|
|
|
|
04/09/2012, 07:44 AM
|
#395 |
|
Registered Member

Join Date: May 2003
Location: Montreal, Quebec.
Posts: 10
|
Just went thru 16 pages of your thread, very informative build. You're really a DIY guy, have fun building your tank and thanks for sharing.
|
|
|
|
|
04/09/2012, 03:28 PM
|
#396 | |
|
Refugium pat.#D414,242
Join Date: Dec 2011
Posts: 844
|
close loop
Quote:
Those Hammerheads are at a wholesaler i know was just showing how to plumb two pumps to get double the flow with only 1 x friction lose. My close loop pumps are Water Blaster 16000 and my sump/refugium pump is a Dart. My WBs are on back order should have in the next two to three weeks then its water time Keep up the great work!
__________________
Doctor "Aquatron" Mister "Spinner" 300 gallon TRUVU AquaSystem "Mod" w/ 150 gallon control center....... Build Thread: http://www.reefcentral.com/forums/showthread.php?t=2276765&highlight=300+dt+ |
|
|
|
|
|
04/11/2012, 01:07 AM
|
#397 |
|
Registered Member
Join Date: Apr 2012
Location: Sweden, Stockholm
Posts: 58
|
Looks like the beginning of my dream reef ;-)
|
|
|
|
|
04/11/2012, 03:39 AM
|
#398 |
|
Registered Member
Join Date: Apr 2009
Location: Netherlands
Posts: 74
|
Brilliant update again of your thread Euler.
You must be fortunate with two right hands and the qualitative help you're getting from friends and family!
__________________
Regards from the Netherlands, Hans Current Tank Info: In wall 240 Gallon tank: 71" x 27.5" x 29" - Sump: 55" x 15.7" x 15.7" - Deltec Skimmer AP702 - Red Dragon Pump 1'680G/h - Lightning: LED 510 W - 3x Tunze 6101 - Calcium reactor: Dastaco T3 - Profilux III |
|
|
|
|
04/11/2012, 07:05 AM
|
#399 |
|
Registered Member
Join Date: Sep 2011
Location: Italy
Posts: 54
|
i-beam too :)
Hi Euler, i'm following your project, it's a nice build... i'm a diy guy too and i discover some same solutions for the stand of my new project (still designing..). It's nice too see that someone like to break bones with heavy weight i-beam
 Like others, i'm waiting new updates. 
__________________
Design Propelled :) ___o_0__ + __0_o___ Current Tank Info: deep acrylic syndrome |
|
|
|
|
04/24/2012, 11:51 AM
|
#400 | |
|
The "DIY Guy"
Join Date: Sep 2010
Posts: 453
|
Quote:
thank you my friend... plumbing work was so hard but I took a lot of pics, will update very soon!
__________________
Euler NON DVCOR DVCO |
|
|
|
|
|
| Tags |
| 350g, brazil, flying dutch |
|
|
 Similar Threads
|
||||
| Thread | Thread Starter | Forum | Replies | Last Post |
| Live rock walls/sides in a fish tank. | crazinezz978 | Lighting, Filtration & Other Equipment | 3 | 12/14/2009 04:33 PM |
| XSiVE's 120 in-wall+fish room upgrade/build. | XSiVE | Reef Discussion | 24 | 09/20/2008 01:12 AM |
| Our 70-Gallon Room Divider Build - Kitchen/Living Room | driftin | Reef Discussion | 13 | 11/05/2007 04:41 PM |
| In Wall Tank Room | UH_OH_5_OH | Do It Yourself |
6 | 02/24/2007 04:58 AM |
| In-walls, Fish rooms, and PLC's, oh and all this while remodeling the whole house. | formanbob | Reef Discussion | 29 | 02/20/2007 11:37 AM |


