


|
 |
|
|
#26 |
|
Registered Member
Join Date: Dec 2010
Location: Fresno, CA
Posts: 83
|
Following.
This post reminds me of my current build. Here is the link if you are interested: http://fragroup.org/showthread.php?1...amp-Tank-Build I'm still trying to get ideas to finish off my tank. Look forward to seeing more of your build. |
|
|

|
|
|
#27 |
|
Registered Member
Join Date: May 2009
Location: Texas
Posts: 18
|
Following.
About to launch my own 210 build in the next few months. I am up north of you in Montgomery/Lake Conroe. 
__________________
Treat everyone like you want to be treated! |
|
|

|
|
|
#28 |
|
Registered Member
Join Date: Jun 2012
Location: Chicago, IL
Posts: 70
|
Great build! What program did you use to create your 3D model?
|
|
|

|
|
|
#29 |
|
Registered Member
Join Date: Oct 2013
Posts: 85
|
Sweet Build! I too am located in Houston, and just started the planning on my 210. I cant wait to see your plumbing.
|
|
|

|
|
|
#30 |
|
Registered Member
Join Date: Dec 2013
Location: Houston,TX
Posts: 198
|
|
|
|

|
|
|
#31 |
|
Registered Member
Join Date: Dec 2013
Location: Houston,TX
Posts: 198
|
Installing and removal of the blocks that need to get between in really tight to avoid any gaps.
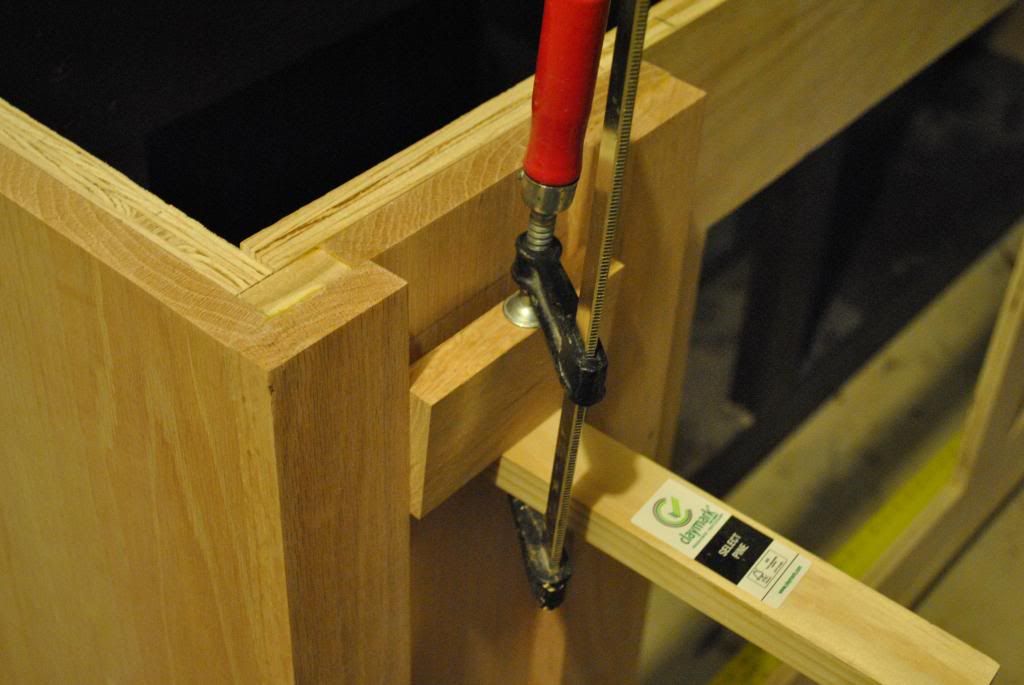 [/IMG] [/IMG]This is how to adjust the Kreg screw tool for the correct depth. 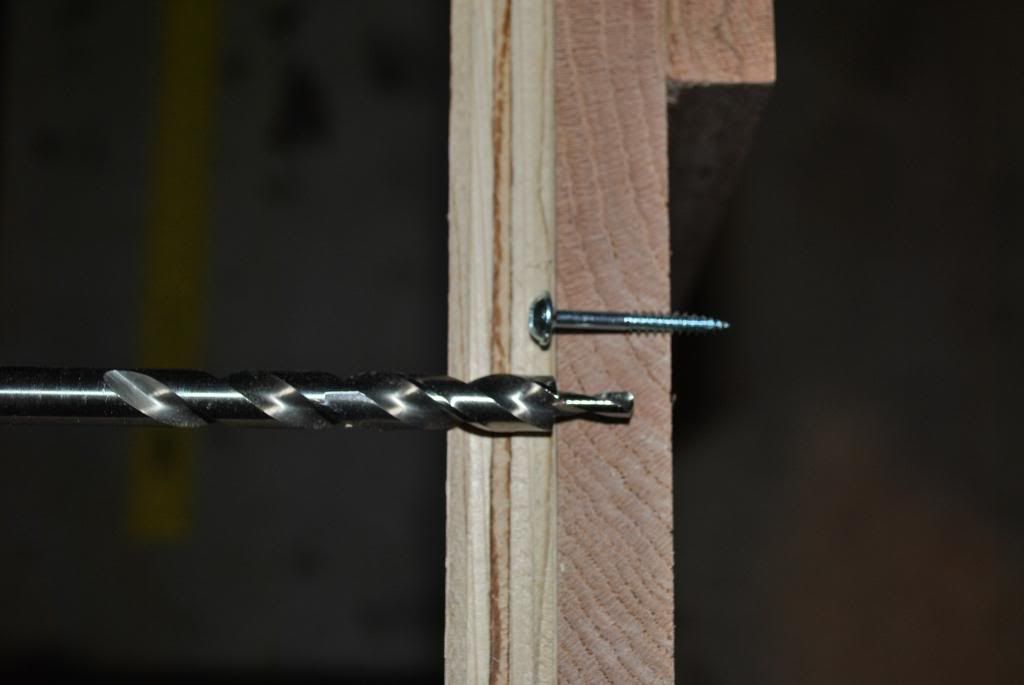 [/IMG] [/IMG]Then glue the blocks with another support block to avoid any damages. 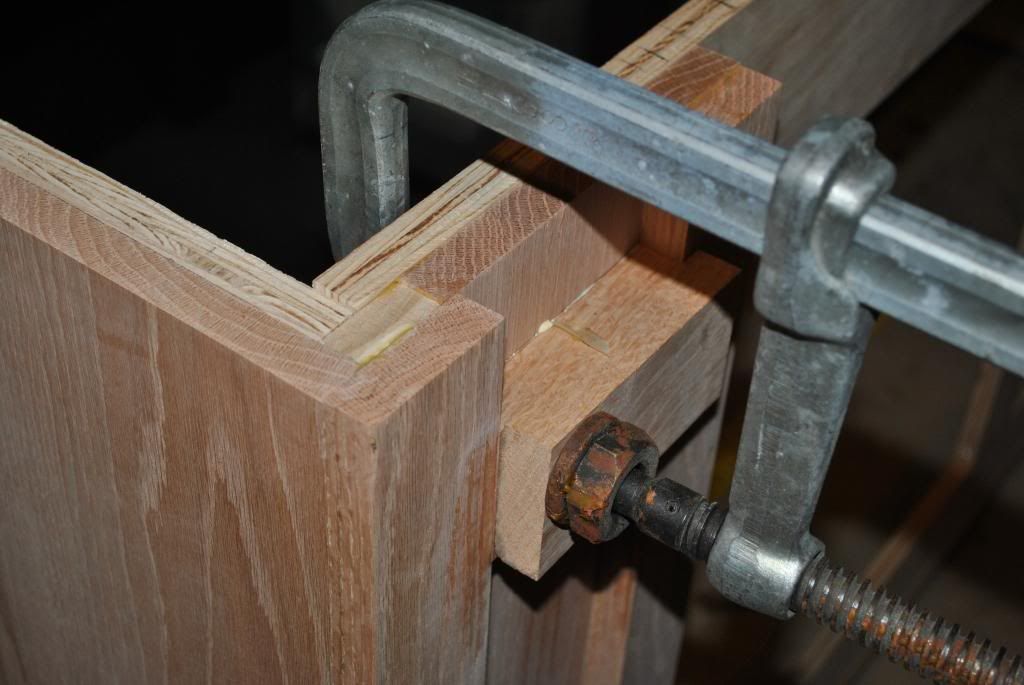 [/IMG] [/IMG]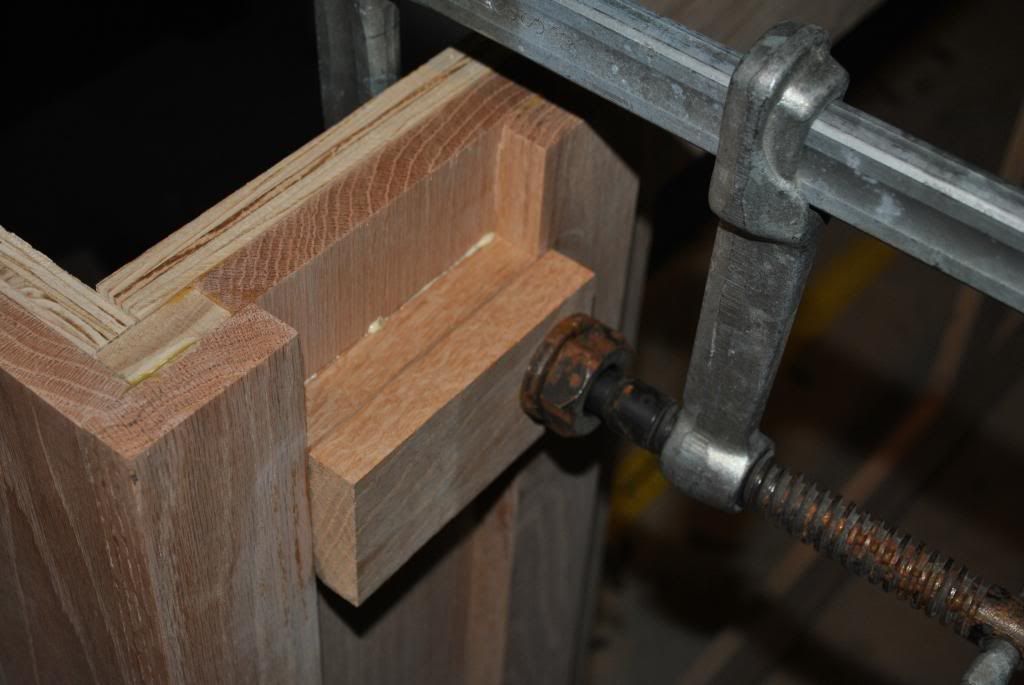 [/IMG] [/IMG]Cleaning up the corners, a towel and a sharp pen does a really good job. 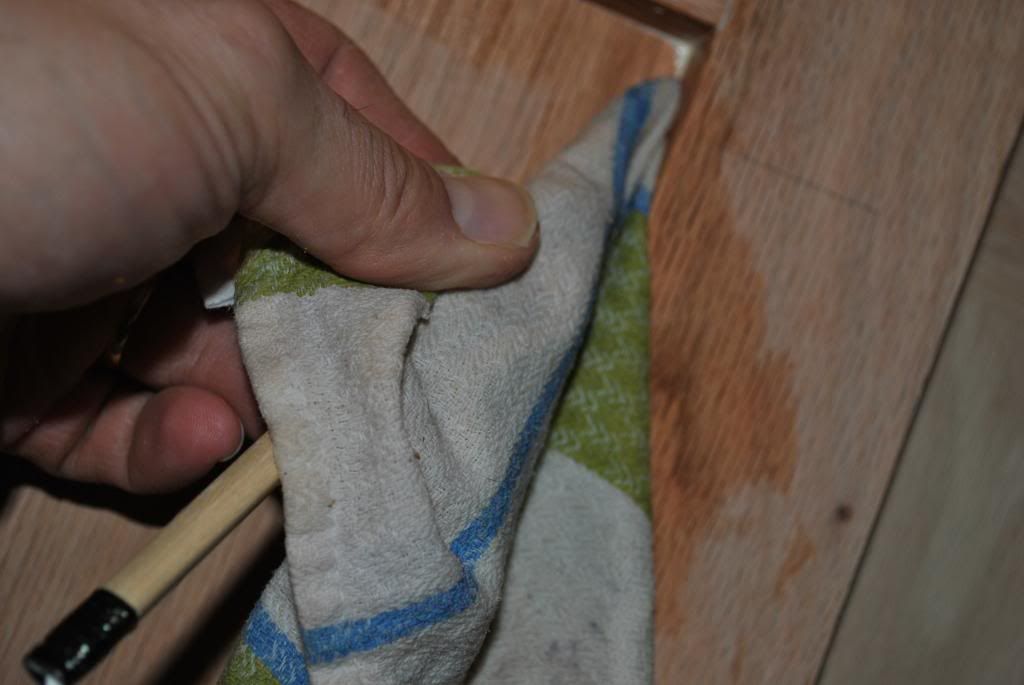 [/IMG] [/IMG]
|
|
|

|
|
|
#32 |
|
Registered Member
Join Date: Dec 2013
Location: Houston,TX
Posts: 198
|
|
|
|

|
|
|
#33 |
|
Registered Member
Join Date: Dec 2013
Location: Houston,TX
Posts: 198
|
|
|
|

|
|
|
#34 |
|
Registered Member
Join Date: Dec 2013
Location: Houston,TX
Posts: 198
|
Now I'm working on the upper trim.
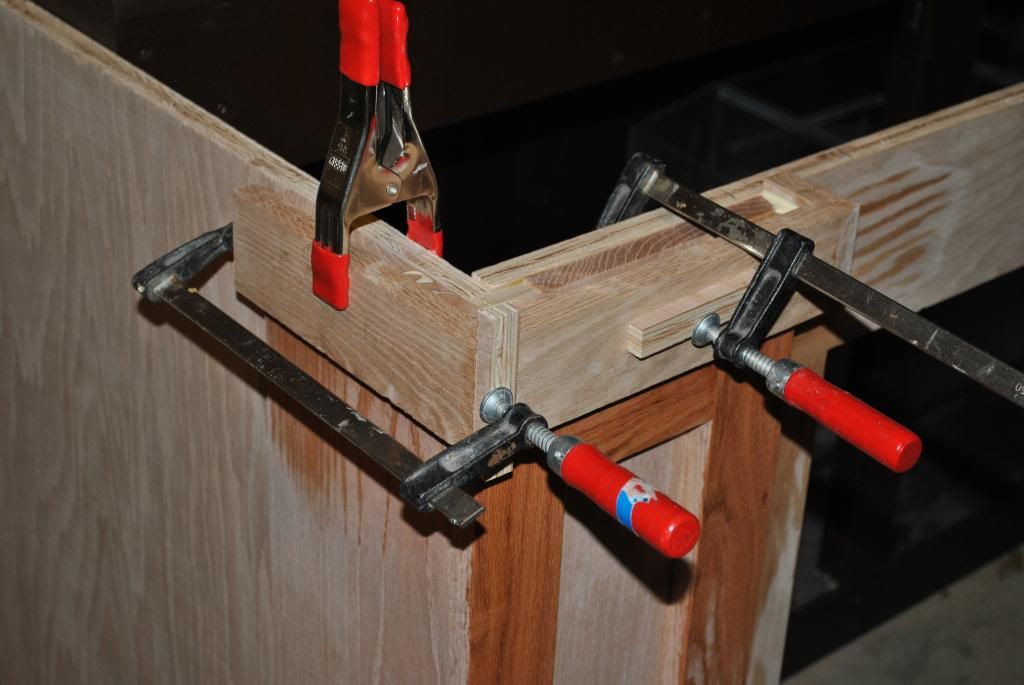 [/IMG] [/IMG]With a few helping pieces to support, you can get shorten even the already short pieces. Precision and the right 90 deg angle is important for the visual perfection later!!!! 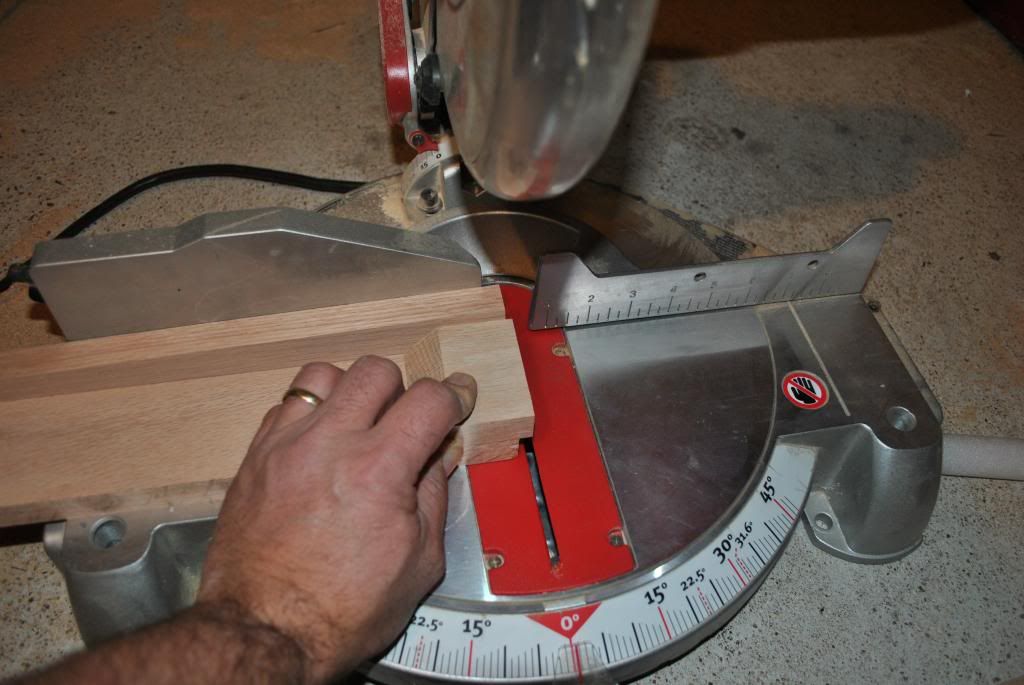 [/IMG] [/IMG]There you go.... clean nice look. So far done. The next step is to complete the bottom trim. That is going to be difficult since the stand will be on the floor, when the skirt shall roll on the carpet. The plan is to bring the skirt inside and mark the height of the precutted trim pieces onto the skirt. 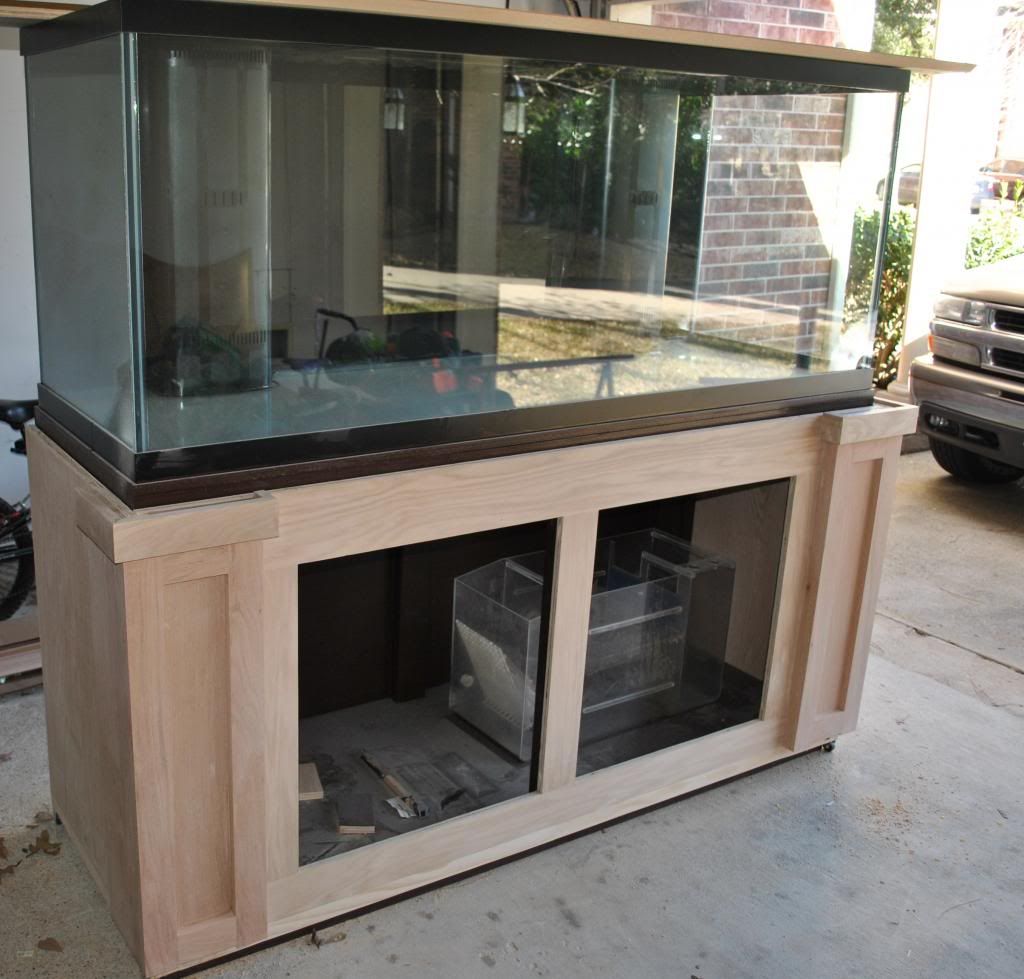 [/IMG] [/IMG]
|
|
|

|
|
|
#35 |
|
Registered Member
Join Date: Dec 2013
Location: Houston,TX
Posts: 198
|
|
|
|

|
|
|
#36 | ||
|
Registered Member
Join Date: Dec 2013
Location: Houston,TX
Posts: 198
|
Quote:
Quote:
From now on I will deviate from the "normal" DIY stand design and will continue as planned a lil bit different. Great built, btw. PSX |
||
|
|

|
|
|
#37 | |
|
Registered Member
Join Date: Dec 2013
Location: Houston,TX
Posts: 198
|
Quote:
Plan on plumbing will be iteresting for you. Also I do have high expectations of my special refugium that I have in mind. PSX |
|
|
|

|
|
|
#38 |
|
Registered Member
Join Date: Dec 2013
Location: Houston,TX
Posts: 198
|
Puuuh...
all the bottom trim pieces have been pre-cutted. Now I need to get the skirt inside on top of the carpet, in order to mark the height, when the Skirt with the wheels is sitting on carpet. ] 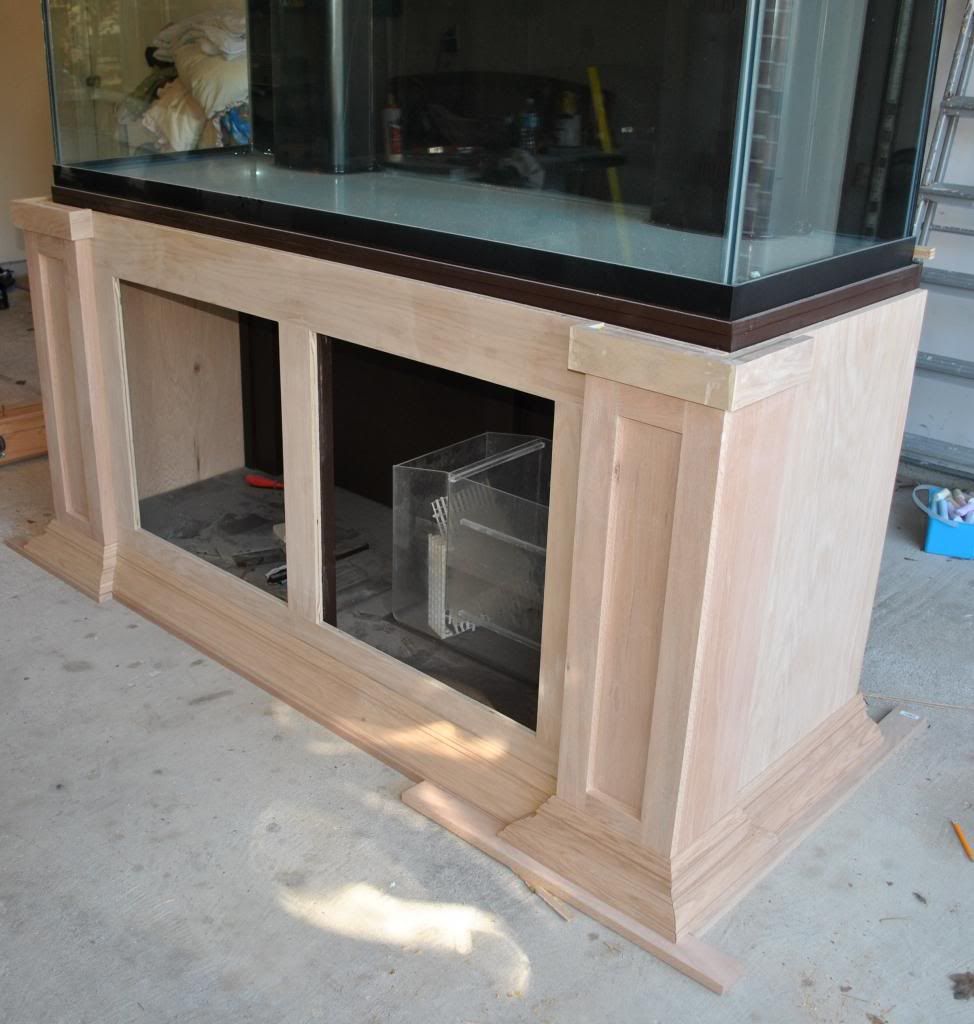 [/IMG] [/IMG]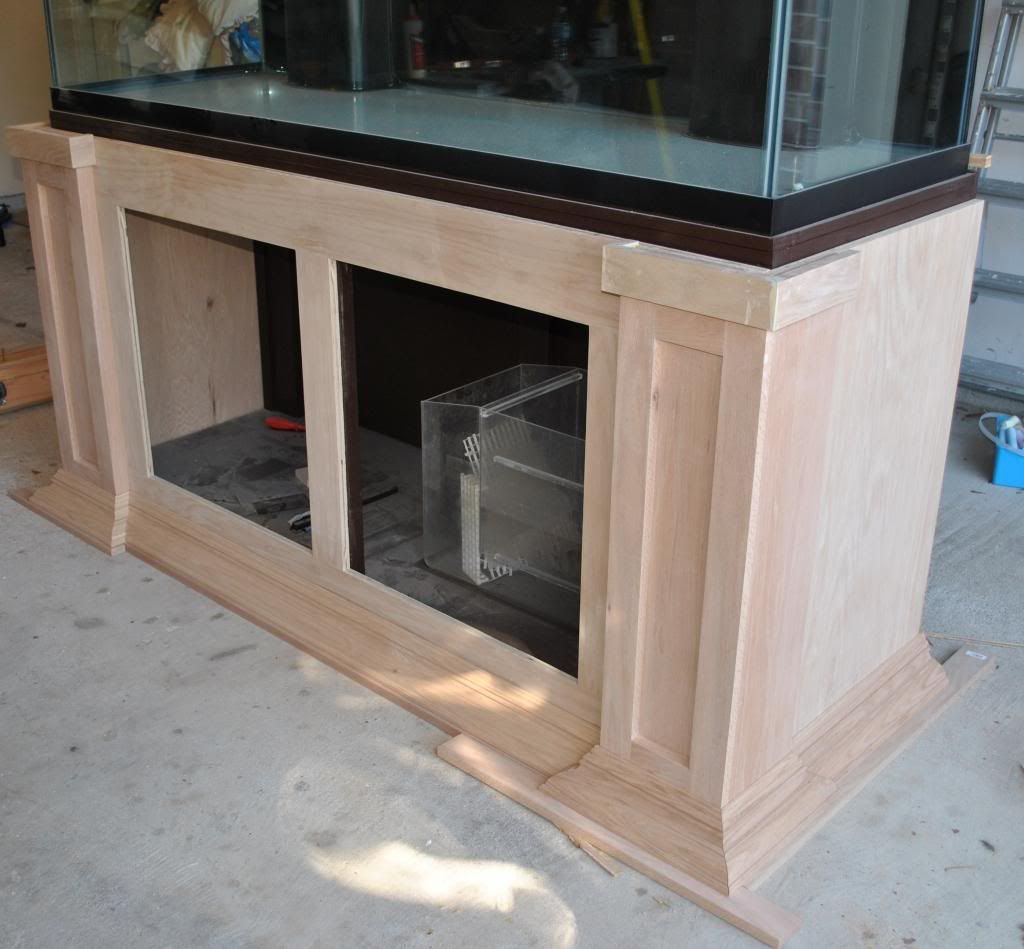 [/IMG] [/IMG]All right, supportet the skirt with a long piece of wood. Now I'm going to do the same thing again inside and mark all pieces. 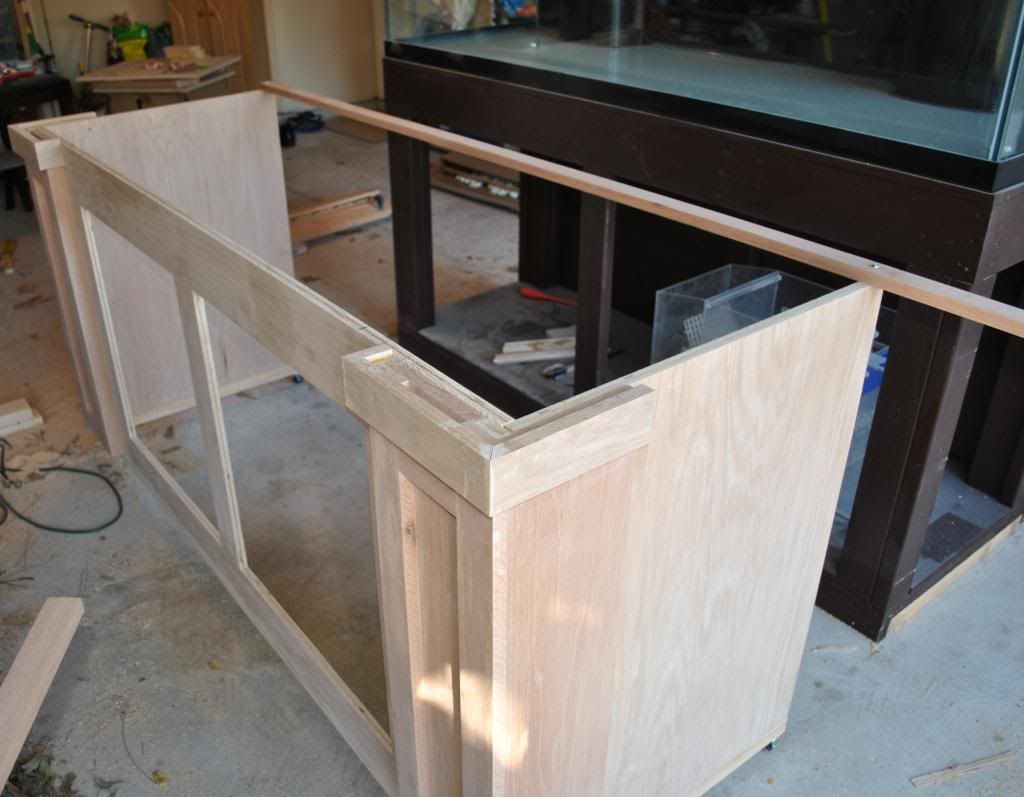 [/IMG] [/IMG]
|
|
|

|
|
|
#39 |
|
Registered Member
Join Date: Dec 2013
Location: Houston,TX
Posts: 198
|
In the meantime I also started purchasing some parts for plumbing after I did the pressure loss calculation and the resulting pipe and pump sizing.
Here some parts I bought. Not sure if I'm gonna use the flex hose for installation and plumbing at this point. 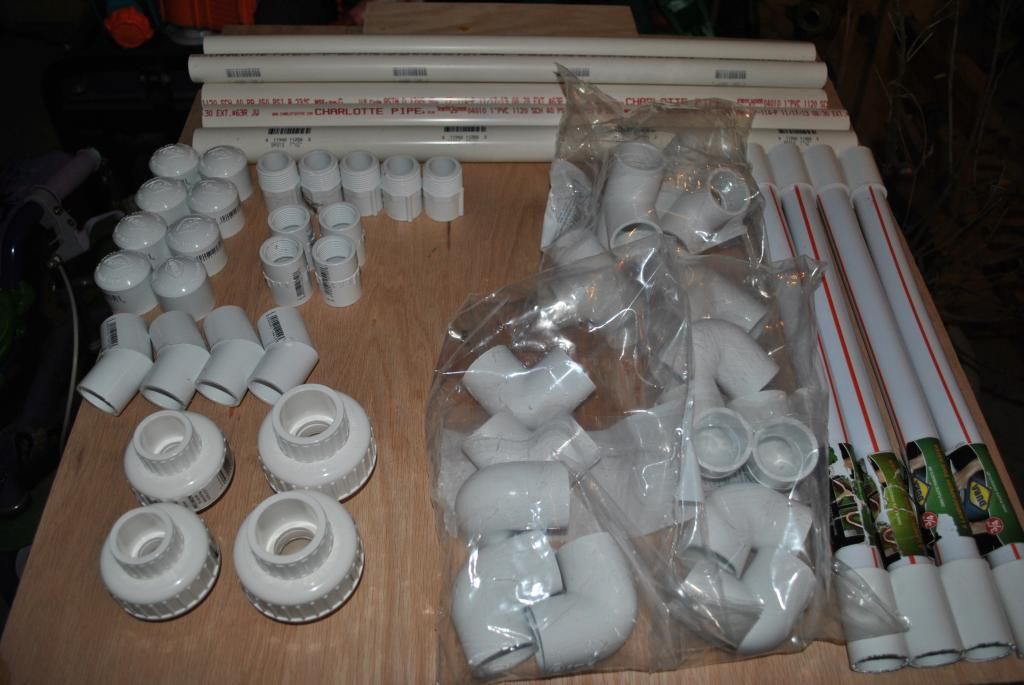 [/IMG] [/IMG]Piping and Pumps: 2x MAG 9.5 - 1358GPH/5140LPH (redundant arrangement in case a pump fails) Tank recirc rate - 6.5 x Refugium recirc rate - 27 x Pump to tank 2x - ea. 1" Durso 2x- max. Durso all. 3800GPH Overflow 2x - max. 2000GPH 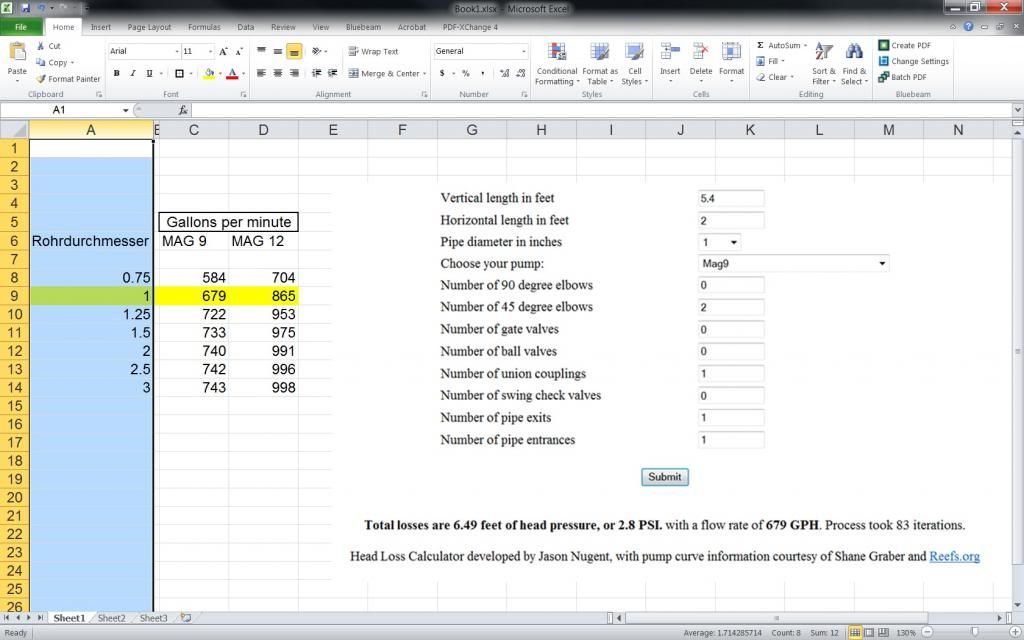 [/IMG] [/IMG]
|
|
|

|
|
|
#40 |
|
Registered Member
Join Date: Dec 2013
Location: Houston,TX
Posts: 198
|
|
|
|

|
|
|
#41 |
|
Registered Member
Join Date: Dec 2013
Location: Houston,TX
Posts: 198
|
|
|
|

|
|
|
#42 |
|
Registered Member
Join Date: Dec 2013
Location: Houston,TX
Posts: 198
|
|
|
|

|
|
|
#43 |
|
Registered Member
Join Date: Dec 2013
Location: Houston,TX
Posts: 198
|
Hey guys, I like the funny stars next to the thread!!!!
Can you guys rate my thread??? Regards PSX |
|
|

|
|
|
#44 |
|
Registered Member
Join Date: Dec 2013
Location: Houston,TX
Posts: 198
|
|
|
|

|
|
|
#45 |
|
Registered Member
Join Date: Dec 2013
Location: Houston,TX
Posts: 198
|
Done and dry.
The next step is the canopy and sanding the entire thing. 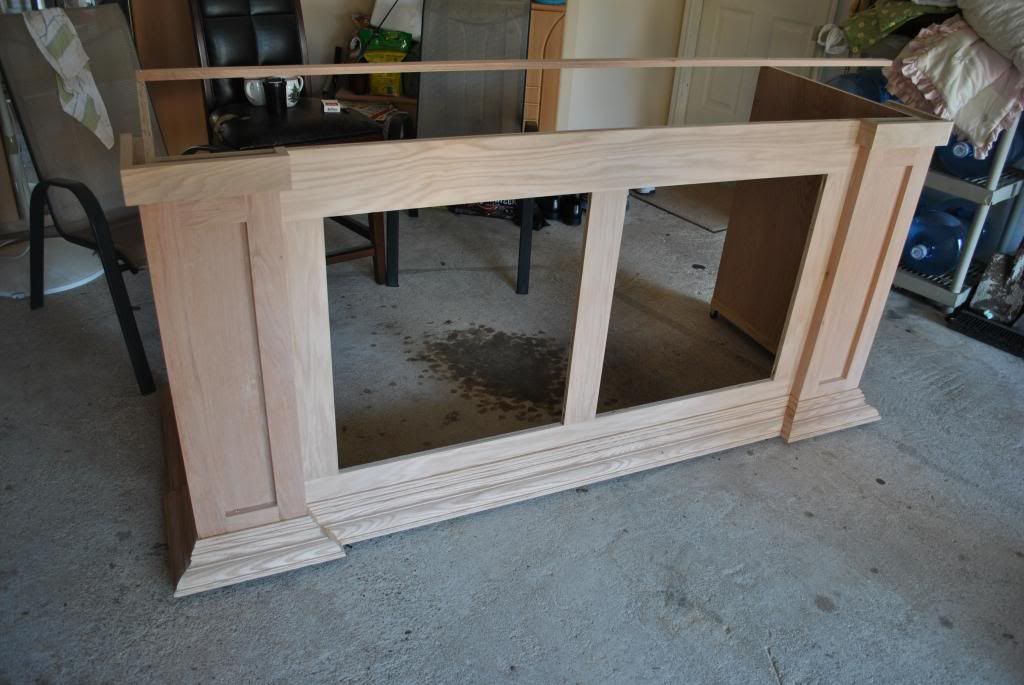 [/IMG] [/IMG]The upper trim should look later like the one on the bottom. But for that the Aquarium must be in it's place. 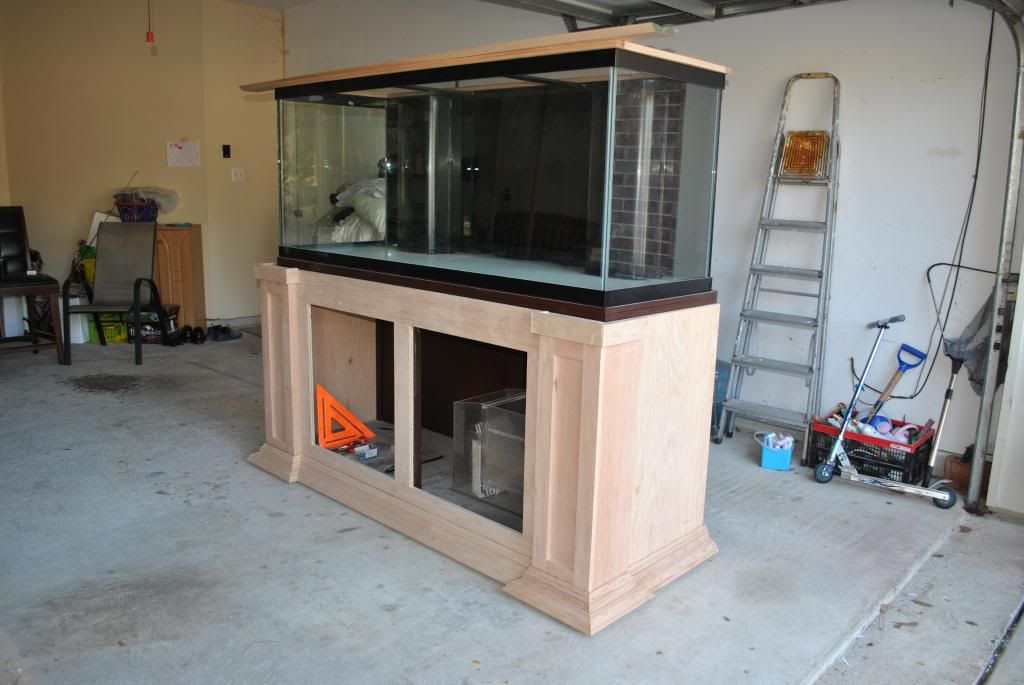 [/IMG] [/IMG]In order to proceed with the Trim on the Canopy I need to wait for more trim material which I ordered from HD. 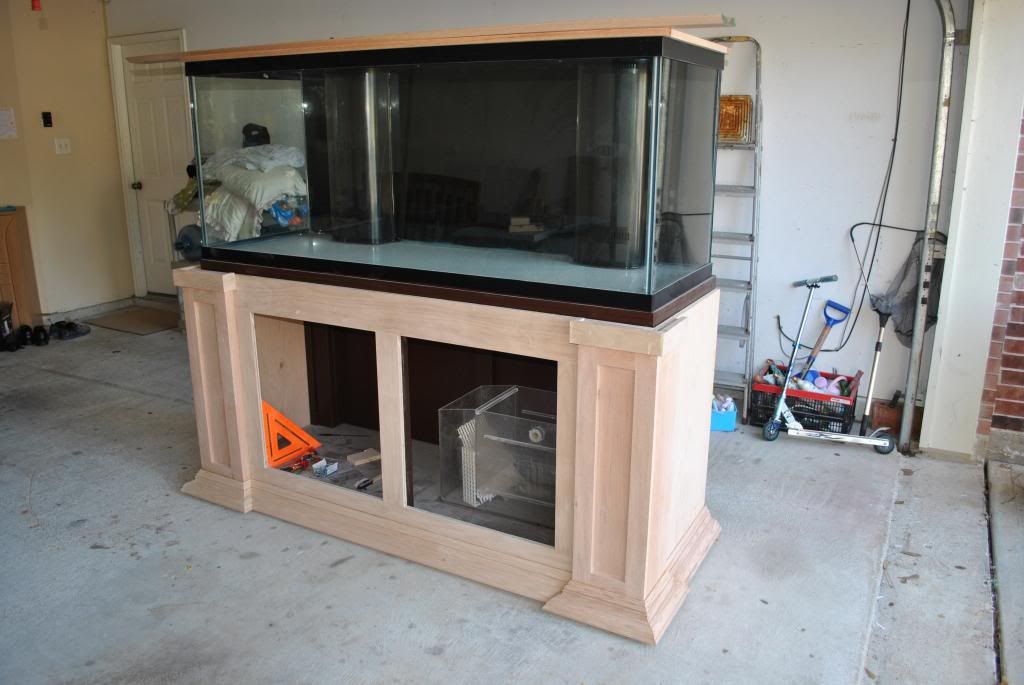 [/IMG] [/IMG]
|
|
|

|
|
|
#46 |
|
Registered Member
Join Date: Dec 2013
Location: Houston,TX
Posts: 198
|
Also I played around a lil bit with the Canopy design and how I'm gonna intend to build the Evaporation cooler and how to integrate the Light fixture.
I'm going Classic with HQI and T5 combi by using Phoenix bulbs. The Vent Fans will be controlled by a Reefkeeper lite system. Evaporated water will be refilled via Limewater or Kalkwasser. The estimated amount of water will be around 2-3 GpD. 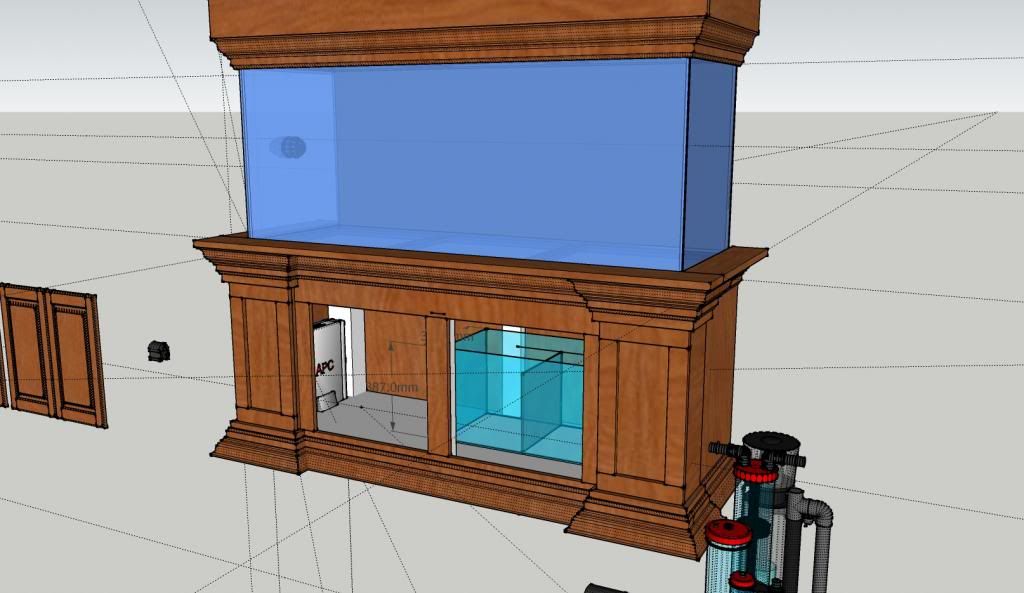 [/IMG] [/IMG]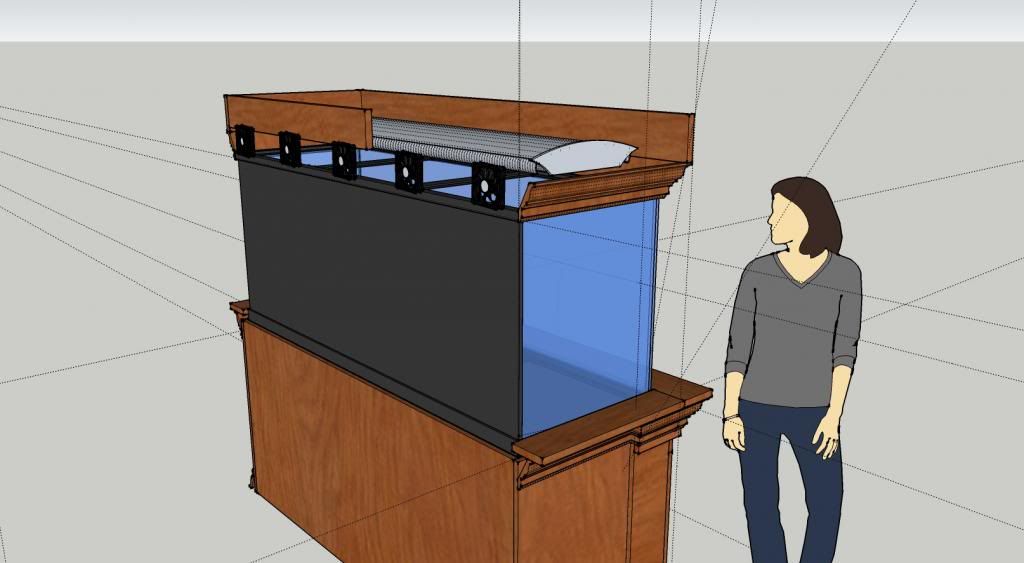 [/IMG] [/IMG]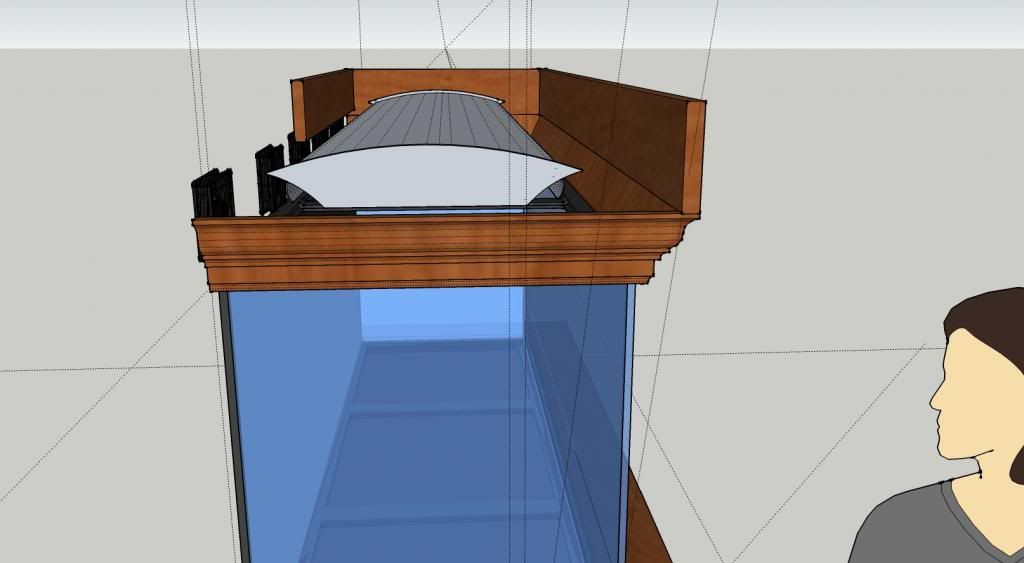 [/IMG] [/IMG]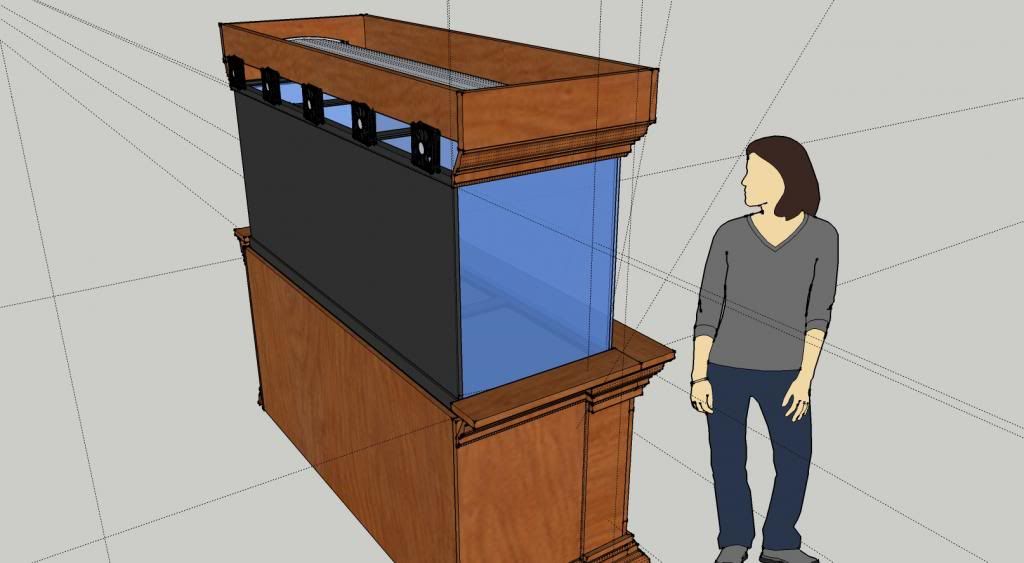 [/IMG] [/IMG]
|
|
|

|
|
|
#47 |
|
Registered Member
Join Date: Jan 2010
Location: Canadia
Posts: 4,276
|
I think you said earlier that the tank is going into a carpeted room and that you expect to have trouble with those wheels under the cabinet facing. As an alternative, perhaps you might want to consider cleats. They would allow you to hang the whole facing piece precisely and you could lift it on and off as required.
Dave.M
__________________
My Gawd! It's full of corals! Current Tank Info: None. Nil. Zip. Nada. |
|
|

|
|
|
#48 |
|
Registered Member
Join Date: Dec 2013
Location: Houston,TX
Posts: 198
|
That would bei an alternative.
But the skirt rolls real nice over the carpet when I had the skirt inside. Also, I can roll it off by myself without any help and basically roll it away from the tank. I think I stay with that. however the cleats would work as plan b. Thanks. PSX |
|
|

|
|
|
#49 |
|
Registered Member
Join Date: Dec 2013
Location: Houston,TX
Posts: 198
|
|
|
|

|
|
|
#50 |
|
Registered Member
Join Date: Dec 2013
Location: Houston,TX
Posts: 198
|
|
|
|

|
 |
| Tags |
| 210 gallon, aquarium stand, diy stand, reef tank stand, rocket engineer |
|
|