


|
 |
|
|
#26 |
|
Registered Member
Join Date: Jul 2002
Location: Wylie, TX
Posts: 473
|
Well. Got the plumbing all done and got the aquarium filled.
Running into a couple of problems that I'll have to work out. 1) Getting free used equipment usually means finding out what works and what doesn't. After getting everything hooked up I found out that the smaller pump and the ocean's motions both leak. Does anyone know if the ocean's motions devices have problems being mounted sideways? The device seems to be leaking out of a little hole on the side. Need to figure out what this is for and why it would be leaking out of there. 2) Some of my plumbing leaks. Not much. A drip every other minute or so. And the over flow box I bought has a little drip in the corner. about 1 drip per minutes. The overflow box I can probably seal by draining it and putting a bead of silicone in it and running some more acrylic glue into the corner. Not sure what to do for the other PVC fittings... re-do? silicone? put some glue on the outside and squeeze? 3) micro-bubbles. The main return is throwing micro-bubbles everywhere. I'm thinking it's probably because I forgot to put a bubble trap on the last overflow into the last section of the sump. I'll need to drain the sump and add one. Good things? 1) The Beananimal overflow works. I threw a quick acrylic lid on the external box and there's only the slightest noise. 2) The main pump, while overkill, can easily be turned down with the ball valve and easily drives all the equipment in the sump as well as the main return. There is a decent hum, but I think once the sides are on the stand it will be much quieter. Most of the sound seems to come from the pump side and not the motor side. If the neighbor's AC is running (locate right by my garage), then I almost couldn't hear the pump. 3) The sump is more than adequate to hold all the water that drains back. I have about 4-5 inches left in the top of the sump when everything is off. It also looks like I still have plenty of room under the stand for my controller. Adding a top-off tank is going to be tight. Pictures from the day: Oops: 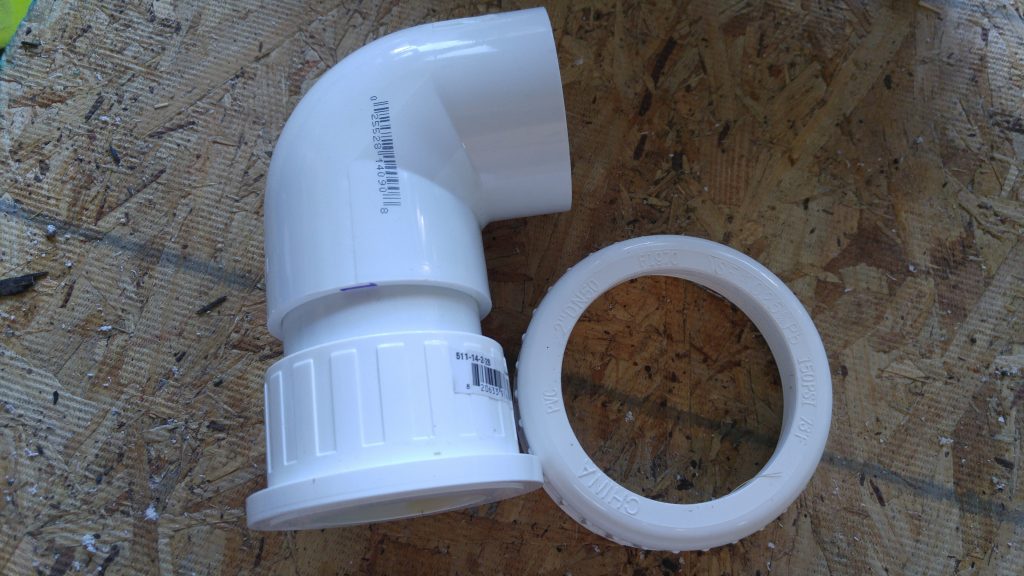 Adding Water 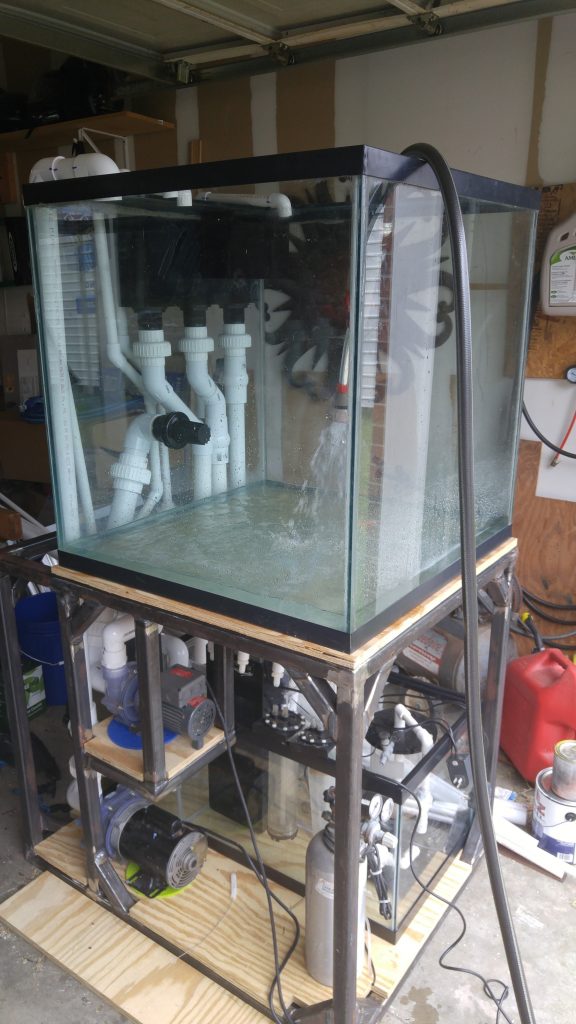 Leaky Ocean's Motions: 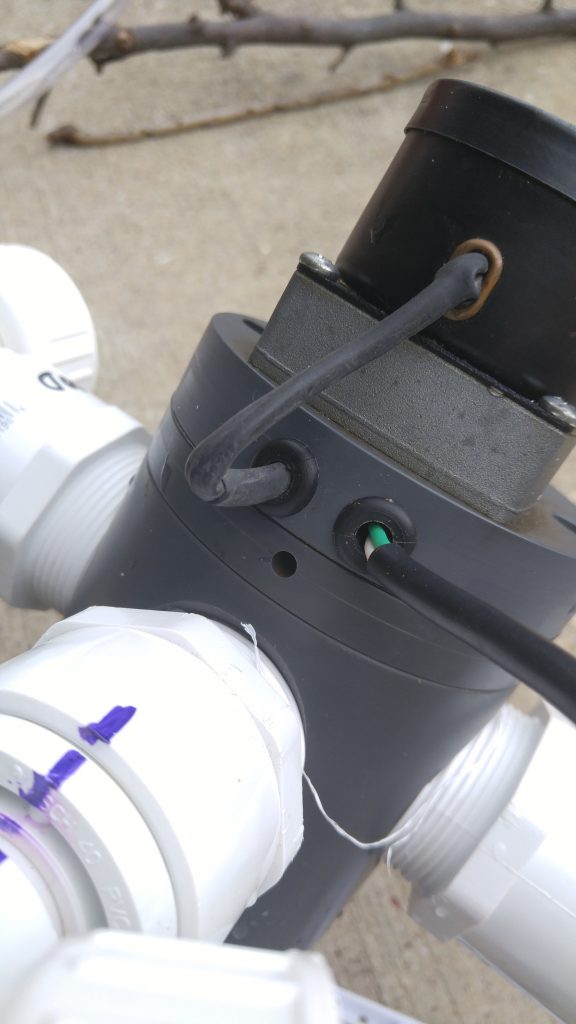
|
|
|

|
|
|
#27 |
|
Registered Member
Join Date: Jul 2002
Location: Wylie, TX
Posts: 473
|
Just got a call from ocean's motions. Looks like my unit is older and not really designed to be mounted horizontal. I should be able to upgrade it to the newer mag drive setup and be good to go.
Sent from my VS986 using Tapatalk |
|
|

|
|
|
#28 |
|
Registered Member
Join Date: Jul 2002
Location: Wylie, TX
Posts: 473
|
I went ahead and ordered the mag-drive upgrade.
I also called up MDM and ordered a replacement O-ring and drive seal to fix the leak on the smaller pump. One other item that I'll need to change is I'll be adding a ball-valve to the return from the main pump AFTER the T for the manifold. This should allow me to send some more pressure down the manifold line to increase flow through some of the equipment. I created a quick youtube video with a little walk through. I've since quieted down the overflow quite a bit. https://www.youtube.com/watch?v=MpJtIJ560Jg |
|
|

|
|
|
#29 |
|
Registered Member
Join Date: Jul 2002
Location: Wylie, TX
Posts: 473
|
The tank has been running since Sunday.
What I've learned so far is that running in my garage it's burning just under a gallon a day in evap. That should go down a little once in the house. I've also learned that I think I want to replace the big return pump. I'm using a ball valve to run it at half power right now. It's really too big for the tank and the motor produces quite a bit of heat. I'm thinking about getting one of the Jebao 12000's to replace it. I need to measure the return area in the sump to make sure it will fit first. |
|
|

|
|
|
#30 |
|
Registered Member
Join Date: Sep 2006
Location: Lawrenceville, Georgia
Posts: 94
|
Looking great!
|
|
|

|
|
|
#31 | |
|
Registered Member
Join Date: Aug 2008
Location: Mount Juliet, TN
Posts: 4,528
|
Quote:
|
|
|
|

|
|
|
#32 |
|
Registered Member
Join Date: Jul 2002
Location: Wylie, TX
Posts: 473
|
I went ahead and bought the pump. I'll need to move a baffle to make sure there's enough room for it to fit, but that shouldn't be too big of a deal. I was needing to modify the sump to reduce micro bubbles anyways.
This will also give me more 'floor' space for putting a top-off tank. So it's kinda a win-win-win for me in that regard. I'll have to pick up some plumbing to redo part of the return, but oh well. |
|
|

|
|
|
#33 |
|
Registered Member
Join Date: Jul 2002
Location: Wylie, TX
Posts: 473
|
I'm still waiting for the new pump to come in, but I've been working on the aquarium controller.
I have the chiller/heater tested. I've been running the controller on the bench with pH probes, temp probe, pump and chiller in a 5 gallon bucket in the garage. Basically just a live test to make sure everything's working. |
|
|

|
|
|
#34 |
|
Registered Member
Join Date: Mar 2015
Location: Upstate NY
Posts: 5,313
|
Looking good BigDave! As far as getting the thread moved, just PM a mod on where it is and where you want it moved to. Shouldn't be a big deal for them, they move threads all the time.
__________________
80G SCA Build: http://reefcentral.com/forums/showthread.php?t=2560256 Originally posted by der_wille_zur_macht: "He's just taking his lunch to work" |
|
|

|
|
|
#35 |
|
Registered Member
Join Date: Jul 2002
Location: Wylie, TX
Posts: 473
|
Another step closer.
I received the replacement seals for the smaller MDM pump, but after putting it back together it still leaked. Closer inspection revealed that the housing itself was cracked. Called MDM again and found out that they could sell me a replacement housing pretty cheap. I doubt it will get here by this weekend, but it should be easy for me to get it installed. I'm hoping to have the tank re-filled by next Weekend to continue testing. I was also able to figure out how to push firmware updates to the Arduino directly from the PI. It was the last piece of the puzzle I had for the controller before being able to finish the case. Now I can button it all up and get that finished. |
|
|

|
|
|
#36 |
|
Registered Member
Join Date: Sep 2006
Location: Lawrenceville, Georgia
Posts: 94
|
Looks like we're on a similar trajectory...
__________________
Zach's 120 Gallon Reef Resurgence: http://www.reefcentral.com/forums/showthread.php?t=2590557 Current Tank Info: 120 Gallon Display + 55 Gallon Sump/Fuge |
|
|

|
|
|
#37 |
|
Registered Member
Join Date: Jul 2002
Location: Wylie, TX
Posts: 473
|
The wife gave me all day Saturday to myself to work in the garage. I was able to finish building the box for the controller. I also got the new pump installed. I'm running the pump at 90% to get enough flow for all the equipment and still have good flow through the tank.
My equipment that I'm running off of it are: Chiller Protein Skimmer Carbon Reactor CA Reactor The first two devices take quite a bit of flow to run efficiently, which is why I'm probably having to run the pump so high. The new pump is significantly quieter than the old huge one, although I do notice that it's a little louder the second day. We'll see what it sounds like in a week. With everything still in the garage, it looks like it's taking about 4 hours for the tank to raise one degree and set off the chiller. Then the chiller runs about 2 hours to chill the tank back down one degree. I'm thinking about changing this to a half degree swing. Once inside, I think it will probably swing a lot slower due to the house temperature being significantly less than what the garage currently is (August in Texas). Anyways, here's a few pictures The controller as it sits now. Still need to glue it and paint it, but wanted to test first 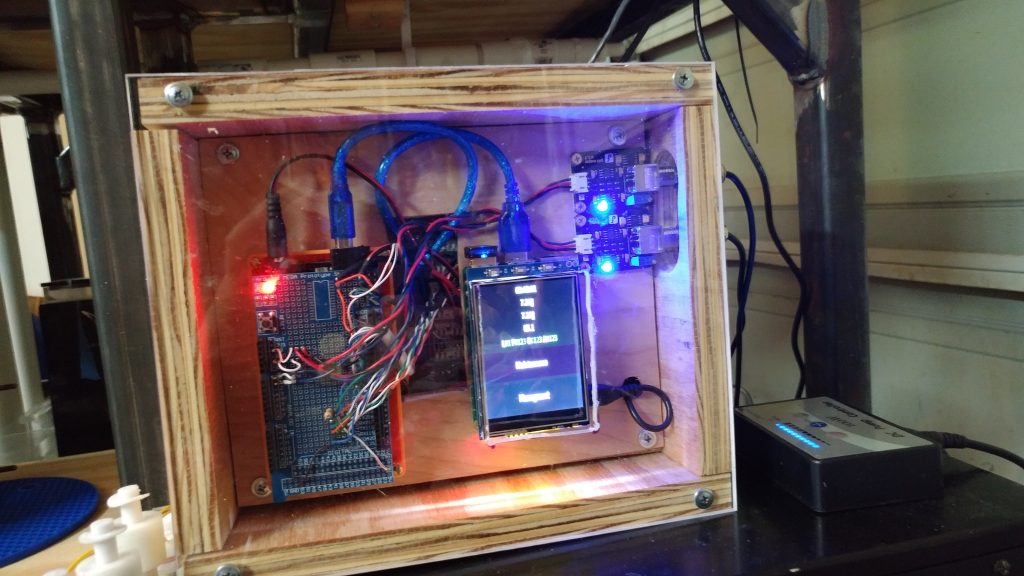 new plumbing. Still missing the wavemaker and second pump 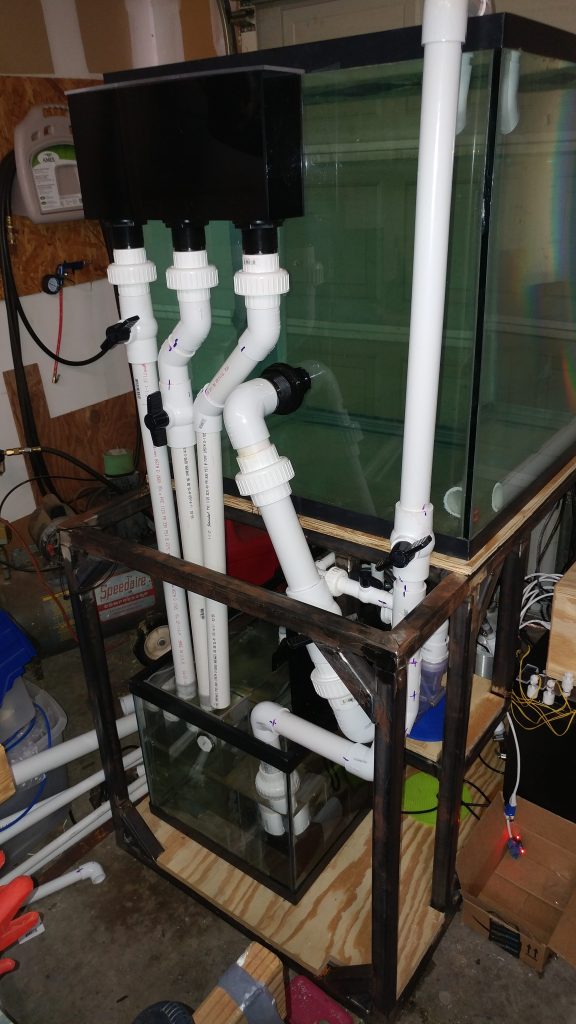
|
|
|

|
|
|
#38 |
|
Registered Member
Join Date: Jul 2002
Location: Wylie, TX
Posts: 473
|
Finally wrote the code for calibrating the PH probes... and there's something wrong with my algorithm. Time to start debugging, but mosquitoes are out already...
|
|
|

|
|
|
#39 |
|
Registered Member
Join Date: Aug 2016
Posts: 7
|
I'd love to see your controller code for the Pi and Arduino, as I have a Maple (advanced arduino) and a few Pi's laying around my house that are looking for something to do.
|
|
|

|
|
|
#40 |
|
Registered Member
Join Date: Jul 2002
Location: Wylie, TX
Posts: 473
|
Sure. Just a few warnings... I'm not the best programmer, and I'm even worse at remembering to add comments. The Arduino code is probably a little better than the python code.
Getting the touchscreen to work was the hardest part of the hardware as I found documentation for those things extremely lacking. I'm also using fbcp to get the hdmi output to show on the TFT screen. I couldn't seem to get kivy to display on the TFT without it. https://github.com/niget2002/AquaControl The Arduino files have a bunch of little test scripts that I used during the initial testing phases. There's only one .ino file in the src directory that's the actual code. Let me know if you have any questions about the code. |
|
|

|
|
|
#41 |
|
Registered Member
Join Date: Jul 2002
Location: Wylie, TX
Posts: 473
|
|
|
|

|
|
|
#42 |
|
Registered Member
Join Date: Jul 2002
Location: Wylie, TX
Posts: 473
|
Good News Bad News
Good news:
New pump housing and mag-drive for the wavemaker came in. Got both of those installed and got the wavemaker running on the tank again. Bad News: Found out a small leak I had in my wavemaker plumbing was due to ta fitting that didn't get glued somehow... It let loose while I was working on the tank and started pumping water all over the garage floor at roughly 3000 gph. Here's a video of the wavemaker being tested prior to the fitting letting loose. https://youtu.be/9TZUDr8cXig The offending fitting 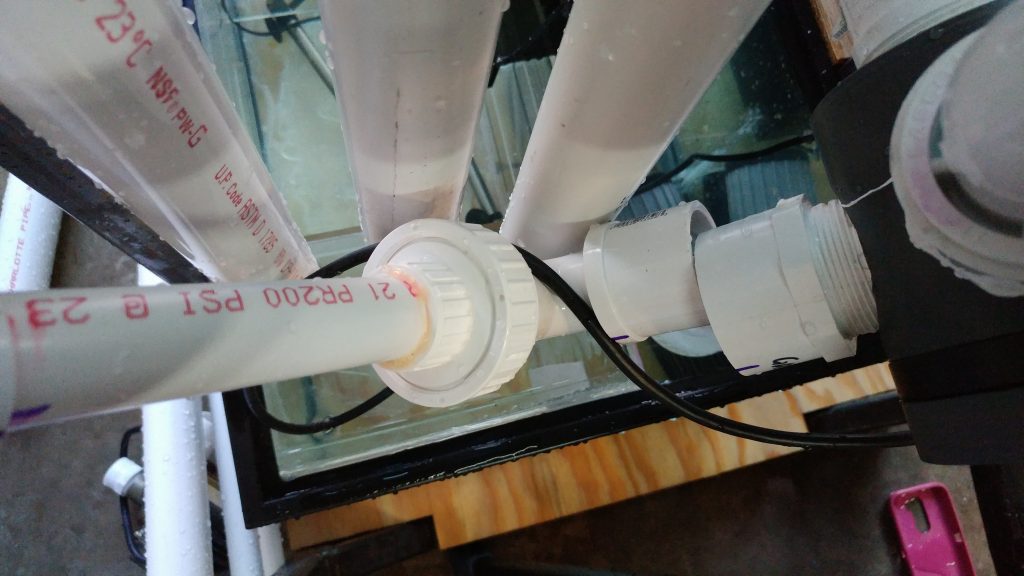 Water all over the garage 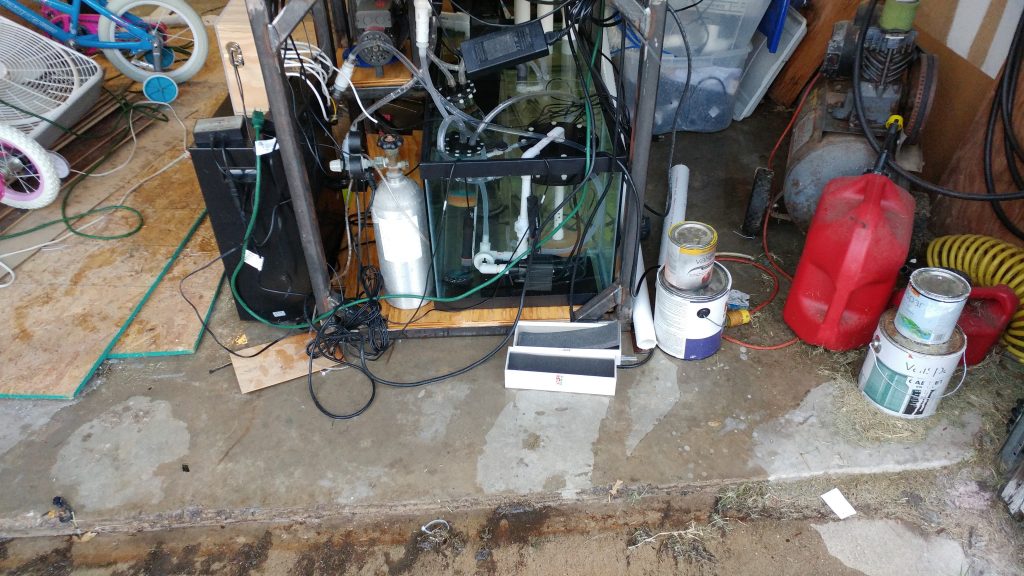
|
|
|

|
|
|
#43 |
|
Registered Member
Join Date: Jul 2002
Location: Wylie, TX
Posts: 473
|
I got everything glued back up and working again. No more leaks.
I went ahead and turned off the chiller. I found out yesterday that with it over 90 degrees outside, the chiller can't cool the tank off. It's not really an issue in the long run as we don't let our house get that hot. I also fixed my code that was keeping the pH calibration from working correctly. Found out there's a difference between eeprom.write and eeprom.put :/ The pH is now accurately being measured (at least technically it is). I still want to grab some of my pool pH test stuff and see how the probes compare to chemical testing. I used the same calibration fluid when calibrating the two probes. This caused the 4.0 test on the second probe to be slightly skewed. I'll have to remember to use fresh packets of test liquid for each probe when doing the final calibration once it's all in the house. I also used tap water for rinsing instead of RO/DI, so yet another skew there probably. It's just testing, so having the values be a little off isn't that big of a deal right now. It's the fact the calibration values are storing correctly into EEPROM for after power outages that matters. |
|
|

|
|
|
#44 |
|
Registered Member
Join Date: Jul 2002
Location: Wylie, TX
Posts: 473
|
I was curious about the draw on the tank, so I borrowed a kill-a-watt meter and measured amp draw while turning the different components on. Everything but lights settled out to just under 6 amps. The spike when the chiller compressor kicked on was interesting
https://www.youtube.com/watch?v=kv7WZ_7j21E |
|
|

|
|
|
#45 |
|
Registered Member
Join Date: Jul 2002
Location: Wylie, TX
Posts: 473
|
It's amazing how much life can get in the way of hobbies.
I was able to get part of the canopy built last week, and I got the relay for the lights installed into the canopy. I still need to finish skinning the other 3 sides of the canopy, but then it will be done. I want to mount it to the wall in the garage to make sure the TV mount I bought will be able to support the canopy with the lights. I was able to pick the light up by the mount and it didn't feel like it was going to bend/break. There is definitely a lot of weight cantilevered out on the end of the mount. I got 0 work done on the tank over the weekend. I did finally remember that the cable management stuff I want is at Fry's, so I'll try to run over there during lunch one day this week. I did buy some metal brackets for mounting the controller to the stand. I still need to mount the float switches and pH monitors. Lastly, I need to build or buy some type of ATO reservoir. I have a peculiar space that is 9wx24lx14h to put it. I'll probably go hunting for that this weekend. I think it would be about $60 for me to buy acrylic to build one. Once that is all done, I'll let it run for a week again, and then I'll start tearing things down and painting the stand, plumbing, etc. |
|
|

|
|
|
#46 |
|
Registered Member
Join Date: Jul 2002
Location: Wylie, TX
Posts: 473
|
This weekend started off good, but went bad quickly.
I finally got most of the float switches mounted, got the controller mounted, and figured out how to mount the pH probe on the CA reactor... and then things went south. I went to mount the pH probe on the CA reactor and found out the pvc pipe coming out the bottom was loose. When I went to fix it, the reactor chamber cracked... bad. I also found out the on/off switch for the co2 container is broken. Now I'm debating if the CA reactor is worth it, or if I want to just do 2-part dosing for a while. I can modify the code to run 2 dosing pumps on two of the relays that were being used on the CA reactor. Any opinions? |
|
|

|
|
|
#47 |
|
Registered Member
Join Date: Jul 2002
Location: Wylie, TX
Posts: 473
|
I think I'll build a new reactor... but I'll wait a little while before I do it.
http://www.reefcentral.com/forums/sh....php?t=2306386 |
|
|

|
|
|
#48 |
|
Registered Member
Join Date: Jul 2002
Location: Wylie, TX
Posts: 473
|
Much better progress today.
I got the rest of the float switches mounted and finished wiring up the electrical. I'm going to let the controller run until next weekend and then I'll drain the tank and take everything apart. Once apart I will paint the stand and the back of the tank. The only thing left is building a platform for the water storage and finish the canopy. I'm hoping i can get that finished next weekend too. Then it will be time to bring the tank into the house and start setting it all back up again. |
|
|

|
|
|
#49 |
|
Registered Member
Join Date: Jul 2015
Location: Santa Rosa
Posts: 17
|
That tanks going to look great cant wait to see it stocked!
|
|
|

|
|
|
#50 |
|
Registered Member
Join Date: Dec 2013
Location: Kenosha WI
Posts: 985
|
Nice group of projects to keep you busy.

|
|
|

|
 |
|
|