
|
|
 06/08/2005, 09:55 AM
|
#26 |
|
SPS OG
Join Date: Dec 2004
Location: Toronto
Posts: 1,282
|
Hey Salty, post pics in here. I will probably have a similar setup as yours.
|

|

|
|
06/08/2005, 12:22 PM
|
#27 |
|
Premium Member
 Join Date: May 2002
Location: NJ
Posts: 1,355
|
I will try to post some later tonight Atomikk.
|
|
|
|
|
06/08/2005, 04:59 PM
|
#28 | |
|
Registered Member

Join Date: May 2005
Location: Reading Pa
Posts: 295
|
Quote:
__________________
if you got questions bout pipes. im your man Current Tank Info: 70 gal oceanic rr, outer orbit 36" 150w mh 2x 96w pc attinics, 20 gal long tank turned into my sump, mag 9.5 sump return pump, little giant 3mdqx-sc used for my closed loop. |
|
|
|
|
|
06/08/2005, 06:38 PM
|
#29 |
|
Premium Member
Join Date: May 2002
Location: NJ
Posts: 1,355
|
Here are the photos of my 65g I promised.
20 gal sump  Front pic of tank  Rear view of tank  Tank room  The sump is divided into separate drain/skimmer, refuge and return areas. I have chaeto macroalgae in the fuge. Right now I have only a Jali 13watt PC light over the fuge but I will most likely upgrade this eventually. I used 3/4inch black tubing for my Mag7, primarily because I already had the barbed fitting for the pump and a barbed ball valve from my previous setup. I used 1" PVC for the drain plumbing. As you can see, my plumbing is very basic. I have my drain pipe exiting about 3 inches below the water line into a Micron bag. The bag has significantly reduced the splashing and noise from the drain. I still have to put my black background on the tank and have to fix the drywall around the front of the tank. Right now I have 45lbs of mature live rock from my 29g sitting on top of about 45 lbs of baserock from HiRocks.com. I still have to play around with the aquascaping since I am not happy with it yet. Let me know if you have any questions Atomikk. Hope this was helpful. |
|
|
|
|
06/08/2005, 07:39 PM
|
#30 |
|
SPS OG
Join Date: Dec 2004
Location: Toronto
Posts: 1,282
|
Hey Salty, that pinkish stuff around the ends of pvc's.. what bonding agent is that?
|
|
|
|
|
06/08/2005, 08:18 PM
|
#31 |
|
Premium Member
Join Date: May 2002
Location: NJ
Posts: 1,355
|
Purple PVC primer. It goes on the pipe before the glue. This was the first time I worked with PVC so my glue job is pretty messy.

|
|
|
|
|
06/09/2005, 11:14 AM
|
#32 |
|
SPS OG
Join Date: Dec 2004
Location: Toronto
Posts: 1,282
|
Oh ok, and the glue you use for the pvcs is.....?
|
|
|
|
|
06/09/2005, 12:14 PM
|
#33 |
|
Premium Member
Join Date: May 2002
Location: NJ
Posts: 1,355
|
PVC glue. You use primer first then the glue. Directions are right on the cans. It was pretty easy to do.
|
|
|
|
|
06/09/2005, 01:04 PM
|
#34 |
|
SPS OG
Join Date: Dec 2004
Location: Toronto
Posts: 1,282
|
Thanks Salty. I also concluded that I will be making a 25gal sump from a small tank. Its really inexpensive when you think about it. It sure beats spending good $400+ on a decent Berlin sump.
|
|
|
|
|
06/09/2005, 05:28 PM
|
#35 | |
|
Premium Member
Join Date: May 2002
Location: NJ
Posts: 1,355
|
Quote:
|
|
|
|
|
|
06/09/2005, 09:17 PM
|
#36 |
|
Registered Member
Join Date: May 2005
Location: Reading Pa
Posts: 295
|
I finaly bought my new tank today. I got a 70 gal oceanic rr. The same as the 65, just an inch taller. Im pretty excited, but i still need the lights.
__________________
if you got questions bout pipes. im your man Current Tank Info: 70 gal oceanic rr, outer orbit 36" 150w mh 2x 96w pc attinics, 20 gal long tank turned into my sump, mag 9.5 sump return pump, little giant 3mdqx-sc used for my closed loop. |
|
|
|
|
06/10/2005, 08:23 PM
|
#37 |
|
SPS OG
Join Date: Dec 2004
Location: Toronto
Posts: 1,282
|
Ok Guys.... I am going in... tonight I am building my sump. Bought a 29 gal 30"x12"x18" tank, and got some acrylic sheets wich I am going to cut. I will post pics of my messy job..err.. project..
|
|
|
|
|
06/10/2005, 10:11 PM
|
#38 |
|
SPS OG
Join Date: Dec 2004
Location: Toronto
Posts: 1,282
|
Ok here we go...
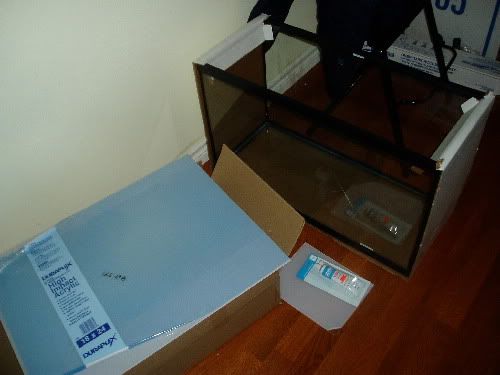 My 29 gal and the tools.... 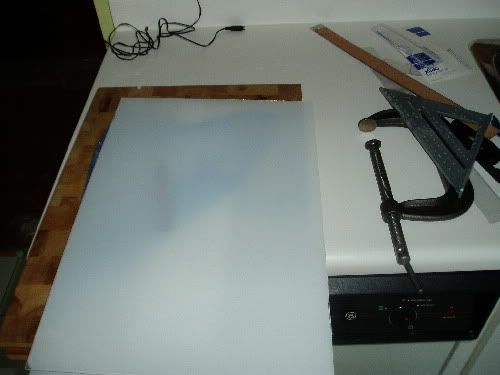 My ghetto work bench.. note the dishwasher and the cutting board as my tools  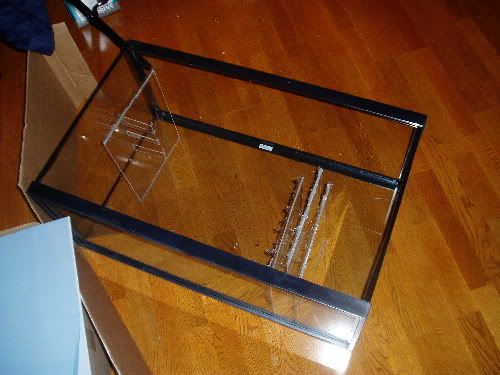 Messy, but its done... The first chamber is the inflow where i will place a sponge and carbon for initial filtration. Then I will have plenty room for a skimmer (a large one), then I will place some LR before the bubble trap baffels. The last chamber is the outflow with my mag 7 pump. I will test the sump for leaks tomorrow. I will post pics on my progress. |
|
|
|
|
06/11/2005, 06:14 AM
|
#39 |
|
Registered Member
Join Date: Feb 2004
Location: O'Fallon, IL
Posts: 2,465
|
You might want to add more distance between those baffles. The closer they are together, the faster the water goes and the more bubbles are carried through. Making the traps 2" apart will slow the water down and allow the bubbles to float up.
Otherwise it looks good. -Mike |
|
|
|
|
06/11/2005, 07:54 AM
|
#40 |
|
SPS OG
Join Date: Dec 2004
Location: Toronto
Posts: 1,282
|
Thats true, but I saw this design for the baffels on Malev's site..
http://www.melevsreef.com/29g/sump/design.html So I went for it. |
|
|
|
|
06/11/2005, 11:11 AM
|
#41 |
|
SPS OG
Join Date: Dec 2004
Location: Toronto
Posts: 1,282
|
Well today I couldnt get the finished sump into the stand. SO I had to shave some small areas in the stand to fit it in properly.
 So now it fits.. yiiipppppeee! 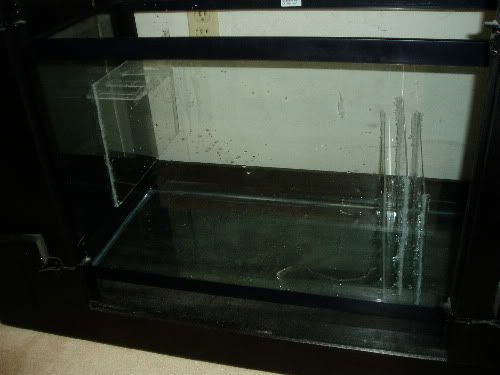 Now to get a skimmer.. any suggestions? |
|
|
|
|
06/11/2005, 12:46 PM
|
#42 |
|
Moved On
Join Date: Nov 2003
Posts: 325
|
just tagging along to see the tanks outcome
|
|
|
|
|
06/11/2005, 04:42 PM
|
#43 |
|
SPS OG
Join Date: Dec 2004
Location: Toronto
Posts: 1,282
|
thanks clown... here are more pics...
Got the skimmer today with plumbing that I am going to use.. no pvcs for me... The Berlin Venturi Skimmer.... its all I will ever need for skimming.. 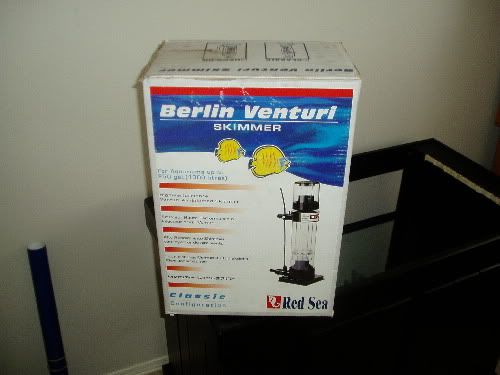 No pvc plumbing.. 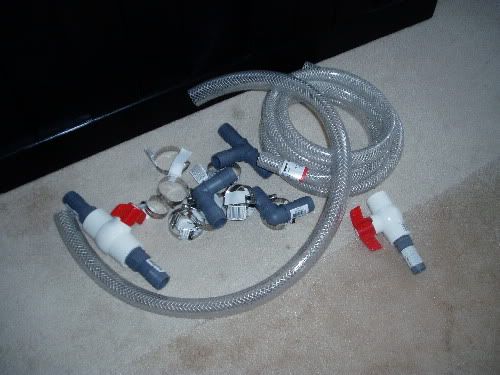 I will post pics once I get the plumbing done.. |
|
|
|
|
06/12/2005, 09:58 AM
|
#44 |
|
Premium Member
Join Date: May 2002
Location: NJ
Posts: 1,355
|
Looks good. Just a tip... To make it easier to get the hose fully on the barbed ends soak the tubing in hot water for a few minutes.
|
|
|
|
|
06/12/2005, 05:27 PM
|
#45 |
|
SPS OG
Join Date: Dec 2004
Location: Toronto
Posts: 1,282
|
Ok folks, this is the work I did today...
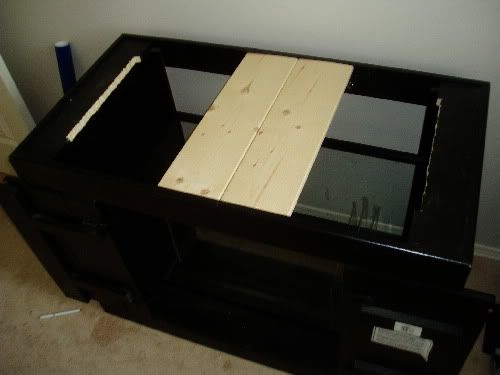 I got scared when I saw this guys 90gal AGA tank's bottom gave out because the stand was bare in the middle.....hence the two new pieces in the stand  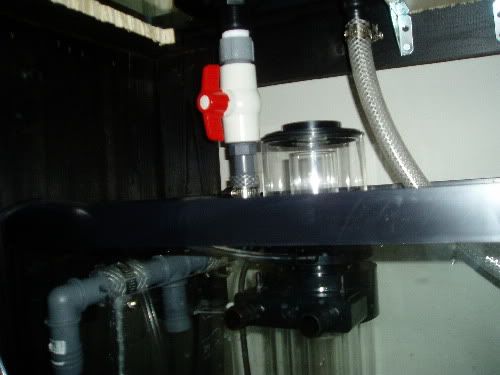 Finally started the piping... the left and right sides of the sump is done.. I still have to figure out how to setup my skimmer...stay tuned.. 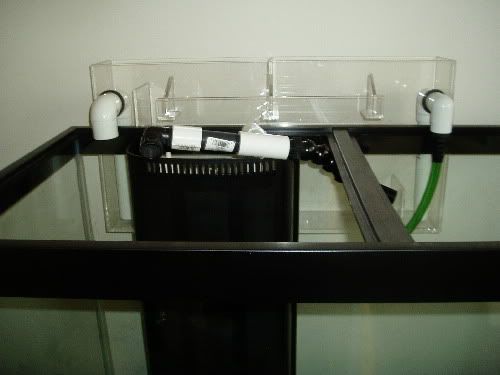 My refugium and the outflow pipes.... might do some more modifications on that... |
|
|
|
|
06/12/2005, 05:37 PM
|
#46 |
|
Registered Member
Join Date: Feb 2004
Location: O'Fallon, IL
Posts: 2,465
|
What are the two pieces in the middle for? The glass tank will be supported by the frame around the bottom - there shouldn't be anything touching the glass on the bottom. If you have those wood pieces supporting the bottom then it could cause the bottom to break.
-Mike |
|
|
|
|
06/12/2005, 08:19 PM
|
#47 |
|
SPS OG
Join Date: Dec 2004
Location: Toronto
Posts: 1,282
|
No, its not supported only by the two pieces. What I found out is that the tank was sitting on two small pieces on boths sides of the stand. I know the tank is supported by a plastic running underneath the center of the tank. Also they are not holding up the tank at all. They are a tiny bit below the tank, so it there is any defects in the structure of the stand, they would serve as a backup plan.
|
|
|
|
|
06/17/2005, 11:01 PM
|
#48 |
|
SPS OG
Join Date: Dec 2004
Location: Toronto
Posts: 1,282
|
Sorry for the lack of updates. I have been busy with work lately.
OK, I have finally finished my plumbing. Its running well. I am running a tap water test to see if there are defects in my design. I get pretty good flow from my mag7. I am also using another mag7 for the Berlin skimmer. I recently figured out how to reduce the noise coming from the sump. All I had to do is turn the ballvalve from the flow-in piping. Oh and BTW ..I LOVE the overflow! I tried to test it if power failed.. and it flows into my sump until the overflow is drained.. but that is it. The tank water remains the same level. ITs because of the dual chambers in the overflow box. I HIGHLY recommend this product!! I will post some pics later... Now I will work on purchasing a RO/DI unit, a refractometer, and a digital thermometer. Keep you all posted.. |
|
|
|
|
06/18/2005, 03:38 AM
|
#49 |
|
Registered Member
Join Date: May 2005
Location: Decatur, GA
Posts: 913
|
Sounds good so far. I have the same problem with noise from overflow and sump. I'll see if turning nob on my ball valve helps it reduce noise.
__________________
"Oh, Mother, I come baring a gift. I'll give you a hint. It's in my diaper and it's not a toaster" -Stewie Griffin Current Tank Info: current tank: 20 gal reef; former tanks: 65 gal reef, 10 gal freshwater |
|
|
|
|
06/28/2005, 07:09 AM
|
#50 |
|
SPS OG
Join Date: Dec 2004
Location: Toronto
Posts: 1,282
|
The ball valve worked good for me!
Sorry guys for the lack of updates and pics.. My computer was in the shop getting fixed.. damned video card. Also my camera is at my brothers place so I have to retrieve it soon. As for my setup, I did some modifications at the base of the overflow holes. I noticed a small leak, and couldn't stop it so I siliconed it and it WORKED! I also had to reinforce the baffels with some more silicone. I bought a Pure-Flo II 24gpd RO/DI unit. It works really good. It is a bit slow but who cares. I sure dont! I have my tank 3/4 filled with the RO water. Soon enough I will be doing my cycle.... woooo hoooo!! Almost there. Now here is a question, because I am going to be buying LR sooner than later. If the LR is uncured.. how do you cure it, and when do you know if it is cured? Do you use any lighting to cure it? And finally does anyone know of a good online store that will ship LR to Canada (Toronto)? |
|
|
|
 |
|
|


