
|
|
 05/14/2007, 11:49 AM
|
#501 |
|
Registered Member
Join Date: Jan 2006
Location: Kent, WA
Posts: 231
|
Ok, some interesting updates over the weekend. I went to my non-bored out venturi that had the original nipple for the venturi and it had been resized only to 1/8". I started off by taking air measurements with the new enkamat layers added, reamed out 3/4" output of pump to skimmer, etc. and I I got 19 SCFH which is pretty good considering the airway is still pretty restricted and the venturi waterway isn't reamed at all.
So, my ideas was to try and increase vaccum by reaming only part of the venturi with 5/8" in spade bit. The area would be the entire area of the 90 degree that the air input takes from nipple to exit on the original venturi leaving the restriction at the end just before the air/water enters the nw pump. I started with just reaming out 1/2" or so, and retested. I was now at 20 SCFH, good! I went the rest of the way just past where the asperating nipple is, and retested...12 SCFH!! OH nO! So, I decided to fill the venturi completely with epoxy and redrill it, and reshape it back. Did that, and now I'm getting some bad sounds like a cavitation sound coming from the pump, air draw is about 10 SCFH, so still no go yet. I have a call in for another venturi, and this time I won't mess with the water dynamics, only drill out the nipple for 3/8" threaded nipple. I reall want to see if all things being equal, if the air draw is better with or without reaming with 5/8" spade bit. My plan is to have the most efficient vaccum in place by design, and then increase the water flow which should increase the vaccum as well. The venturi's seem to be out of stock, so I'll be using my other modified one for now. Still getting 28 SCFH out of that one. Thanks all, I'll have more measurements when the Kill-o-watt meter shows up. Anyone know where to get a venturi in stock? |

|
|
05/14/2007, 04:46 PM
|
#502 |
|
Premium Member
 Join Date: Apr 2004
Location: Wallingford, CT
Posts: 1,211
|
The stock venturi isn't worth ordering... I bet you can make one out of PVC in less than three tries that is significantly better than stock. You want about a 1/2" narrow section for these pumps. I bored my venturi that was at 45 scfh and
63 watts from 1/2" to 5/8ths and tried it - my air flow dropped to 38 scfh and my wattage went up to 85. I am thinking about trying to go even smaller than 1/2" just to see what happens. |
|
|
|
05/14/2007, 05:05 PM
|
#503 | |
|
Registered Member
Join Date: Jan 2006
Location: Kent, WA
Posts: 231
|
Quote:
If I remember correctly, you went from a 1" to 1/2" back to 1", is that right? what size is the venturi input, and where did you drill it...at the 1" to 1/2" transition, or in the middle of the 1/2" or closer to the 1/2 to 1" transition to the pump input? I'm going to toy with that some more, but I hate to test on something I can't back out of. It sounds like you would have to use a butane torch to heat up the metric threads in order to make the connections work, and I'd have to do that on the pump input side and the output side to the skimmer, and have it not leak, and make sure the ends still match up to the skimmer. So, I'm a bit out of my comfort area, I could see doing this on an in-sump model, but more hesitant on an external. So, I've ordered some metric to standard pvc in hopes of doing this with a back out plan. I don't know if the fittings will be the right ones, but I've ordered (2) 40/32 x 1" spigot-socket by MBSP and FBSP in hopes that I can create my own venturi the way you described. I'm tempted to see if my performance goes up if I put this thing in my sump...if it can fit. My goal is to get at least 35 SCFH, and anything above that is gravy. |
|
|
|
|
05/14/2007, 05:16 PM
|
#504 |
|
Registered Member
Join Date: Dec 2002
Location: wisconsin
Posts: 1,281
|
This doesn't relate to what is being talked about now, but figured I'd throw my current thoughts on this skimmer from my experience so far.
I've modded my NW-200 with the following: 1. Ported out the elbow from the pump to the skimmer. 2. Drilled out the nipple on the black venturi and slipped in RO tubing 3. I tried various methods of the mesh mod, with limited and inconsistant results, so i'm back to the stock impeller. I had the airline constantly hooked up to an air meter, more so for the valve effect for dialing in the skimmer. I've been plagued by overflowing skimmer cup every few days and it was not making me happy. A couple of days of nasty gunk washing right back into the tank. I now have just a JG valve on the air line, and the valve is wide open. This has been very consistant now, no overflowing and it's still pulling lots of gunk. I had to raise the water level quite a bit to make up for the loss of processing rate. But figured making slightly less skimmate is ok, compared to dumping it back into the tank when the skimmer freaks out. 36hrs. with the air wide open (with flash) 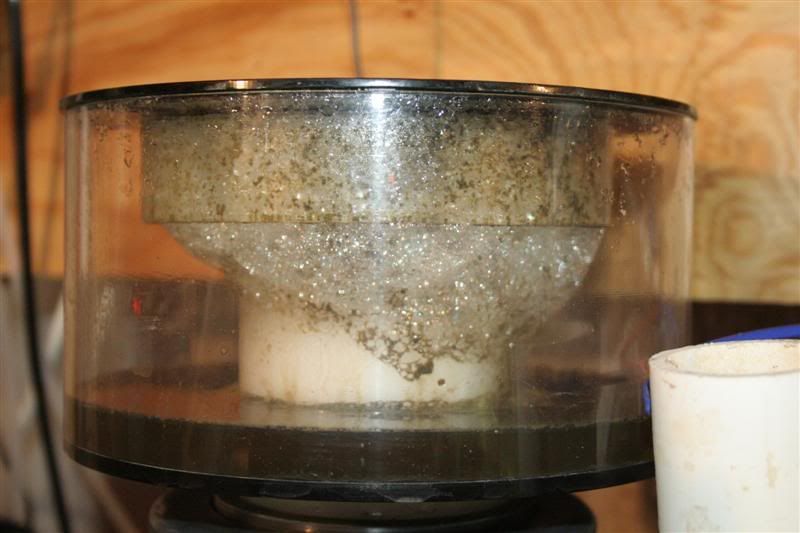
__________________
Just a girl looking to build a little piece of heaven on earth, without killing it! |
|
|
|
05/14/2007, 05:24 PM
|
#505 |
|
Registered Member
Join Date: Jan 2006
Location: Naperville, IL
Posts: 2,911
|
When I was using a gate valve on my ASM instead of the stand pipe, whenever I would shut down my return pump, the water level in my skimmer compartment would rise and because of the gatevalve this would push the water level in the skimmer higher too. Resulted in a flooded collection cup every time so I went back to the stand pipe.
The other thing a gate valve isn't forgiving of is changes in the pump behavior. If the pump is not steady in the air/water ratio, then the water level in the skimmer will rise and fall and the skimmer will ether flood or produce no skimmate depending on whether it is pushing more or less water than when you set it up. I notice that the watts on my kilowatt vary by almost 10% during the week. I'm not sure what the cause is, but I bet that would have a negative effect on the skimmer if I were still using a gate valve. |
|
|
|
05/14/2007, 11:09 PM
|
#506 | |
|
Moved On
Join Date: Oct 2005
Location: Wilmington, Ohio
Posts: 3,040
|
Quote:
|
|
|
|
|
05/15/2007, 06:24 AM
|
#507 |
|
Registered Member
Join Date: Jan 2006
Location: Naperville, IL
Posts: 2,911
|
my pump was running pretty steady in the 74-79 watt range, then yesterday after I wrote that last post I was looking at it and it had jumped up to 108. I'm going to have to open it up to make sure nothing has changed in the impeller housing.
|
|
|
|
05/15/2007, 08:49 AM
|
#508 | |
|
Registered Member
Join Date: Jan 2006
Location: Kent, WA
Posts: 231
|
Quote:
Thanks |
|
|
|
|
05/15/2007, 10:04 AM
|
#509 | |
|
Registered Member
Join Date: Jul 2006
Location: Michigan
Posts: 879
|
Quote:
|
|
|
|
|
05/15/2007, 01:13 PM
|
#510 |
|
Registered Member
Join Date: Dec 2002
Location: wisconsin
Posts: 1,281
|
davidabrown66, that is without the meshmod, just stock NW impeller. I tired the mesh and saw a slight increase in air intake, but it ran very inconsistantly so I took off the mesh.
I took off the flowmeter, but will clean it up and throw it back on to get some readings for you. But I think it is pulling very close to stock numbers. It is very consistant now. I will take 'consistancy' over a little more 'power'. The skimmer is useless if it keeps overflowing and dumping what it pulled out, back into the water.
__________________
Just a girl looking to build a little piece of heaven on earth, without killing it! |
|
|
|
05/15/2007, 02:25 PM
|
#511 | |
|
Registered Member
Join Date: Jan 2006
Location: Kent, WA
Posts: 231
|
Quote:
|
|
|
|
|
05/15/2007, 04:12 PM
|
#512 | |
|
Premium Member
Join Date: Aug 2004
Location: St. Petersburg, FL
Posts: 143
|
Quote:
I'm very interested in your Kill-A-Watt readings when you receive. |
|
|
|
|
05/15/2007, 04:27 PM
|
#513 |
|
Registered Member
Join Date: Jan 2006
Location: Kent, WA
Posts: 231
|
Ya, I should have it delivered today, and I'll take some readings tonight. I won't have another venturi until probably next week unless I make my own.
|
|
|
|
05/15/2007, 05:07 PM
|
#514 | |
|
Premium Member
Join Date: Aug 2004
Location: St. Petersburg, FL
Posts: 143
|
Quote:
Any thoughts on how to work around the metric unions and remain leak proof on the re-circ skimmers running outside the sump? |
|
|
|
|
05/15/2007, 09:58 PM
|
#515 |
|
Moved On
Join Date: Oct 2004
Location: auburn CA
Posts: 4,021
|
i will be letting you know about recircs very soon as mine will be here tomorrow
i just got the 250 and plan on modding heavy still retaining the external use. i should get a air gauge i guess and the killawat |
|
|
|
05/16/2007, 06:50 AM
|
#516 |
|
Registered Member
Join Date: Jan 2006
Location: Naperville, IL
Posts: 2,911
|
7 scfh is really low. I was getting 5 lpm (10.5 scfh) on my stock OTP-3000. I posted some pics a few pages back of how I implemented some of the mods discussed in this thread that can get you up to 25-29 scfh (75-80watts) and don't require any major mods to the pump housing or impeller.
There are a lot of other posts that will get you into the same range with more "adventuresome" mods. I still plan to implement jctwerks recommendation of removing at least the first needlewheel and probably the second too. And also kroe's case mod on the output. Between the two I fully expect to reach 45 scfh or better and see my watt draw drop below 70. |
|
|
|
05/16/2007, 09:19 AM
|
#517 | |
|
Registered Member
Join Date: Jan 2006
Location: Kent, WA
Posts: 231
|
Quote:
|
|
|
|
|
05/16/2007, 09:25 AM
|
#518 |
|
Registered Member
Join Date: Jan 2006
Location: Kent, WA
Posts: 231
|
Sorry, G4?
I just got my Kill-a-watt meter yesterday and I'm only pulling 66-67 watts on my modified venturi reamed to 5/8" and a 3/8" airway, 3 layers of enkamat, top nw taken off, reamed out 90 elbow from pump output to skimmer body to 5/8" and getting 28 SCFH. I think the only way I'm going to reach the 30's and 40's for SCFH is to improve the venturi or create my own. |
|
|
|
05/16/2007, 09:32 AM
|
#519 |
|
Registered Member
Join Date: Jan 2006
Location: Naperville, IL
Posts: 2,911
|
It is on my G4+, but I don't think the skimmer body matters much so long as you aren't introducing a lot of additional backpressure.
Both the NW200 and the G4 have 8" bodies and I think both are about 30" tall so that should pose much of a difference. I am using a 1" output adaptor on my skimmer. I'm not sure what the output on the NW200 is. Did you grind out the output area in the impeller housing? That mod bought me a bit over 1 lpm (2-3 scfh) by itself. My pics are on page 13, but I realized that I ground out the impeller housing after I posted those pics and I didn't take or post any pics after wards. |
|
|
|
05/16/2007, 09:51 AM
|
#520 | |
|
Registered Member
Join Date: Jan 2006
Location: Kent, WA
Posts: 231
|
Quote:
I have another pump coming today as well as some metric to standard fittings so I may try an grind down the volute some more, and try 4 layers of enkamat although the pump is starting to clack more as I add layers, and create my own venturi. I'm also trying to get my hands on another stock venturi, but coralvue isn't responding to the vendors I'm trying to work through to get it. |
|
|
|
|
05/16/2007, 10:10 AM
|
#521 |
|
Registered Member
Join Date: Jan 2006
Location: Naperville, IL
Posts: 2,911
|
I wouldn't bother with the stock venturi. You can make one that works better for $5 or less in parts from the plumbing department. You can use a 1" coupler, drill a hole through it, attach an airline hose, insert a 3/4 ring or a 1"to1/2" bushing and slide it over the intake and call it done; but I see yours is a recirc, are you running it externally? If so, then it's going to be more of a challange to make it water tight.
If I remember correctly, there is a 3/4" male hose thread to 19 or 20mm adaptor on the output of my pump which I replaced with a 3/4" hose to 3/4 MPT nylon adaptor. Once you get to 3/4 mpt, you can pretty much do whatever you want. and I think both skimmers are 24" tall, not 30" as I posted before. Last edited by ppurcell; 05/16/2007 at 10:15 AM. |
|
|
|
05/16/2007, 10:21 AM
|
#522 | |
|
Registered Member
Join Date: Jan 2006
Location: Kent, WA
Posts: 231
|
Quote:
|
|
|
|
|
05/16/2007, 10:23 AM
|
#523 | |
|
Registered Member
Join Date: Jan 2006
Location: Kent, WA
Posts: 231
|
Quote:
|
|
|
|
|
05/16/2007, 11:01 AM
|
#524 | |
|
Premium Member
Join Date: Aug 2004
Location: St. Petersburg, FL
Posts: 143
|
Quote:
Would you refresh my memory on exactly what you did to your venturi? Reading all your previous posts you have been through a number of iterations, some worked, some not so good. Its hard for me to tell what worked and what did not. Did you ream the venturi waterway all the way through to 5/8" or just to a certain point on the output of the venturi. If so, how far? Did you insert the 3/8" tubing all the way into the water flow stream (3/8" tubing blocks some of the water flow), or attach with a fitting? I believe I remember you are running external. Any drips or other gotcha's I should avoid? As you said, venturi's are hard to come by, and finding metrics parts has been a challenge as well. I need to be sure I get it right the first time. |
|
|
|
|
05/16/2007, 12:12 PM
|
#525 | |
|
Registered Member
Join Date: Jan 2006
Location: Kent, WA
Posts: 231
|
Quote:
I'm using the completely reamed venturi waterway to 5/8" drilled with a 3/8" drill bit for a threaded 3/8" nipple which gives me a 5/16" ID for air draw and more stability than just an airline inserted into a drilled hole. I only found these clear/white nipples at mcclendons and it was where they keep there RO tubing and special plastic parts in those tiny bins. I will post pics soon so you can see. I used aquarium sealant on the threads and screwed it all the way in, and the union still screw all the way with these nipples, but anything larger in that hole would create a problem when tightening down the unions again, and best of all no leaks whatsoever. I would also buy the tubing that goes with this nipple. Find the fittings you need, double check my drill sizes, go slowly, start with a smaller bit if not sure, drill straight so you do NOT create any beveling of the hole by moving the drill in circular motions, and use aquarium sealant not epoxy, b/c it's more forgiving if you need to pull it out and start over. |
|
|
|
 |
|
|


