
|
|
 08/06/2008, 08:41 PM
|
#76 |
|
Likey the bikey
Join Date: Dec 2004
Location: Colorado
Posts: 3,371
|
Now for a little plumbing.
Here's the stuff. 20 trips to Home Depot after that, I was done. 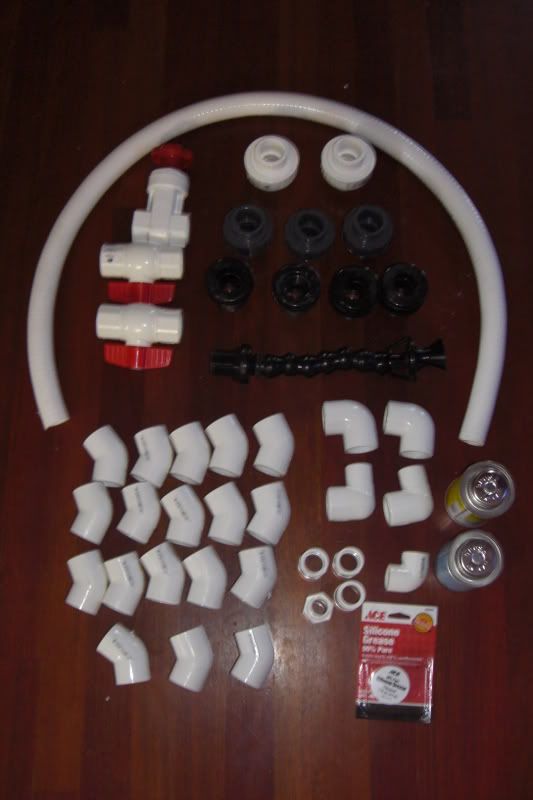 Plumbing is in place. 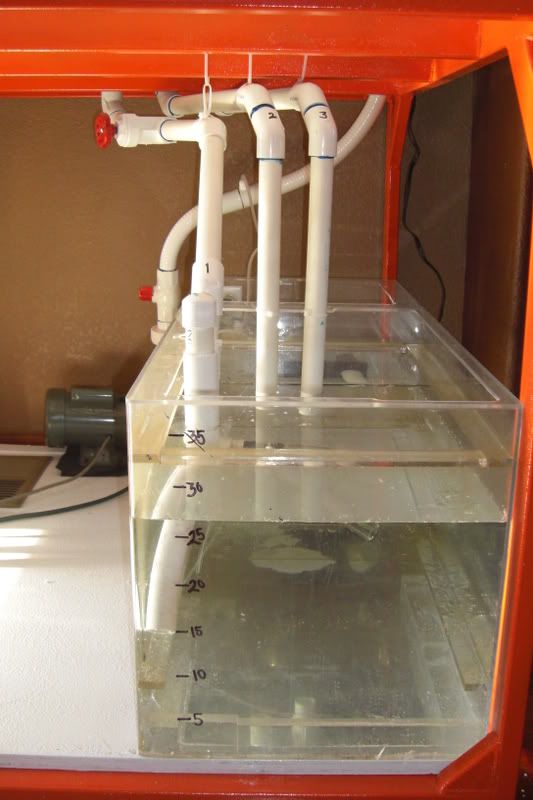 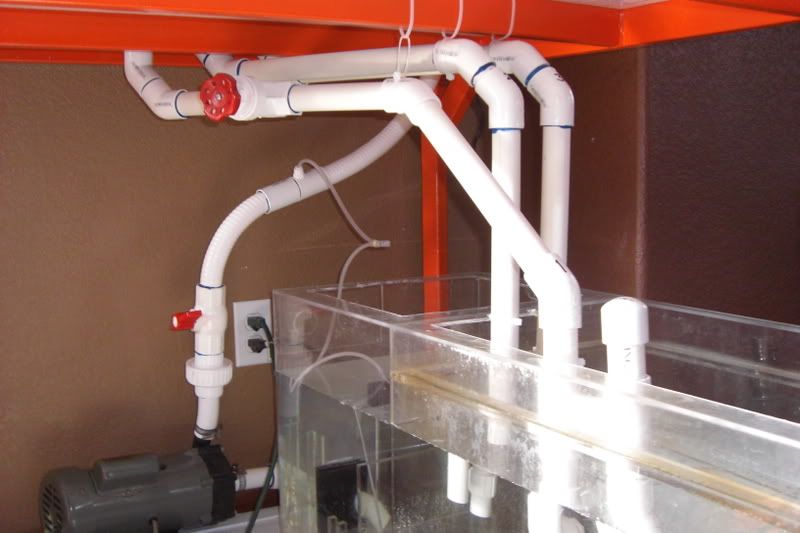 I'm using a drain system per Beanimal's thread (http://www.reefcentral.com/forums/sh...5&pagenumber=1). This thing took nearly 2,000 gph without making a sound using 1" lines. 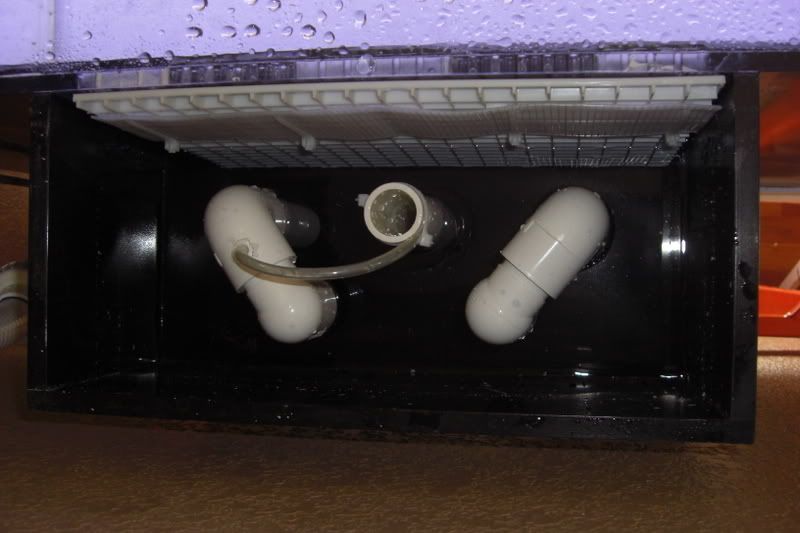 And a little story of what *not* to do when you fire up the pump the first time. Always, always, always, do one final check before plugging in the pump. It was absolutely amazing to see an ~1,800 gph Iwaki 100 shoot full force out of the 1/4" outlet that I installed for my calcium reactor. If the tank and stand hadn't been in the way, I bet it would have shot a good 20 feet in the air. It took only two seconds to completely soak the entire bottom side of the stand, the entire floor around the tank, myself, and the wall outlet (that reminds me, it's time to install the GFCI I bought!). The tank now sits in the living room. I've added about two inches of sand and ~80 gallons of water and have completed changing about 10 gallons between the two tanks. I want to start swapping livestock as soon as possible. I'm loosing tips on a daily basis in my 65 due to corals fighting. Next steps, install the GFCI (duh!), continue the water swapping, install the trim to the face boards, and order the doors.
__________________
Mike On hiatus. I'm either out riding my bicycle, playing with my family, or throwing ferts in my planted tank. Or working. I hope I'm not doing that though. Current Tank Info: 140 DIY Cube |

|

|
|
08/06/2008, 08:53 PM
|
#77 |
|
Registered Member
 Join Date: Dec 2003
Location: Denver, Colorado
Posts: 9,579
|
It is really looking awesome Mike, I must say it looks even better in person.
Did you fing that gate valve local or did you order it on line? Thanks Keep th eupdates coming. Spleify
__________________
Make it a Great Day!!!! Current Tank Info: 60 gal SPS cube, with 25 gal refugium, 400W MH, DIY Lumenarc III, DIY skimmer, DIY stand and canopy. 40 breeder LPS with 40 gallon sump, DIY stand, 250W MH |
|
|
|
|
08/06/2008, 09:17 PM
|
#78 |
|
Likey the bikey
Join Date: Dec 2004
Location: Colorado
Posts: 3,371
|
I found the gate valve at A&A Trading post on Broadway a little south of Belleview. $10! They only stock one of each size at a time though. If you called them a week in advance I'm sure they would bring in a larger quantity. That place is the little mom-and-pop shop that always has the stuff you can't find at the big box stores. Whenever HD doesn't have what I want, that's where they send me and I'm rarely disappointed when I go.
__________________
Mike On hiatus. I'm either out riding my bicycle, playing with my family, or throwing ferts in my planted tank. Or working. I hope I'm not doing that though. Current Tank Info: 140 DIY Cube |
|
|
|
|
08/06/2008, 09:57 PM
|
#79 |
|
Registered Member
Join Date: Dec 2003
Location: Denver, Colorado
Posts: 9,579
|
Thanks Mike, the build is going very good. If you need any help let me know.
__________________
Make it a Great Day!!!! Current Tank Info: 60 gal SPS cube, with 25 gal refugium, 400W MH, DIY Lumenarc III, DIY skimmer, DIY stand and canopy. 40 breeder LPS with 40 gallon sump, DIY stand, 250W MH |
|
|
|
|
08/07/2008, 01:04 AM
|
#80 |
|
Moved On
Join Date: Sep 2002
Location: Ft Worth, Tx
Posts: 43,217
|
Love seeing these updates. Your woodwork looks great, and I agree those pocket screws look so professional.
|
|
|
|
|
08/07/2008, 06:38 AM
|
#81 |
|
Likey the bikey
Join Date: Dec 2004
Location: Colorado
Posts: 3,371
|
 You're telling me! I'm going to be able to park in the garage again in only a few short weeks! You're telling me! I'm going to be able to park in the garage again in only a few short weeks!
__________________
Mike On hiatus. I'm either out riding my bicycle, playing with my family, or throwing ferts in my planted tank. Or working. I hope I'm not doing that though. Current Tank Info: 140 DIY Cube |
|
|
|
|
08/07/2008, 10:53 AM
|
#82 |
|
Foaming Conehead
Join Date: Sep 2006
Location: CO
Posts: 1,002
|
That setup looks mighty nice!
Question, on the overflow did you just cut out a slot? Is that the purpose of the egg crate in the overflow box. |
|
|
|
|
08/07/2008, 11:16 AM
|
#83 |
|
Likey the bikey
Join Date: Dec 2004
Location: Colorado
Posts: 3,371
|
I cut three short slots and a grid of holes. In hindsight, I wish I had just gone with teeth. Hmmm...I guess I was having one of those 'creative' days. It skims well though.
Dude - what the crap!? Are acans supposed to be *that* mean? Last month it sent sweepers an inch and a half to nail my red mille and killed a few inch long branches. Last week it wiped out a portion of my birdsnest. This morning I woke up to find that it had attacked an awesome closed brain I got from RHS (http://www.reefcentral.com/forums/sh...readid=1420875). The acan nailed a 1"x2" section on the side of this piece. The flesh is still alive but it's been zapped pretty hard. 
__________________
Mike On hiatus. I'm either out riding my bicycle, playing with my family, or throwing ferts in my planted tank. Or working. I hope I'm not doing that though. Current Tank Info: 140 DIY Cube |
|
|
|
|
08/07/2008, 02:13 PM
|
#84 |
|
Moved On
Join Date: Sep 2002
Location: Ft Worth, Tx
Posts: 43,217
|
Yep, anything within stinging distance is fair game. And that includes other acans. You can put Lords together, but if you put an Echinata near a Lord, they will immediately go to Defcon One and assure mutual destruction.
|
|
|
|
|
08/07/2008, 02:30 PM
|
#85 |
|
Team RC Member
Join Date: Jul 2005
Location: houstonia
Posts: 7,989
|
I did not know that about acans. Glad I clicked this thread open! Woodwork looks good, looking forward to seeing it all buttoned up.
__________________
-Chris- You don't win friends with salad. "Look! They're trying to learn for free!" ... "Use your phony guns as clubs!" Current Tank Info: rectangluar? wet? |
|
|
|
|
08/07/2008, 03:51 PM
|
#86 |
|
Registered Member
Join Date: Sep 2001
Location: TX
Posts: 1,156
|
Looks good. Planning something very similar by the end of the year.
In case I missed it, I saw 36" by 36", what height is it? The only difference is i'm trying to get away with only running one 250w DE bulb with T5 supplement. Good luck. |
|
|
|
|
08/07/2008, 04:06 PM
|
#87 |
|
Likey the bikey
Join Date: Dec 2004
Location: Colorado
Posts: 3,371
|
The finished product is 37x37x26. The extra inch of width was added so I could fit 36" VHOs in the hood and have enough room left for the end caps.
__________________
Mike On hiatus. I'm either out riding my bicycle, playing with my family, or throwing ferts in my planted tank. Or working. I hope I'm not doing that though. Current Tank Info: 140 DIY Cube |
|
|
|
|
08/07/2008, 08:18 PM
|
#88 |
|
Likey the bikey
Join Date: Dec 2004
Location: Colorado
Posts: 3,371
|
I mocked up the trim on the lower face frame today. The design has changed a little. Rather than trim the top of the frame with a chair rail, we've decided to go with a small crown. I'm digging the proportions. I guess wood work is kind of like plumbing. I will be making a run to the wood place tomorrow to buy a few more planks. Austin Hardwoods in Denver rocks.
A 1x10 has also been added to the back side of the stand for hanging the electrical connections. It's going to be awesome to have the top off container under the stand (I've never had such a luxury). The fact that it will hold two weeks worth of water if I ever need it to is even better. 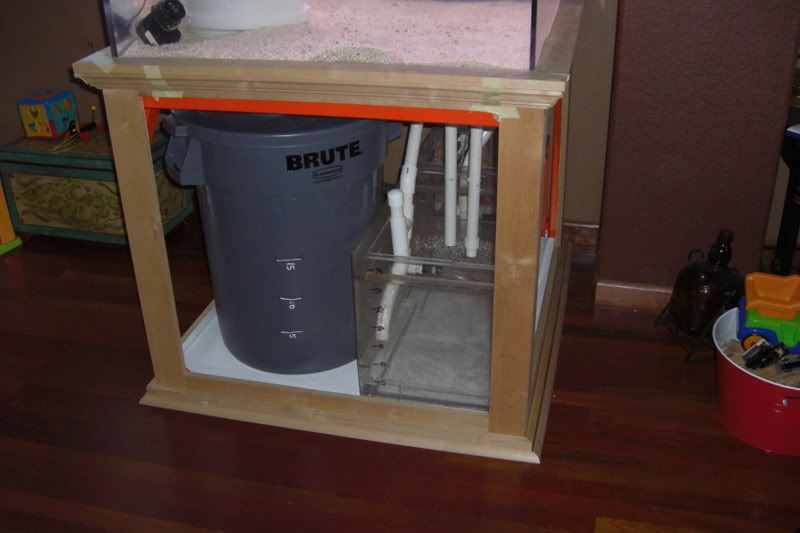 
__________________
Mike On hiatus. I'm either out riding my bicycle, playing with my family, or throwing ferts in my planted tank. Or working. I hope I'm not doing that though. Current Tank Info: 140 DIY Cube |
|
|
|
|
08/07/2008, 09:28 PM
|
#89 |
|
Moved On
Join Date: Sep 2002
Location: Ft Worth, Tx
Posts: 43,217
|
Mike, that looks really nice. Regarding your top off container, while it is nice to have two weeks worth of water, I would recommend less. If you topped off completely, then filled up the reservoir, then left town for a short vacation, it is guaranteed that Murphy will make something go wrong so all that water dumps into the system before you board your plane.
Better to have enough water to keep your system running a few days, but not more than what your system can handle in the event of an accidental over-delivery. |
|
|
|
|
08/07/2008, 10:05 PM
|
#90 |
|
Likey the bikey
Join Date: Dec 2004
Location: Colorado
Posts: 3,371
|
Yes - I agree. Good advice. Along the same lines, I have been pondering plumbing it into my RO/DI. Even if I do though, refills will remain a manual process wherein I will have to turn the valve on/off to add more water (with a float valve shut off JIC I forget to do so).
__________________
Mike On hiatus. I'm either out riding my bicycle, playing with my family, or throwing ferts in my planted tank. Or working. I hope I'm not doing that though. Current Tank Info: 140 DIY Cube |
|
|
|
|
08/07/2008, 10:09 PM
|
#91 |
|
Moved On
Join Date: Sep 2002
Location: Ft Worth, Tx
Posts: 43,217
|
If you want to hook up the RO/DI to it (only to fill it up once a week), that's fine:
Hooking Up an RO Unit Directly to Your Sump - A Recipe for Disaster http://reefkeeping.com/issues/2007-05/ml/index.php |
|
|
|
|
08/07/2008, 10:27 PM
|
#92 |
|
Likey the bikey
Join Date: Dec 2004
Location: Colorado
Posts: 3,371
|
I forgot you wrote that. Thanks for the link.
__________________
Mike On hiatus. I'm either out riding my bicycle, playing with my family, or throwing ferts in my planted tank. Or working. I hope I'm not doing that though. Current Tank Info: 140 DIY Cube |
|
|
|
|
08/11/2008, 09:55 PM
|
#93 |
|
Likey the bikey
Join Date: Dec 2004
Location: Colorado
Posts: 3,371
|
I've been pondering adding a foam or concrete background. Hmmm. I can't decide. Any thoughts?
Some progress pics... The canopy has ended up being proportionally taller than I thought it would be. I like it, but it's a touch surprising that it looks so large now. Anyways, here's the final mock up including the trim work: 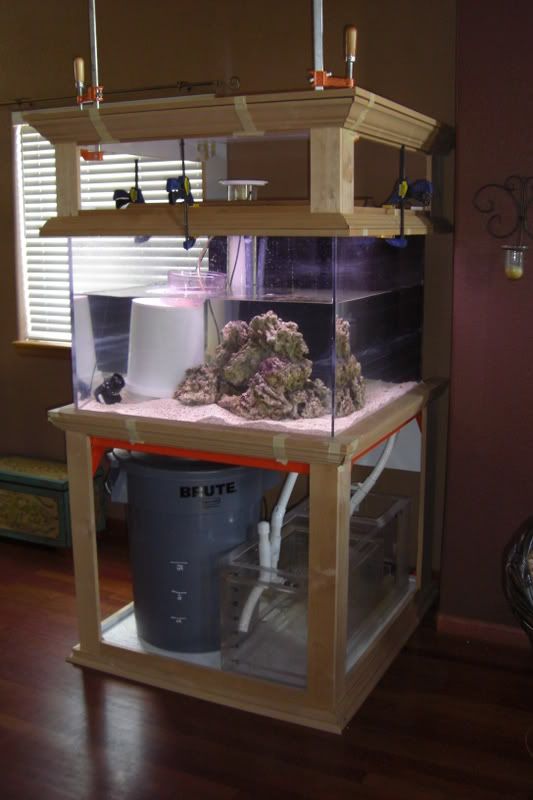 This helped me keep track of what went where:  And then back to the garage to start attaching the trim work in earnest. Mmmm, biscuits. 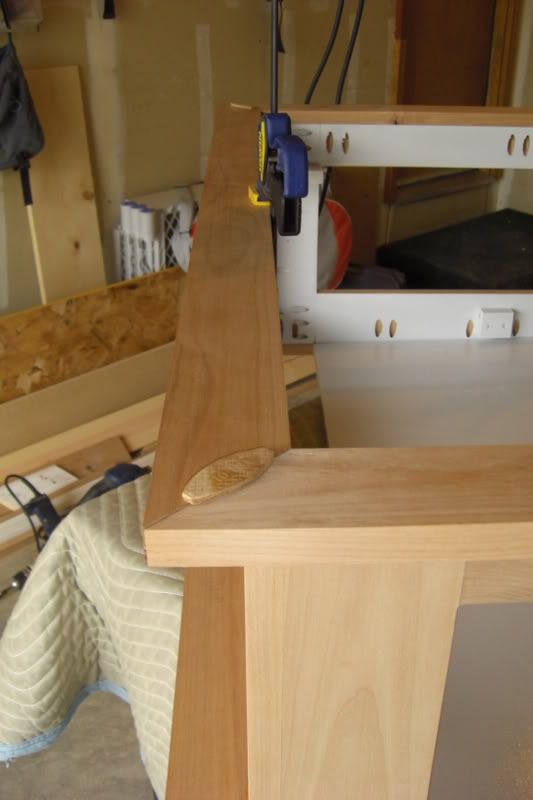 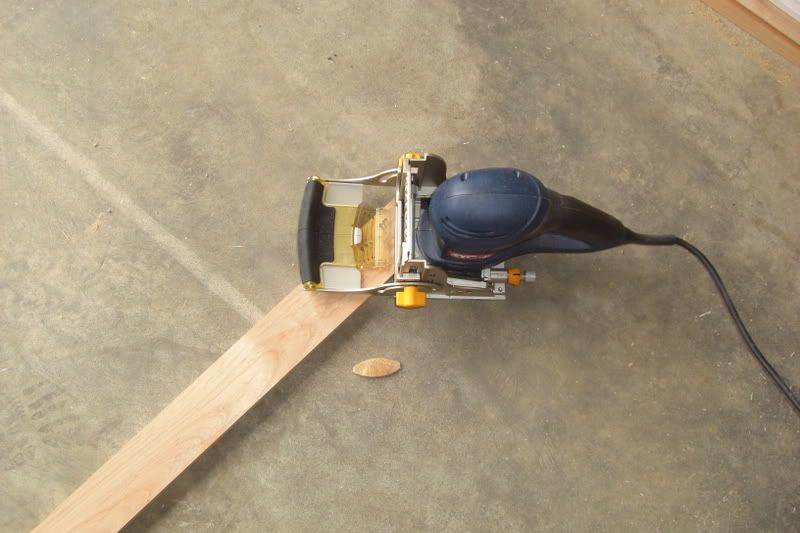 I like these picture frame clamps to get good corners. If you're using to make a trim like mine, I might suggest gluing up the three trim pieces in the picture frame clamps and adding them to the frame only after they are dry. Here's an example of what can happen when you glue the corners and the boards to the frame all at once. I've filled the gap with a saw dust + glue concoction, but it's a little disappointing to have it not come out exactly right. Hint to you, I might not be the best wood worker in the world. 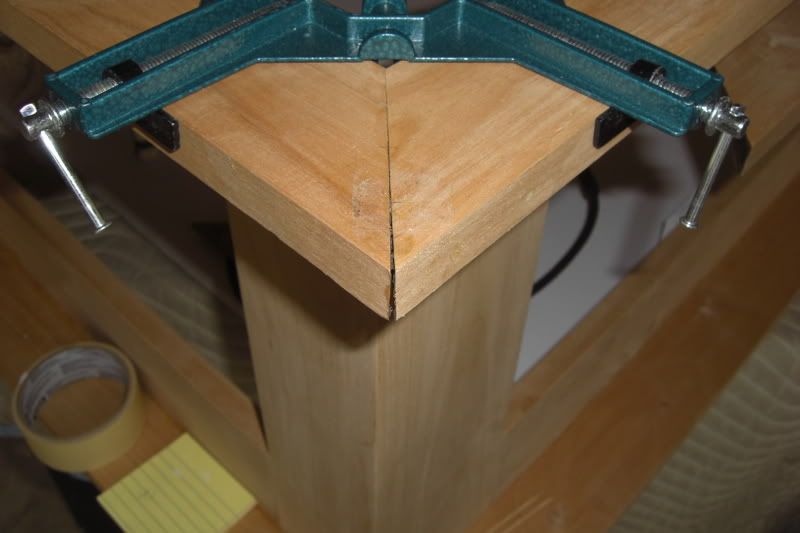 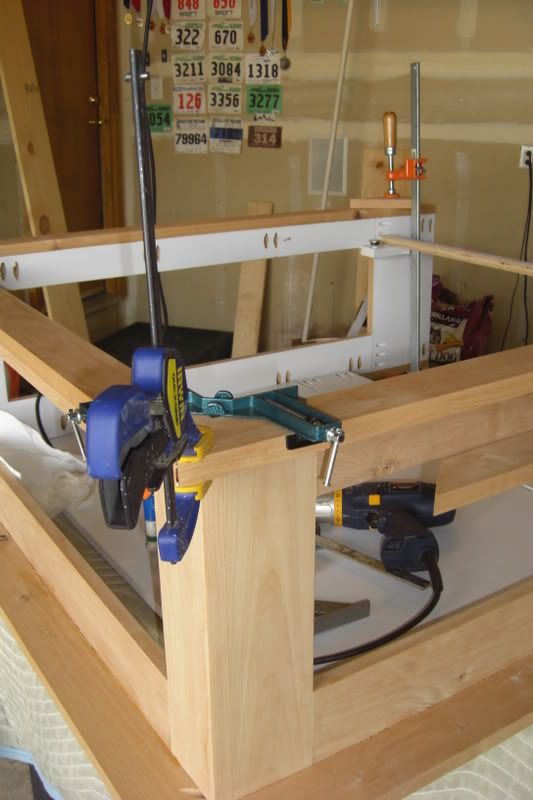 And here's what they look like when you glue the corners first then add them to the frame after they are dry. 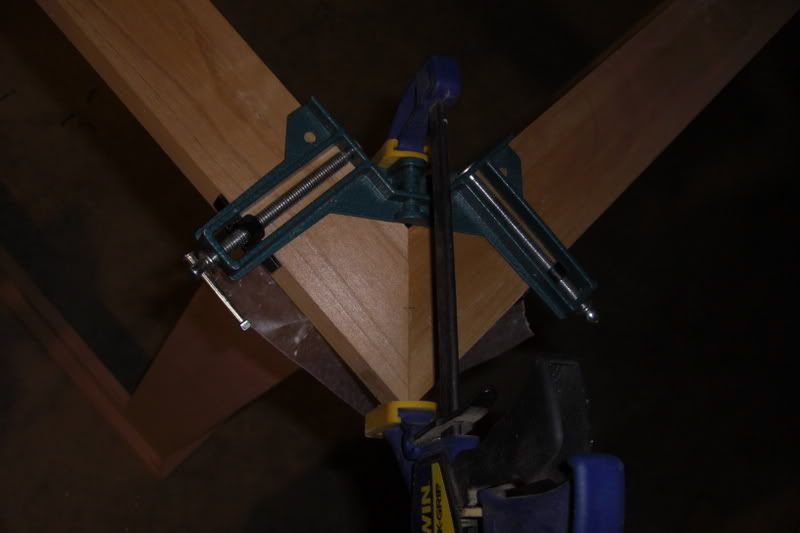 Adding the final piece of cap trim: 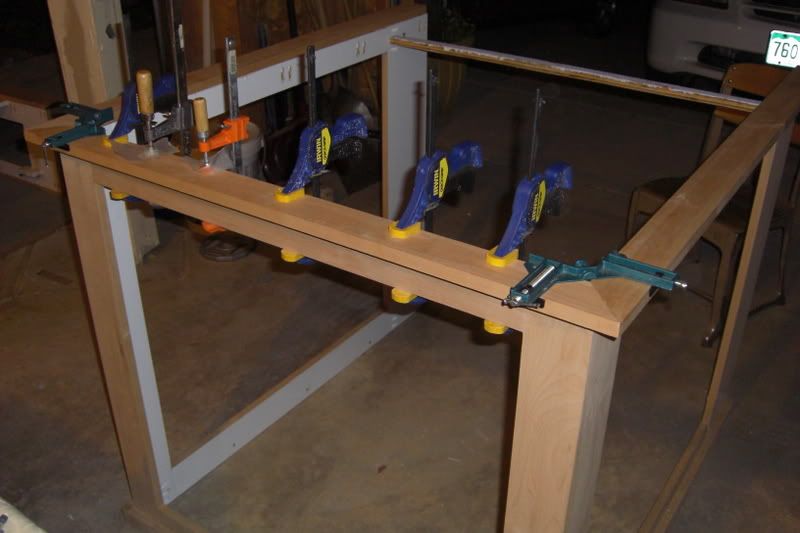 And back inside the house...thanks to my brother for giving me about 40 lbs of good, cured rock. Look at that Berlin go! 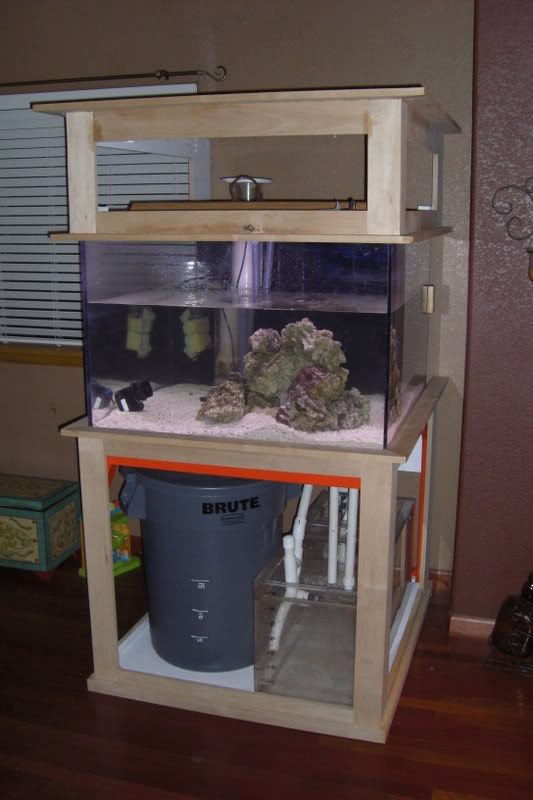
__________________
Mike On hiatus. I'm either out riding my bicycle, playing with my family, or throwing ferts in my planted tank. Or working. I hope I'm not doing that though. Current Tank Info: 140 DIY Cube Last edited by miwoodar; 08/11/2008 at 10:03 PM. |
|
|
|
|
08/11/2008, 10:07 PM
|
#94 |
|
Moved On
Join Date: Sep 2002
Location: Ft Worth, Tx
Posts: 43,217
|
What kind of wood is that? Does it comes with one white side, or did you paint it on? I seem to remember you mentioning painting. The trim is coming out nicely. I've had to do quite of bit of it over the years, but never used those clamps.
|
|
|
|
|
08/11/2008, 10:08 PM
|
#95 |
|
Registered Member
Join Date: Dec 2003
Location: Denver, Colorado
Posts: 9,579
|
Mike it's looking awesome!!
It will be done in no time. Spleify
__________________
Make it a Great Day!!!! Current Tank Info: 60 gal SPS cube, with 25 gal refugium, 400W MH, DIY Lumenarc III, DIY skimmer, DIY stand and canopy. 40 breeder LPS with 40 gallon sump, DIY stand, 250W MH |
|
|
|
|
08/11/2008, 10:09 PM
|
#96 |
|
Likey the bikey
Join Date: Dec 2004
Location: Colorado
Posts: 3,371
|
I've swapped out 35 gallons between my 65 and the 140. My tenuis has simultaneously developed some STN. I seriously doubt these events are related but it is a little curious that it happened now. Maybe it picked up some of the slop that the acan ripped off of the closed brain? I first noticed the STN the very same day that the acan vs brain battle occurred. This is the first time I've ever had to deal with anything like this. I think I'm just going to wait until this weekend and snap off the offending branches when I transfer everything over. I would try now but the rock would be very difficult to get out of the tank and to do it in the tank would be near impossible without just breaking off every tip.
Does anyone know of any good websites to learn more about staining and top coating? I've been googling but haven't found what I'm looking for. I would like to find a good tutorial discussion somewhere.
__________________
Mike On hiatus. I'm either out riding my bicycle, playing with my family, or throwing ferts in my planted tank. Or working. I hope I'm not doing that though. Current Tank Info: 140 DIY Cube |
|
|
|
|
08/11/2008, 10:20 PM
|
#97 |
|
Moved On
Join Date: Sep 2002
Location: Ft Worth, Tx
Posts: 43,217
|
Hey Mike, try this link:
EDIT: The URL was beat to death. Type in staining wood tutorial and see what you get. I saw a ton of good links. |
|
|
|
|
08/11/2008, 10:22 PM
|
#98 |
|
Likey the bikey
Join Date: Dec 2004
Location: Colorado
Posts: 3,371
|
Marc - it's alder. I painted the inside before I started applying the trim. I'm going to go back and paint the last pocket holes a little later.
Leif - livestock is moving this weekend. You're still looking for a piece of red mille, right? I almost forgot, I ordered the doors last Friday from Advantage Doors (http://www.advantagecabinetdoors.com/). Buying premade doors ended up being cheaper than buying the wood and bits to make the doors myself. To top that, the doors will be better than I would have been able to make. The company is even going to sand them to 150 (what I plan on sanding to anyways) and will be drilling the hinge holes. Now that's service! They quoted 10 to 15 business days. I feel like I should make a one of those calendars you use to count down the days until Christmas.
__________________
Mike On hiatus. I'm either out riding my bicycle, playing with my family, or throwing ferts in my planted tank. Or working. I hope I'm not doing that though. Current Tank Info: 140 DIY Cube |
|
|
|
|
08/11/2008, 10:23 PM
|
#99 |
|
Likey the bikey
Join Date: Dec 2004
Location: Colorado
Posts: 3,371
|
'tutorial'
Genius!
__________________
Mike On hiatus. I'm either out riding my bicycle, playing with my family, or throwing ferts in my planted tank. Or working. I hope I'm not doing that though. Current Tank Info: 140 DIY Cube |
|
|
|
|
08/12/2008, 07:43 AM
|
#100 |
|
Registered Member
Join Date: Aug 2007
Location: indy
Posts: 128
|
Looking good!
Hey is that the rock I sent you or did you add more to it? |
|
|
|
 |
|
|


