


|
 |
|
|
#126 |
|
Combat-tested Reefer
Join Date: Jan 2008
Location: Cincinnati, OH
Posts: 169
|
Some work in progress pics:
The room as it stands tonight. Got the photo print from Kodak today (20"x30" Pro-Print on metallic paper), got the materials to put together the frame and matting, and put it all together and hung it. We still need to get the smaller frames, possibly tomorrow. Pardon the mess, like I said, it's still a work in progress. 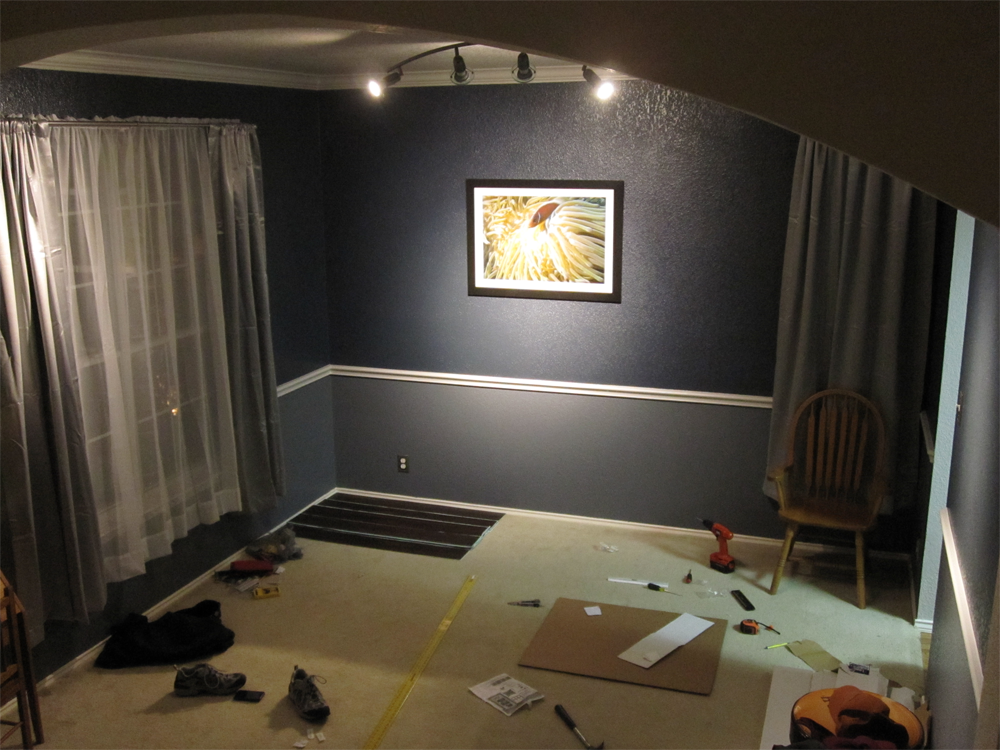 Some of the vinyl planks. Don't worry about the drips on the floorboards, they're all getting torn up and replaced when we put down the new flooring. 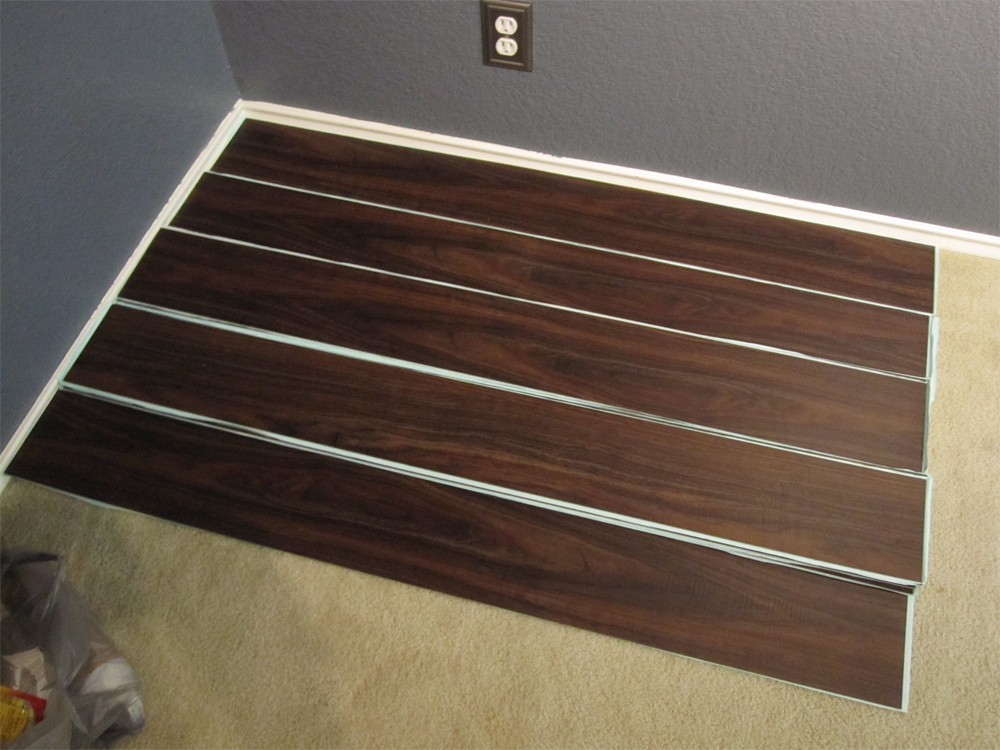 The photo lit by the LED light fixture. Looks fantastic (much better than in the photo) in person, almost 3D in appearance. Definitely glad we sprung for the metallic printing. 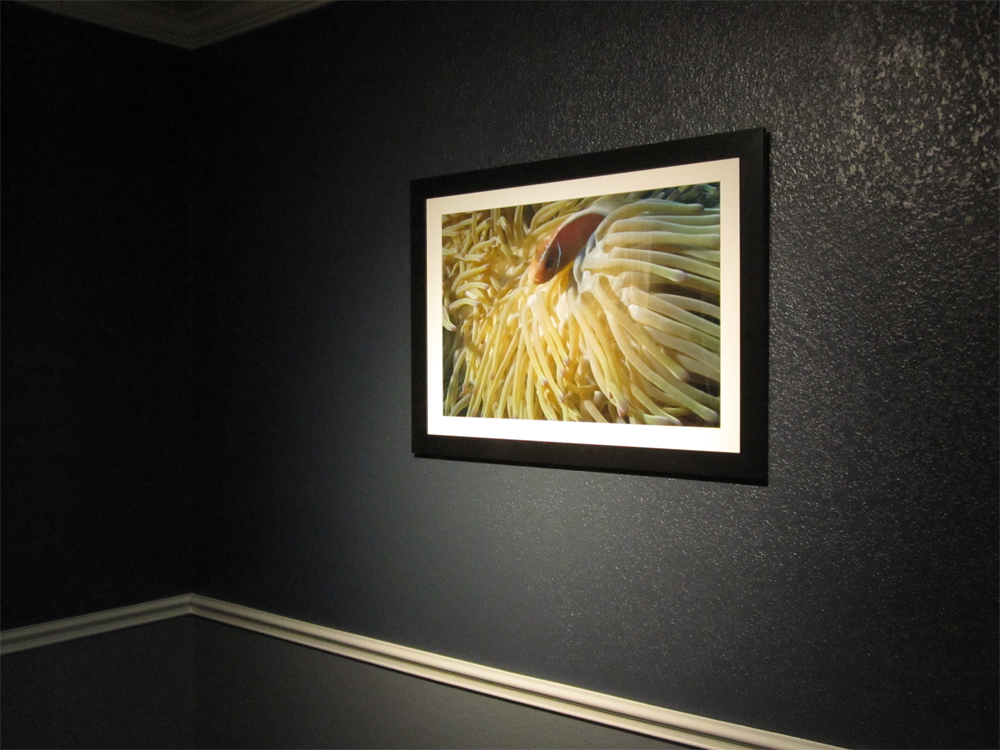 We also FINALLY (as you can tell from the first pic) found some drapes we liked. Just need to get the steamer out and steam out the wrinkles and we'll be set as far as that goes. Slowly but surely, the room is coming together...
__________________
Previous tanks: 60g AO Starphire cube w/ 400w MH, 2x Vortech MP40w // 29g BC w/ 250w MH // 29g BioCube Currently: in design/building process |
|
|

|
|
|
#127 |
|
Registered Member
Join Date: Oct 2011
Location: Phoenix,AZ
Posts: 535
|
The room is coming along nicely!
|
|
|

|
|
|
#128 |
|
Registered Member
Join Date: Dec 2008
Location: Salem Oregon
Posts: 66
|
I wish I would have seen this post earlier so I could tell you how much I HATE this floor in my house! Scrathes very easy, and shows scuff marks like crazy. Best advice I can give you is make sure the subfloor is perfectly smooth below it because it shows every little bump!
|
|
|

|
|
|
#129 |
|
Super Housemonkey!
Join Date: Apr 2003
Location: St Louis Mo
Posts: 4,442
|
So which pictures did you go with?
__________________
A good friend will come and bail you out of jail...but, a true friend will be sitting next to you saying, "Damn, that was fun!" |
|
|

|
|
|
#130 |
|
Combat-tested Reefer
Join Date: Jan 2008
Location: Cincinnati, OH
Posts: 169
|
Thanks, mjhall85, we sure think so.
Mikep503, thanks for the heads up. We're only using this room for my wife and I to relax in with the tank (kids are banned from the room, LOL) and we're not going to be wearing shoes in the room, so I think we'll be okay, but we'll definitely be careful with it. Thanks again for the warning. MaxxII, we still haven't decided on which ones for the smaller photos. We'll decide sometime later on this week.
__________________
Previous tanks: 60g AO Starphire cube w/ 400w MH, 2x Vortech MP40w // 29g BC w/ 250w MH // 29g BioCube Currently: in design/building process |
|
|

|
|
|
#131 |
|
How do I change this?
Join Date: Mar 2003
Location: Wisconsin
Posts: 3,037
|
Looks great! I'm only on the first page but wanted to put this out there in case its worth anything. Someone may have mentioned it already. Have you thought about the possibility of detritus collecting in the lower portion? It would seem that if the mp40's were strong enough the keep everything suspended high enough for the overflow to catch it, the mp60's with stronger flow would push it right back down. Maybe some flow at the bottom of the lower half pointed upwards? Definitely tagging along.
|
|
|

|
|
|
#132 |
|
Registered Member
Join Date: Dec 2011
Posts: 17
|
Wow can't wait to see this thing!
|
|
|

|
|
|
#133 |
|
Combat-tested Reefer
Join Date: Jan 2008
Location: Cincinnati, OH
Posts: 169
|
Thanks, mjhall85. We tore up all the carpet yesterday and can hopefully start laying planks today.
__________________
Previous tanks: 60g AO Starphire cube w/ 400w MH, 2x Vortech MP40w // 29g BC w/ 250w MH // 29g BioCube Currently: in design/building process |
|
|

|
|
|
#134 |
|
Registered Member
Join Date: Oct 2011
Location: Phoenix,AZ
Posts: 535
|
Awesome! can't wait to see the finish project.
|
|
|

|
|
|
#135 |
|
Registered Member
Join Date: Jan 2008
Location: Parker, CO
Posts: 14
|
I am tagging along. This is going to be cool.
|
|
|

|
|
|
#136 |
|
Registered Member
Join Date: Sep 2008
Location: El Paso, Texas
Posts: 1,340
|
looks awesome...
__________________
rpjaws Current Tank Info: 500 glln system/ Reef |
|
|

|
|
|
#137 |
|
Combat-tested Reefer
Join Date: Jan 2008
Location: Cincinnati, OH
Posts: 169
|
So, as the title says, finally got the floor done and super pleased with how it turns out. Wendy grew up in the flooring business (her parents owned a flooring company) and even she was amazed with how it looks. Now to just find some baseboard I like and put that in, and the room portion of the build is done!
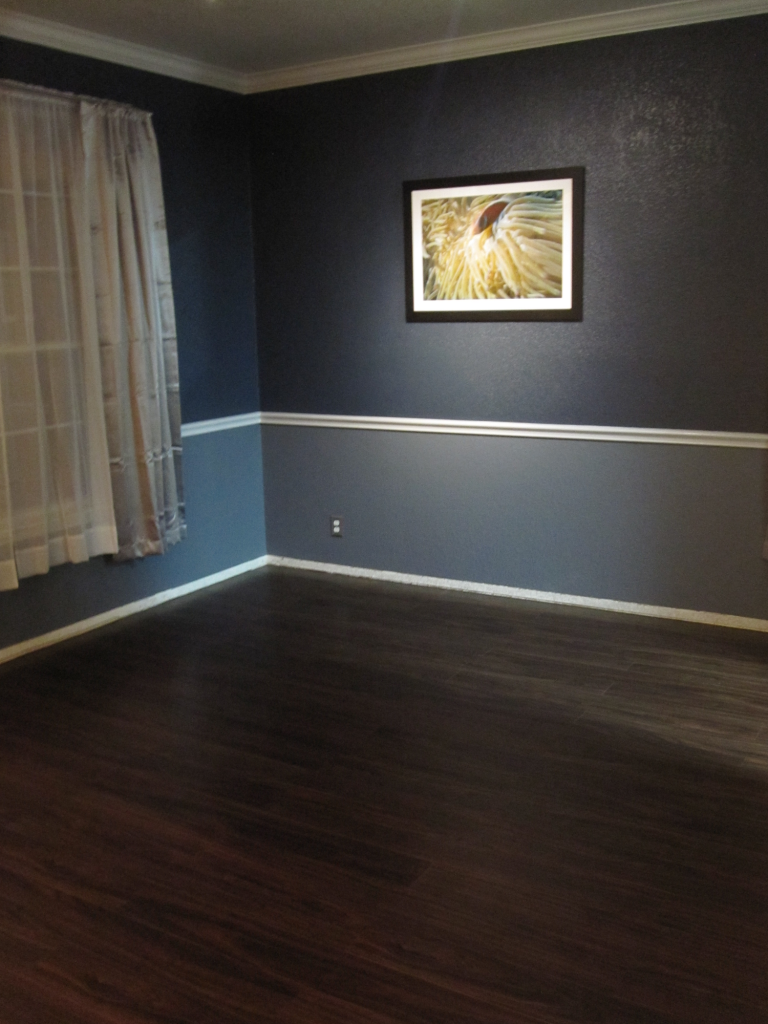 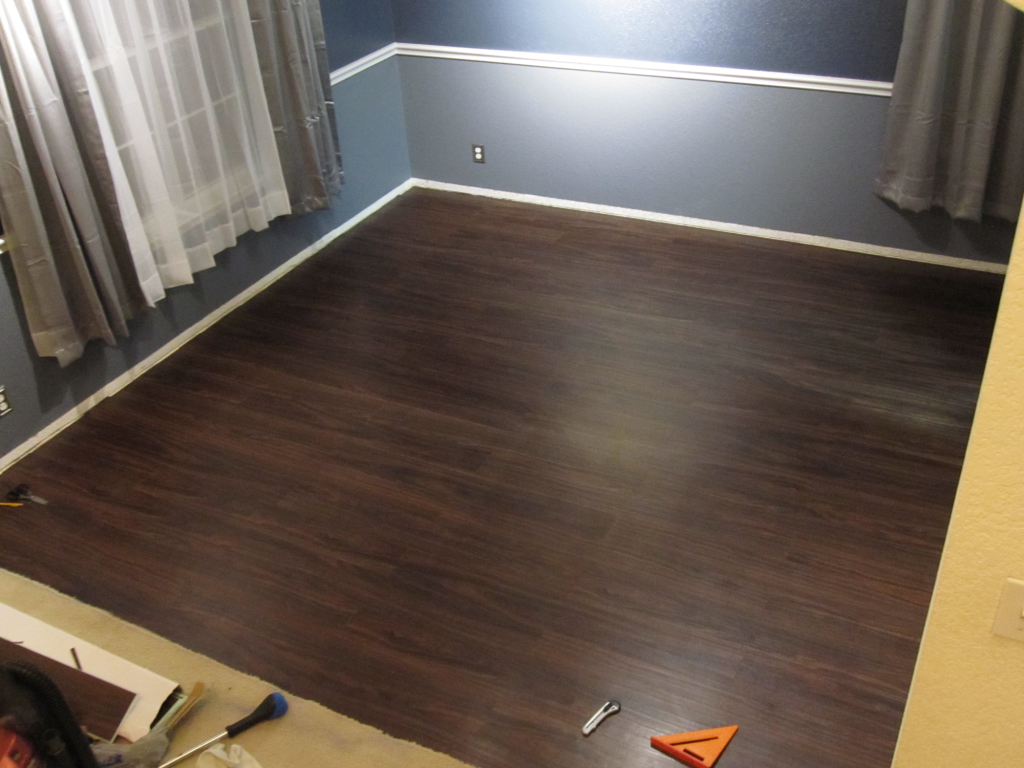 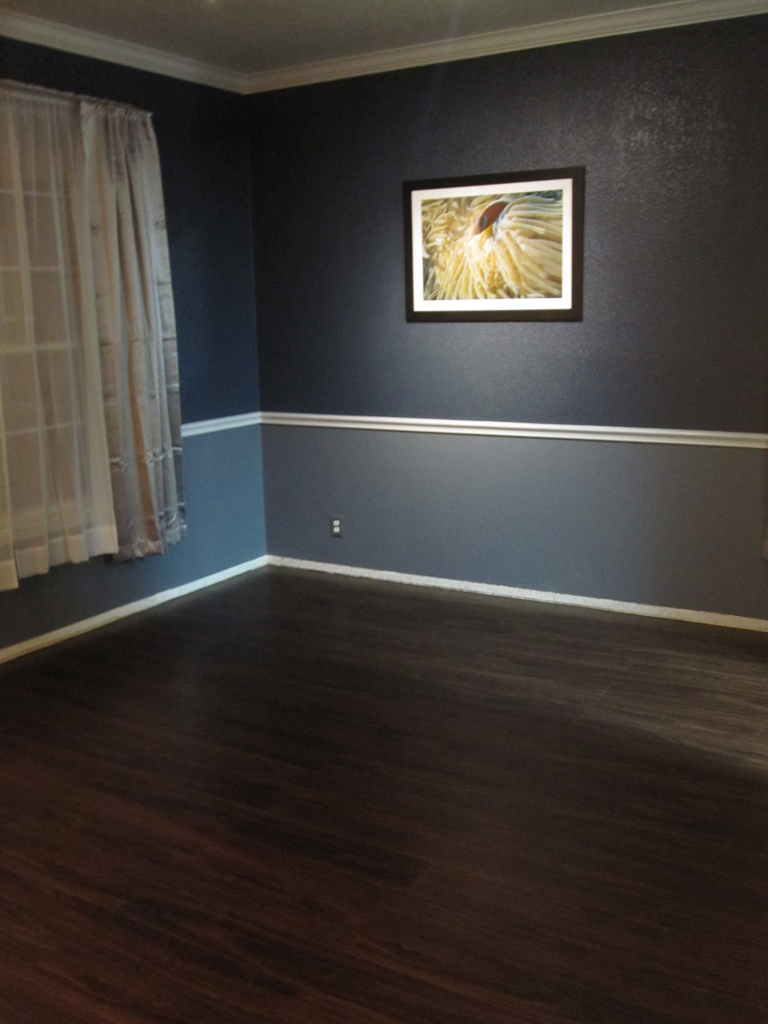 Now, on a (semi) side note... Wendy and I have been talking about putting together a little pico/nano for our son Tito's room. I played around with the idea, and thought, "Hey, why not make a scale version of the big tank?" So, voila! 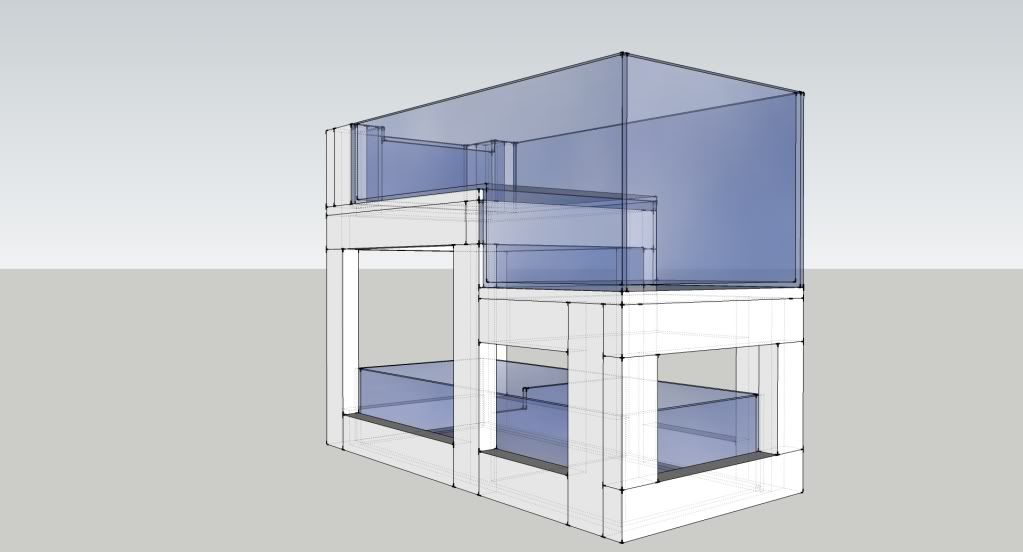 Just need to pick up some 1"x2" for the stand and some 1/4" acrylic for the rest, and we're in business. Hopefully I can put it together this weekend, or at least start on it. I found some great little LED strips that will work perfectly for lighting it, and a great DIY for a pico skimmer, and Hydor makes some great little nano pumps and powerheads that will fit perfectly. Overall size (including stand) is 24"L x 12"W x 18"H.
__________________
Previous tanks: 60g AO Starphire cube w/ 400w MH, 2x Vortech MP40w // 29g BC w/ 250w MH // 29g BioCube Currently: in design/building process |
|
|

|
|
|
#138 |
|
Combat-tested Reefer
Join Date: Jan 2008
Location: Cincinnati, OH
Posts: 169
|
FINALLY got the floor done... and now got one MORE project to tackle... LOL
So, as the title says, finally got the floor done and super pleased with how it turns out. Wendy grew up in the flooring business (her parents owned a flooring company) and even she was amazed with how it looks. Now to just find some baseboard I like and put that in, and the room portion of the build is done!
   Now, on a (semi) side note... Wendy and I have been talking about putting together a little pico/nano for our son Tito's room. I played around with the idea, and thought, "Hey, why not make a scale version of the big tank?" So, voila!  Just need to pick up some 1"x2" for the stand and some 1/4" acrylic for the rest, and we're in business. Hopefully I can put it together this weekend, or at least start on it. I found some great little LED strips that will work perfectly for lighting it, and a great DIY for a pico skimmer, and Hydor makes some great little nano pumps and powerheads that will fit perfectly. Overall size (including stand) is 24"L x 12"W x 18"H.
__________________
Previous tanks: 60g AO Starphire cube w/ 400w MH, 2x Vortech MP40w // 29g BC w/ 250w MH // 29g BioCube Currently: in design/building process |
|
|

|
|
|
#139 |
|
Registered Member
Join Date: Oct 2011
Location: Phoenix,AZ
Posts: 535
|
Looks wonderful! Look forward to seeing a scale version for your son.
|
|
|

|
|
|
#140 |
|
Registered Member
Join Date: Feb 2011
Location: Athens, Hellas
Posts: 684
|
Nice thinking!Even your tank should have its brother soul!LOL!!!!!!!!!!
|
|
|

|
|
|
#141 |
|
Registered Member
Join Date: Jan 2012
Posts: 1
|
That mini me tank will look pretty cool. You didn't install that floor on top of the carpet did you?
|
|
|

|
|
|
#142 |
|
Registered Member
Join Date: Feb 2008
Location: Greenville, NC
Posts: 30
|
Tagging along on this build!!
|
|
|

|
|
|
#143 |
|
Combat-tested Reefer
Join Date: Jan 2008
Location: Cincinnati, OH
Posts: 169
|
You mean I shouldn't have installed it over the carpet? Really???
LOL No, Stouty109, I ripped up the carpet and padding, removed the baseboard, scraped it all down to bare concrete, swept and mopped about 20 stinkin' times, coated the bare floor with an acrylic primer, then laid down the planks. Really came out great, and you'd never guess it was anything other than actual hand-scraped walnut. Yeah, I'm really looking forward to making that mini-tank. I'm going to try to mirror the big tank as much as possible.
__________________
Previous tanks: 60g AO Starphire cube w/ 400w MH, 2x Vortech MP40w // 29g BC w/ 250w MH // 29g BioCube Currently: in design/building process |
|
|

|
|
|
#144 |
|
Registered Member
Join Date: Sep 2008
Location: El Paso, Texas
Posts: 1,340
|
everyrhing is coming along great, Im impressed.
__________________
rpjaws Current Tank Info: 500 glln system/ Reef |
|
|

|
|
|
#145 |
|
Registered Member
Join Date: Jun 2003
Posts: 52
|
Great documentation and the room where the "L" shaped tank is going is stunning!
__________________
270 gallon 6' L x 3' W x 2' H custom reef tank + 120 gallon 4' x 2' x 2' Oceanic Tech Tank + 37 gallon 45" L x 24" W x 8" H frag tank + 65 gallon sump. 450 gallon system volume. |
|
|

|
|
|
#146 |
|
Combat-tested Reefer
Join Date: Jan 2008
Location: Cincinnati, OH
Posts: 169
|
Thanks, everyone. I've got to say we're pretty pleased so far, too.
Speaking of which, I've had a few people ask about how the big tank is being constructed, i.e.- why not make it the normal way, why build it this way, why not have AGE/Marineland/etc. make it. Here's why: Beyond the issues of having to perfectly level the two levels in order to achieve a perfect silicone bond without weak points (if you were to build it the normal glass/silicone way), the other reason it's being siliconed directly to the steel, much like a large-scale commercial aquarium. And no, unlike some people have thought, you don't want it to give, to do so introduces shear forces upon the silicone seal. Ideally, you want to silicone directly against the most stable outer surface as possible, so that the only force being acted upon the silicone is compressive force, where the silicone acts merely as a packer and seal, rather than being held in tension or shear, as most silicone and glass aquariums are. Utilizing silicone in this manner is almost incalculably stronger (assuming a strong outer surface, i.e.- strong welds and well-built structure, to seal against) than utilizing silicone as an adhesive. Not only that, but then your safety factor relies on the strength of the glass between the steel frames, rather than upon the strength of the silicone bond (either in tension or in shear) to retain the shape of the glass and keep it from reaching the point of failure due to deflection. Remember, when calculating required glass thickness, the biggest issue is bending stress, so supporting the top and bottom of the pane of glass reduces (almost to the point of removal) that bending stress at the point where it's most likely, i.e.- the top and bottom shear-held silicone bonds. Really, the only issue relative to the use of metal for the frame is the differential linear coefficient of expansion between glass and most metals, especially steel. To offset this in larger joints (i.e.- those longer than 1 meter on their longest edge, or a bit over 2 meters in this case) the thickness of the silicone seal must be changed to allow linear expansion without the fear of compressive failure. Assuming that plate glass has a linear coefficient of expansion of ~5.0 x 10^6 in/in degrees F, and steel has a coefficient of linear thermal expansion of ~7.3 x 10^6 in/in degrees F, allowing 2-3mm per meter of joint length (i.e.- 5mm seal along the large side plates, and 3mm along the front plate) will allow the silicone to take up the linear expansion differences without failure of the silicone seal.
__________________
Previous tanks: 60g AO Starphire cube w/ 400w MH, 2x Vortech MP40w // 29g BC w/ 250w MH // 29g BioCube Currently: in design/building process |
|
|

|
|
|
#147 |
|
Registered Member
Join Date: Sep 2010
Location: Huber Heights, Ohio
Posts: 410
|
That just got way way to technical for me. I go with the thought better safe than sorry...
__________________
Firefighting: How hard can it be? You just put the wet stuff on the red stuff right? Current Tank Info: 180g mixed reef, 70g sump, 2 30g frag tanks, 30g macro algae tank. 300g total system. |
|
|

|
|
|
#148 |
|
Combat-tested Reefer
Join Date: Jan 2008
Location: Cincinnati, OH
Posts: 169
|
Exactly. Hence the serious amounts of overengineering involved in this build. LOL
__________________
Previous tanks: 60g AO Starphire cube w/ 400w MH, 2x Vortech MP40w // 29g BC w/ 250w MH // 29g BioCube Currently: in design/building process |
|
|

|
|
|
#149 |
|
Registered Member
Join Date: Jan 2012
Location: Not in Kansas... anymore?
Posts: 45
|
I like the build. Good luck! the interior design really adds to the overall appeal of the tank.
|
|
|

|
|
|
#150 |
|
Registered Member
Join Date: Sep 2010
Location: Huber Heights, Ohio
Posts: 410
|
Make sure that you take tons of pictures when it comes to actually installing the glass and stand. It will help alot of people in the future.
__________________
Firefighting: How hard can it be? You just put the wet stuff on the red stuff right? Current Tank Info: 180g mixed reef, 70g sump, 2 30g frag tanks, 30g macro algae tank. 300g total system. |
|
|

|
 |
| Tags |
| 440 gallon, custom, dropoff, reef, starphire |
|
|