


|
 |
|
|
#1 |
|
Registered Member
Join Date: May 2013
Posts: 307
|
How to build a CO2 regulator for your calcium reactor.
Hi All,
I'm new to the reef community. I have been building custom CO2 systems for planted tanks. I want to start off by sharing my knowledge with you guys on how to build a quality CO2 system to use with the calcium reactor. There are commercial CO2 systems that anyone can purchase. However, there is a DIY route. We can build a high quality industrial grade CO2 system with a few parts for the same price. The parts you will need are: 1) Regulator I suggest using a dual stage regulator as some single stage regulators will most likely to experience end of tank dump. When your CO2 tank is full, everything works as expected. End of tank dump occurs when the tank gets near empty and the pressure drops. This causes more CO2 to get into your tank and will suffocate your livestocks. You will need a dual stage regulator that has a working pressure at anywhere between 15 PSI to 100 PSI. Higher working pressure will also work but it's a little harder to adjust because the output pressure gauge is more sensitive. Here are a few things to look for when you are hunting for a regulator: a) High pressure gauge should read from 3000 PSI to 4000 PSI. The low pressure gauge should read from 30 PSI to 200 PSI. Most regulators are usually equipped with a low pressure gauge that reads double the max working pressure (output pressure). For example, if you see a regulator with a 100 PSI low pressure gauge, this means the working pressure is usually 40 to 60 PSI. In most case it only required 20 PSI to 30 PSI of working pressure to diffuse CO2 into the calcium reactor. You can go lower than 20 PSI but the injection is not as stable. b) Stainless steel and brass regulators - A stainless steel regulator will cost more than a brass regulator. It usually retails for $600+. These are designed for high purity and corrosive gasses. However a brass regulator will do the job. You just need to be careful when placing it near salt water. c) Brand - There are more than a dozen brands. The most popular brands among the planted tank hobbyist are Victor HPT500 (brass), Victor SGT500 (SS), Matheson 3810 (SS), Concoa 432 (SS), and Concoa 312 (brass). These regulators are often rebranded to a third party like Air Products, Airgas, Harris, Praxair, Linde, just to name a few... Where to buy these regs? Ebay, bio surplus sites, Craigslist..... I would pay up to $100 for a used unit in good condition and up to $160 for a brand new SS unit. 2) CGA 320 nipple and nut CGA-320 is the American standard thread found on Co2 tanks. Most regulators you find on Ebay or surplus sites will have different CGA connection. To make it work with your CO2 tank, you will need a CGA 320 nipple and nut. Your local welding place is a good source or online stores. 3) Fittings There are many ways to put together a CO2 system. These are the fittings that I normally use. -1/4 male NPT x 1/4 male NPT hex nipple (Swagelok cross ref. SS-4-HLN-200 or 150. 200 is 2 inches. 150 is 1.5 inch) -1/4 female NPT x 1/8 male NPT elbow (Swagelok cross ref. SS-4-RSE-2) -1/8 male NPT x 1/8 male NPT elbow (Swagelok cross ref. SS-2-SE) *The SS in front of the Swagelok part # stands for Stainless Steel. Substitute it with a B if you want brass. 5) Burkert 6011 solenoid (1/8 NPT) This is one of the most reliable solenoids and is proven by the hobbyists. 6) Metering Valve Metering valve is the most vital part. A good unit will provide you with a precise and constant CO2 reading. There are a few good metering valves such as Swagelok S series (SS-SS4), Ideal V54-1-12, Hoke 1300 series and etc.,. Bear in mind that not all metering valve will work. We only use medium flow and low flow valves for our purpose. The metering valve I'm using is a Hoke 1300 series. This valve required tube fitting reducer 1/4 in. x 1/8 in tube OD (Swagelok SS-400-R-2) to mount the CO2 tubing. Note: A vise is highly recommended but it's not impossible to assemble the system without one. Never overtighten the fittings. I usually do 3 to 4 turns until the joints are secured and cannot be wiggled by hand. Since I can only include 10 images per post. I can reply to the thread with more images if needed. Preparation Start out by cutting a piece of teflon tape and fold it in half. Wrap the Teflon tape around the threads in clockwise direction. Leave the first thread exposed. Wrap the Teflon around each fitting 2 times. 3 times for the CGA 320 nipple. Assembly Tighten the 1/4 hex nipple to the 1/4 female x 1/8 male elbow.  Tighten the 1/8 male x 1/8 female elbow to the solenoid's outlet "A" port (as labeled on the solenoid).  Tighten the CGA320 to the regulator's inlet port. Remember to slip in the nut before you attach the nipple.  Tighten the 1/4 hex nipple and 1/4 female x 1/8 male elbow to the regulator's outlet port.  Tighten the solenoid's inlet "P" port to the 1/4 female x 1/8 male elbow. You can use your legs to secure the regulator. Try not to hold the regulator knob.  Tighten the Hoke 1300 series needle valve to the 1/8 male x 1/8 female elbow.  Connect the power adapter to the DIN and attach the complete unit to the solenoid. This is a 24 VDC power adapter.  Insert a 1/4 OD CO2 tubing to the Swagelok tube fitting.  Tighten the the Swagelok tube fitting unit to the Hoke needle valve.  Here is the finish product and you're ready to pump some CO2. Remember to do a leak test by applying soapy water with a Q-tip around the joints. 
Last edited by alanle; 12/02/2014 at 05:15 PM. |
|
|

|
|
|
#2 |
|
Registered Member
 Join Date: Jan 2006
Location: Westminster, CO
Posts: 17,289
|
Nice write-up, thanks for the post

__________________
Hobby Experience: 9200ish gallons, 26 skimmers, and a handful of Kent Scrapers. Current Tank: Vortech Powered 600G SPS Tank w/ 100gal frag tank & 100g Sump. RK2-RK10 Skimmer. ReefAngel. Radium 20k. |
|
|

|
|
|
#3 |
|
Registered Member
 Join Date: Jan 2007
Location: menifee So cal
Posts: 11,042
|
Thanks for all the DIY tips.
|
|
|

|
|
|
#4 |
|
Registered Member
Join Date: May 2013
Posts: 307
|
Thanks!!^^^
Here are a few more CO2 system that I built recently. This one is my personal. I'm currently running it 24/7 on my planted tank. The reason most people use industrial grade parts is to keep the CO2 distribution remain constant and precise. You can set the system up and forget about it. CO2 bubble rate will remain the same after 1 year! 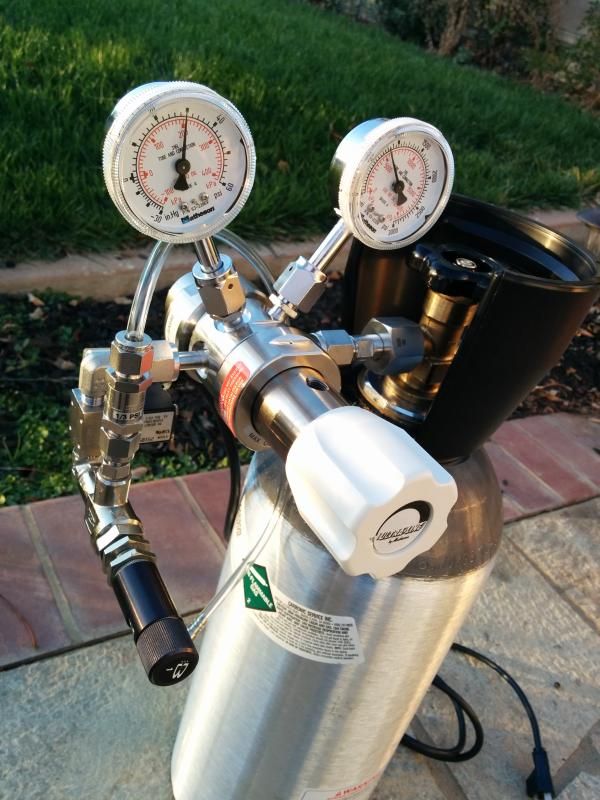 This is a Matheson 3810 system. It has a dual solenoid and dual metering valve. You can diffuse CO2 into 2 different tanks. 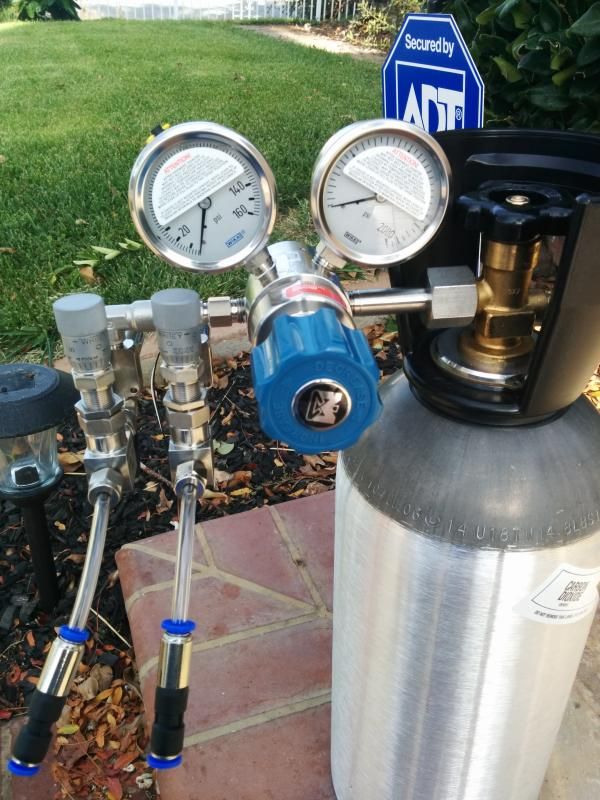 Complete stainless steel. Nothing will get through this beast!! 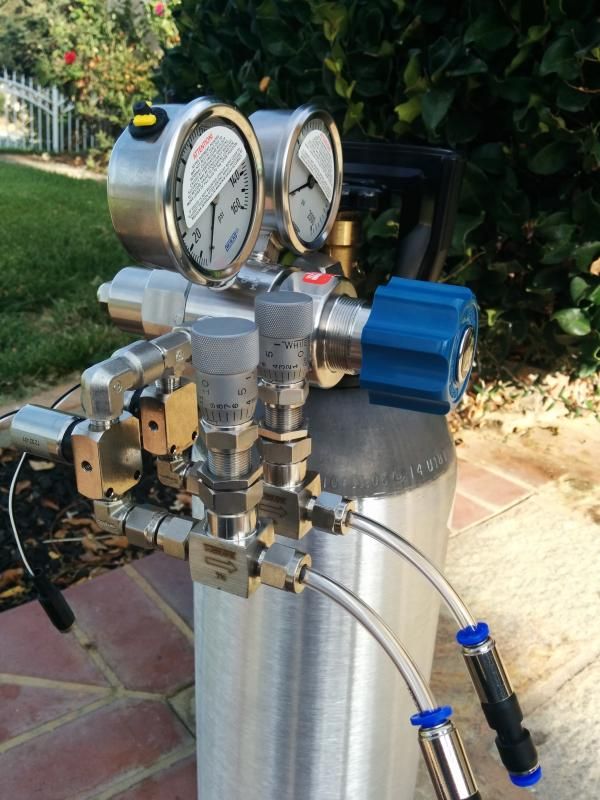 This one is an all brass AirProducts system. The original finish has a misted brass coating. I use Brasso and make it look shiny. 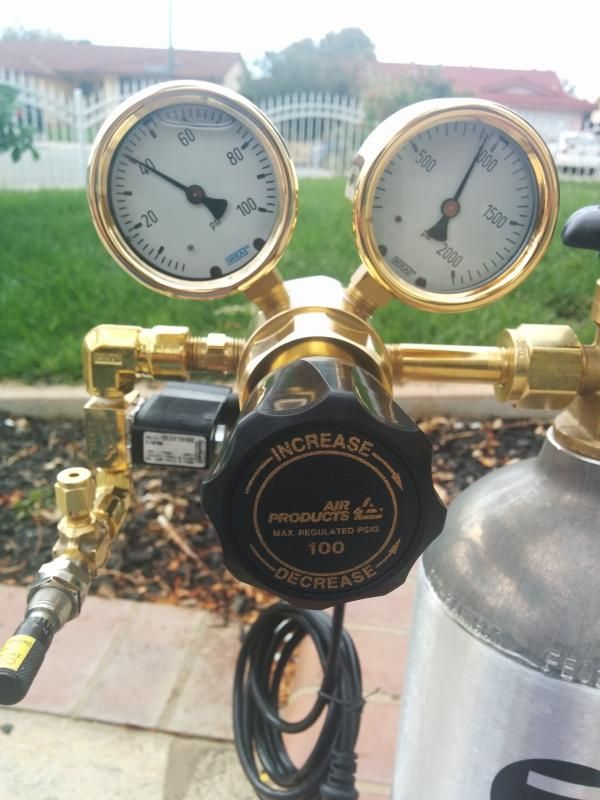 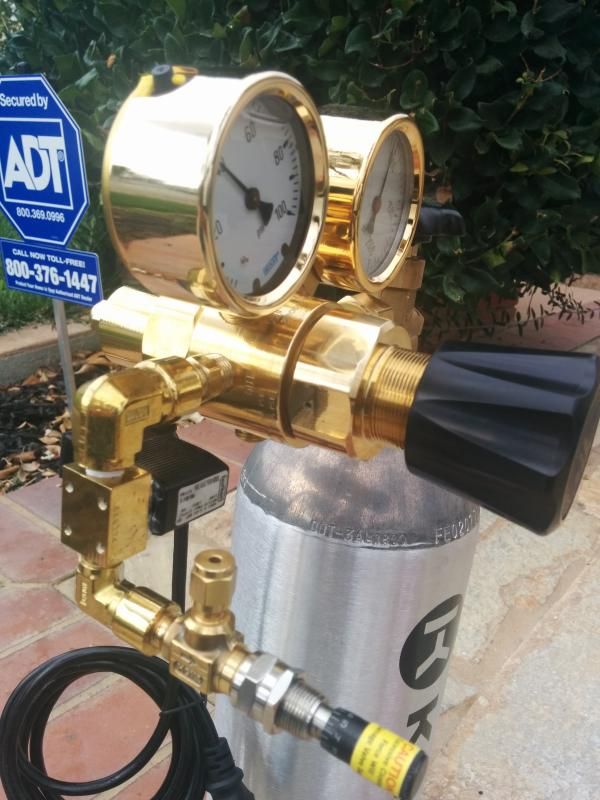 This one is a stainless steel Parker IR6000 system. Metering valve is a low flow Swagelok S Series. 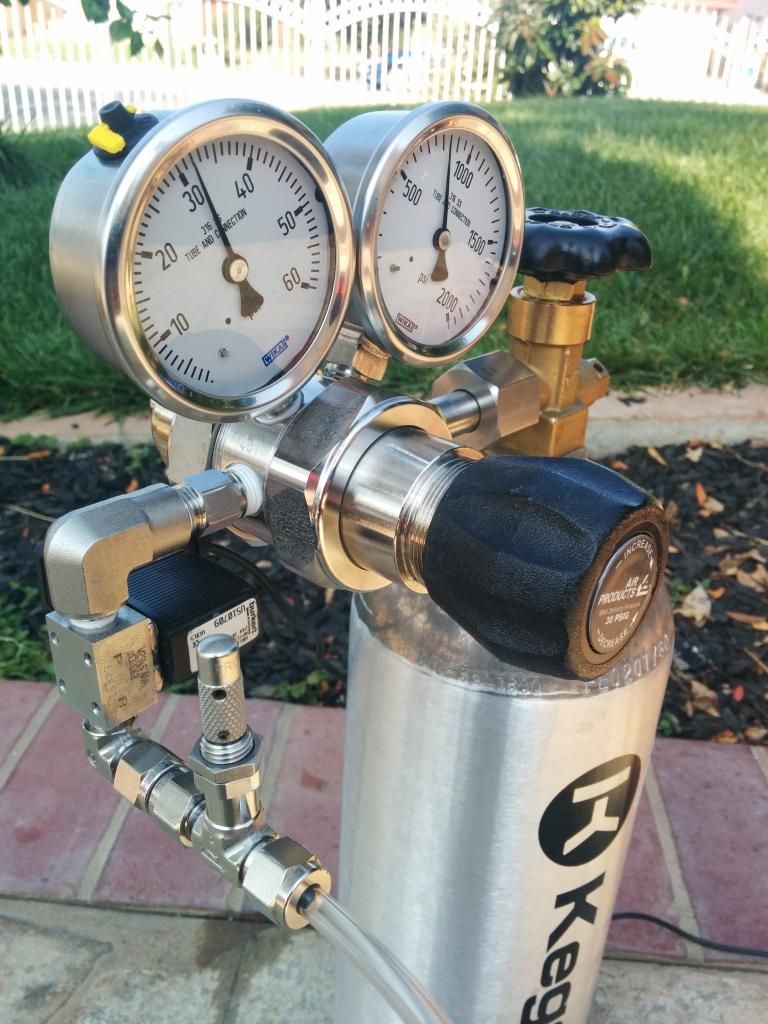 Here is the stainless steel Victor SGT500 regulator. It also has the Swagelok S series needle valve with an integrated bubble counter and check valve. 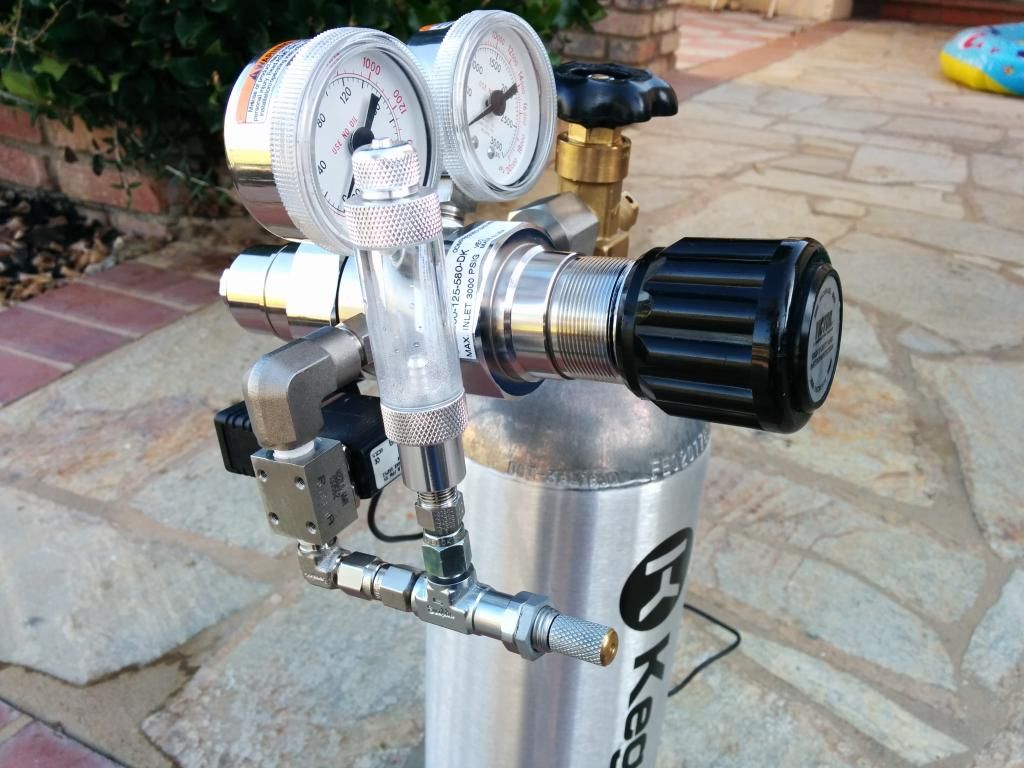 -Alan Last edited by alanle; 12/02/2014 at 07:47 PM. |
|
|

|
|
|
#5 |
|
Registered Member
 Join Date: Nov 2008
Location: Houston, TX
Posts: 10,344
|
I never thought pics of regulators could be pornographic, but you sir have figured out a way.

__________________
-dennis Elos Diamond 120xl | Elos Stand | Radion G4 Pros | GHL Profilux Controller | LifeReef Skimmer | LifeReef Sump Photos taken with a Nikon D750 or Leica M. |
|
|

|
|
|
#6 |
|
Registered Member
Join Date: Apr 2004
Posts: 240
|
Great thread. Thanks for sharing.
|
|
|

|
|
|
#7 |
|
Registered Member
Join Date: Apr 2004
Posts: 240
|
With these regulator setups in your opinion would they be as stable and reliable as the CarbonDoser digital regulator/solenoid?
|
|
|

|
|
|
#8 | |
|
Registered Member
Join Date: May 2013
Posts: 307
|
Quote:
You can read more about the carbondoser here: http://www.plantedtank.net/forums/sh...d.php?t=502081 -Alan |
|
|
|

|
|
|
#9 |
|
Registered Member
 Join Date: Jan 2006
Location: Westminster, CO
Posts: 17,289
|
IME with a reactor the carbondoser on a dual stage reg is incredible reliable and can provide a very consistent amount of gas. The single stage regs they use are ok and for most it is adequate.
Adding a carbon doser on top of a dual stage can get pricey. Are these solenoid valves you are listing rated for continuous duty?
__________________
Hobby Experience: 9200ish gallons, 26 skimmers, and a handful of Kent Scrapers. Current Tank: Vortech Powered 600G SPS Tank w/ 100gal frag tank & 100g Sump. RK2-RK10 Skimmer. ReefAngel. Radium 20k. |
|
|

|
|
|
#10 |
|
Registered Member
Join Date: Apr 2004
Posts: 240
|
I'm new to calcium reactor operation but it seems to me that the issues with this equipment centers a lot around solenoid failures and inability to accurately dial in the bubble count. It seems that the components listed here take these issues off the table or at least minimizes them. No disrespect to CarbonDoser.
|
|
|

|
|
|
#11 | |
|
Registered Member
Join Date: May 2013
Posts: 307
|
Quote:
Last edited by alanle; 12/03/2014 at 07:17 PM. |
|
|
|

|
|
|
#12 |
|
Registered Member
Join Date: May 2013
Posts: 307
|
If you are getting a used regulator, there are chances that the regulator has an internal leak. Some regulators have faulty gauges, diaphragm seal broken, and the seal between first stage and second stage not completely sealed. So an internal leak test must be performed before you start the assembly. If you are buying a regulator from Ebay or any other sites, make sure you read the return policy clearly. Don't buy any used regulators from sellers that don't accept returns.
Step 1 A. Attach the regulator to the CO2 tank by tighten the CGA nipple to the tank's valve. Remember to place the nylon washer between the 2 ends or you will have a leak. B. Turn the regulator knob all the way to the left (counter clockwise). C. Open the CO2 tank valve. The high pressure gauge should read 800 PSI to 900 PSI (if you have a full tank). D. Close the CO2 tank valve. E. Record the PSI reading and let the regulator sit there for 6 hours. If the reading is the same after 6 hours, the first stage has no leak. Move on to step 2. Note: If the PSI reading on the high pressure gauge drops and the low pressure gauge remains at 0, this indicates that there is a leak on the CGA nipple connection. You should do soapy water test on the joints. If the PSI on low pressure gauge spikes from zero to ~30 PSI, you can stop the test. Your regulator has an internal leak. Step 2 A. Turn the regulator knob clockwise to let the CO2 gas travel the second chamber. Set the pressure to the maximum working pressure of your regulator. For example, if the regulator's max working is 60 PSI, you should set it to 60 PSI. Note: Most regulators come with a shutoff valve attached at the output port. This valve must be fully closed so the CO2 can remain in the second chamber. If there is no shutoff valve, you can attach a solenoid to the output pressure port and make sure the solenoid is not powered on. B. Isolate the CO2 gas between the first chamber and second chamber by turning the regulator knob all the way to the left (counter clockwise). C. Make sure the CO2 tank valve is closed. You can remove the regulator from the CO2 tank at this point. Again never remove the regulator from the CO2 tank when the tank valve is opened or you will have a heart attack. Note that CO2 gas is trapped in the second chamber after you remove the regulator from the tank because you have closed the second stage by turing the regulator all the way to the left. D. Wait for ~5 minutes. The pressure might drop 1 to 2 psi due to second stage diaphragm being stretched. E. Do a soapy water leak test around the low pressure gauge and shut off valve joints to make sure you have zero leak. Record the final PSI reading and wait for 6 hours. If there is no change in the final reading, your regulator is good to go. Last edited by alanle; 12/04/2014 at 04:16 PM. |
|
|

|
|
|
#13 |
|
Registered Member
Join Date: Apr 2004
Posts: 240
|
Looks like the solenoid on my Milwaukee regulator failed. The unit is cold and when I kill power to it the bubbles still flow. Looking for opinions on whether to replace the solenoid with a Burkert or go with the CarbonDoser. I could just use the box of the CarbonDoser since the gauges don't appear to be defective. I believe the piping on the Milwaukee is 1/4" NPT so I'd have to get reducers to go to 1/8" which is what the fittings are on the Burkert.
|
|
|

|
|
|
#14 | |
|
Registered Member
Join Date: May 2013
Posts: 307
|
Quote:
|
|
|
|

|
|
|
#15 |
|
Registered Member
Join Date: Apr 2004
Posts: 240
|
Thanks for the info. Should the solenoid be warm if it is energized or only if it is closed
|
|
|

|
|
|
#16 |
|
Registered Member
Join Date: May 2013
Posts: 307
|
|
|
|

|
|
|
#17 |
|
Registered Member
Join Date: Dec 2007
Location: Largo, FL
Posts: 1,526
|
Taggin along. Just bought parts "post" the regulator. Thanks Alan!!!
mike
__________________
300G 96x24x30, BK250 Skimmer with Avast Swabbie, LED/T5, Geo CaRx with Masterflex effluent cntl, Zeovite User - Avast Marine Tumbler, Archon control, Vortech MP60,Tunze 6125, & Jebao RW20 making waves |
|
|

|
|
|
#18 |
|
Registered Member
Join Date: Oct 2009
Location: SoCal
Posts: 1,597
|
Fantastic writeup! Those regulators looks amazing.
__________________
-Matt in between tanks |
|
|

|
|
|
#19 | |
|
Registered Member
Join Date: May 2013
Posts: 307
|
Quote:
 I'm excited to see the complete system. Keep me updated. I'm excited to see the complete system. Keep me updated. I had a few free hours today and managed to put together these Airgas systems. They are identical. The solenoid is a stainless steel Burkert 6011. Needle valve is a Hoke 1300 series. I added a bubble counter with built in check valve right on top of the needle valve to make it like an all in one system. Let me know if you guys need any help in building a system like this. I can help.    -Alan |
|
|
|

|
|
|
#20 |
|
Registered Member
Join Date: Dec 2011
Location: Pacifica
Posts: 3,741
|
Nice write up, I've been looking for dual stage regs but was lost after trying to figure what would work for c02.im glad I read this thread makes it a whole lot easier sourcing the parts needed for this venture..
__________________
15 years in the hobby yet still learning every day. 280g radium lit sps flat living in my garage rent free. Current Tank Info: 105g SPS dominant euro braced powered by 4 ecotech pumps and lit by an ATI powermodule controlled by a reef angel =). |
|
|

|
|
|
#21 |
|
Registered Member
Join Date: Dec 2014
Location: West Coast (Canada)
Posts: 39
|
Nice setup!!
|
|
|

|
|
|
#22 |
|
Registered Member
Join Date: Dec 2014
Location: West Coast (Canada)
Posts: 39
|
Very clean
|
|
|

|
|
|
#23 |
|
Registered Member
Join Date: May 2013
Posts: 307
|
|
|
|

|
|
|
#24 |
|
Registered Member
Join Date: May 2013
Posts: 307
|
Here's a special Linde system with the white knob. Linde is a gas company located in Germany.
    a shot in front of my planted tank  
|
|
|

|
|
|
#25 |
|
Registered Member
Join Date: Dec 2007
Location: Largo, FL
Posts: 1,526
|
Nice tank Alan!
By the way, what do you recommend for a check valve between needle valve and reactor? mike
__________________
300G 96x24x30, BK250 Skimmer with Avast Swabbie, LED/T5, Geo CaRx with Masterflex effluent cntl, Zeovite User - Avast Marine Tumbler, Archon control, Vortech MP60,Tunze 6125, & Jebao RW20 making waves |
|
|

|
 |
|
|