
|
|
 04/21/2008, 10:01 AM
|
#1 |
|
Premium Member
 Join Date: Jan 2008
Location: MA
Posts: 1,232
|
My 90gal BowFront Build [pic intense]
I've finally gotten to a place where I can share some of what I've learned and give props to people here (and elsewhere) that provide solutions and/or inspiration that allowed me to solve problems during the build.
I'd had a 72gal bowfront FW tank for well over 10yrs. Last summer I did a huge plumbing rebuild on that setup to significantly improve the water quality and maintenance. Still, it was an ongoing process of correcting 'issues' that developed from not having done it right the first time. Hey, we basically threw that tank together in a weekend. After I had completed the plumbing rebuild (not without its share of catastrophy I might add) I made a comment to my wife that someday I'd like to get a new tank since there were numerous scratches on the back glass from poor cleaning methods. It's importnat to mention that my wife has wanted a SW tank since we first met (I had the FW setup before I met her). Last Christmas she surprised me with a brand new Oceanic 92gal bowfront. Within days of Christmas a major crisis hit the 72gal tank --- fish started dying in multiples with no outward signs. Water chemistries were right on. Coincidence or something more sinister? We'll never know... It was a sad crisis that virtually wiped out the 72gal tank within a couple weeks taking a number of fish that I had had since the day the tank was setup. It was a truly dark period. So a decision had to be made. Another FW tank or do we attempt something entirely new? My wife was happy to provide her input. The reading/studying/research began. SW it is! And the journey begins... |

|

|
|
04/21/2008, 10:10 AM
|
#2 |
|
Premium Member
Join Date: Jan 2008
Location: MA
Posts: 1,232
|
The start...
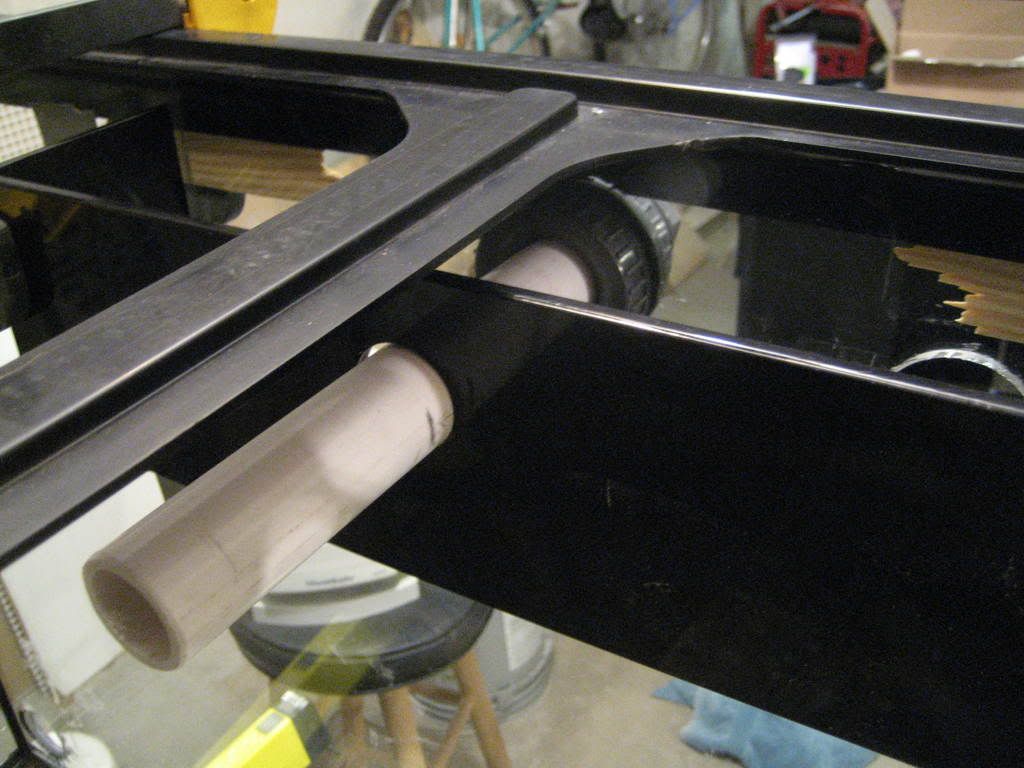
The new 92 was not RR so I had to make some decisions about what I wanted to do as far as circulation went. After tons of research I opted for a horizontal overflow and a closed-loop system. This required my cutting 8 holes in a brand new tank.
Beginning the drilling:  Since I had to drill the tank vertically (becasue it's a bowfront) I used a spray bottle for lubrication and duct tape to secure the blank: 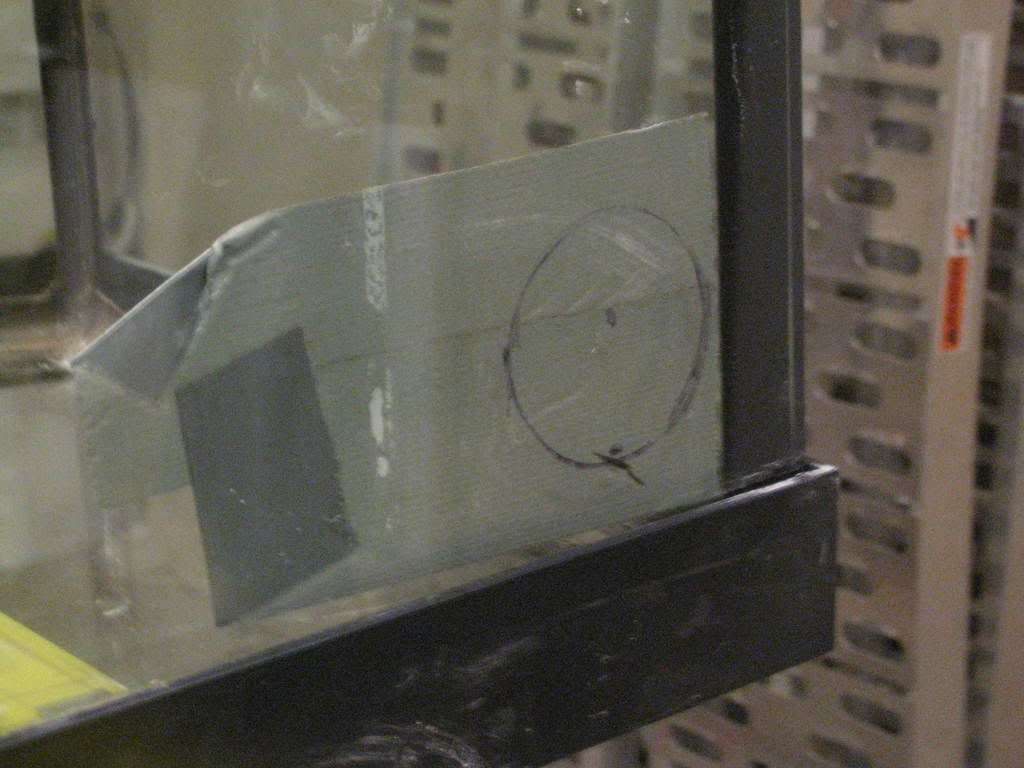 Here's the overflow: 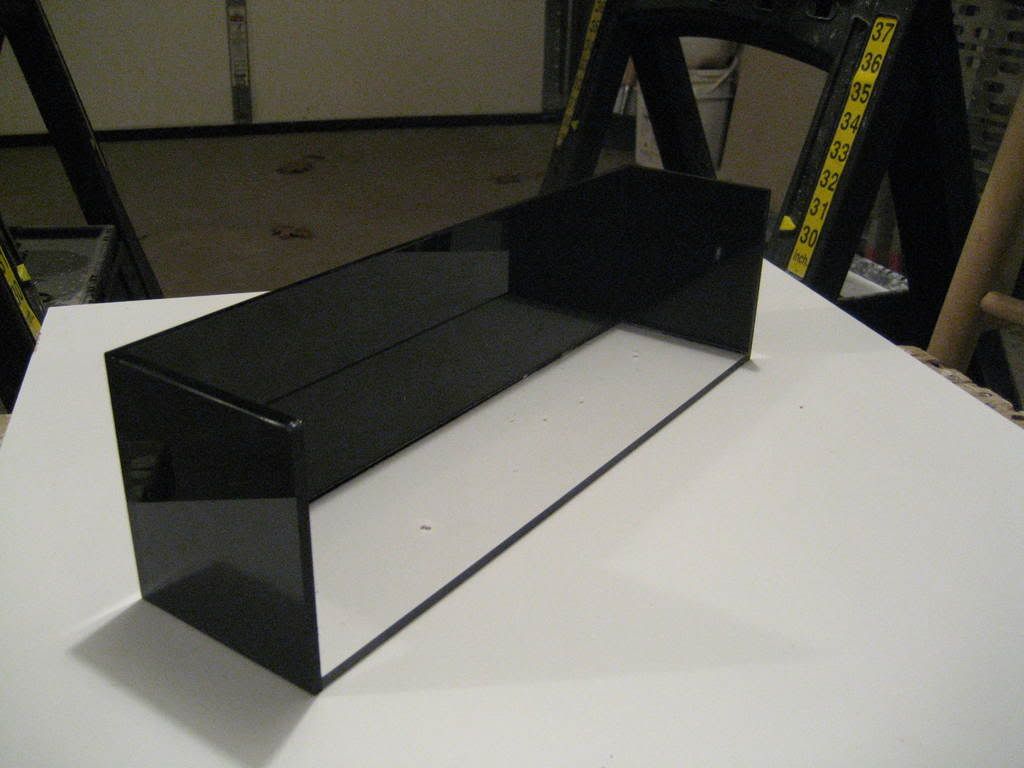 And the overflow layout: 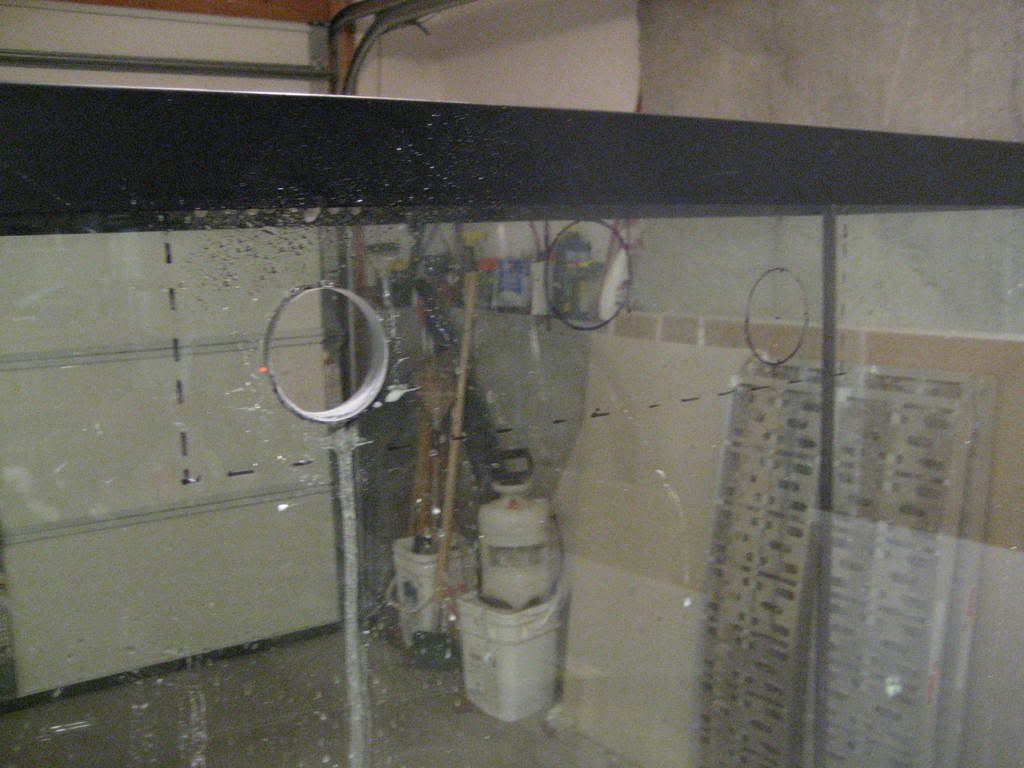 The sump return will come through the overflow so it has to be drilled: 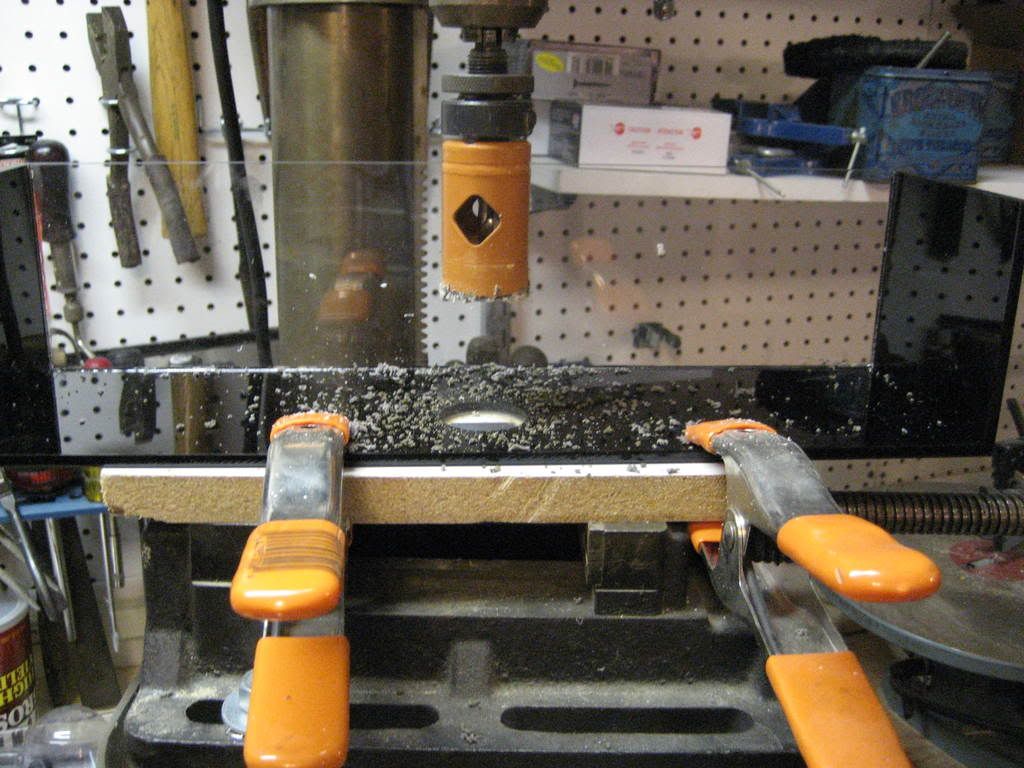 Installing the overflow: 
|
|
|
|
|
04/21/2008, 10:25 AM
|
#3 |
|
Premium Member
Join Date: Jan 2008
Location: MA
Posts: 1,232
|
continuing...
This shows how the sump return will work:
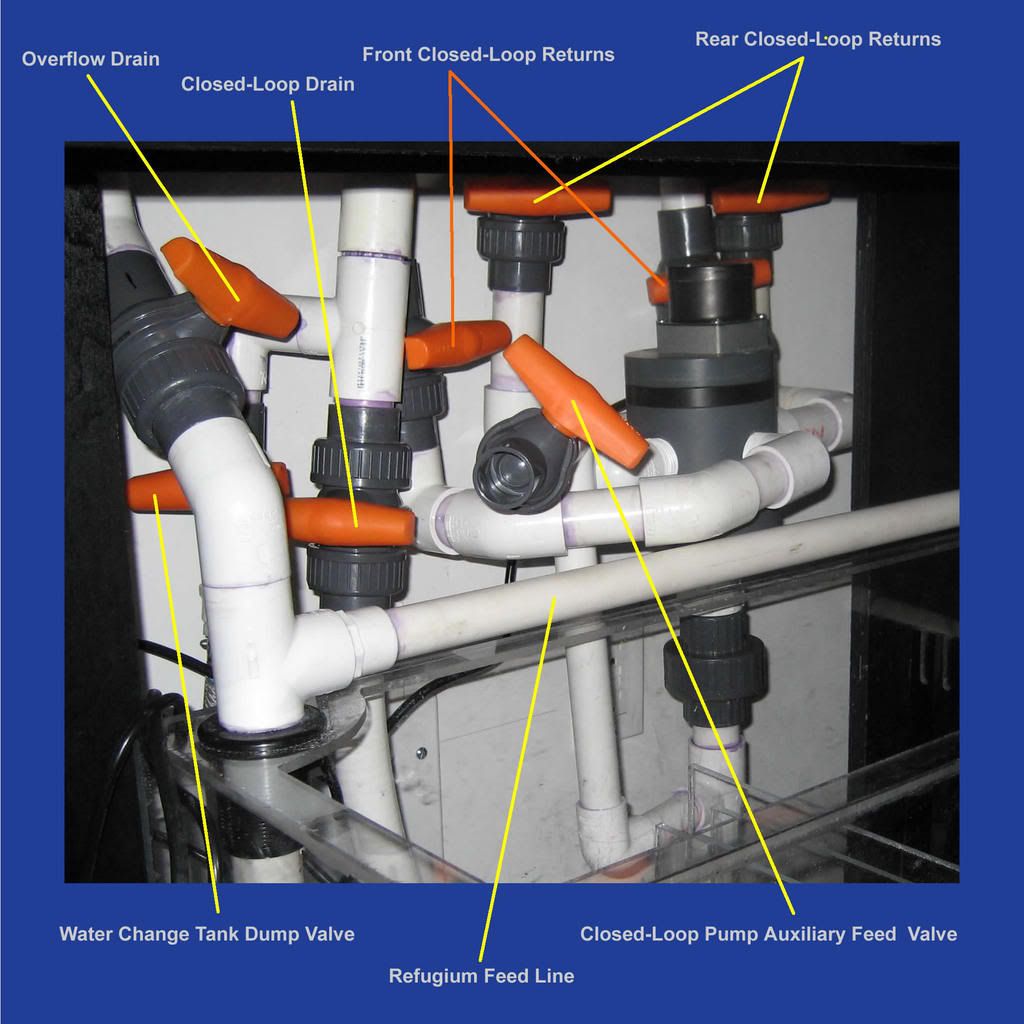
 I'll be using Oceans Motions return nozzles on the two rear closed-loop returns as well as the sump return. I'll modify this, however, to get the nozzle closer to the overflow: 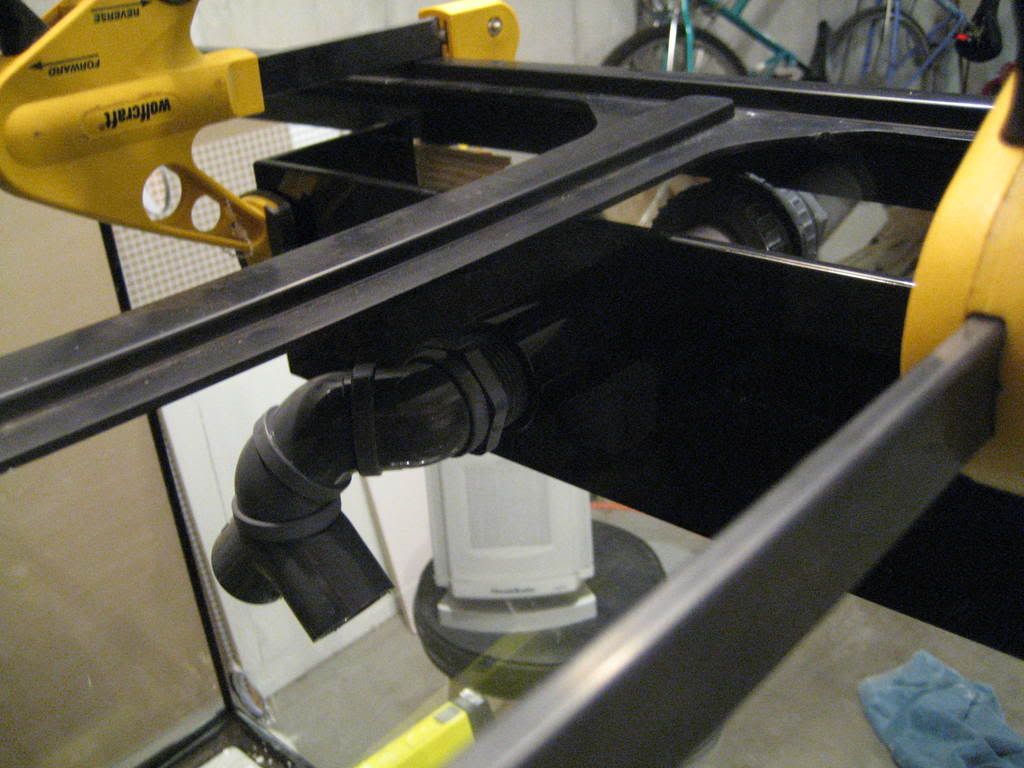 All the bulkheads are 1" Schedule 80 and the tank background is one of the Blue Life Water Colors backgrounds. It looks nice but was a pain to apply. 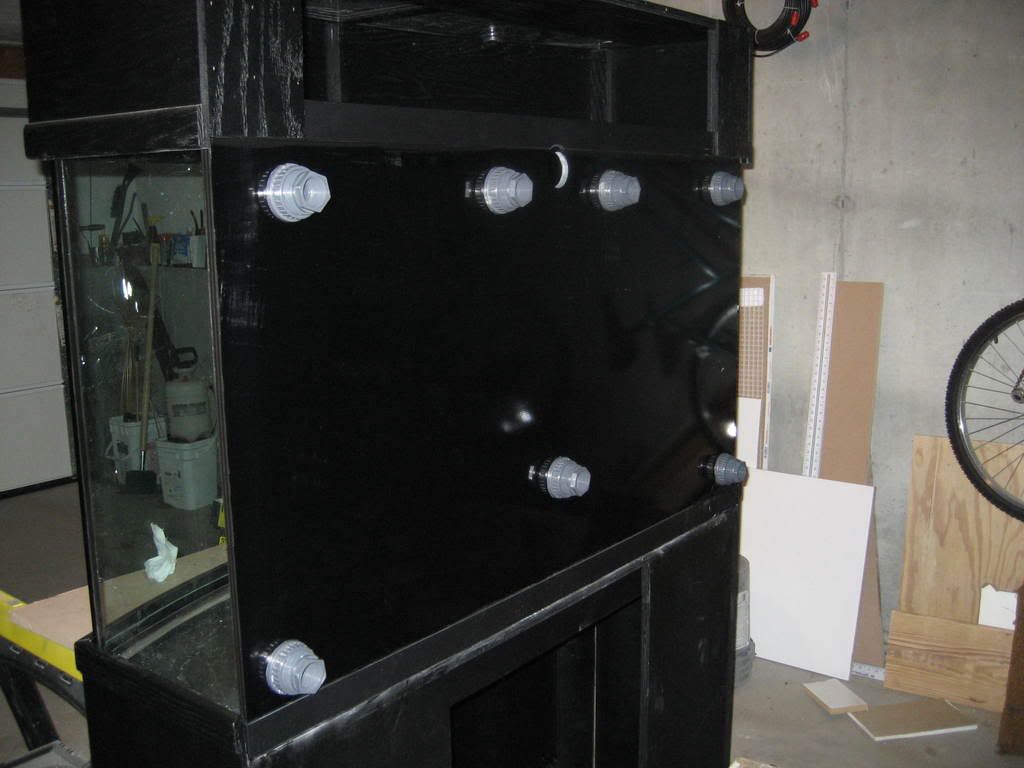 Here's how the overflow plumbing will work: 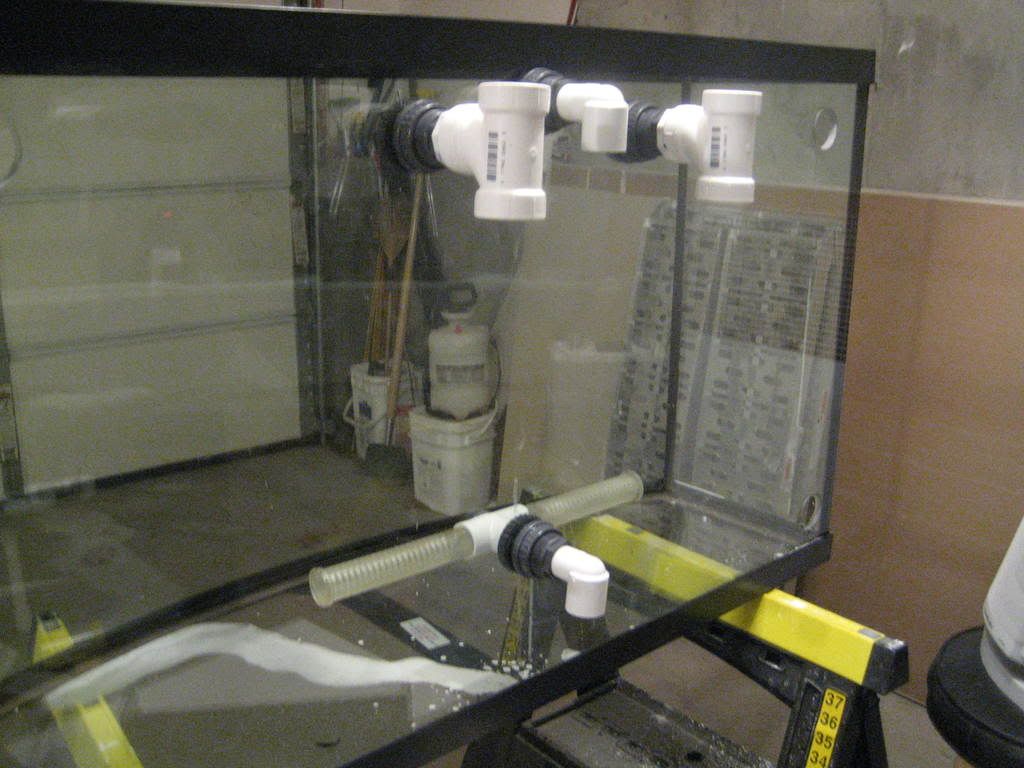 I'm using a Velocity T2 for the sump/refuge retrun and a Pan World 100PX-X for the closed-loop will use an Oceans Motion 4-way that will cycle between two low front returns and the two high rear returns. Here are the two pumps and the 4-way 'candelabra':  This shows thr front closed-loop retruns and intake: 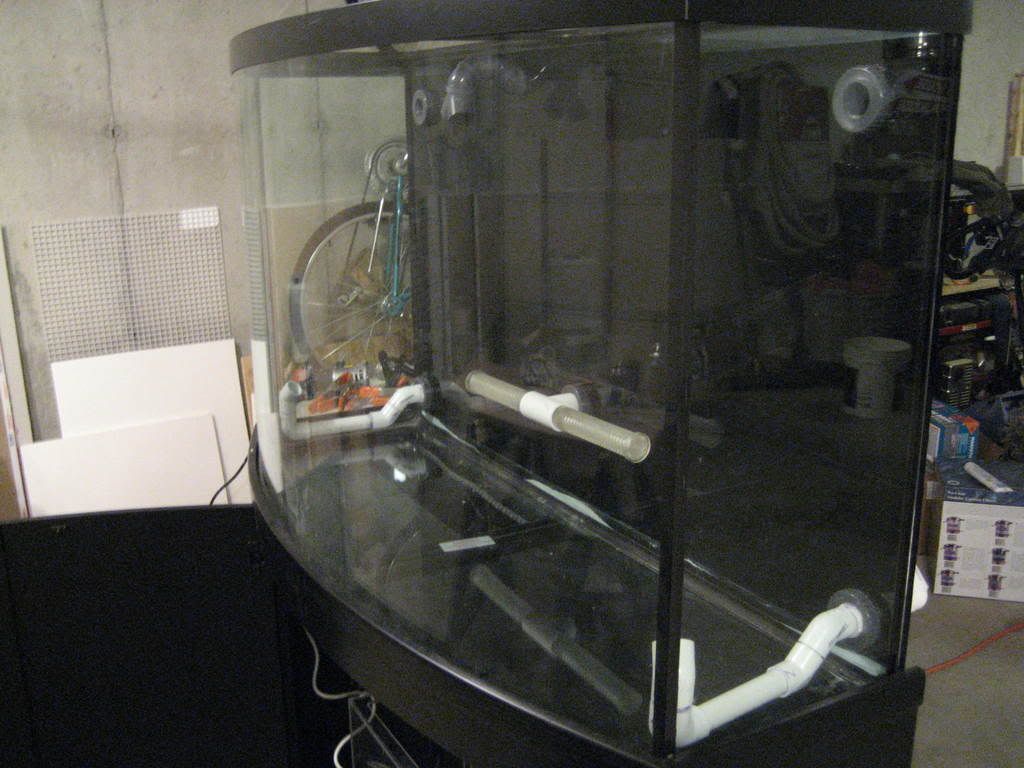
|
|
|
|
|
04/21/2008, 10:48 AM
|
#4 |
|
Premium Member
Join Date: Jan 2008
Location: MA
Posts: 1,232
|
and more... (bored yet???)
The front closed-loop returns are adjustable. The 'shaft' can be rotated allowing the 'nozzle' to traverse up-and-down and, of course, the 'nozzle' can be rotated side-to-side.
Two important design considerations that I'm faced with are the fact that this is a bowfront tank so I have somewhat limited real estate in the under tank cabinet (especially front-to-back). Also, all the plumbing has to fit either in the cabinet or in a 7" space between the tank and the wall (no fish room for me unfortunately). This results in a rather scary looking plumbing layout: 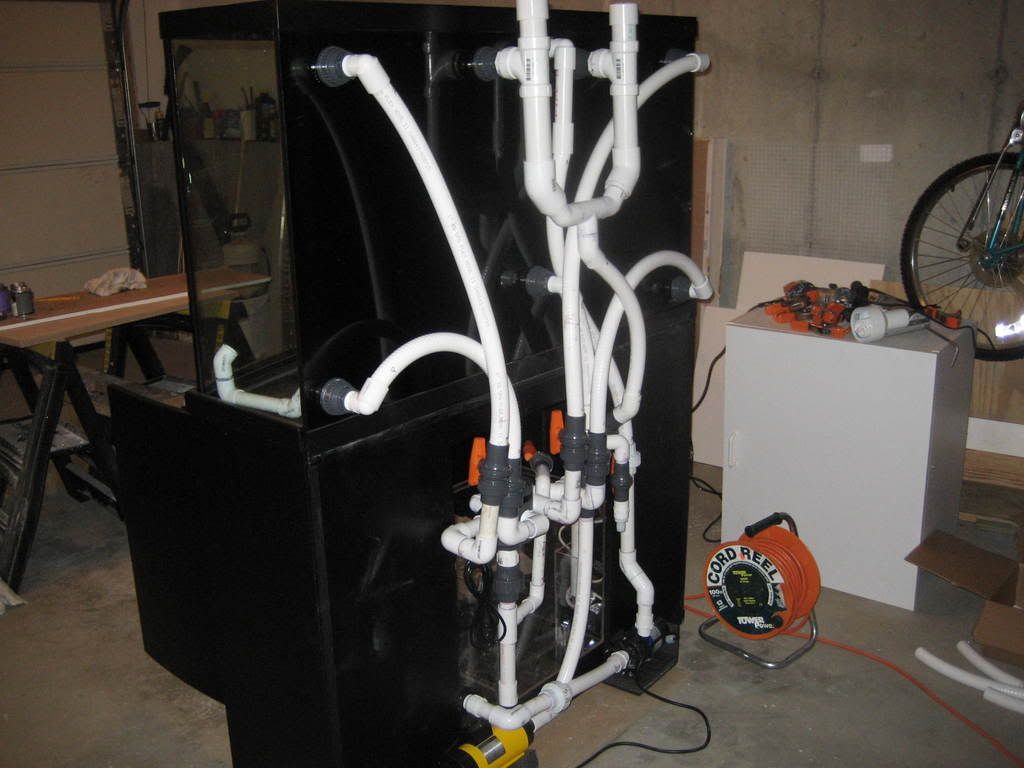 I also found that the bowfront design severely limited my options as far a prebuilt sumps go. Without centering the sump/refuge in the cabinet and wasting alot of space, the maximum front-to-back dimension is 12". With no luck finding a prebuilt that was what I wanted and that would fit and with even less luck locating a fabricator I steeled myself on Melev's site and decided to build my own sump/refuge: 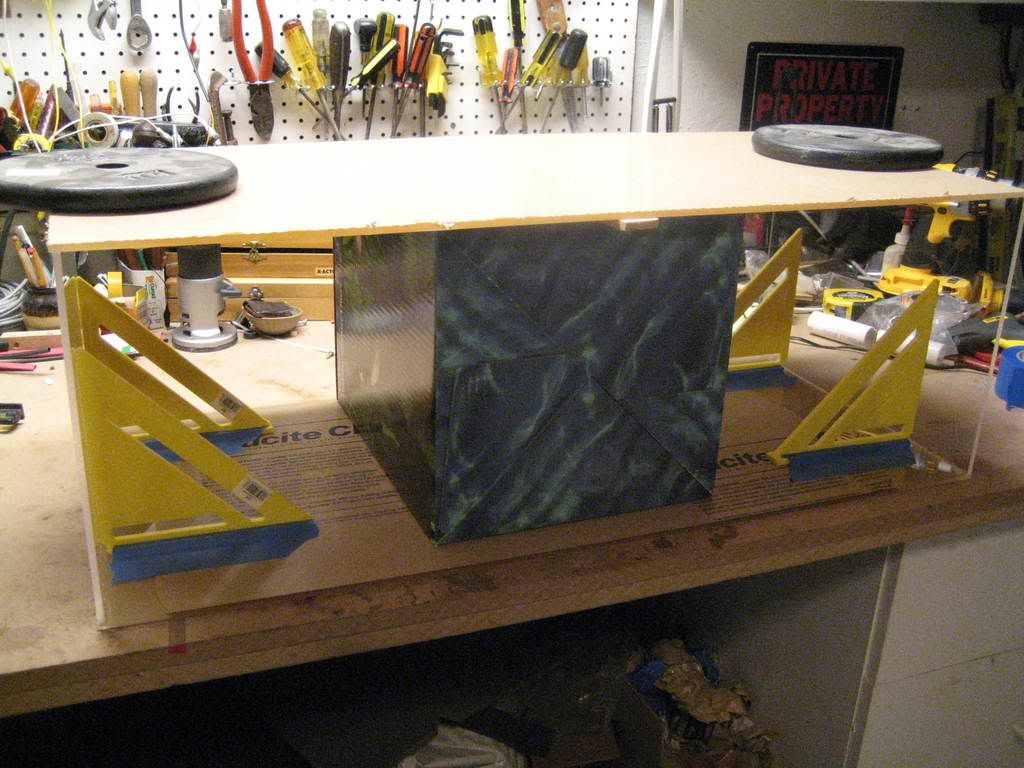 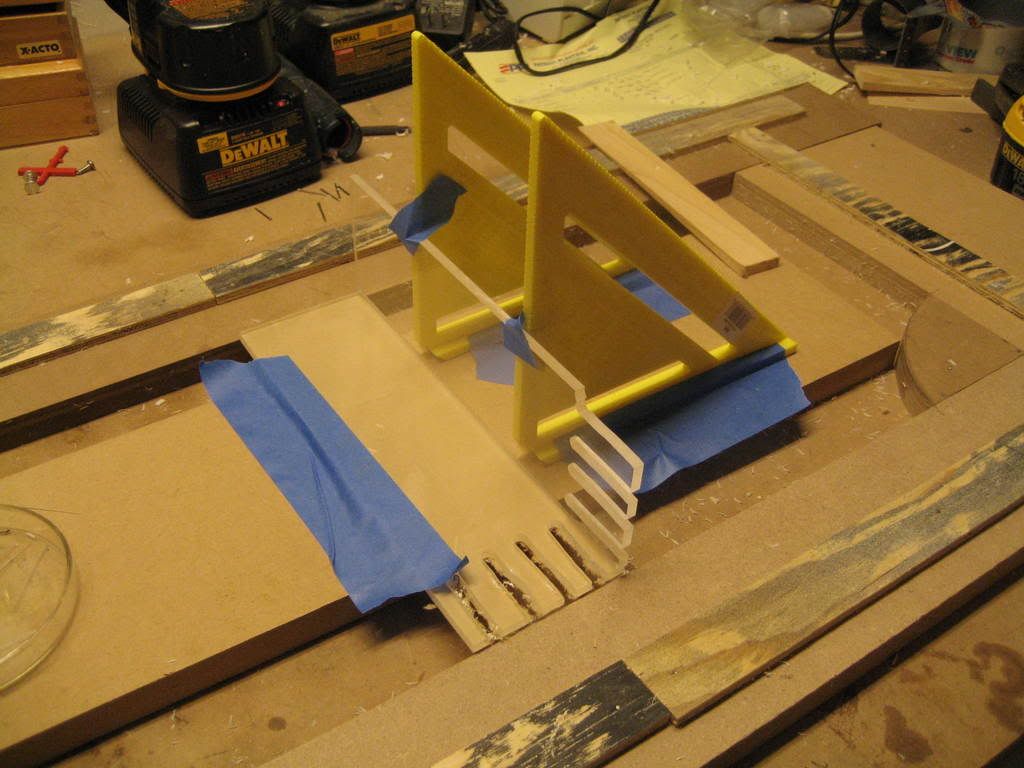  It didn't come out quite as professional looking as far as the seams went and I did have a pin-hole leak on water test (that was easily remedied with some 30min 2-part epoxy) but it ended up being exactly what I wanted. The overflow feed is split between the skimmer section (left) and the refugium (right) so the refuge gets 'raw' tank water and the relative flow-throus can be controlled. Both the skimmer section and refuge dump into the return section (middle). The sump is 34" long x 12" deep by 16" high. The water level in the skimmer and return is 10" and the water level in the refuge is 12". The refuge baffle is black. 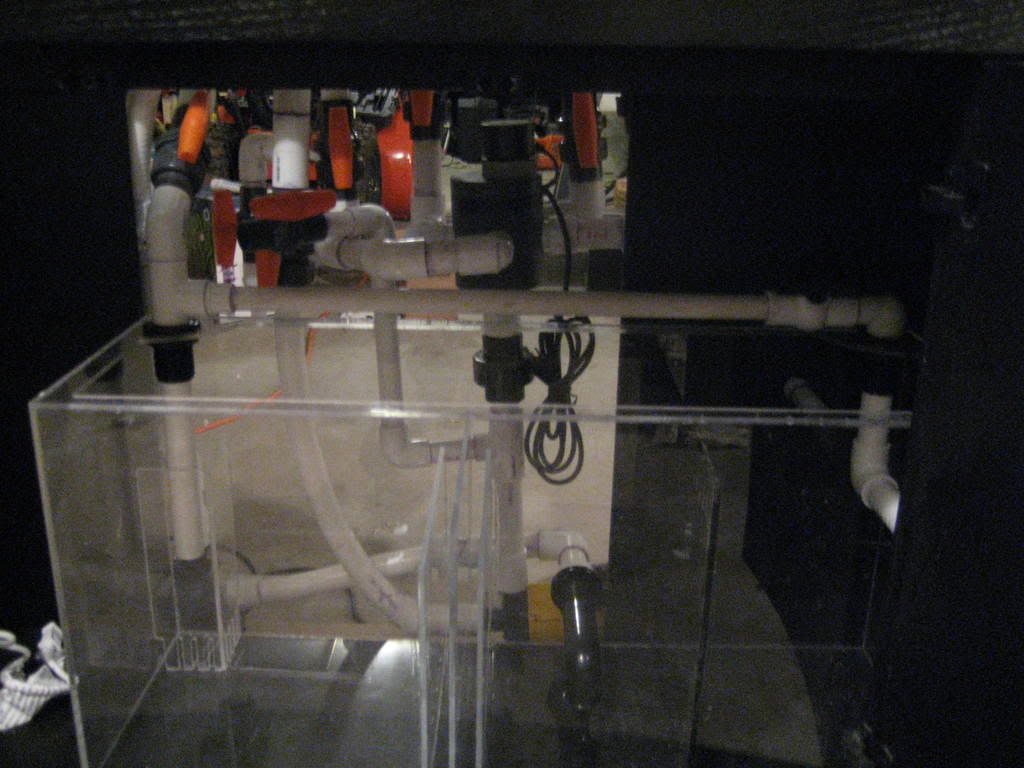
|
|
|
|
|
04/21/2008, 10:57 AM
|
#5 |
|
Premium Member
Join Date: Jan 2008
Location: MA
Posts: 1,232
|
Very tight real estate...
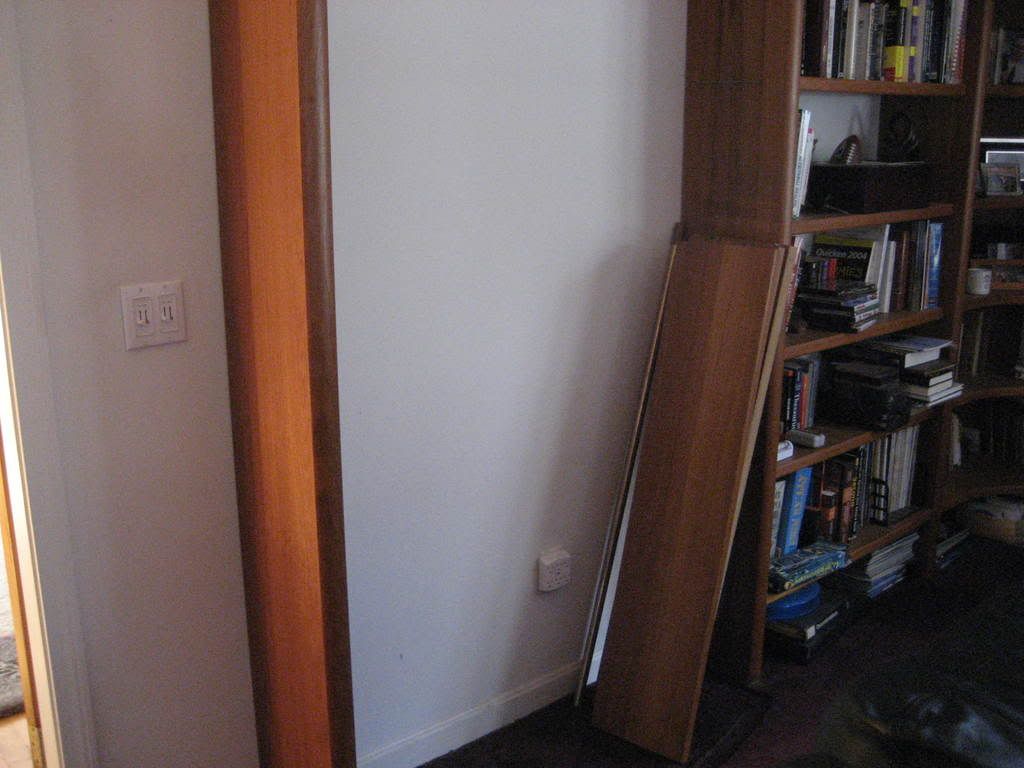
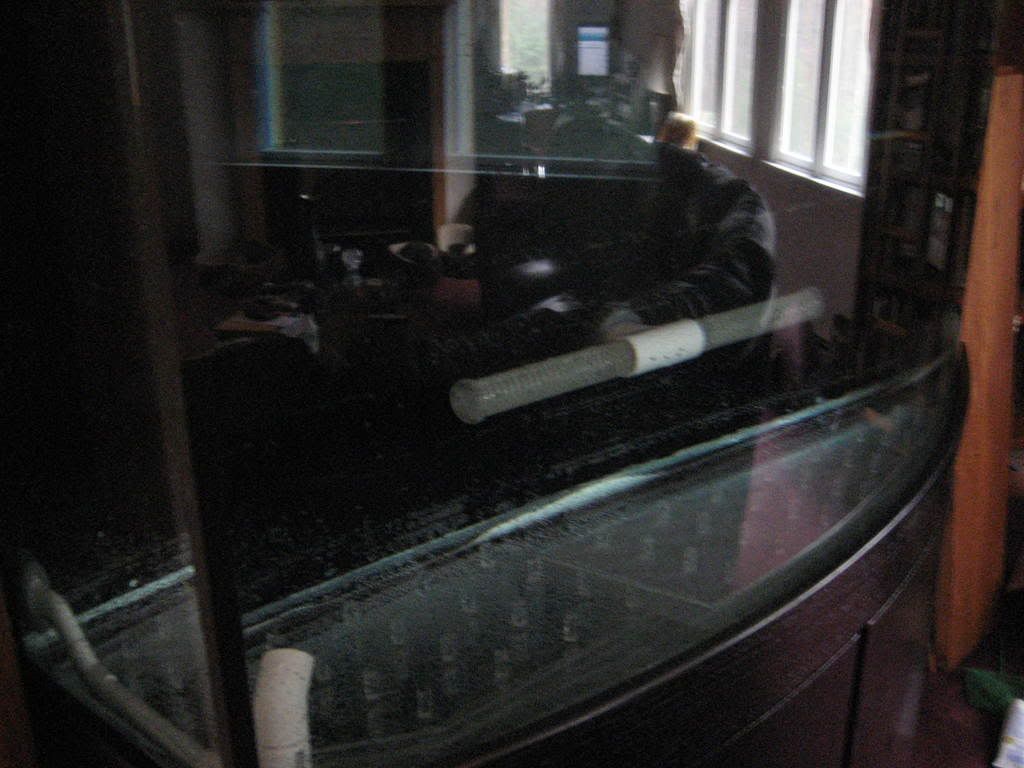
As mentioned, there is no way I can have access to the rear of the tank except through the cabinet. The setup is going to fit into a 'library system' in our living room where the old FW setup was:
 RO/DI water was going to have to come from the basement. I also wanted a drain line to facilitate water changes. To accomodate this I installed one of those plumbing inserts used in laundry rooms. It has a JG fitting for the RO/DI, a 3/4" barb for a drain line and an electrical line to control the RO/DI unit for top-offs: 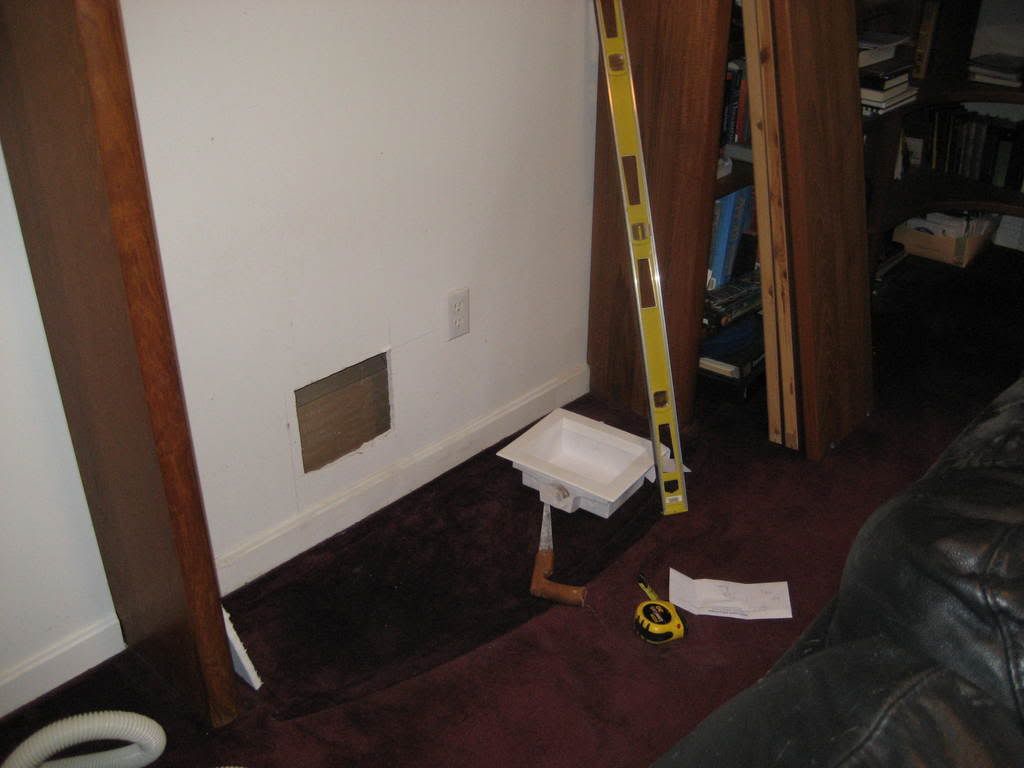  Checking the fit: 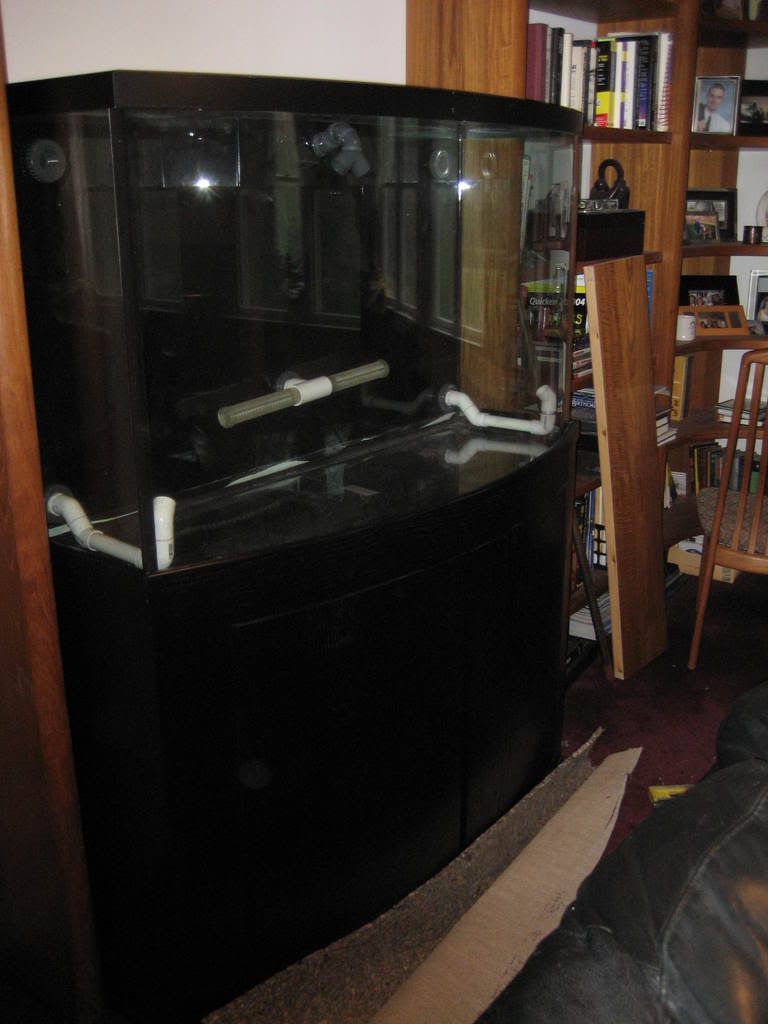
|
|
|
|
|
04/21/2008, 11:27 AM
|
#6 |
|
Premium Member
Join Date: Jun 2006
Location: South FL
Posts: 1,541
|
Wow, great work. I love seeing custom stuff being done. Did you build the overflow yourself?
__________________
Out of the hobby, but thinking of rejoining Current Tank Info: 92 Reef, 10 Reef |
|
|
|
|
04/21/2008, 11:35 AM
|
#7 |
|
Premium Member
Join Date: Jan 2008
Location: MA
Posts: 1,232
|
putting it all together...
Here's how the plumbing system is controlled:
 I went with an AquaC EV-180 for a skimmer and am very pleased with the decision: 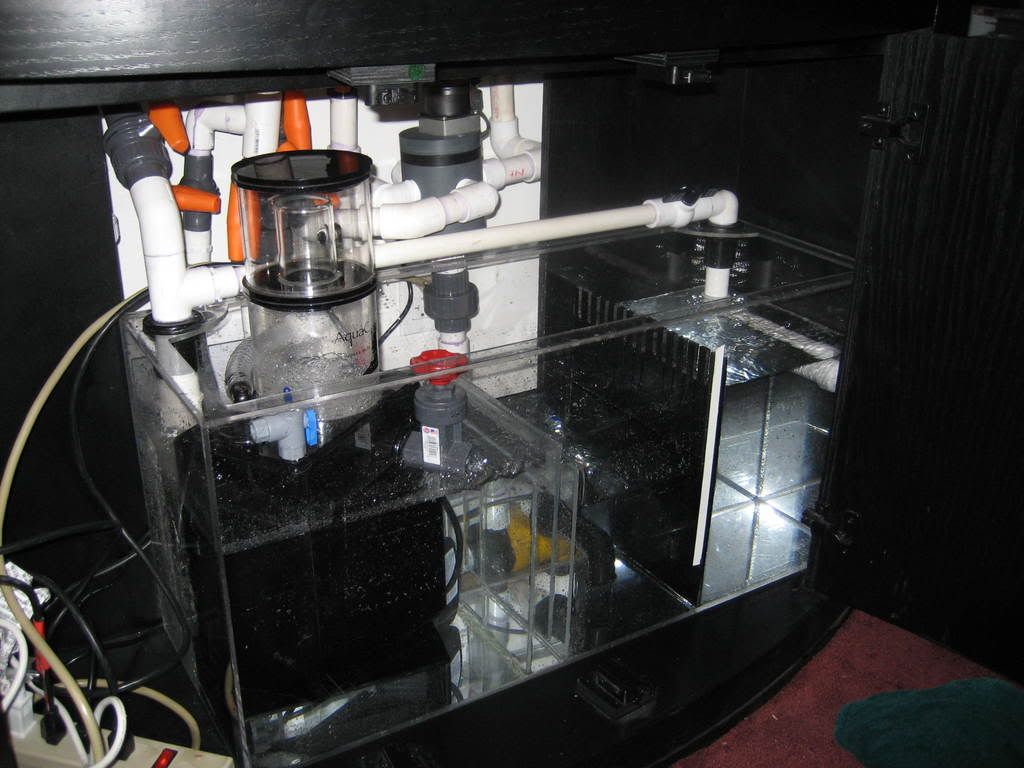 RO/DI is from a Filter Guys Reef Miser 150GPD unit that I modded to allow for a boost pump. Here is the install in my basement. The power supply for the boost pump and solenoid is obviously temporary: 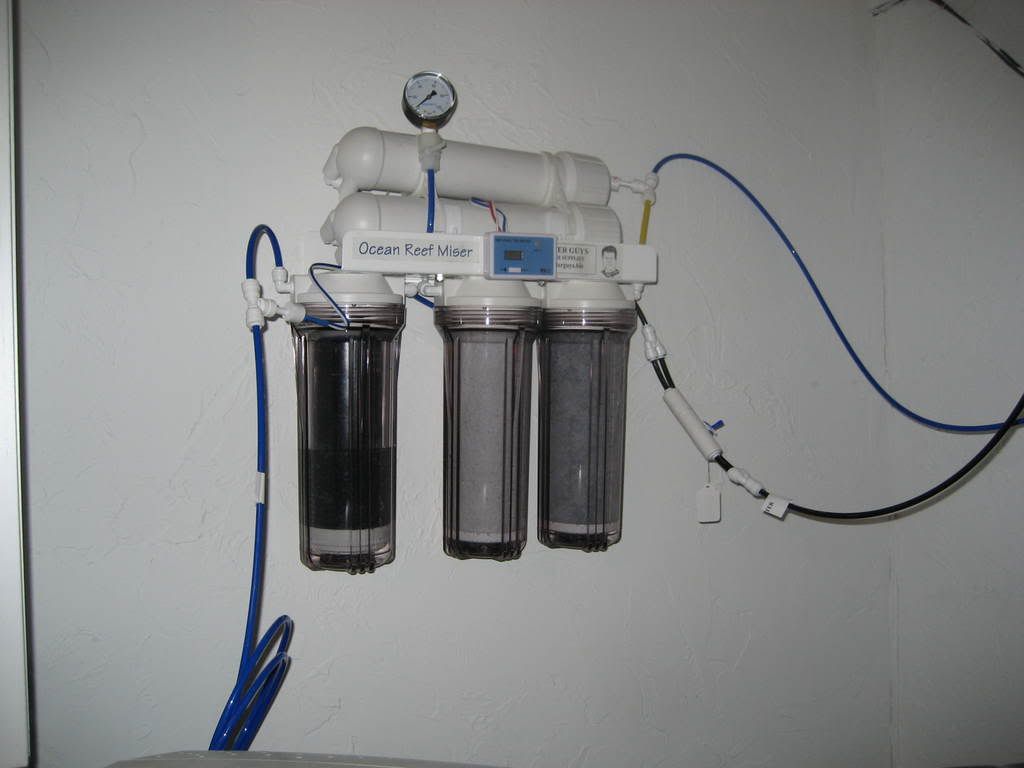 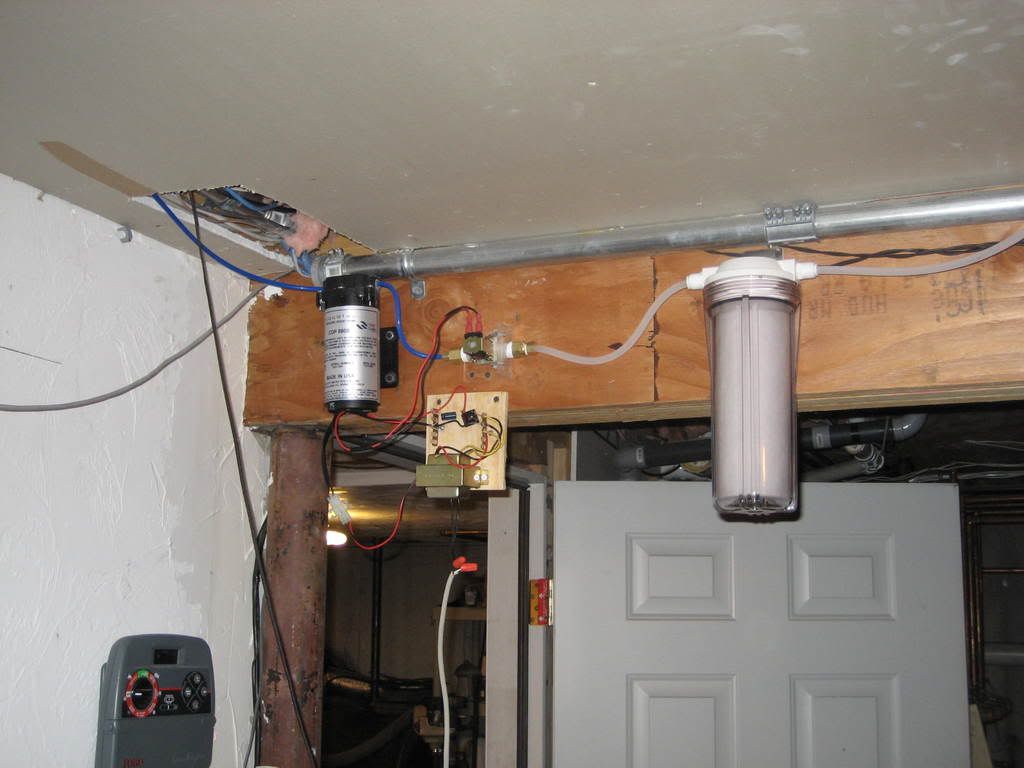 Installation of some rug-surfer-disuader-panels: 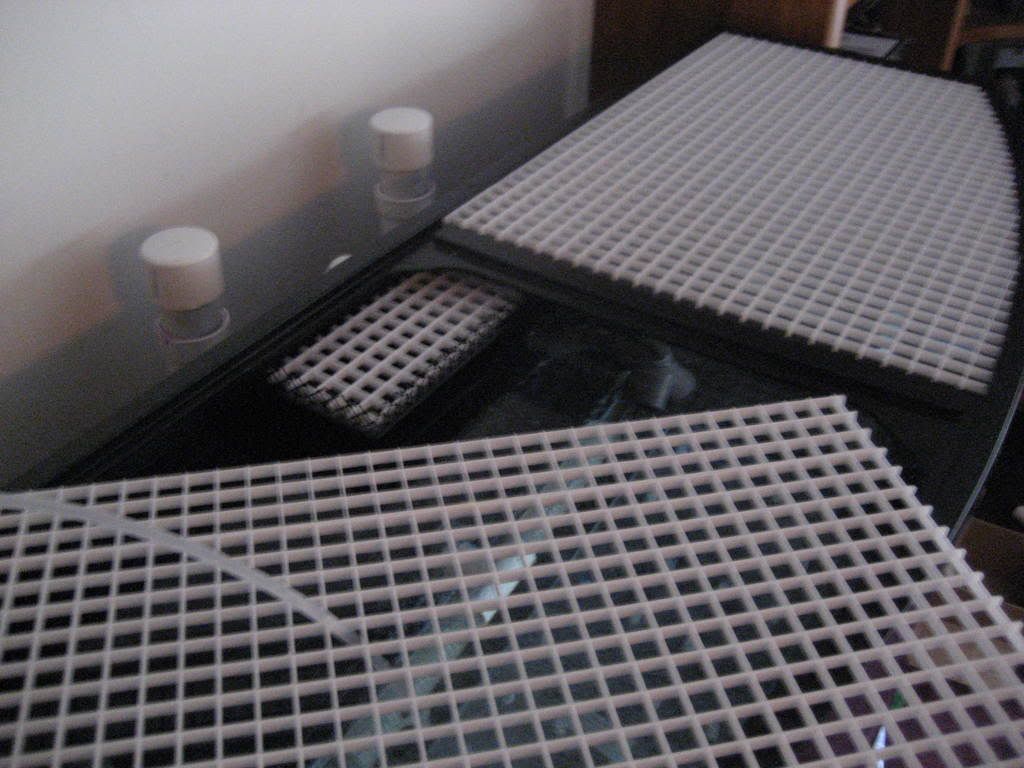 The fuge comes alive: 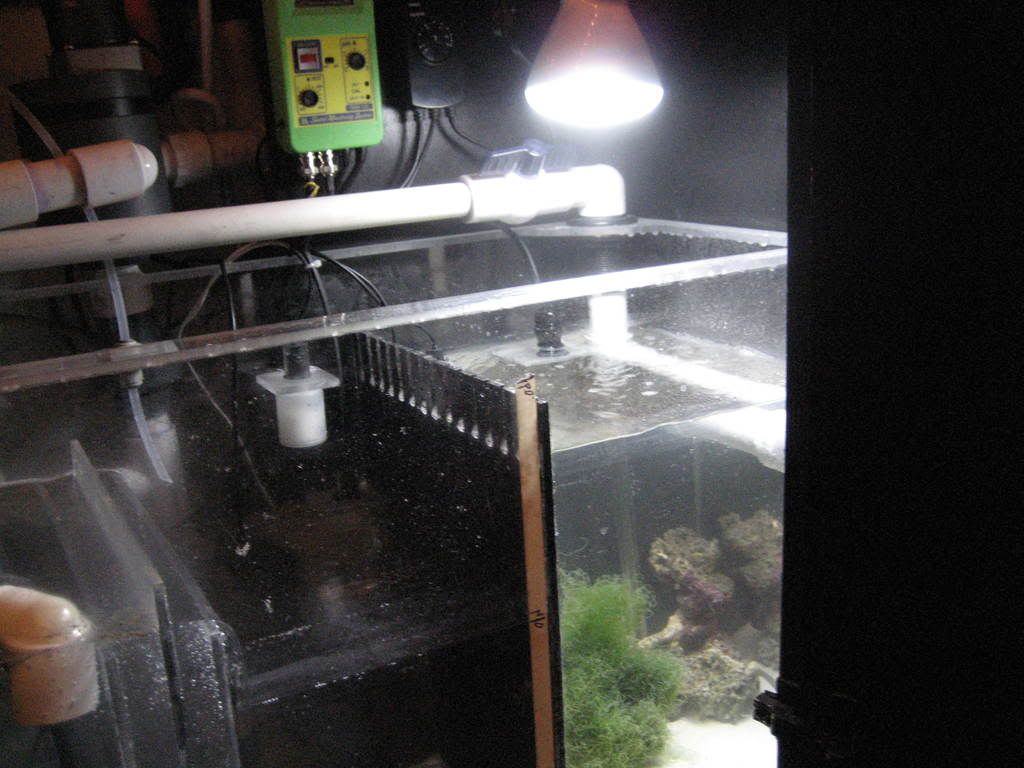 After the LR went in I could hardly keep up with the skimmer. Skim you animal, skim... 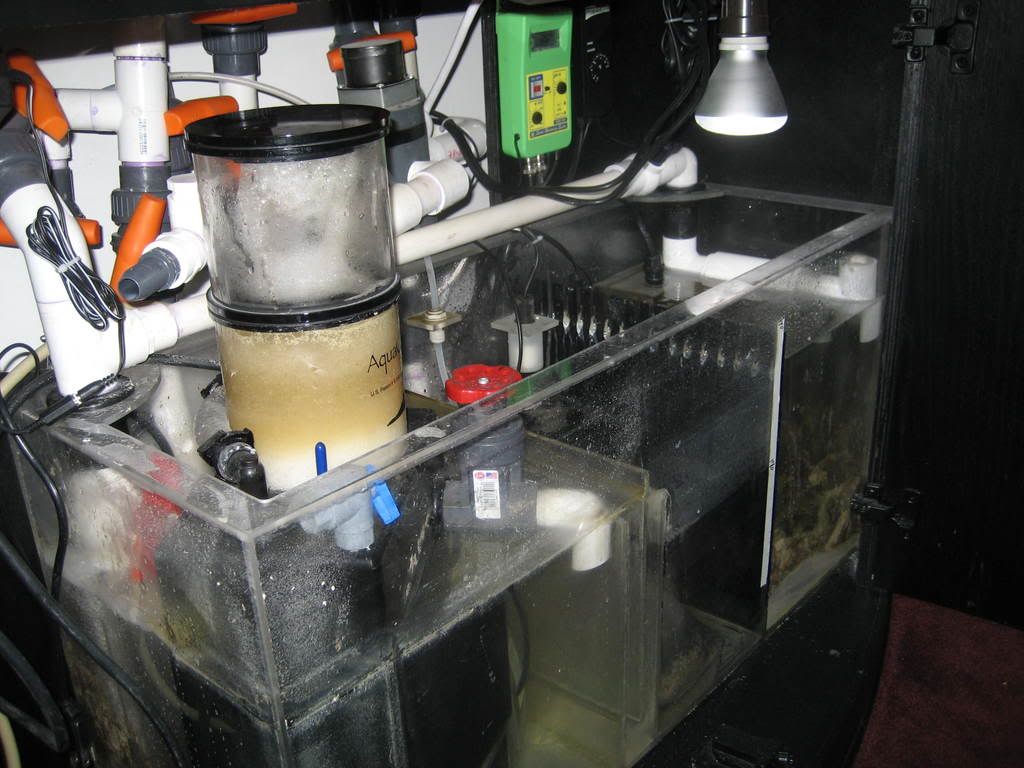 I used a combination of 35lbs of gulf LR from SeaLife and 108lbs of Lalo from LiveAquaria. The SeaLife rock was trulay alive with hitchhikers. Here's our aquascape: 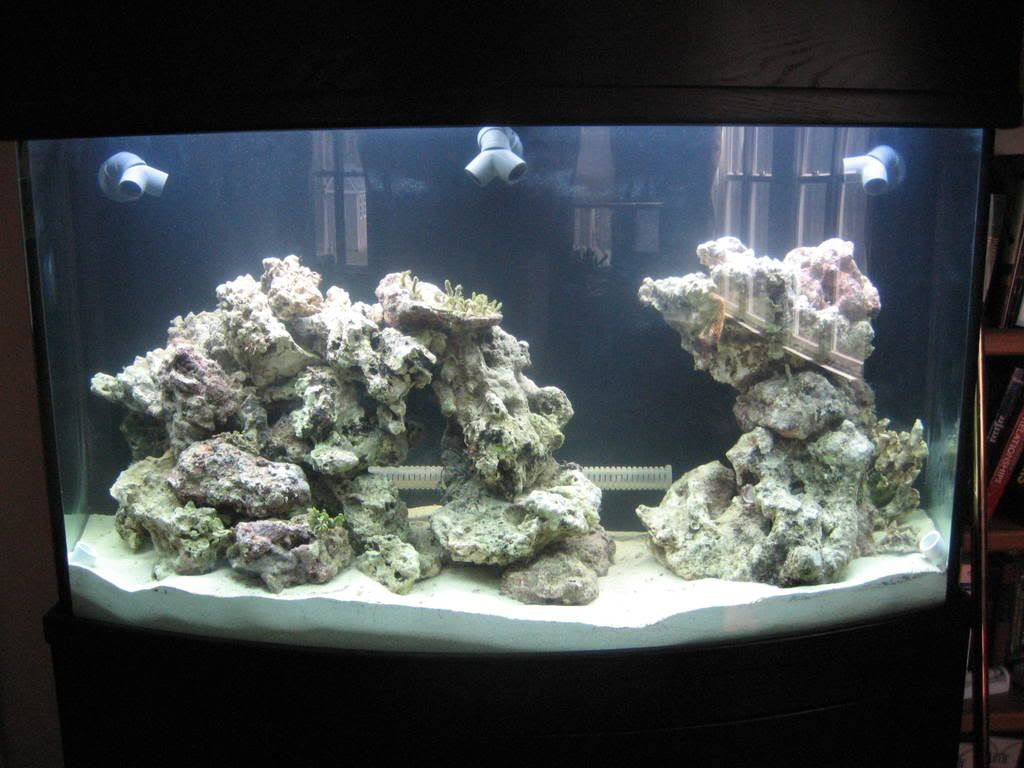 And the finished install as we wait for the cycle to complete. Day-by-day all manner of sealife is popping up. Already there are pods everywhere. 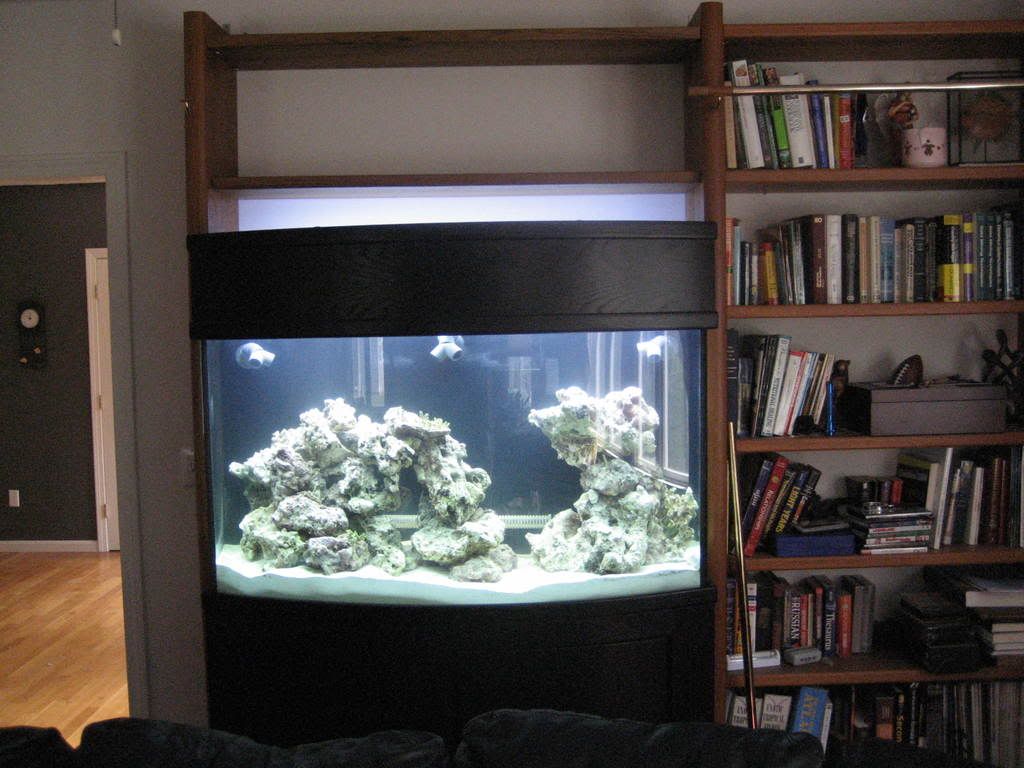
|
|
|
|
|
04/21/2008, 11:39 AM
|
#8 | |
|
Premium Member
Join Date: Jan 2008
Location: MA
Posts: 1,232
|
Quote:
|
|
|
|
|
|
04/21/2008, 12:07 PM
|
#9 |
|
Registered Member
|
great build and like you stated--very picture intense
Could you possible repost on this thread--this would be a great example for people to access: http://www.reefcentral.com/forums/sh...readid=1349443
__________________
I prefer my substrates stirred but not shaken Current Tank Info: 150gal long mixed reef, 90gal sump, 60 gal refugium with 200 lbs live rock |
|
|
|
|
04/21/2008, 12:30 PM
|
#10 |
|
Registered Member
Join Date: Sep 2007
Location: Zion Il
Posts: 959
|
What kind of lighting are you using Very nice build
__________________
Ken Current Tank Info: 90 Gal mixed reef 55 Gallon basement pump up Sump 25 Gal fuge 2 Mp40 DIY led light fixture Bubble King Mini 200 Gen2 skimmer BRS Duel reactor |
|
|
|
|
04/21/2008, 12:41 PM
|
#11 |
|
Premium Member
Join Date: Jan 2008
Location: MA
Posts: 1,232
|
Some additional notes and PIA's...
I've read so many articles over the last few months that I've lost track of the source of many ideas I used. One was a system to keep the LR off the tank bottom while providing some 'anchoring' of the rock. It consists of sheets of acrylic that have acrylic rod posts spaced in a grid pattern. The tops of each post are fabricated into a 'crown' to provide some 'grab'. You can kindof see them in this picture:
 A major non-tank issue was the library the tank is set into. The original tank stand (a wood AGA stand) fit nicely into the 48" space with only some minor modifications to the tank stand. We wanted the new tank higher and decided on the Oceanic black oak stand ($$$) and there was NO way I was going to tray and modify it. Simply not doable. That meant I had to fabricate new teak shelves for the library unit that were 50" wide. The valve in this picture provides an auxiliary feed from the closed-loop pump. It can provide flow with either the closed-loop in operation or, with the 4 closed-loop return valves closed, with the closed-loop shut down. I drove an external canister filter (NuClear 533 pleated cartridge filter) to clear the water after the substrate was added using this feed. 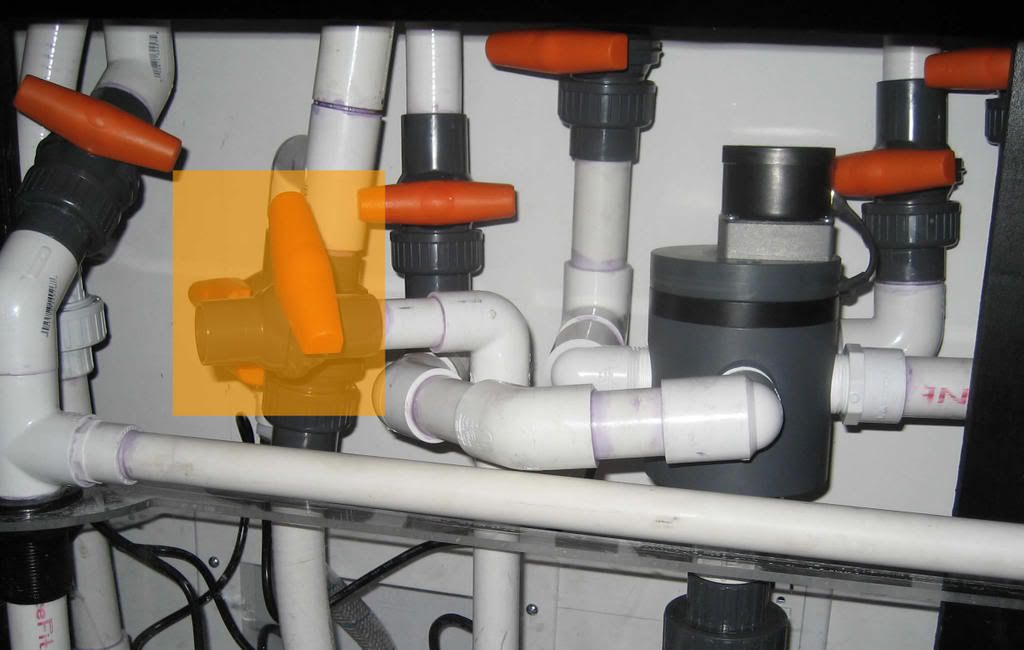 The valve has two ports that will have female, valved quick disconnects. One will drive a pair of PhosBan Reactor 150's (one for carbon one for PhosBan) and the other will eventually drive a calcium reactor. The quick disconnects will make changing-out units easier if I need some external filtration. We also have an Ozotech O3 system that I'm bringing over from the FW system but have yet to install. For lighting we're using the Coralife Aqualight PC fixture we had on the FW tank but with Actinics and 10k's. The lighting will be upgraded as we get closer to adding livestock. |
|
|
|
|
04/21/2008, 01:52 PM
|
#12 |
|
Registered Member
Join Date: Dec 2007
Location: Canada
Posts: 890
|
I like how you have set it up. I wish i had taken my time and planned it out. You have a great start here.
__________________
180g FOWLR "Sun bathing on the floor next to your tank is not, in any way equivalent to spending time outdoors." |
|
|
|
|
04/21/2008, 05:19 PM
|
#13 | |
|
Premium Member
Join Date: Jan 2008
Location: MA
Posts: 1,232
|
Quote:
|
|
|
|
|
|
04/21/2008, 07:14 PM
|
#14 |
|
Registered Member
Join Date: Mar 2008
Location: Akron
Posts: 217
|
Sweet pictures.......... the fun starts now
__________________
up up down down left right left right A B A B select start Current Tank Info: 72 bowfront 20 gallon refugium MSX160 Skimmer t5 lighting powered by icecap 660 90 lbs live rock |
|
|
|
|
05/01/2008, 10:29 AM
|
#15 |
|
Premium Member
Join Date: Jan 2008
Location: MA
Posts: 1,232
|
I've started addressing some of the sub-systems that will come on-line as the tank finishes its cycle. I installed the quick-disconnects in the auxiliary feed line (for the PO4 and AC reactors) and the future Ca reactor. These QDC's are valved so they won't spray when the line is disconnected. Pretty handy...
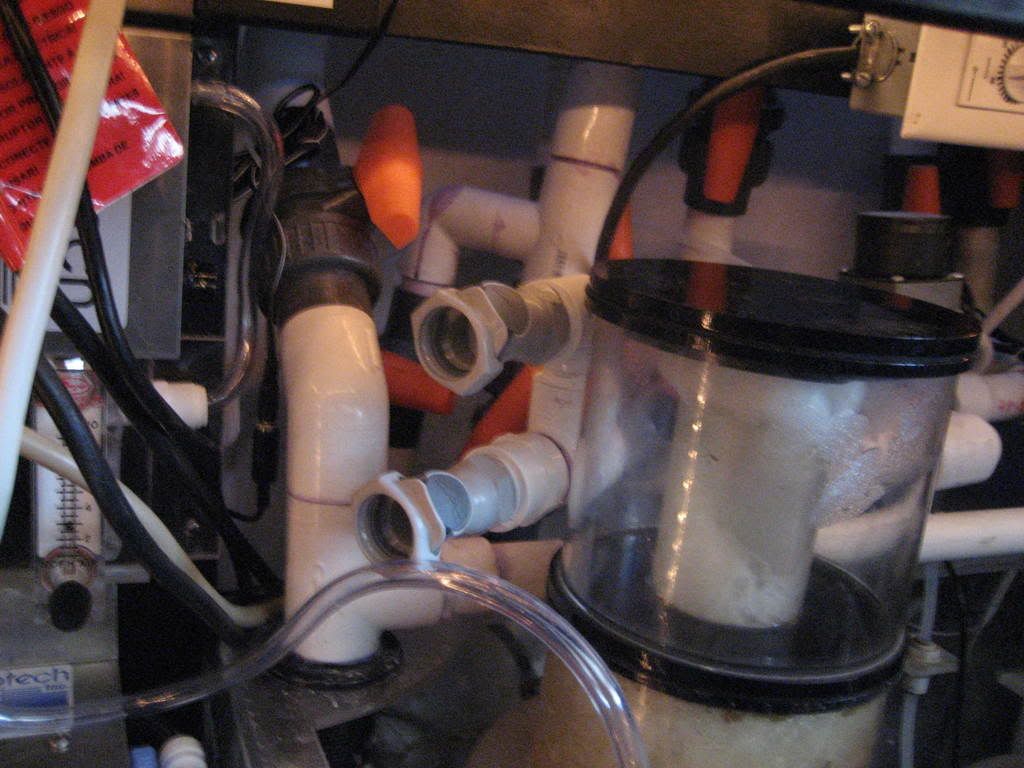 I've also installed my ozone system. The mixing station allows me to set the correct air flow through the unit. Since this feeds into a 3/8in JG fitting on the EV-180 skimmer and air flow into the skimmer has everything to do with the skimmer's function I found it was important to be able to control both sources of air to the skimmer: the 180's air valve and the feed to the JG fitting. 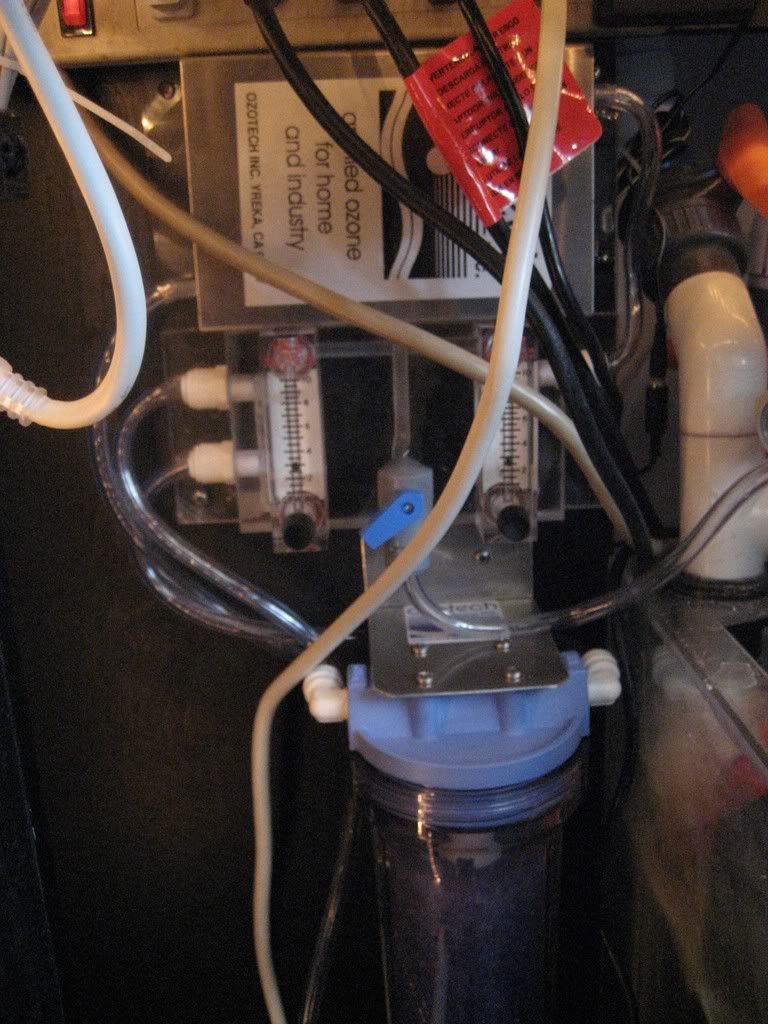
|
|
|
|
|
05/01/2008, 11:49 AM
|
#16 |
|
Moved On
Join Date: Jun 2007
Location: Laguna Niguel, CA
Posts: 7,497
|
A fine outstanding job
 It makes me wish I had a basement to work with. |
|
|
|
|
05/01/2008, 12:33 PM
|
#17 |
|
Canuckian
Join Date: May 2007
Location: Winnipeg, MB
Posts: 1,276
|
Love your plumbing. It looks like a big old humboldt squid is attacking the back of your tank...
__________________
Working on a neeew tank! http://www.reefcentral.com/forums/showthread.php?p=25596043 |
|
|
|
|
05/01/2008, 01:40 PM
|
#18 | |
|
Premium Member
Join Date: Jan 2008
Location: MA
Posts: 1,232
|
Quote:
|
|
|
|
|
 |
|
|


