
|
|
 10/11/2008, 01:54 PM
|
#1 |
|
Registered Member
Join Date: Feb 2004
Location: Long Island, New York
Posts: 622
|
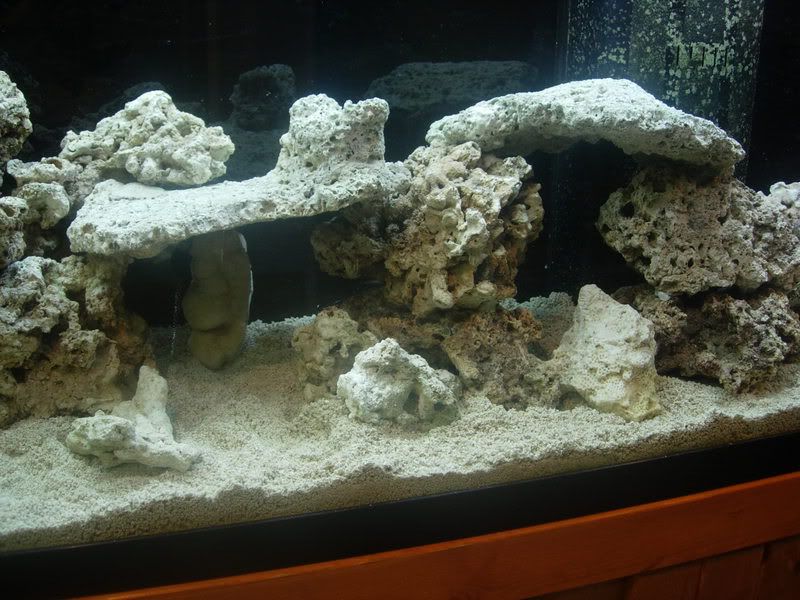
here's my aquascaping, all suggestions/comments welcome
Here's my aquascaping, I know I'm not the greatest at it so any suggestions/comments are welcome (fire away). My wife doesn't like that it seems to be all against the back glass, I also have 1 more really big piece of figi shelf that I dont know where to put it's where it will be stable. it only 18" from front to back and really hard to work with ( I knew I should have gotten a 180
 ). ).Thanks Gus[IMG] 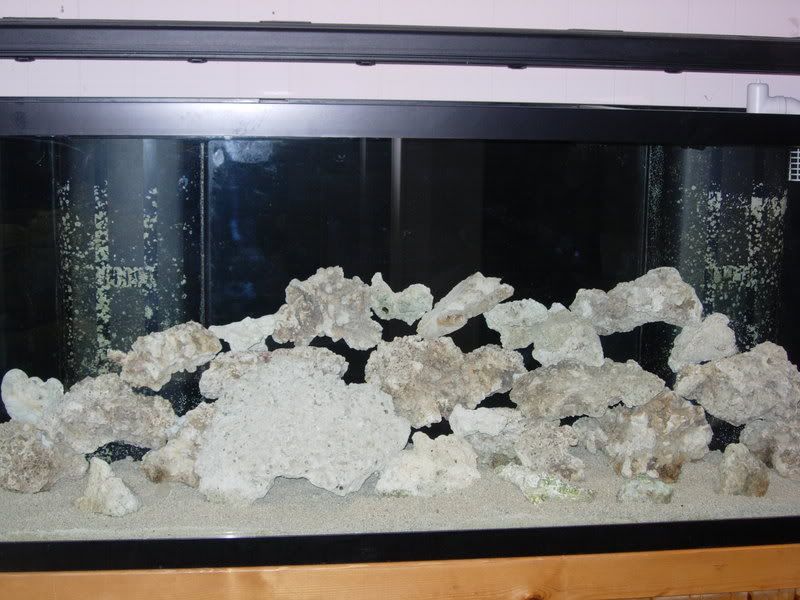 [/IMG] [/IMG] [IMG] 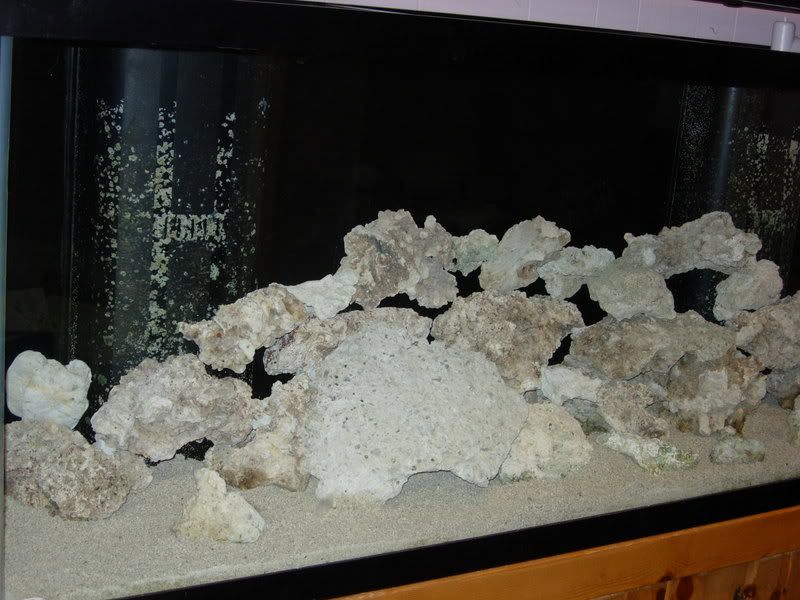 [/IMG] [/IMG] [IMG] 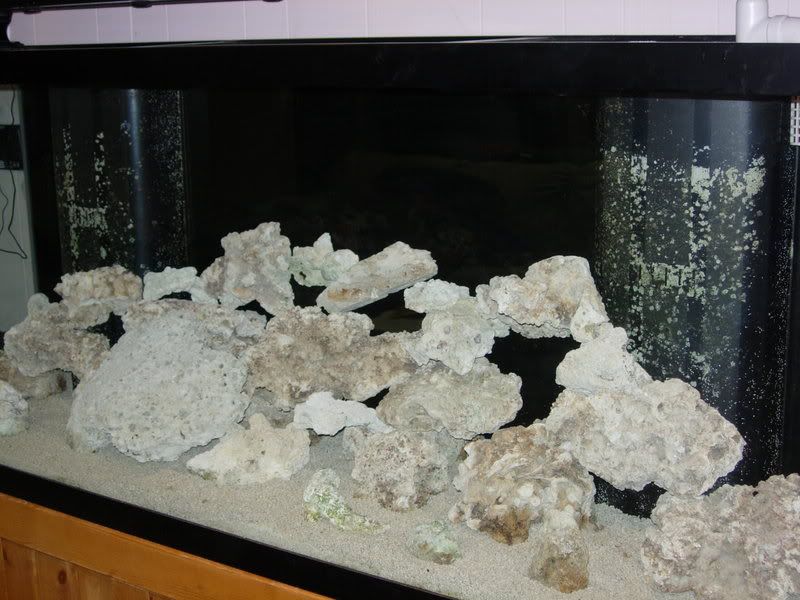 [/IMG] [/IMG]
__________________
Gus Current Tank Info: IM Fusion 20 Gallon |

|

|
|
10/11/2008, 02:48 PM
|
#2 |
|
Moved On
Join Date: Aug 2007
Location: Napa, CA
Posts: 1,091
|
Looks unnatural with the way you have those top rocks balancing against each other.
|
|
|
|
|
10/11/2008, 02:58 PM
|
#3 |
|
Registered Member

Join Date: Mar 2003
Location: Flower Mound, Texas
Posts: 561
|
Did you use any putty? The top rocks look unstable, you may get a rock slide. If i was setting it up i would lay the top rocks down. I know i spent forever doing the rockscape, it would never seem to look right

|
|
|
|
|
10/11/2008, 04:11 PM
|
#4 |
|
Registered Member
Join Date: Feb 2008
Location: California
Posts: 248
|
I would suggest using putty or drilling some holes in the rocks and inserting acrylic rods with super glue. You're just starting this project so getting it right in the beginning will save you many headaches down the road.
I got a large piece of cardboad and started stacking rocks until I was happy with the design. I used a 5/16" mason drill bit to drill the rocks and inserted 2.5" x 1/4" acrylic rod to bond the rock together in my cave. You wife is right you should have a gap of at least a couple of inches to allow for good water flow behind the structure.I would build a nice big cave with the rock you have using the big one for the top. Use putty or acrylic to prevent a rock slides. Keep your rock work away for the tank walls and you will have much better water quality. It took me multiple (at least a dozen) attempts to get it right, believe me it is a work in progress in the early stages of a new tank. Wait till the wife is away before you start pulling dripping rocks out of the tank  . . Get ideas from other tanks. Check out some tanks of the month on this site to start. |
|
|
|
|
10/11/2008, 06:07 PM
|
#5 |
|
Registered Member
Join Date: Apr 2008
Location: Long island, NY
Posts: 497
|
maybe do some pillars & caves to make it look more natural, better flow and to remove the danger of crushing several hundred $$ worth of livestock.
|
|
|
|
|
10/11/2008, 06:17 PM
|
#6 |
|
Registered Member
Join Date: Feb 2004
Location: Long Island, New York
Posts: 622
|
thank you everyone for your suggestions. I did use some putty on the bottom rocks.
whats the best way to make caves? it's hard aquascaping this tank because it's only 18" from front to back and then the overflows get in the way. I will try to get more room between the back glass. Now there's no water in the tank right now, do you think it's easier with or without water. I know the water kind of helps stabilize it a little.
__________________
Gus Current Tank Info: IM Fusion 20 Gallon |
|
|
|
|
10/11/2008, 06:26 PM
|
#7 |
|
Registered Member
Join Date: Oct 2006
Location: Northern New Mexico
Posts: 17,420
|
try to avoid the wall, think in terms of islands and pillars.
here is my new aquascape, i am still deciding on what sand to go with. 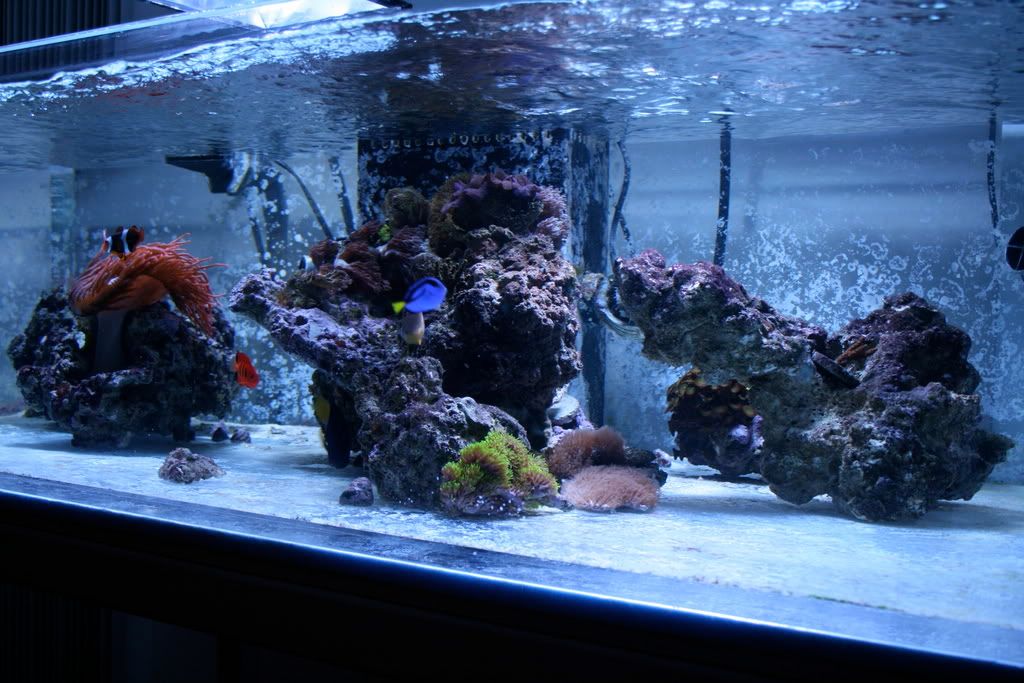
__________________
Nick. Conehead. Shallow Reef club. Current Tank Info: 48"x27"x14" Envision Acrylic rimless, 6x39w ATi Sunpower, Custom ATB Deluxe Skimmer, 4x tunze nano stream,ATB flowstar 1500, ACJR, Tunze osmolator. |
|
|
|
|
10/11/2008, 06:32 PM
|
#8 |
|
Registered Member
Join Date: Feb 2006
Location: Long Island N.Y
Posts: 159
|
I would also drill out some of your shelfs so you can peg your acros instead of epoxy or glue ,looks alot better that way.
|
|
|
|
|
10/11/2008, 07:43 PM
|
#9 |
|
Registered Member
Join Date: Feb 2004
Location: Long Island, New York
Posts: 622
|
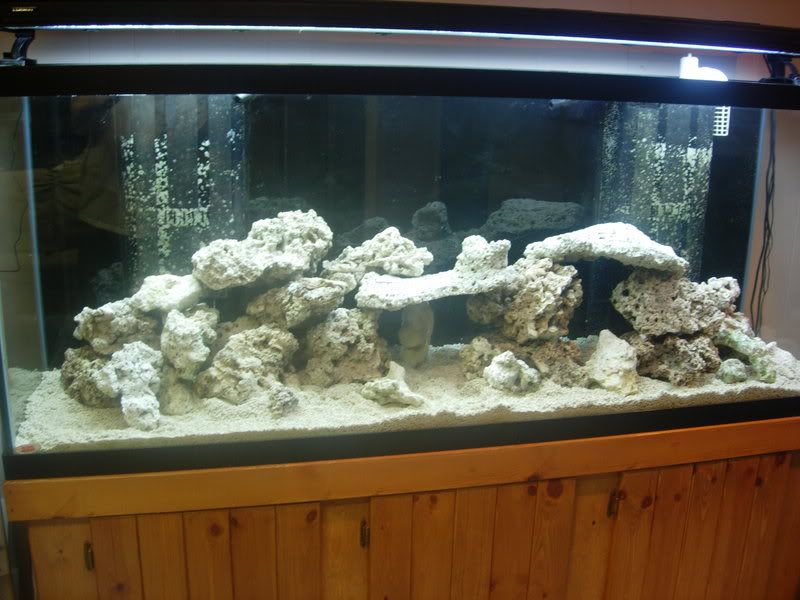
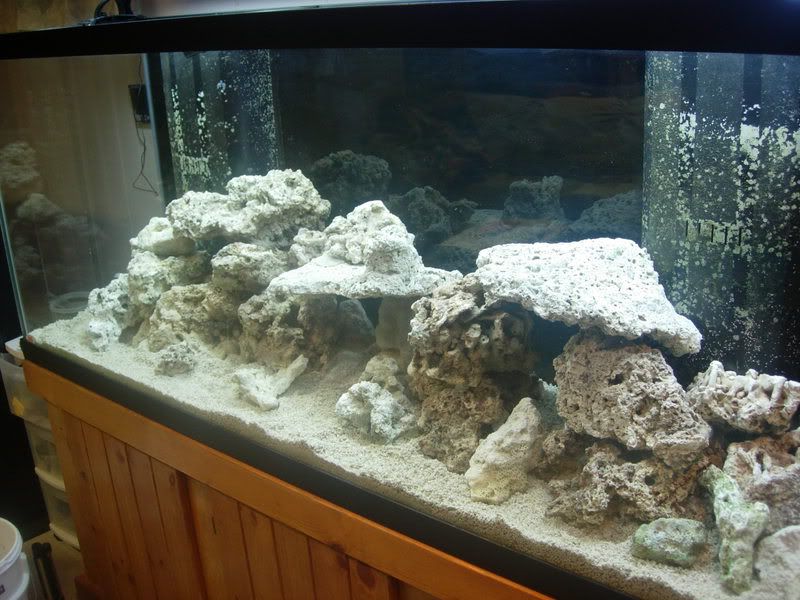
Thanks for all your help.....
I'm I getting there? I tried to create a few big caves also there's a good 4" space from the back glass. [IMG] 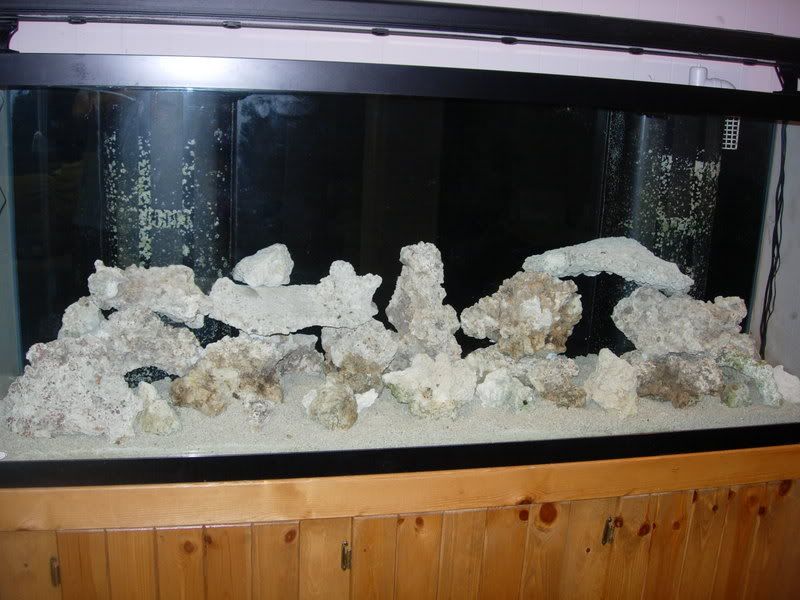 [/IMG] [/IMG]
__________________
Gus Current Tank Info: IM Fusion 20 Gallon |
|
|
|
|
10/11/2008, 08:00 PM
|
#10 |
|
Registered Member
Join Date: Oct 2004
Location: connecticut
Posts: 1,699
|
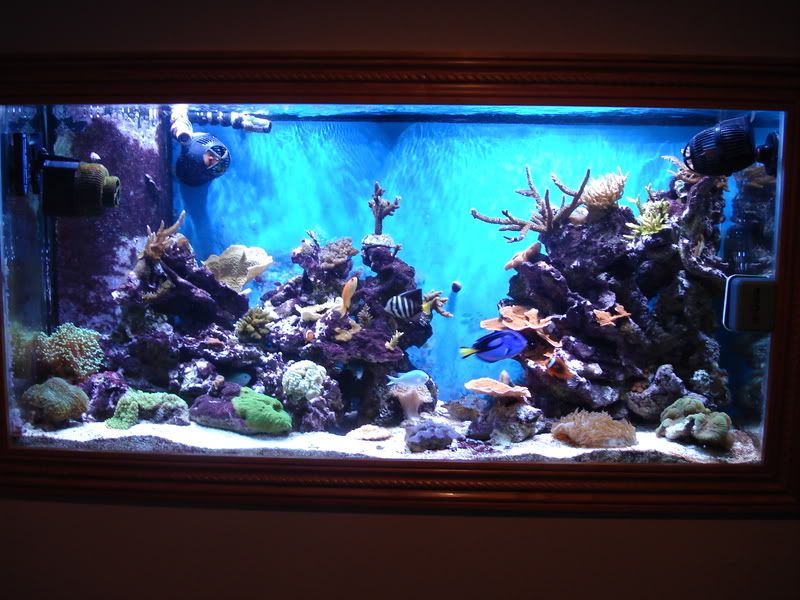
Agreed that it looks unnatural if you want honesty. The top rocks are balancing. I didn't glue or epoxy any of mine in my 90 (and anyone who has a 90 knows it isn't the easiest to scape). I like the island look and I try no matter what to put rocks as they would look naturally. Rocks would never fall into place like you have them. I'm not trying to sound like an expert and certainly mean all due respect. I think if you try to separate islands, you will like it much better. Here's a pic of mine - I could use some retouching myself.
|
|
|
|
|
10/11/2008, 08:26 PM
|
#11 |
|
Registered Member
Join Date: Feb 2004
Location: Long Island, New York
Posts: 622
|
gsmguy and giants4pc, I do like both of your aquascaping, and I appreciate your honesty. Giants4pc how did you get all your rocks to pile into an island like that. I was trying something like that but I was nervous about them falling and trying not to lean them against the back glass
__________________
Gus Current Tank Info: IM Fusion 20 Gallon |
|
|
|
|
10/11/2008, 08:39 PM
|
#12 |
|
Registered Member
Join Date: Oct 2004
Location: connecticut
Posts: 1,699
|
Many people prefer to build first on the glass and then add the sand. I don't do that. I built on top of the sand because that's how I feel it is best stabalized. I've grown accustomed to aquascaping because I'm never satisfied. I've been doing it for a while. It's just trying to get the right piece positioned in the right crevice/location - I try to "see" it before it's there. I think I got a little lucky too. But, it's been like this for months without problems. No secrets other than that. You have several smaller pieces. Put the flat pieces down first and build from there. I do use the back glass as support where needed.
|
|
|
|
|
10/11/2008, 11:51 PM
|
#13 |
|
Registered Member
Join Date: Feb 2008
Location: Salt Lake City, Utah
Posts: 2,831
|
i used to build away from glass, and then had a pile fall over, i heard it across the house, scared me bad. now i just stack against the back. i agree. you need to add some larger caves, and not worry as much about the small openings. try and go for the two islands look. make two separate piles and ditch trying to make it all one continuous pile. i used to do that too, but like it much more with depth and some dimension.
here is my before:  and after: 
__________________
The friendliest GIANT you'll ever meet. Current Tank Info: 200g Marineland Deep Dimension (Lumenmax Reflectors/Dual PFO 400w/Radium 20K) and 2xFrag Tanks (One TEK T5 fixture and one MH, Galaxy/Phoenix) on same system w/100g sump w/6"x100g DSB, AquaC EV-1000 Skimmer, Reeflo Barracuda return pump |
|
|
|
|
10/11/2008, 11:55 PM
|
#14 |
|
Registered Member
Join Date: Apr 2006
Location: jackson
Posts: 1,371
|
do what you like. don't worry about what others think.
but just be careful about staking rocks, you dont want them falling. it just takes time and trial and error to get it right, but even then you wil be changing things around from time to time. this silly hobby will make you nuts. seriously.
__________________
"it's not the heat, it's the humility" Current Tank Info: 90 gal. sps mostly. bubble master 200. pci cl-300 chiller |
|
|
|
|
10/12/2008, 06:25 AM
|
#15 |
|
Registered Member
Join Date: Aug 2007
Location: Chester County PA
Posts: 1,508
|
I'm wondering how much rock you have? It seems like the amount may be a little short of the lb. per gallon goal, though I am just guessing. It also looks like you have a lot of smaller rocks, which may be adding to your challenge. You might want to look for a couple of larger, but fairly flat pieces to form the bases for the smaller rocks. I really like the island look I have seen in some tanks on here, where there are two distinct "islands" of rock with some swimming space in between. If you do this, I would make one a bit higher than the other. To most people, a little asymmetry looks better...
__________________
Lynn 1 horse, 1 dog, 2 cats, small pond with a few koi. The fish tank is gone. |
|
|
|
|
10/12/2008, 09:03 AM
|
#16 | |
|
Premium Member
 Join Date: Oct 1999
Location: Victoria, BC, Canada
Posts: 1,367
|
Quote:
a) it's not necessary with appropriately sized equipment b) less LR allows for more flow if the aquascape isn't a pile of rocks or a rock wall and, therefore, less rock allows for improved filtration capabilities (obviously there's a happy medium at play here) c) more LR in a 90g tank which is quite narrow to begin with will force you to start building what looks like a retaining wall instead of building unique open shapes that accentuate the height of a 90g tank.
__________________
Andrew --- "mens sana in corpore sano" --- Current Tank Info: SPS Dedicated 24x24x20 Trimless with Beananimal Overflow | 20 g Sump | Bubble King Mini 160 | Biopellets in TLF Reactor | ATI Sunpower 6 x 24W T5HO | Vortech MP20 | Tunze Nanostream 6025 | Eheim 1260 Return | GHL Profilux Standalone Doser |
|
|
|
|
|
10/12/2008, 09:20 AM
|
#17 |
|
Registered Member
Join Date: Sep 2007
Location: Kenwood, Ohio
Posts: 4,073
|
Gusto.
Take you rocks and try stacking them into three separate towers, going as high as possible while keeping them stable. You have some great puzzle piece type rocks that would link together really well. |
|
|
|
|
10/12/2008, 05:00 PM
|
#18 |
|
Registered Member
Join Date: Feb 2004
Location: Long Island, New York
Posts: 622
|
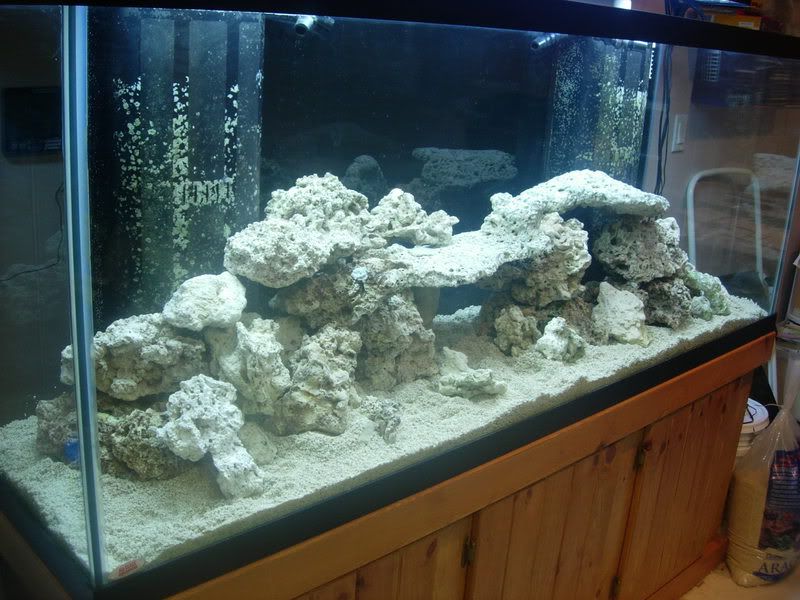
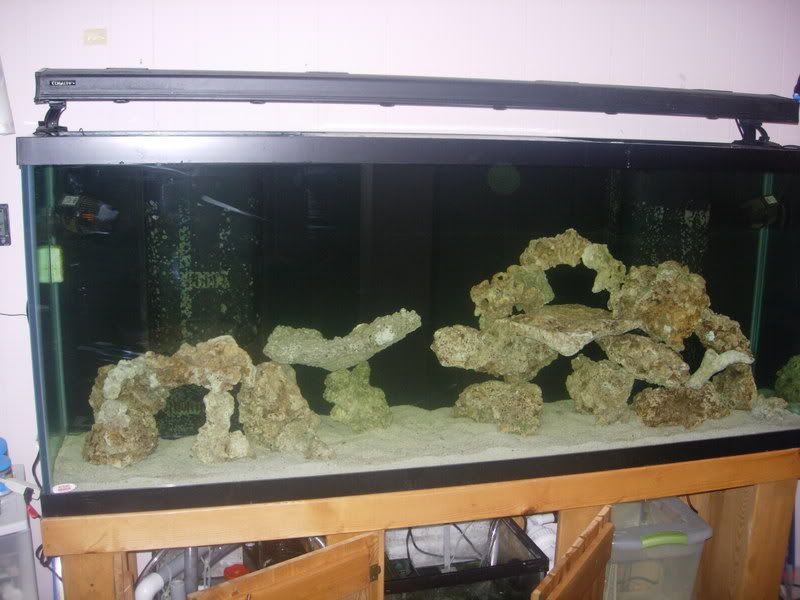
Thank you, since it's all base rock and I have no water in the tank I'm going to try to get some caves and maybe a few piles. I do want to make sure I leave open spaces for water flow like Canadian said. I guess I can play until I get something I like. Now the total amount of rock I have is 120 lbs which I thought was good for a 150, I do need a few lbs of Live rock to seed these rock. I did this this afternoon
__________________
Gus Current Tank Info: IM Fusion 20 Gallon Last edited by gusto1; 10/12/2008 at 05:29 PM. |
|
|
|
|
10/12/2008, 07:22 PM
|
#19 |
|
Registered Member
Join Date: Sep 2001
Location: Costa Mesa, California
Posts: 104
|
Better. I would leave the center completely open. The structure is still a bit angular though. When you close your eyes and then open them all you see is those two flat planes of rock very angular, and right next to eachother. Take out the center flat piece and leave that section open. Then see if you can add that peice into the rock pile without the cave (The tank's right side) in a way that adds height and masks the huge exposed overflow.
Think ahead to what rock structure you will want in a year when everything has grown in. Leave space. |
|
|
|
|
10/12/2008, 07:53 PM
|
#20 |
|
Registered Member

Join Date: Sep 2007
Location: Central PA
Posts: 100
|
Its looking much better
|
|
|
|
|
10/12/2008, 08:11 PM
|
#21 |
|
Registered Member
Join Date: Feb 2004
Location: Long Island, New York
Posts: 622
|
Thank's, I'm going to try to work off this plan and maybe try Lewin suggestion of making another cave.
__________________
Gus Current Tank Info: IM Fusion 20 Gallon |
|
|
|
|
10/12/2008, 10:32 PM
|
#22 |
|
Moved On
Join Date: Aug 2007
Location: Napa, CA
Posts: 1,091
|
The main thing is picturing what it will look like once it's all filled in with the type of corals you plan on getting.
|
|
|
|
|
10/12/2008, 11:00 PM
|
#23 |
|
Premium Member
Join Date: Mar 2007
Location: Pompano Beach, FL
Posts: 1,232
|
Honestly, with a wide tank like you have you should go for a "reefs edge" look. In other words, looking at your tank from the front you'd see a "V" shape in the rock formation where the rock is the highest to the left side and the right of the tank then it descends down so that in the middle of the tank you have about 4 to 6 inches of sand and not rock. This is a killer look and very natural.
Judging by the rock you have in your tank now you'd probably need more to pull off my suggestion but you have the shot NOW to do something killer. BTW, don't be afraid to ask a vet at a LFS to stop by your house to help you; a few cold ones go a long way and you'll be happy you asked for the help
__________________
What's good having a monkey if you can't play with it? Current Tank Info: 65g Mixed Reef - 35g Fuge - EcoSystem Method |
|
|
|
|
10/18/2008, 09:15 AM
|
#24 |
|
Registered Member
Join Date: Feb 2004
Location: Long Island, New York
Posts: 622
|
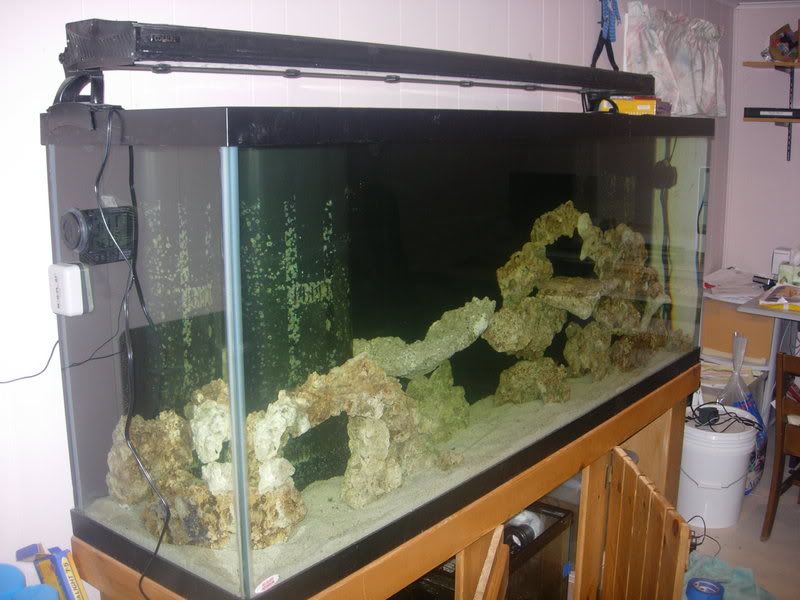
How's this a friend came over and helped, I have to clean the glass of course.
__________________
Gus Current Tank Info: IM Fusion 20 Gallon |
|
|
|
|
10/18/2008, 09:32 AM
|
#25 |
|
Registered Member
Join Date: Mar 2002
Location: Warren, VT
Posts: 1,181
|
I think you are close with the way you had it in this picture.
I agree with some of the others about creating islands and having an open area in the middle. You want to make sure the entire structure is stable and natural looking as well. I used about 7-8 big rocks to start my reef and it is not going anywhere. 
__________________
*March 2009 TOTM* *July 2003 TOTM* Current Tank Info: Eurobraced 187g Low Iron Glass Tank |
|
|
|
 |
|
|


