
|
|
 07/09/2009, 11:57 PM
|
#1 |
|
Registered Member
Join Date: Jan 2007
Location: Anaheim, CA
Posts: 278
|
120 Bookcase build
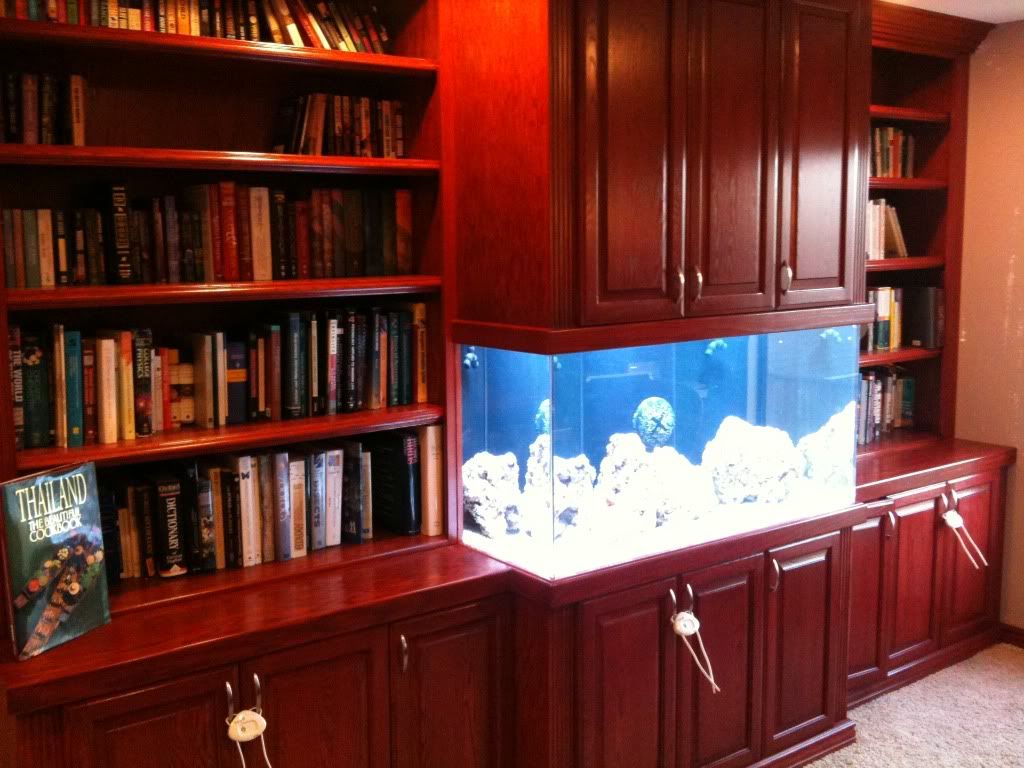
I have been lurking on Reefcentral for some time now, and I am now close to finishing my 120 gallon tank. This has been over a year in the making, but I think it was worth it. My goal was to re-design my office and on one wall put in a 12 foot bookcase with a 120 gallon tank in the middle.
My last tank was an 80 gallon and I did a lot of things wrong but still had good success. I think this time will definately be even better. Some stats, the tank is 120 gallons 4x2x2. It is starfire glass on the front three viewing planes. The tank is drilled for a four input closed loop and an overflow with the sump return and the closed loop return in it. Here are some screen shots of the build in progress. This is the base units for the bookcase and the tank installed. In this picture we are doing a water test of the closed loop system. 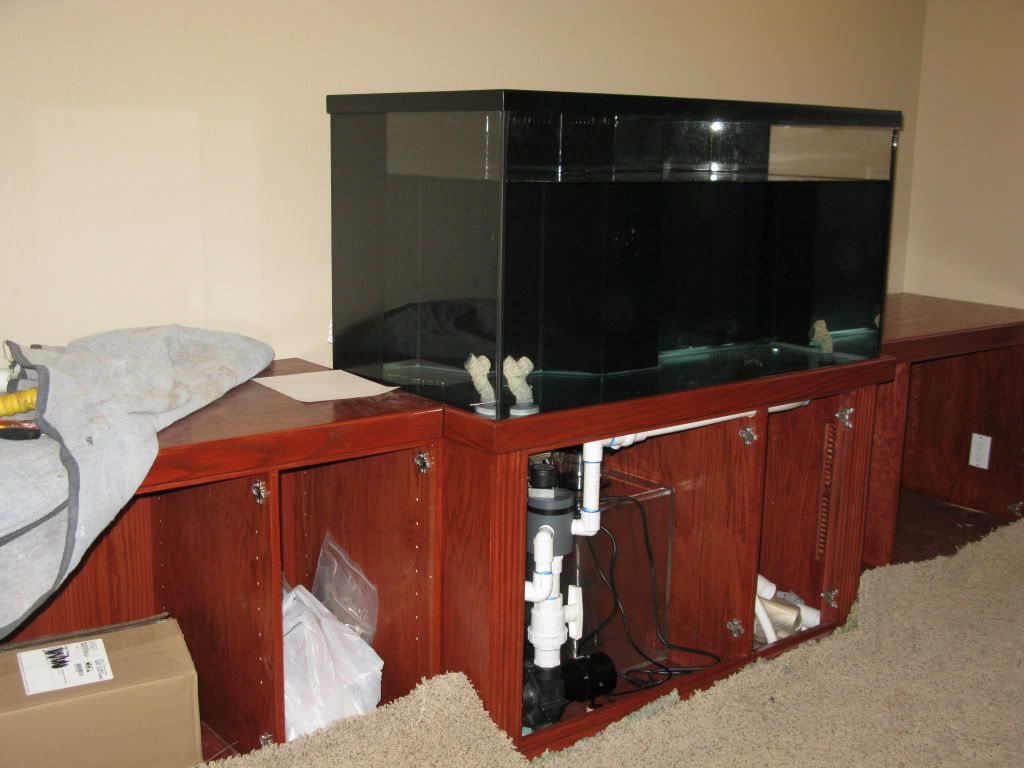 Here is the guts of the closed loop system. At this point the sump has not been plumbed yet. I have an oceans motions 4-way and a sequence dart that can be seen in this picture.  Here is another shot of the oceans motions 4-way. http://s434.photobucket.com/albums/q...h_IMG_1168.jpg Finally a picture of the back inputs from behind the tank. http://s434.photobucket.com/albums/q...h_IMG_1172.jpg |

|

|
|
07/10/2009, 12:04 AM
|
#2 |
|
Registered Member
Join Date: Jan 2007
Location: Anaheim, CA
Posts: 278
|
Ventilation
One of the challenges of this project was to get good ventilation because the chiller needed to be hidden in the stand. I did not want to have heat issues negate the chiller effect so we had a pretty serious ventilation system put in.
The chiller has its own compartment under the stand and ventilation was put into the stand to give the chiller fresh air.  Ducting was then run from the chiller compartment and a seperate duct for the rest of the tank. The bottom of the stand opposite the chiller has a ~5 inch pass through up the back of the tank and has air pulled out by the second duct.   Finally here is a picture of the beast of a fan. it is dimmable, and way overkill. The first time I turned it on it sounded like a 747. Needless to say I have it dimmed to about 15-20% power. 
|
|
|
|
|
07/10/2009, 12:07 AM
|
#3 |
|
Registered Member
Join Date: Feb 2009
Location: west virginia
Posts: 360
|
looks nice i will be following this one here.
What kind of wood you use for the stand/bookcase? What lighting are you going with? What are your overall plans for this setup?
__________________
L0S3R CVRC ------------------------------------------------ To check out my thread on Gorgonia Fragging click my red house Current Tank Info: 2g pico reef with 13w pc lighting stocked with zoos and a small hammer... 29g in progress (diy aquaclear 500 fuge) |
|
|
|
|
07/10/2009, 12:10 AM
|
#4 |
|
Registered Member
Join Date: Feb 2009
Location: west virginia
Posts: 360
|
WOW I was posting while you was putting the second post up and that is a beast of a fan.
Seems like you definitely put some thought into this.
__________________
L0S3R CVRC ------------------------------------------------ To check out my thread on Gorgonia Fragging click my red house Current Tank Info: 2g pico reef with 13w pc lighting stocked with zoos and a small hammer... 29g in progress (diy aquaclear 500 fuge) |
|
|
|
|
07/10/2009, 12:10 AM
|
#5 |
|
Registered Member
Join Date: Jan 2007
Location: Anaheim, CA
Posts: 278
|
My camera just ran out of batteries. I will upload a few more pictures tomorrow.
|
|
|
|
|
07/10/2009, 12:11 AM
|
#6 |
|
Registered Member
Join Date: Feb 2009
Location: west virginia
Posts: 360
|
Ok somehow it double posted with you a post in between.
MODS please delete this post.
__________________
L0S3R CVRC ------------------------------------------------ To check out my thread on Gorgonia Fragging click my red house Current Tank Info: 2g pico reef with 13w pc lighting stocked with zoos and a small hammer... 29g in progress (diy aquaclear 500 fuge) |
|
|
|
|
07/10/2009, 12:22 AM
|
#7 |
|
Registered Member
Join Date: Feb 2009
Location: Chester, VA
Posts: 3,626
|
__________________
http://www.reefcentral.com/forums/showthread.php?t=2534403 Current Tank Info: 225 gal Reef, 60 gal reef & 40b frag tank |
|
|
|
|
07/10/2009, 12:22 AM
|
#8 | |
|
Registered Member
Join Date: Jan 2007
Location: Anaheim, CA
Posts: 278
|
Quote:
I will put up some pictures of the lighting tommorrow. I am using the new Hamilton Cayman Sun 250 HQI fixtures with electronic ballasts and 14K bulbs. My plan from the beginning was to try to make a system that didn't require a ton of maintenance(Yes I realize this is wishful thinking). The tank is on the second floor and I would like to minimize carrying 5 gallon containers of saltwater upstairs. So...I decided to do a clownfish and anemone as the centerpiece, and stock the rest of the tank with soft corals. I have a refugium in the stand, and I will be putting a significant amount of live rock and live sand via Richard from Tampa Bay Saltwater. Basically I am devoting a large percentage of the tank to things that clean and don't need a pristine tank. Hopefully it works. I feel the lure of the hard corals and we shall see if I can resist. |
|
|
|
|
|
07/10/2009, 12:31 AM
|
#9 |
|
Registered Member
Join Date: Feb 2009
Location: west virginia
Posts: 360
|
Thats a beautiful color in my opinion.
Sounds like a nice fixture.  Low maintenance is the best but so hard to get lol. But with soft corals its alot easier to accomplish than SPS. It sounds like you have put plenty of thought into this and I cant wait to see it through. Good luck on all aspects of this one. BTW I know the feeling about lugging 5g buckets upstairs. Therefore my upstairs tank is a 2g pico lol makes it alot easier carrying a 1g or a 20oz bottle up the stairs lol
__________________
L0S3R CVRC ------------------------------------------------ To check out my thread on Gorgonia Fragging click my red house Current Tank Info: 2g pico reef with 13w pc lighting stocked with zoos and a small hammer... 29g in progress (diy aquaclear 500 fuge) |
|
|
|
|
07/10/2009, 10:29 AM
|
#10 |
|
Registered Member
Join Date: Jan 2007
Location: Anaheim, CA
Posts: 278
|
Install update
Here are some more shots of the installation.
This is the bookcase as it is being installed. All the wood work was done by a company called Woodcrafters in Costa Mesa. I can send you their information if you are interested.  Here is a shot of the lighting install.  Here is a picture from this morning of the tank running with lights on.  Here is a close-up of one the closed loop inputs on the bottom. this was a fun project for me and my daughter. Richard from Tampa Bay Saltwater sent me some sand and rock bits free of charge so I could do these ahead of time. I was fearful of introducing toxins to the tank and used aquarium sealant as the glue. It worked OK. Probably should have used epoxy but oh well. On the plus side the silicone was easy to seperate at the seams of the inputs, where epoxy would have been a real chore I imagine. 
|
|
|
|
|
07/12/2009, 01:50 PM
|
#11 |
|
Registered Member
Join Date: Jan 2007
Location: Anaheim, CA
Posts: 278
|
Install Update
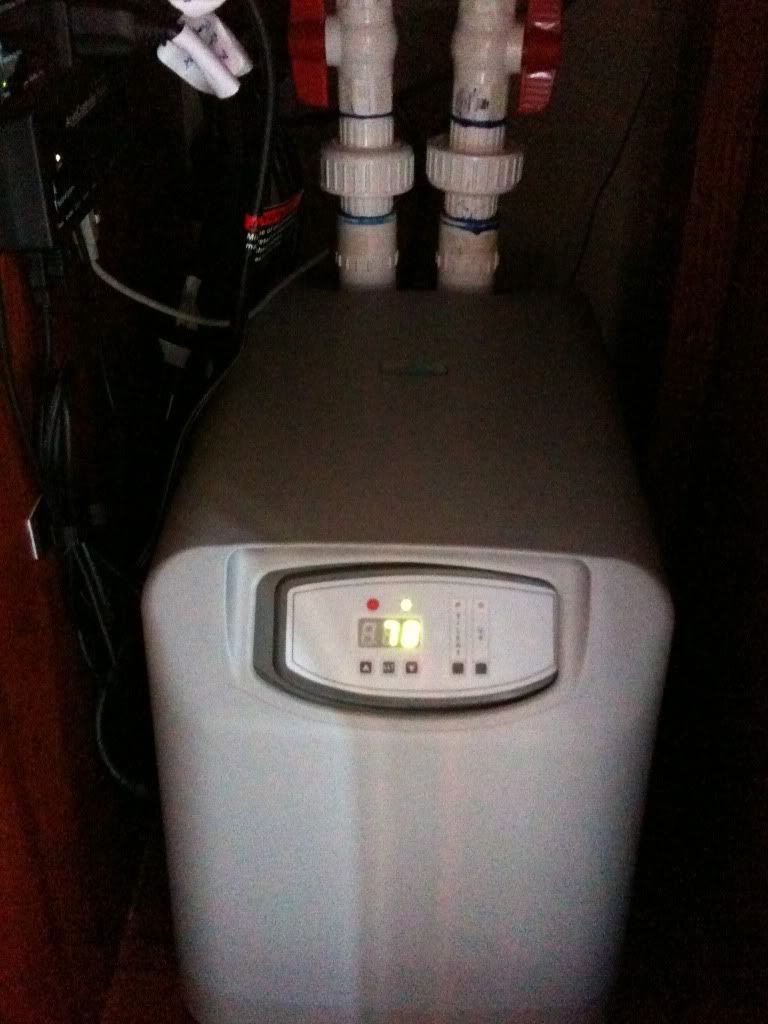
The Sump Plumbing is now complete. Isntalled is a Aqua Euro Calcuim Reactor and an Aqua Euro Protein Skimmer. A Mag 12 is used for the return. Here is a shot:
 The chiller also arrived. This was kinf of a mess because I originally purchased a JBJ 1/3 HP, but it would not fit in the front of the stand, it was 1 inch too big. I had to purchase a slimmer chiller so I went with the TECO TR20. Now I just need to find a home for the JBJ in my garage. Here is a picture, plumbing to come later in the week. 
|
|
|
|
|
07/12/2009, 02:14 PM
|
#12 |
|
Registered Member
Join Date: Apr 2009
Location: MN
Posts: 599
|
Wow looks like your off to a great start!
What kind of tank you setting up mixed reef?
__________________
I smell something Fishy! Oops excuse me! Current Tank Info: 180gal Mixed Reef |
|
|
|
|
07/12/2009, 02:54 PM
|
#13 | |
|
Registered Member
Join Date: Sep 2008
Location: Wake Forest, NC
Posts: 3,696
|
Re: Install update
Quote:
You have a VERY cool setup indeed! Being a cabinet maker, I can tell by the pics that your cabinet makers did a good job. The finish looks great. The finish on a cabinet makes or breaks the deal, if you ask me. I've seen a lot of very well built DIY stands that have hideous finishes (rough, unsanded, blotchy stain) and I've seen some that were exquisite. The difference was in the finish quality and time spent. Your guys did you good 
__________________
"The measure of a life is not its duration but its donation." Corrie Ten Boom The tyrant dies and his rule is over, the martyr dies and his rule begins -- Søren Kierkegaard Current Tank Info: ghetto grad school reef.....11g rimless tank, 36X9X9, lit by Cree and Rebels scobbled together. Stocked mostly with free stuff I got from panhandling my fellow reefers. |
|
|
|
|
|
07/12/2009, 09:17 PM
|
#14 | |
|
Registered Member
Join Date: Jan 2007
Location: Anaheim, CA
Posts: 278
|
Re: Re: Install update
Quote:
|
|
|
|
|
|
07/12/2009, 09:23 PM
|
#15 | |
|
Registered Member
Join Date: Jan 2007
Location: Anaheim, CA
Posts: 278
|
Quote:
|
|
|
|
|
|
08/01/2009, 07:43 PM
|
#16 |
|
Registered Member
Join Date: Jan 2007
Location: Anaheim, CA
Posts: 278
|
Update
OK So I installed the chiller, and it had some issues so a replacement was sent out. The new one works fine. Here is a picture of the chiller installed.
 Here is a shot of the new APEX controller screen. I will get some pictures of the rest of the controller, when I get the camera with it's flash back. These pictures are from my Iphone, not a bad camera for a phone really. 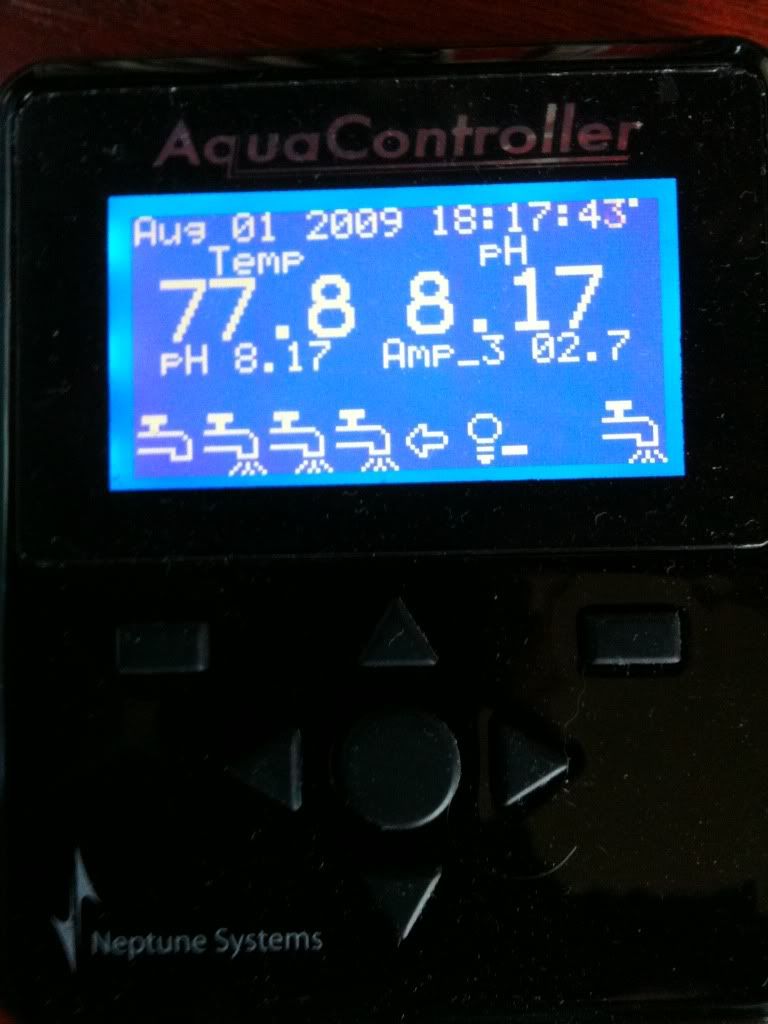
|
|
|
|
|
08/01/2009, 07:54 PM
|
#17 |
|
Registered Member
Join Date: Jan 2007
Location: Anaheim, CA
Posts: 278
|
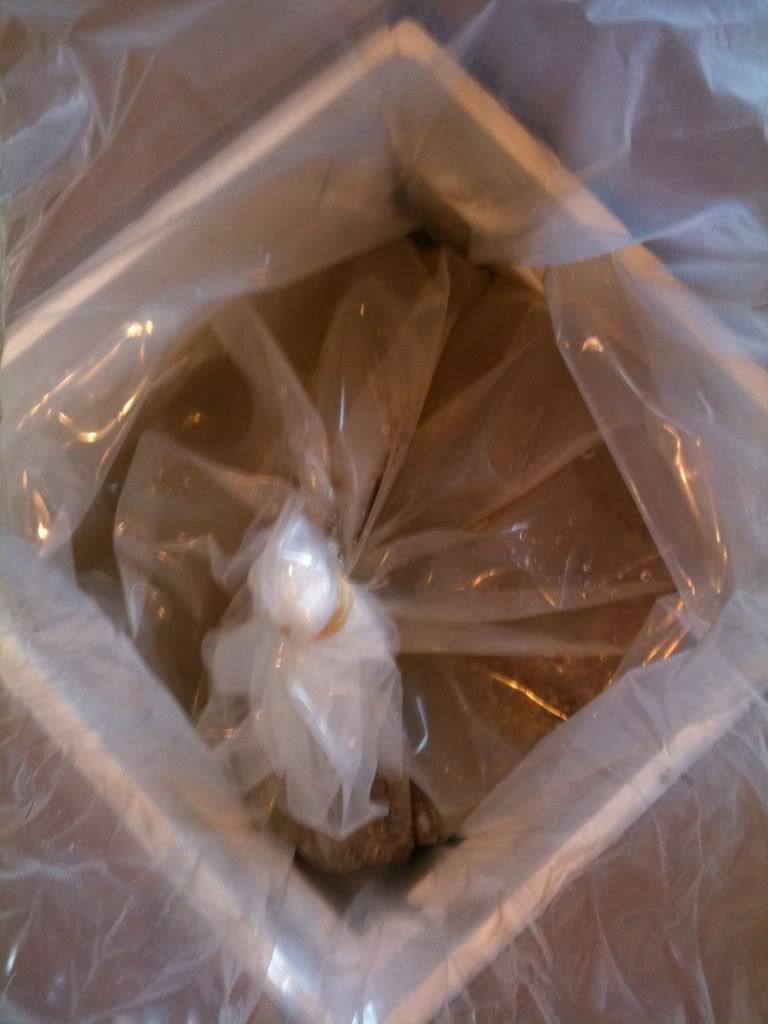
So the rock arrived wednesday this week. Was I surprised, the boxes at the airport weighed 440 pounds! And this is only half. Here is a shot of the boxes and a picture of the packing job Tampa Bay saltwater does.
  Here is a shot of the rock in my tank. 4 pices weighing 120+ pounds. Wow. Great for the base, the rock in the back right corner probably wieghed 50+ pounds, and barely fit in my tank between the braces. 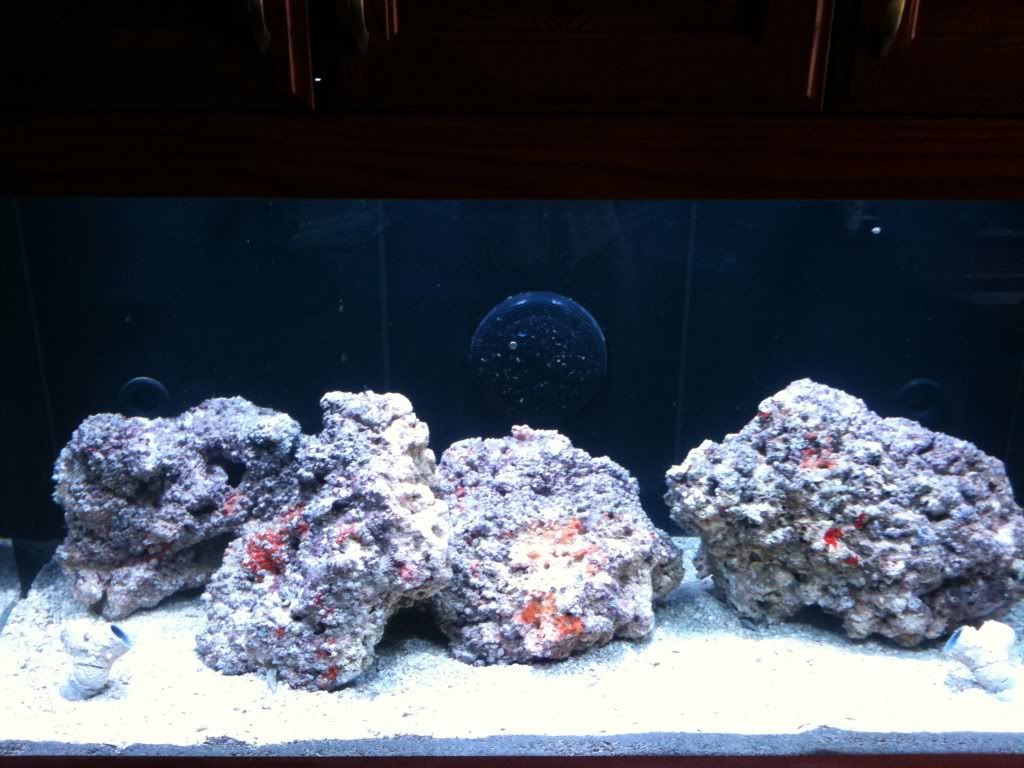 There are at least two mantis shrimp in my tank, maybe three. If you go by the roach rule I probably have a few more. Here is my first attempt at a mantis trap, two days and no luck.  I purchased a couple from Tong's today. If you live in Southern California and you don't know about Tong's, you should check them out, they are probably the gold standard around here.  I hear the Mantis clicking constantly, they are taunting me. I know where two of the burrows are so hopefully I catch them soon. I tried taking a photo, but you can't see them real well. Hopefully I'll have a photo of them in a bucket soon! |
|
|
|
|
08/01/2009, 08:15 PM
|
#18 |
|
Registered Member
Join Date: Jun 2004
Location: benton, ky
Posts: 974
|
how about some big pics of the cabinets?
|
|
|
|
|
08/01/2009, 08:17 PM
|
#19 |
|
Registered Member
Join Date: Apr 2006
Location: San Francisco, CA
Posts: 2,502
|
I had a clicking sound that drove me nuts for some time so I removed lots of rock, lucky for me it was not a mantis but a pistol.
Here's the fun part; I picked up a frag of zoas and a pistol was hiding in the rock... |
|
|
|
|
08/01/2009, 08:26 PM
|
#20 |
|
Registered Member
Join Date: Feb 2009
Location: west virginia
Posts: 360
|
Looking good. Glad to see it coming along. Man those are some huge rocks!!!
You should setup a tank for the mantis shrimp. They are cool if they arent in your reef lol. How much rock you gonna have total?
__________________
L0S3R CVRC ------------------------------------------------ To check out my thread on Gorgonia Fragging click my red house Current Tank Info: 2g pico reef with 13w pc lighting stocked with zoos and a small hammer... 29g in progress (diy aquaclear 500 fuge) |
|
|
|
|
08/01/2009, 08:29 PM
|
#21 | |
|
Registered Member
Join Date: Jan 2007
Location: Anaheim, CA
Posts: 278
|
Quote:
|
|
|
|
|
|
08/01/2009, 08:34 PM
|
#22 | |
|
Registered Member
Join Date: Jan 2007
Location: Anaheim, CA
Posts: 278
|
Quote:
I have thought about sticking them in my sump. The fact that they eat my cleanup crew goes against my whole plan. I did manage to smash a gorrilla crab today with a screwdriver, that was mildly satisfying. Total is supposed to 240 pounds. But Richard admittadly sent me more than 120 pounds this time. I can't complain though the rock looks great, and is already interesting to watch. The rock from Tampa Bay Saltwater is pretty dense, so I imagine different rock would be a lot lighter to fill the same space. |
|
|
|
|
|
08/01/2009, 08:46 PM
|
#23 |
|
Registered Member
Join Date: Jun 2004
Location: benton, ky
Posts: 974
|
that is awesome...I am or used to be an amateur furniture maker...when you get time you should do a series of pics that show the ins and outs of the cabinets and tank maintenance...
|
|
|
|
|
08/02/2009, 10:11 AM
|
#24 |
|
Registered Member
Join Date: Feb 2009
Location: west virginia
Posts: 360
|
http://www.childsafetystore.com/.sc/...oduct--Latches
Check there for a new child safe latch for your cabinet. Might even find something at walmart.
__________________
L0S3R CVRC ------------------------------------------------ To check out my thread on Gorgonia Fragging click my red house Current Tank Info: 2g pico reef with 13w pc lighting stocked with zoos and a small hammer... 29g in progress (diy aquaclear 500 fuge) |
|
|
|
|
08/02/2009, 02:33 PM
|
#25 |
|
Registered Member
Join Date: Apr 2008
Location: Indianapolis
Posts: 2,447
|
Very nice design, well done.

__________________
120g DT 100lbs LR / 200 lbs LS, 45g fuge, VectraM1 Return, Herbie drain, 4x RW-8, 2x AI Hydra 26 w AWM, ASM G2, Apex controller, Apex BoB w floats ATO |
|
|
|
 |
|
|


