
|
|
 02/04/2007, 12:29 PM
|
#1 |
|
Registered Member
Join Date: May 2005
Location: Woodstock, GA
Posts: 894
|
Kalk Dripper/Doser
I wanted to duplicate the dosers you can buy at the fish store, but I didn't want to spend quite that much, and I like to make things.
I didn't have a bulkhead, so I decided to make one with PVC parts at my local hardware store. I don't know that what I came up with would work in high pressure situations, but it works just fine for the 2.5g my doser holds. Anyway, Here's a shot of what I used to make the doser and some information on the parts below: 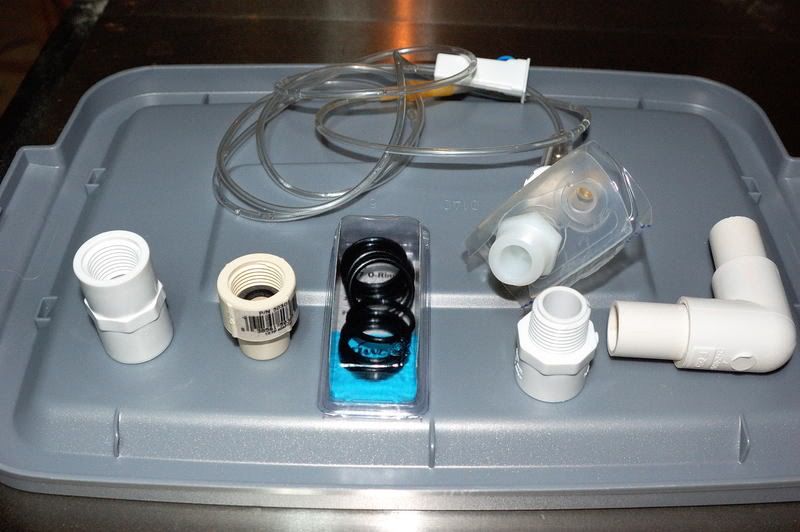 List --------------------------------------- IV - this might be hard to get if you don't live around a vet or know someone who works in the medical field. I was able to get a used Salene IV from a local vet (w/ out the needle). I cut the bag off. Needle Barb - this (already in the IV in the picture) is a 3/8" x 1/2" threaded hose barb. I inserted the 3/8" part into the IV. It is a tight fit, but elbow grease does the job 1/2" Female Adapter - standard sch40 pvc 1/2" Male Adapter - same as above 1/2" Female Cold Water Adapter - this is not standard it is in the cold/hot area of the plumbing section. I used this to complete the bulkhead because it threads much nicer. You can see the "washer" inside of it. I used a small screwdriver to pop that out. 1/2" 90d Elbow - this is used so that the "drip counter" on the IV unit works, it has to be upright. O-Rings - available in the faucet repair section, the #17 fit the 1/2" PVC nicely 3g Rubbermaid Roughneck - in the storage section! -------------------------------------- Because the IV dripper was free, the total cost for this system was less than $10.00, tax included.
__________________
Click my little red house! Current Tank Info: 65g Anemone Tank |

|

|
|
02/04/2007, 12:34 PM
|
#2 |
|
Registered Member
Join Date: May 2005
Location: Woodstock, GA
Posts: 894
|
Okay, after cutting out the IV, I then drilled a hole in the roughneck.
I wanted the hole to be off the base of the unit because of the settling that takes place in kalkwasser. 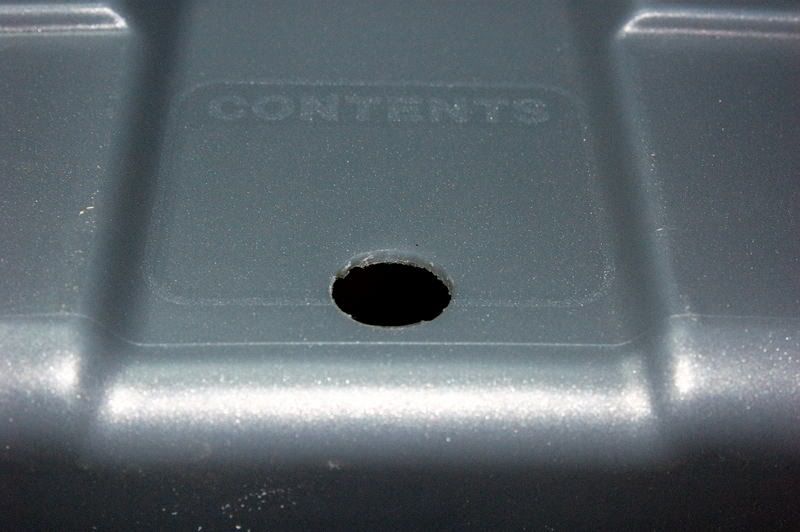 the hole is drilled using a 3/4" bit, 7/8" may be TOO BIG, but the 3/4" was a pretty tight fit. I initially put an o-ring only on the inside of the roughneck, but that leaked, so I put one on both the inside and outside of the bulkhead. No leaks now. Here are the bulkhead components: 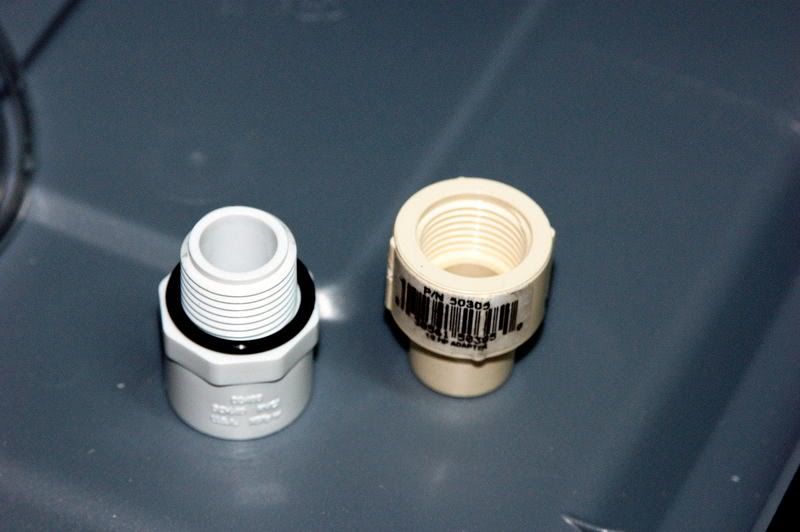 Here is the female part installed. 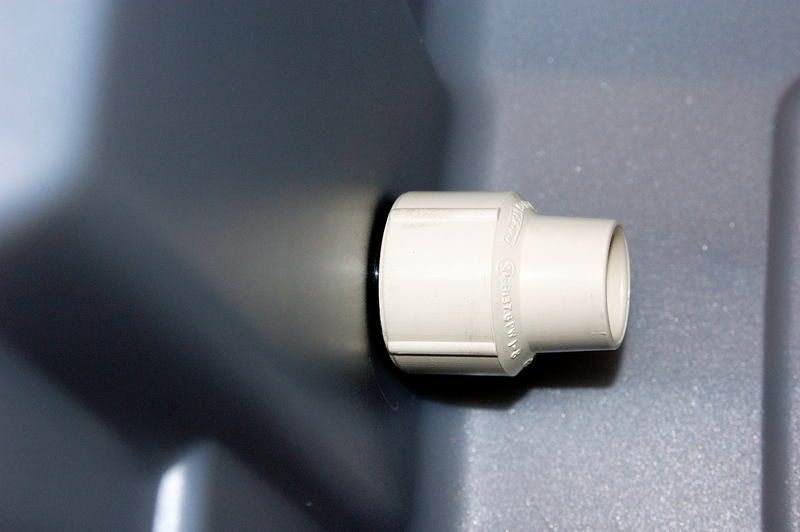 I didn't screw too tightly as the o-ring begins to misbehave, so you have to be careful between screwing it too loose or too tight. Here it is put together: 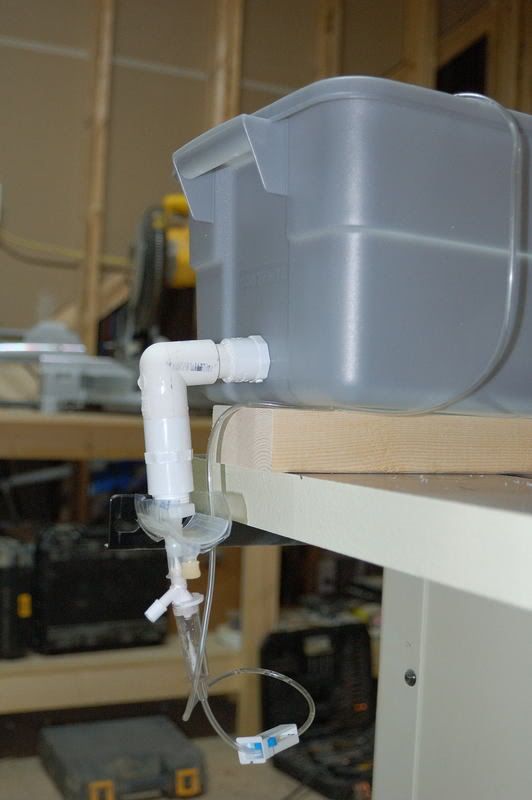 And here it is during the testing stage: 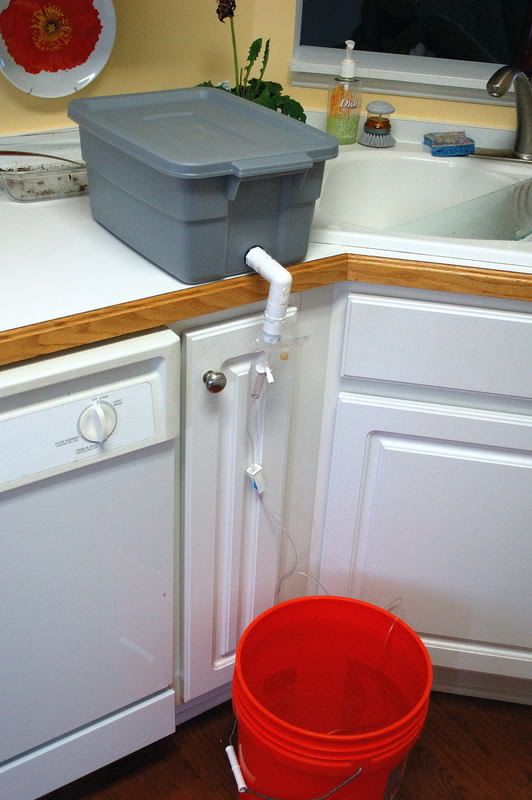 ---------------------------------------------------- Well, that's all there is too it. I took about 30 minutes to put together and cost less than $10.00 (USD). It's a very simple, very easy thing to do. hope you like it, Matt
__________________
Click my little red house! Current Tank Info: 65g Anemone Tank |
|
|
|
|
02/10/2007, 08:47 PM
|
#3 |
|
Registered Member
Join Date: Jan 2005
Location: Atlanta, GA
Posts: 967
|
Nice job and very cheap to make!

|
|
|
|
 |
|
|


