
|
|
 02/19/2008, 09:51 AM
|
#1 |
|
Registered Member
Join Date: Feb 2003
Location: Myrtle Beach
Posts: 229
|
Misfitkris' Average Joe 75g Build
So the time has come for me to share with the world my "Average Joe" build. I do not claim to be a carpenter or really that handy of a guy, just average. So in my build below I will just share what I have created using advice on this board, cheap power tools (Ryobi, Makita, RotoZip) and common sense (Probably could have used more of this).
I would like to credit all the veterans in the DIY board and those with similar 4' tank builds for sharing theirs. (i.e. JCPatella, Nanogurl and others) It definitely made mine easier. I built a 125g reef 5 or so years ago, so I had the experience from that build as well and planned on doing things right, as much as possible, this time. The total buld will include the following: Aquarium -75 Gallon AGA Megaflow Stand - Custom Deep Ebony Color Skimmer - Octopus NW-200 Sump/Fuge - 40 Gallon Breeder Return - Mag 9.5 Lights - 2 X 175w Icecap Retrofit 1 x T5 Tek Retro Kit 48in -2 x 54w Flow - 2 Koralia 4's for now. Substrate - 75 lbs aragonite sugar sized sand QT Tank - 20g long 100GPD RO/DI unit Planned DIY Top Off and DIY Electrical Stand these will be located on either side of the stand. 100+ lbs of fiji rock Fish list and coral list to come. Still reading and deciding. I should have taken more pictures, but I believe these will paint a pretty good picture. So without further adieu, here it is. This first shot is after the original 2x4 framing and the 3/4" birch on the sides and top. Overkill, I know. But with me building it, I wanted to be sure.  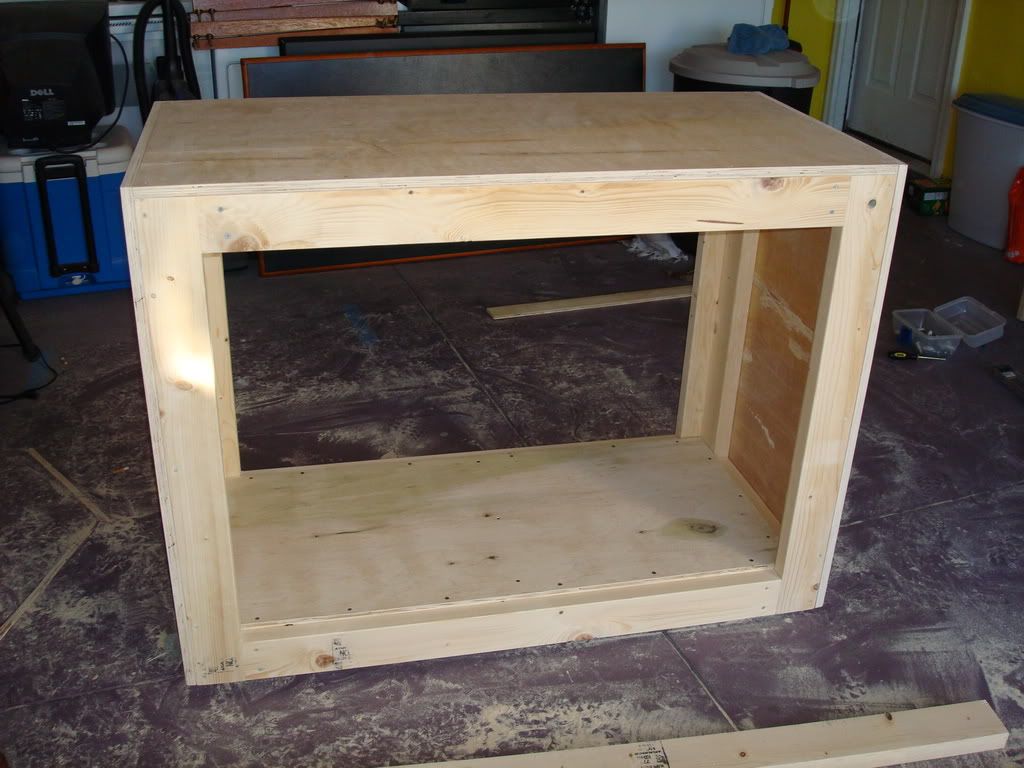 This is a shot showing some of the framing from the inside. IMG]http://i206.photobucket.com/albums/bb84/kriskuball/TankBuild002.jpg[/IMG] Here you can see the front piece of 3/4" birch. It is one solid piece of plywood with the center rectangle cut out to match the interior framing. 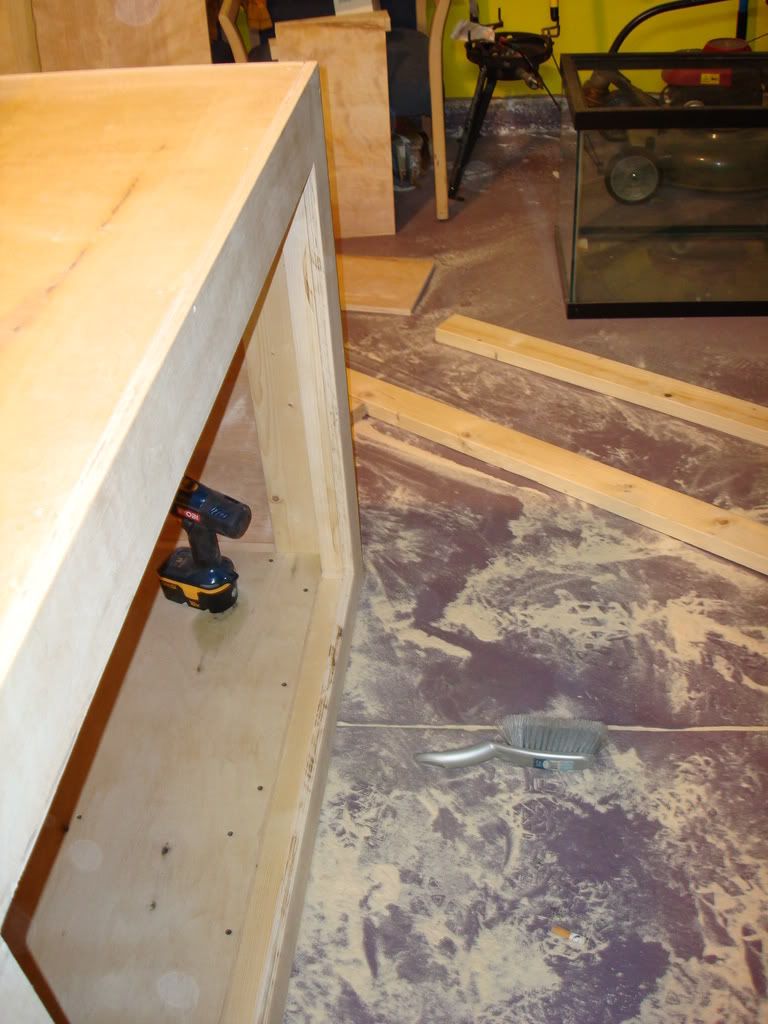 Another shot from the top showing the corner and how it comes together. I didn't trust myself to cut even 45's to make it flush. It will be relatively unnoticable after staining as well. 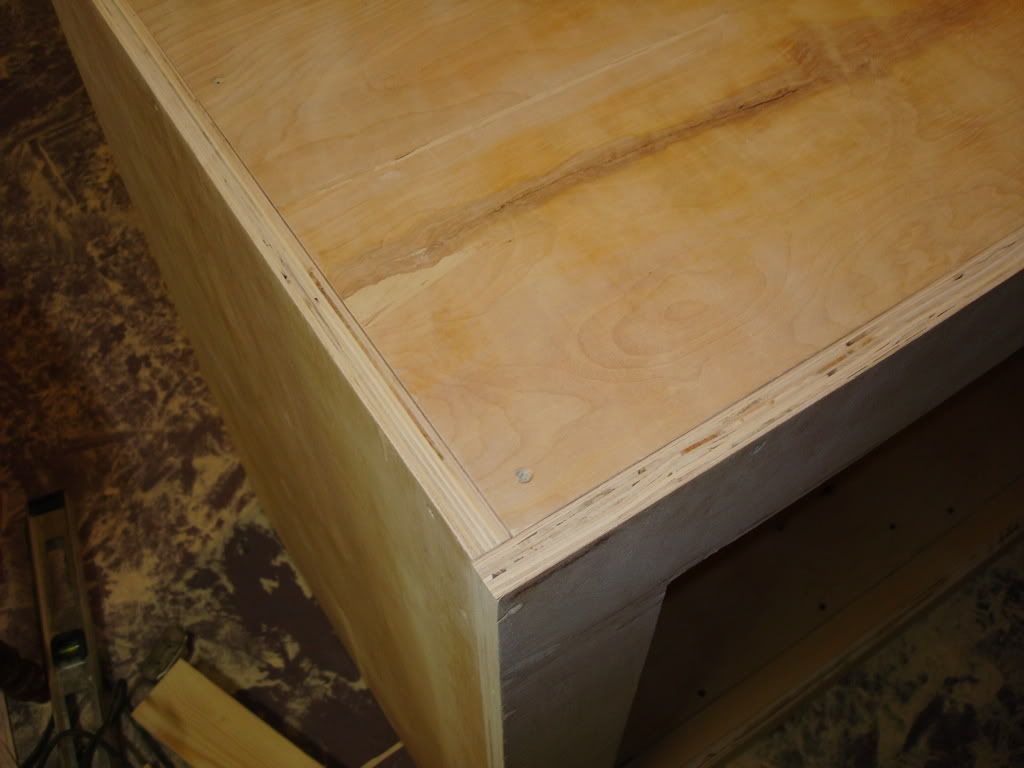 Here is the complete stand unfinished. I am pretty happy with it. I test fit all of the hinges and handles to make sure everything looked square. 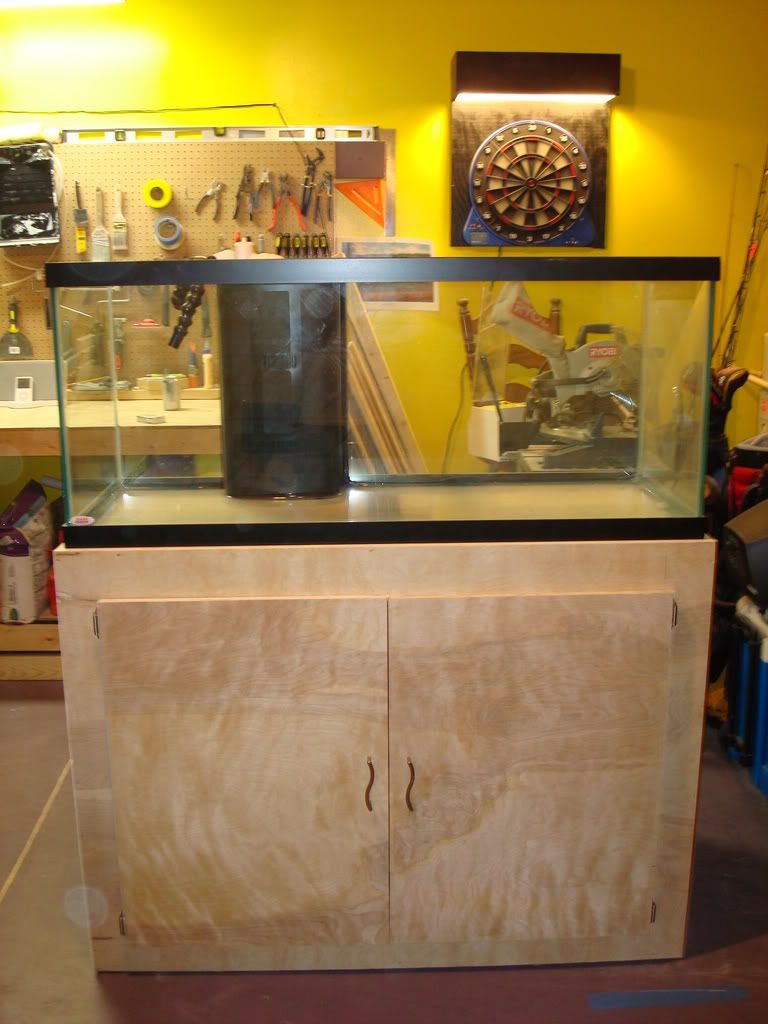 Here you can see the inside from the back. I am leaving this wide open for air circulation. 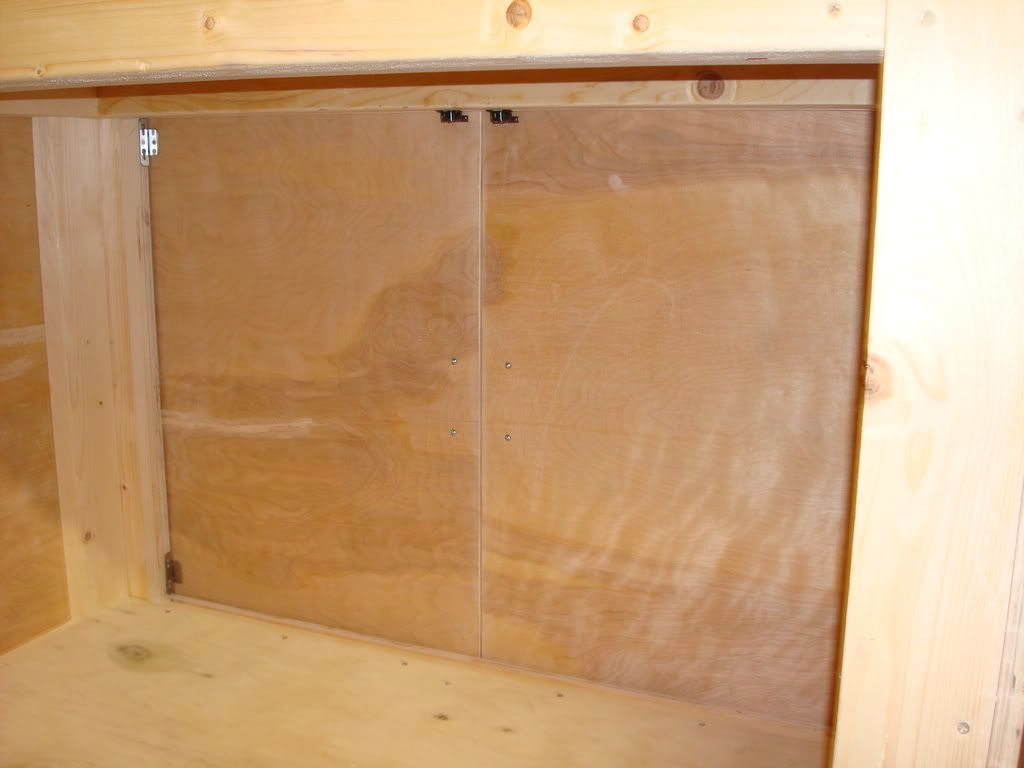 More to follow. Critiques, Criticism and praise all welcome. Even though I have done it before, I am still learning. Aren't we all?
|

|

|
|
02/19/2008, 09:57 AM
|
#2 |
|
Registered Member
Join Date: Feb 2005
Location: Winona MN
Posts: 165
|
Looking really good so far, I'm following along on this one!
__________________
Nick There's a reason why blood, sweat and tears are all salty. I have saltwater coursing through my veins. - Melev Current Tank Info: 75 Gallon RR, SPS dominated, Outer Orbit 2x250 (14k)MH 4x54 T5, Bubble King Mini160, Tunze Ozmolator 3155, Eheim 1262 |
|
|
|
|
02/19/2008, 09:58 AM
|
#3 |
|
Registered Member
Join Date: Feb 2003
Location: Myrtle Beach
Posts: 229
|
Here are some shots after staining and placement.
You can see I am getting anxious, with the water already ready to go. Just waiting for the plumbing to be finished before rock is order. Here you can see where it will be located and the color of the stain. It is dark. Its called "Deep Ebony" and I used alot of coats. 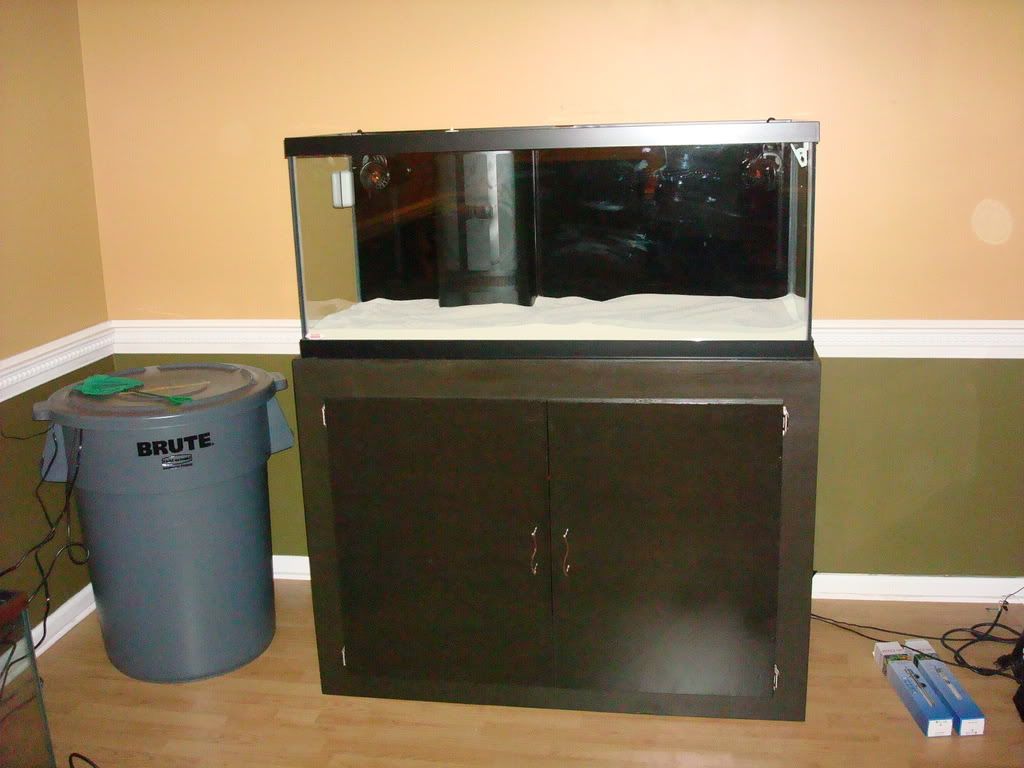 Here is the stand with the doors open and some of the electrical items in place. 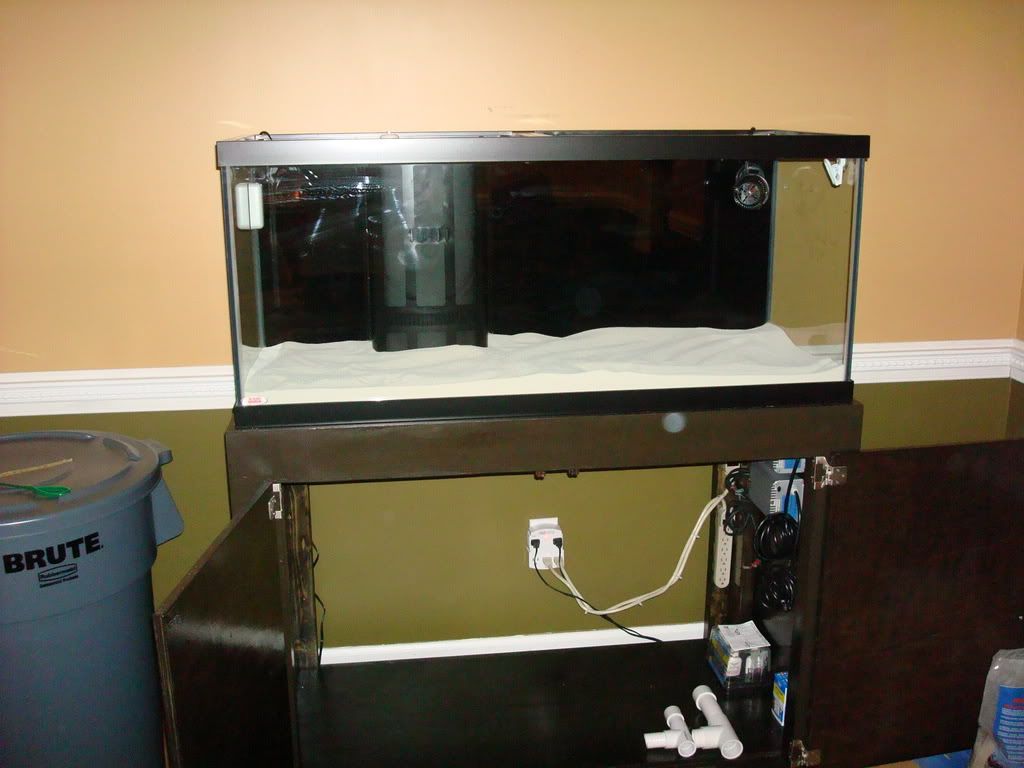 Another shot of the inside of the stand and where the ballasts and power strips will be located. 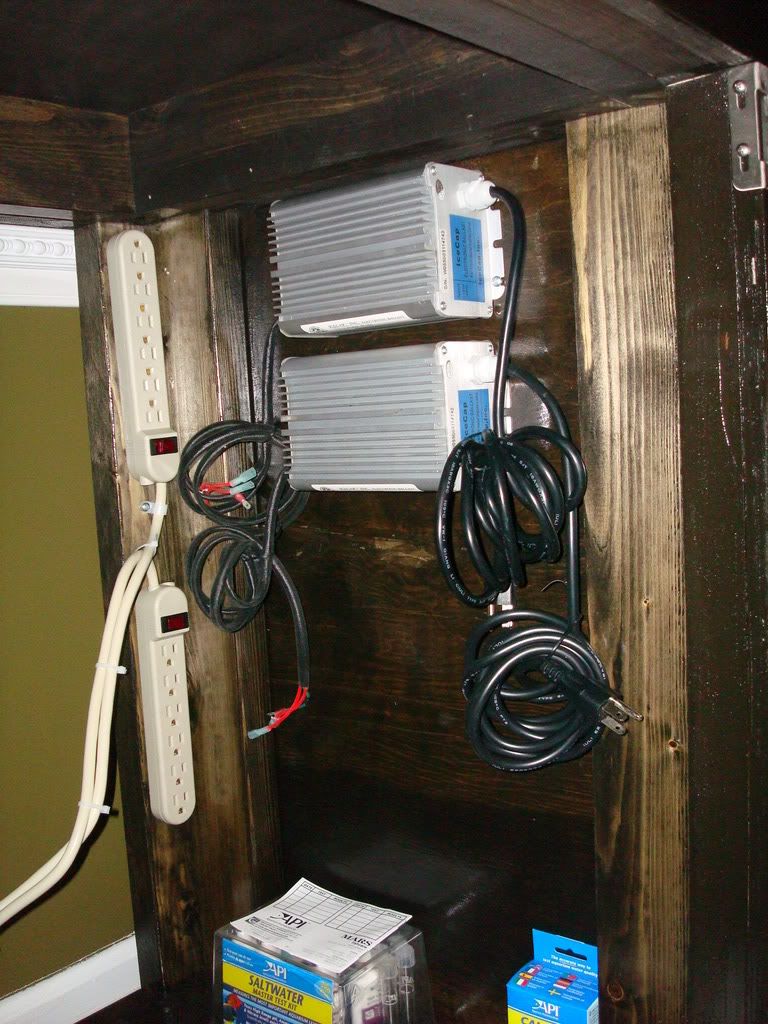 This is the canopy being test fit. Phew! It fit.  Here is a shot inside the canopy. 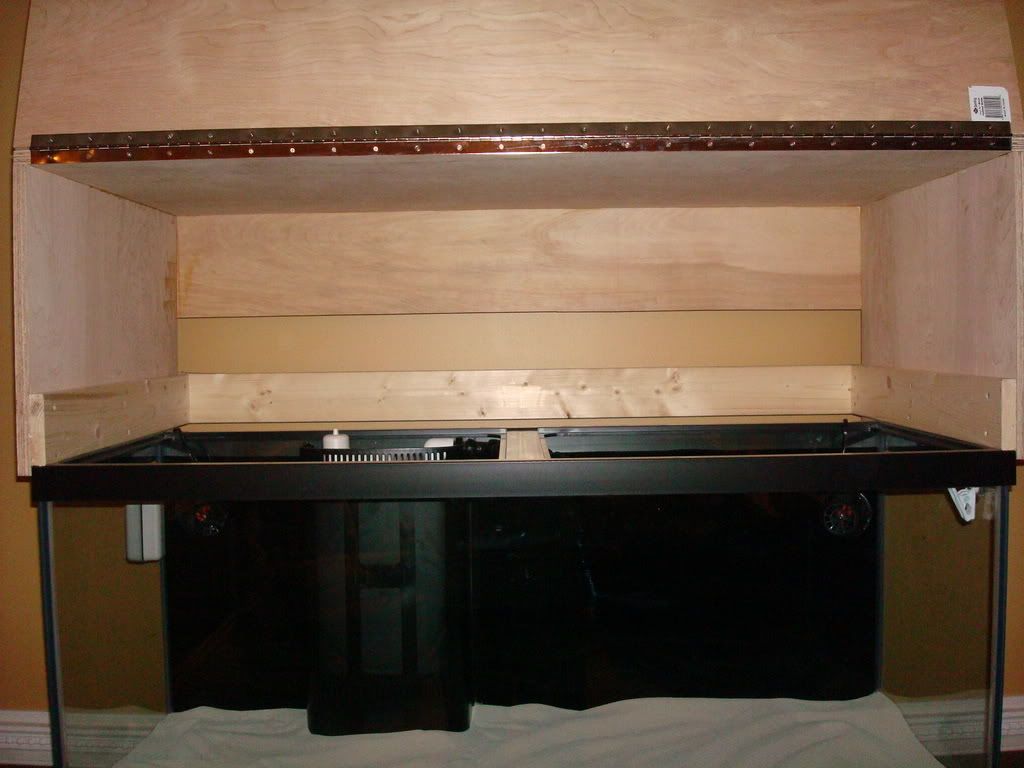 And last picture for now. I had to order a 40g Breeder for a sump as I just didn't trust myelf to work with Acrylic and figured the cost to build one would be the same as this $80 breeder when all the tools were set and done. The baffles were free and I had the silicone. 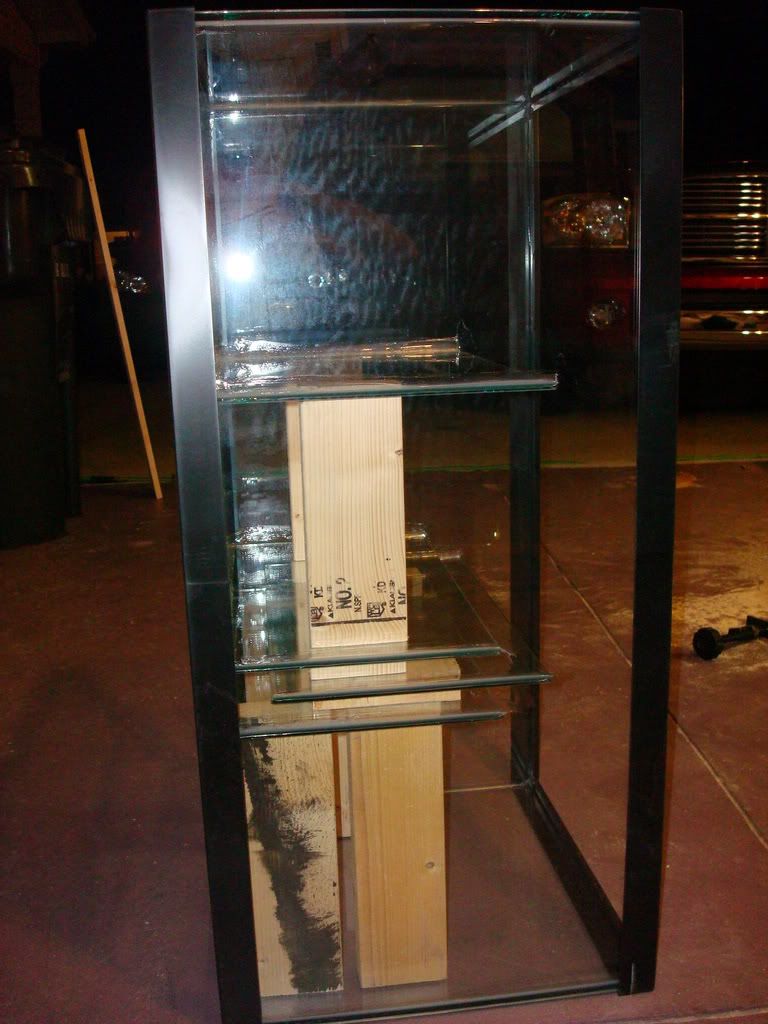 More to come. Tonight I am going to work on plumbing and mounting the lights in the canopy. Thanks for looking! |
|
|
|
|
02/19/2008, 10:16 AM
|
#4 |
|
Registered Member.
Join Date: Mar 2005
Location: Chattanooga, Tn.
Posts: 2,742
|
Sorry but this is nicer than the "average Joe" build.
|
|
|
|
|
02/19/2008, 10:39 AM
|
#6 |
|
Registered Member

Join Date: Apr 2006
Location: Ocean City, MD
Posts: 651
|
One thing to watch out for is the plywood doors warping. You may be able to minimize this by adding some structural members to the inside of the doors. You may want to do the same thing to the canopy door.
I agree with Rev. You're not Joe Average. Just look at that man garage, complete with pegboard and dartboard! Nice paint and chair rail in the tank room, BTW.
__________________
Elos mini reef Current Tank Info: Elos mini, reefkeeper 2, Vortech MP20, ice cap moonlight, Reef Fanatic ATO |
|
|
|
|
02/19/2008, 10:40 AM
|
#7 |
|
Registered Member
Join Date: Mar 2003
Location: Surfside Beach, SC
Posts: 3,008
|
Wow, that was fast. Is this the same tank you were picking up on Thursday? I really like the flame maple door panel.
|
|
|
|
|
02/19/2008, 10:44 AM
|
#8 |
|
Registered Member
Join Date: Feb 2003
Location: Myrtle Beach
Posts: 229
|
firsthesitation, RevHtree, Reefn00b Thanks for the kind words!!
But in a reality anyone can do this. I don't have much if any experience and most of it was learn as I go. Just thought up a plan and put it together. I still need to figure out how I want to mount the lights in the canopy. Thanks again! |
|
|
|
|
02/19/2008, 10:44 AM
|
#9 | |
|
Unregistered Member
Join Date: Jun 2003
Location: Arizona
Posts: 5,096
|
Quote:
Now let's get that sucker filled up with some water. 
__________________
Rob Current Tank Info: DSA 155 Pro | ATI Sunpower | ATB 840 v2 | Apex | Wav |
|
|
|
|
|
02/19/2008, 10:44 AM
|
#10 |
|
Registered Member
Join Date: May 2005
Location: Never,Never Land
Posts: 7,061
|
Very nice job.I myself am no carpenter,so i will ask.Do you think that there should be a center brace on your stand?
Other than that great build,& way more than "average Joe"
__________________
We the few have done so much,for so long,for so little.That we are now qualified to do anything with nothing. ____________________________________________________________________________ Current Tank Info: RR 90 Maganvore sump,250w Hamilton fixture,VorTec's ASM skimmer. |
|
|
|
|
02/19/2008, 10:50 AM
|
#11 | ||||
|
Registered Member
Join Date: Feb 2003
Location: Myrtle Beach
Posts: 229
|
Quote:
Quote:
Quote:
Quote:
Thanks again for the kind words! |
||||
|
|
|
|
02/19/2008, 12:28 PM
|
#12 |
|
Registered Member
Join Date: Oct 2006
Posts: 378
|
beautiful stand chris glad that 40 breeder worked out for ya like the way you stood it on its side and cut the peices of wood to hold the baffles in place good idea might have to try that once
|
|
|
|
|
02/19/2008, 12:41 PM
|
#13 | |
|
Registered Member
Join Date: Feb 2003
Location: Myrtle Beach
Posts: 229
|
Quote:
|
|
|
|
|
|
02/19/2008, 01:28 PM
|
#14 |
|
Registered Member
Join Date: Mar 2003
Location: Surfside Beach, SC
Posts: 3,008
|
I have frags when you need them
|
|
|
|
|
02/19/2008, 03:33 PM
|
#15 | |
|
Registered Member
Join Date: Feb 2003
Location: Myrtle Beach
Posts: 229
|
Quote:
Awesome! Thanks for letting me know that. I will let you know when the cycle is complete. |
|
|
|
|
|
02/20/2008, 08:46 AM
|
#16 | |
|
Registered Member
Join Date: Feb 2003
Location: Myrtle Beach
Posts: 229
|
Quote:
Isn't moisture what causes warping? I had another question as well. What is everyone's experience with PH monitors? I don't want a controller, just something I can quick view to see what my PH is. I was doing some searching and found a company on the dreaded e-bay site that sells pinpoint monitors as well as a "knock-off." Any opinions on which one to buy? I am assuming a monitor is only as good as the probe. No/Yes? Check these two out: Aqua Digital Pinpoint PH Monitor Aqua Digital Knock Off What would be the pro's and con's of going cheap here? It does have a one year warranty. It does come with the calibration kit and power adapter. I'm not one to cheap out in a reef, however, I am not one to impulse buy either. (most of the time, DOH!) But I really don't see the pain in buying the cheaper one at half the price. Give me some thoughts please! |
|
|
|
|
|
02/20/2008, 10:28 AM
|
#17 |
|
Registered Member
Join Date: Mar 2003
Location: Surfside Beach, SC
Posts: 3,008
|
I might lean toward a hand held. http://www.customaquatic.com/customa...dexid=di-hm-ph
They are about the same price as the knock off and you would have the advantage of purchasing from a reputable dealer in the United States. |
|
|
|
|
02/21/2008, 09:23 AM
|
#18 |
|
Registered Member
Join Date: Feb 2003
Location: Myrtle Beach
Posts: 229
|
Just wanted to give a few updates on my tank build and process.
Things are getting exciting around my house. We are getting closer and closer to having live inhabitants in the tank. Hope you enjoy the pics. Here is a close up of the sump. It is fully plumbed for the most part. I did not glue the very ends of the drains yet as I might want to change them based on noise issues. 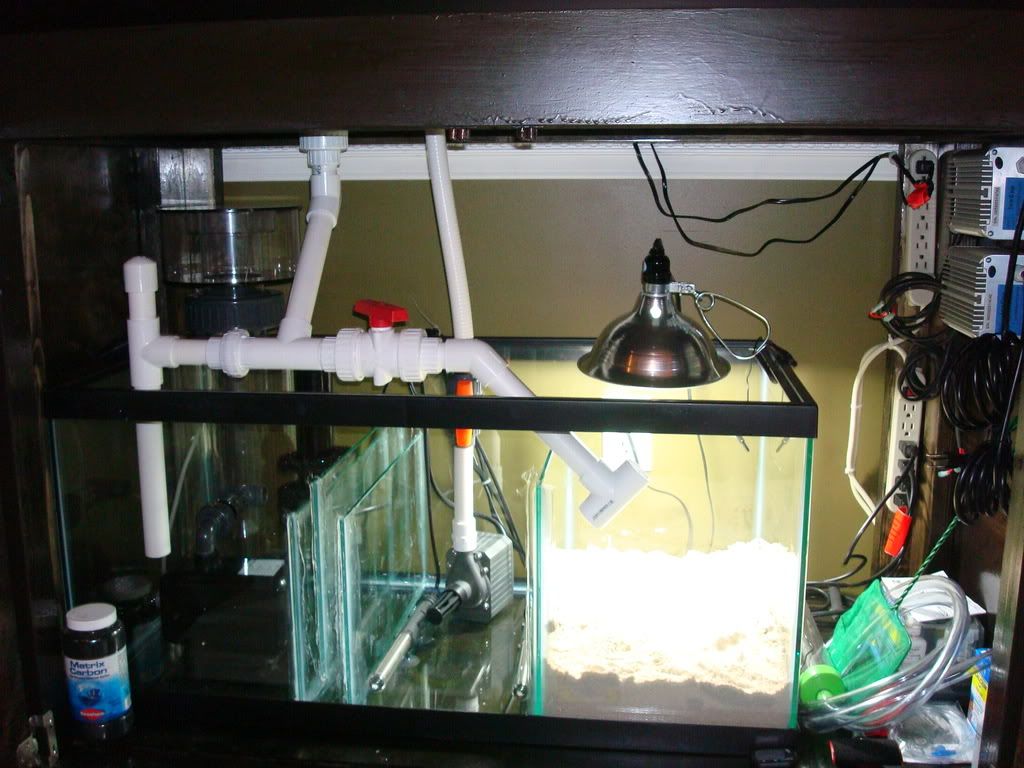 Another shot of the sump. 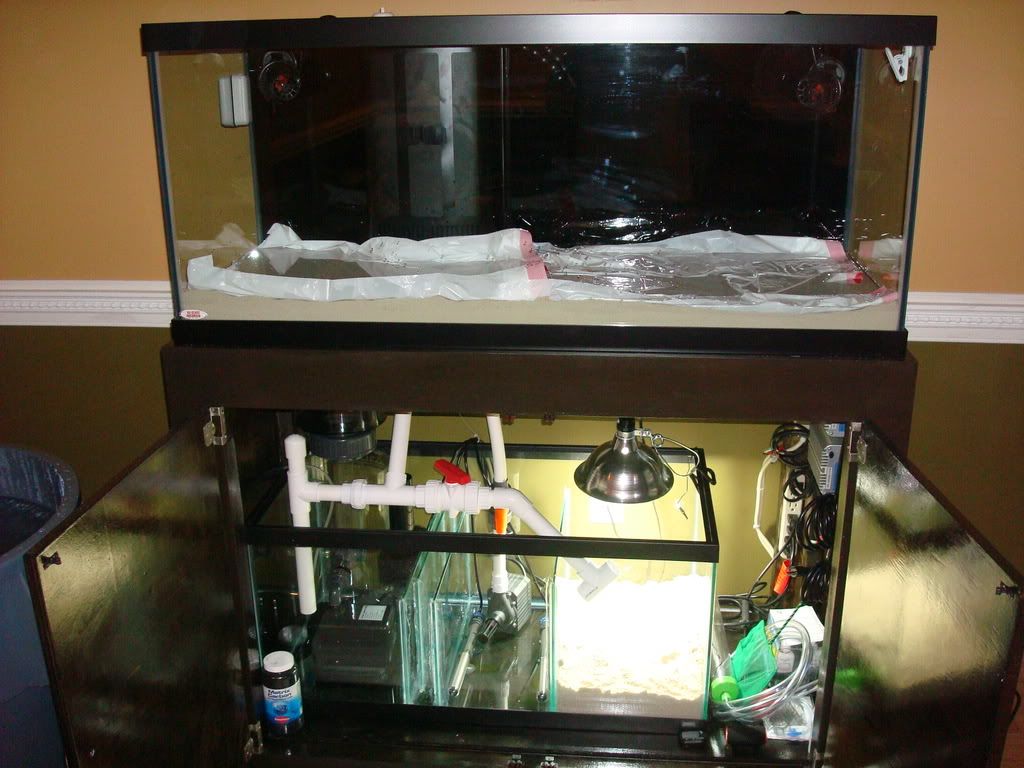 Even better! Preparing for water! 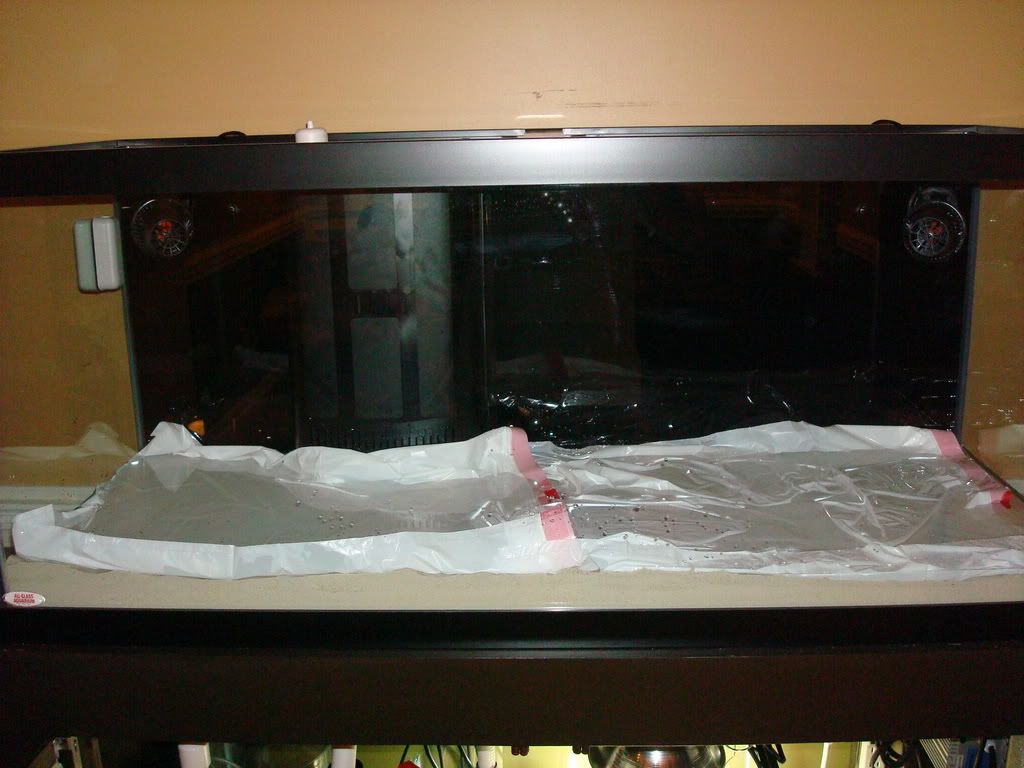 One thing I didn't show in my other pics was how I allowed room for upgrades when I built the stand. The tank is only 18" deep however the stand can hold a 24" deep tank. If I decided to go wider it would be easy to add length, but depth would be harder. And we all know that upgrades are inevitable. The Canopy is also built the same way. So here are some shots of that. 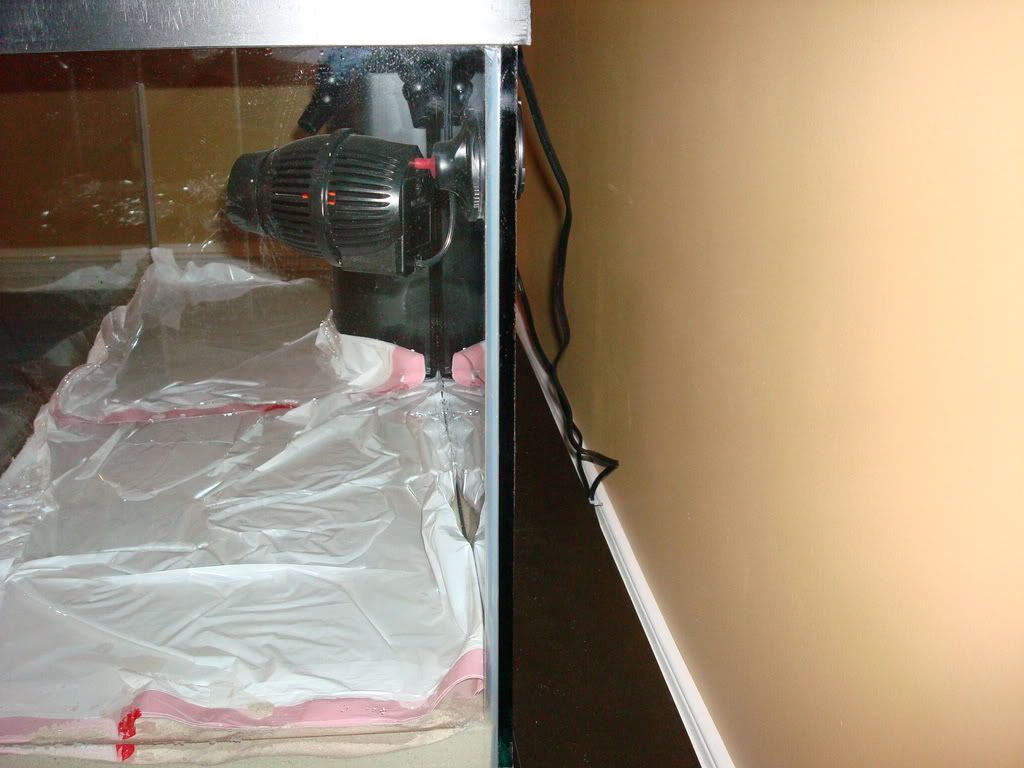 And another. 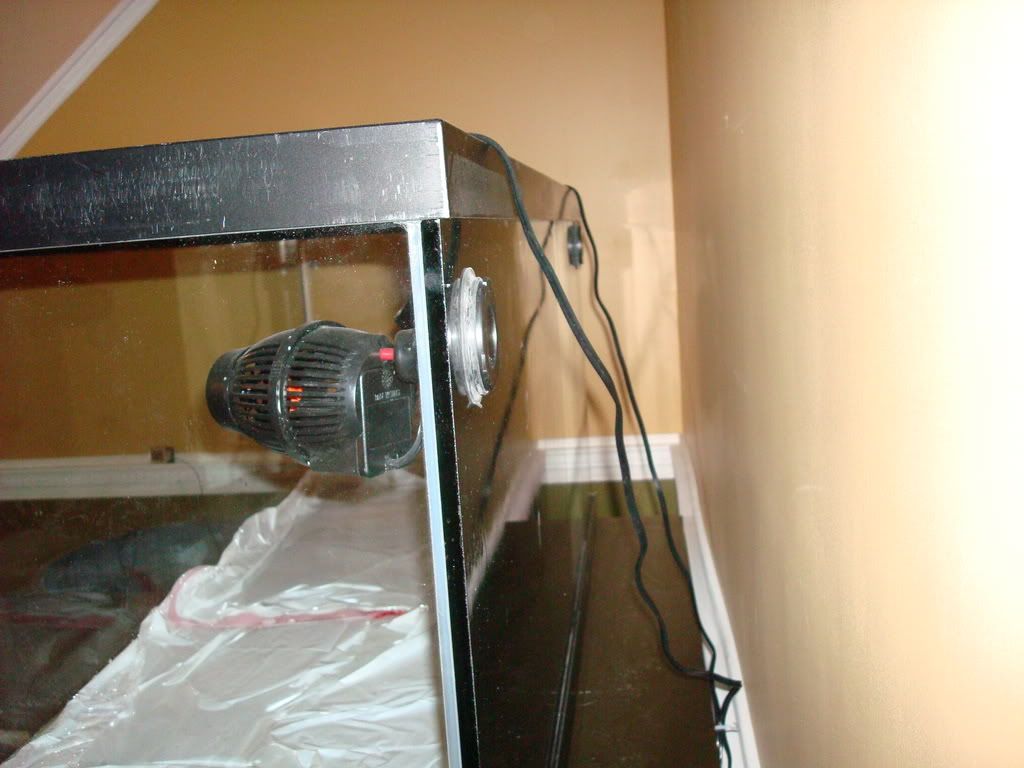 And now you can see we have water! I don't have it completely full yet. The 44 brute is filling up as I write this. Should be it. 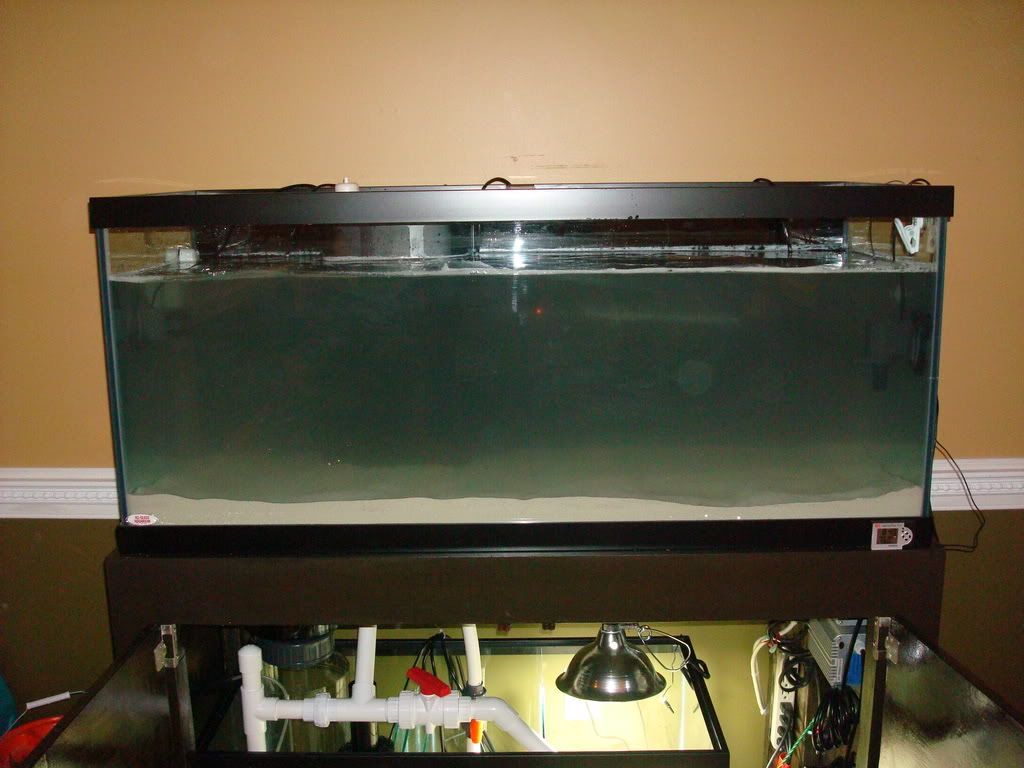 More water. 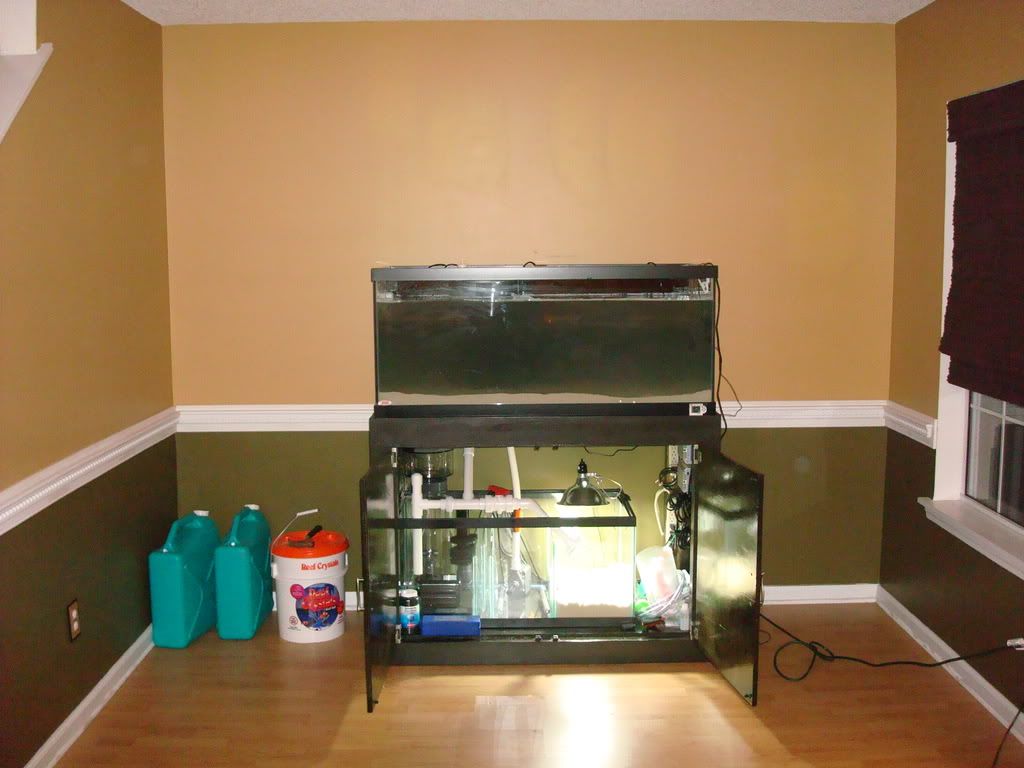 I plan on obtaining rock the beginning of next week and should complete the canopy over the weekend. Hope you enjoy!! Thanks, Kris |
|
|
|
|
02/21/2008, 01:12 PM
|
#20 | |
|
Registered Member
Join Date: Feb 2003
Location: Myrtle Beach
Posts: 229
|
Quote:
Thanks for the kind words. I hope my tank looks as gorgeous as yours one day! Kris |
|
|
|
|
|
02/21/2008, 01:32 PM
|
#22 |
|
Registered Member
Join Date: Apr 2006
Location: Ocean City, MD
Posts: 651
|
You will definately slow down the warping by coating the wood but I don't think you will eliminate the chance of it eventually happening. It's just the nature of plywood.
Just keep an eye on it and fix it as soon as possible before it's too late. Those are some beautiful doors and I'm sure you'd like them to stay that way. Please report about your drain function and volume. Mine's a little noisy and yours looks like a better design. Also, good thinking on the added depth of the stand for when you buy the 90!
__________________
Elos mini reef Current Tank Info: Elos mini, reefkeeper 2, Vortech MP20, ice cap moonlight, Reef Fanatic ATO |
|
|
|
|
02/22/2008, 08:33 AM
|
#23 |
|
Registered Member
Join Date: Feb 2003
Location: Myrtle Beach
Posts: 229
|
Well, the tank is full and operational. I'm proud to report no leaks!
Everything works great, I have the Mag 9.5 full blast and everything is very close to silent. When I try to throttle it back with the ball valve it does produce some gurgling, but not a full blast. I hear the skimmer and it's pump over everything else. When I close the doors, I barely hear anything. I hear a little trickle from the water into the overflow, but it is a peaceful trickle, kind of like one of those desktop rock sculptures that have water slow flowing down. So, being that the skimmer is relatively loud. Kind of like a hum, I can say I don't hear the drains where they enter the sump. There are some bubbles where it enters, but it doesn't gurgle or have surges so it sounds like a fizzing soda. And once again, you don't hear it with the door closes. I am very happy with it, and when the fiance says, "So I thought you said I would be annoyed with the sound." and then immediately states, "Where's the noise?" thats a good sound. On my 125 I had before, I had the drain empty just below the water level into a filter sock. It sounded like a water flow, it was almost a straight drop to from an over flow box with just a pipe and no type of silencer on it. With this design, I decided to have the pipe fall at angles and then hit a T with the hopes that above the T would allow any air to escape before entering the tank. Well, there are still bubbles in the sump, but bubble traps take care of it. I didn't post any pictures as I did experience a sand storm once it was full and the all the powerheads and pumps were turned on. There is a ton of flow from the two Koralia 4s and the two locline returns with an estimated 600gph being returned by them. I also have a Maxijet in there temporarily to really keep the water moving and to help in the curing process of the rock when I obtain it. I am guessing I have flow in the tank around 40x or 3000gph. My 125 didn't have that much. So this is new for me. It is also my first time using Sugar/Oolite sand. I love the look of it, I just hope the sandstorms die down. I am definitely glad I didn't do any more than 2" or so. Thanks, |
|
|
|
|
02/22/2008, 09:57 AM
|
#25 |
|
Registered Member
Join Date: Apr 2003
Location: Mississippi
Posts: 452
|
I really like the work you've done so far. One question, any worries about the back rim of the tank not sitting on legs or any weight supporting structure? I could be wrong, but it looks like the weight is supported on three sides and the back sits on the plywood top.
The reason I ask is I'm trying to design a stand like this for myself (for a 50 now and a 90 later). -avp |
|
|
|
 |
|
|


