
|
|
 08/09/2008, 10:52 AM
|
#1 |
|
Registered Member
Join Date: Jul 2003
Location: Middletown PA
Posts: 762
|
pvc cement and twisting
I know you're supposed to twist PVC 1/4 turn as you attach two pieces together to ensure a consistent spread of the cement. I *think* I can get every joint to do this as I go, but in case I come across one that I'm unable to twist, is it a big deal? I think I got it all worked out that it shouldn't be a problem, but it's going diagonally down into the basement so there's a lot of joints to account for in my head.
Just trying to get my ducks in a row before I make the lines permanent... a lot of friggen plumbing work would be a shame to ruin with a single leaking joint  
__________________
Tank Info: 120g |

|

|
|
08/09/2008, 10:54 AM
|
#2 |
|
RC Mod
Join Date: Apr 2000
Location: St. George Island, FL
Posts: 19,512
|
You should be just fine. Wet both the male and female part of the connection and give it a twist if you can.
__________________
I'm sorry I had a fight in the middle of your Black Panther party. |
|
|
|
|
08/09/2008, 10:56 AM
|
#3 |
|
Registered Member
Join Date: Sep 2005
Location: Spanish Fort, AL
Posts: 1,032
|
if you coat all the way around both pieces i would say no. It should still work, but the bond wouldn't be the 100% you would have gotten otherwise. The glue from what i understand actually dissolves the pvc. So, when you twist it, it mixes the dissolved pvc on both pieces and "welds" them together. That being said, i've never had a leak or joint come undone when i couldn't twist them.
|
|
|
|
|
08/09/2008, 11:01 AM
|
#4 |
|
Registered Member
Join Date: Aug 2008
Location: DK
Posts: 9
|
If you sand both parts (just to make the surface rough), and spread glue/cement on both parts it will glue together fine.
But when you twist it while attaching, you will get an very smooth - almost like welded attach.
__________________
- Torben Current Tank Info: Just moved - waiting to set up a new |
|
|
|
|
08/09/2008, 11:19 AM
|
#5 |
|
Registered Member
Join Date: Jul 2003
Location: Middletown PA
Posts: 762
|
k, sounds good. thanks guys
__________________
Tank Info: 120g |
|
|
|
|
08/09/2008, 11:40 AM
|
#6 |
|
It's what it's
Join Date: Mar 2003
Location: 41° 2' 45" N 85° 8' 43" W
Posts: 7,579
|
Dry fit all the pieces first to the exact fit and angle you need them to be. Mark a small parallel line on each piece where they join. Take them all apart and glue one by one together starting the piece 1/4 turn off so when you twist them together you can line the marks up to where they need to be. Do this for each one if you can and you will end up how you need them.
__________________
Freed Current Tank Info: 180gal(1120 watts of MH/VHO light), 60gal "sump", Deltec 601 calcium reactor, Euro Reef CS8-3+ skimmer, 20 gallon QT |
|
|
|
|
08/09/2008, 01:38 PM
|
#7 |
|
Registered Member
Join Date: Jul 2003
Location: Middletown PA
Posts: 762
|
I'm just finishing up the dry fitting of the entire system. great idea with the lines!
__________________
Tank Info: 120g |
|
|
|
|
08/11/2008, 11:00 AM
|
#8 |
|
It's what it's
Join Date: Mar 2003
Location: 41° 2' 45" N 85° 8' 43" W
Posts: 7,579
|
You get everything fitteded?
__________________
Freed Current Tank Info: 180gal(1120 watts of MH/VHO light), 60gal "sump", Deltec 601 calcium reactor, Euro Reef CS8-3+ skimmer, 20 gallon QT |
|
|
|
|
08/12/2008, 06:02 AM
|
#9 |
|
Registered Member
Join Date: Jul 2003
Location: Middletown PA
Posts: 762
|
yep, as of Sunday night plumbing was 100% complete. The only sections I couldn't get at least a 90* twist on, were the connections behind the tank... I preassembled some sections then in one whole piece I attached to the line going downstairs. Otherwise no problems except a dizzying headache from fumes.
 Last night I did leak testing on the drains and a-ok. I haven't tested the return line yet which is I suppose the true test, I'll probably do that tonight. Going through the painfully slow process of RO/DI'ing about 100 gallons as we speak. Here are a few pics of the system, albeit taken before I cemented the pieces together, so you won't see any primer at the joints. It's a little late in the game, but maybe I should start a build thread while I'm at it. empty tank ready to go (painted stand, tank trim, back pane... and drilled) 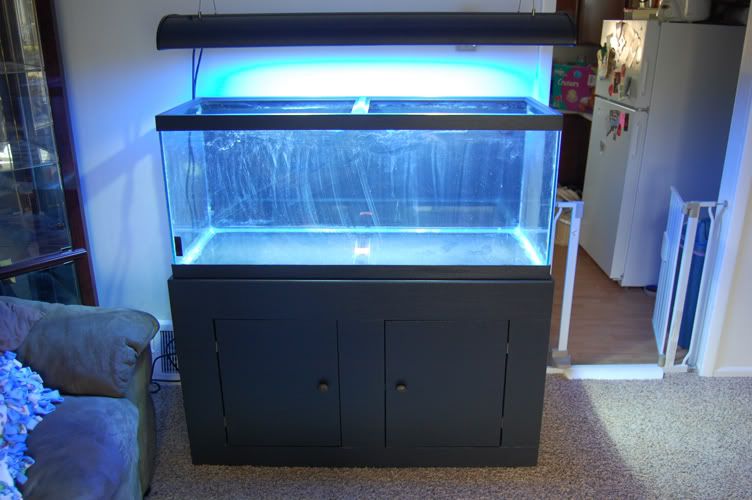 tee'd return in the middle, independent drain lines on the sides. 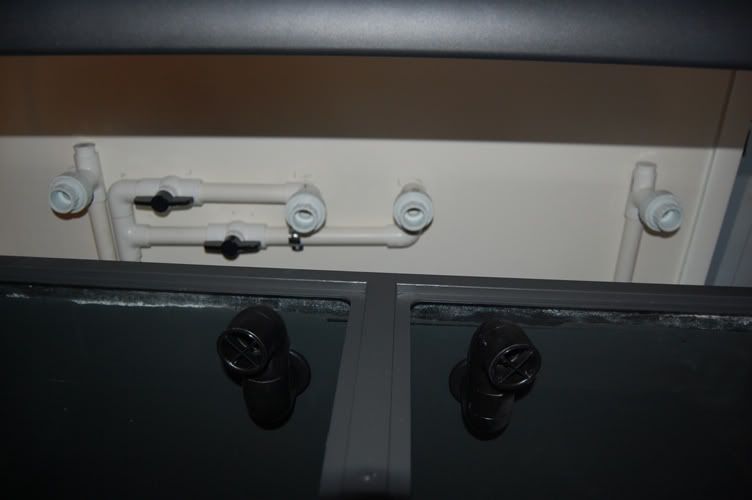 into the wall... 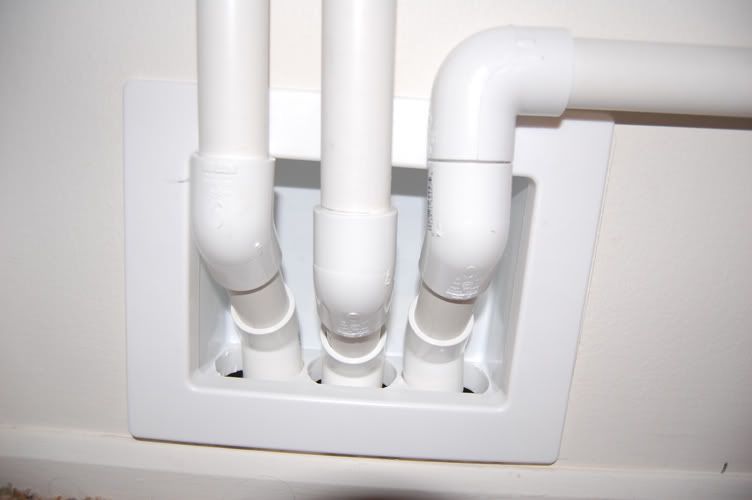 ...and into the basement. It's a load bearing wall here, so a lot of 45* elbows were involved to route down around the beams located behind that strip of panelling. 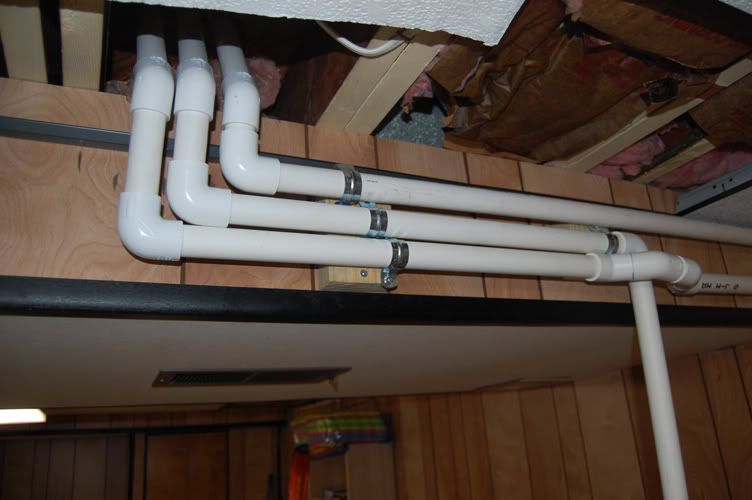 rest of the basement plumbing. 30g will be the fuge, 20g will be the sump. oh, and yes the skimmer is getting upgraded for sure!  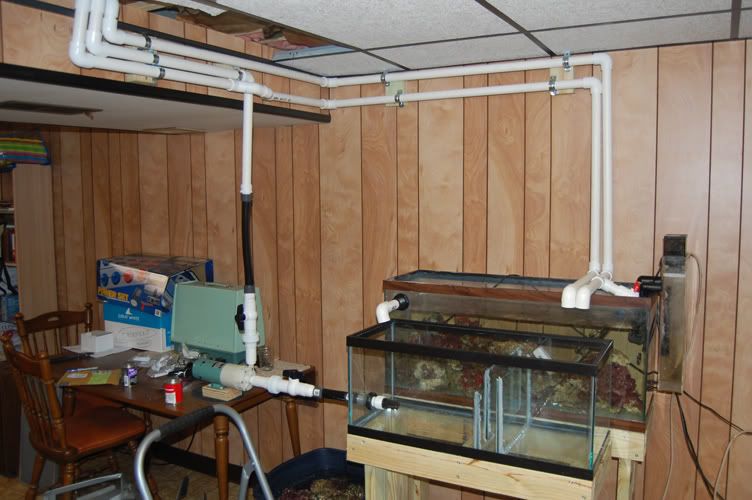
__________________
Tank Info: 120g |
|
|
|
 |
|
|


