
|
|
 09/08/2008, 02:08 PM
|
#1 |
|
Premium Member
 Join Date: Jul 2005
Location: Seattle, WA
Posts: 2,415
|
My 90G rimless/starphire cube build
I am getting close to adding water so I thought I would start a thread on this new tank. I've had my AGA 65G for over three years now and I've been wanting something a little larger and a 90G seemed to fit the bill. I love the rimless cubes so I had one custom built by Joel and Waves Marine down in Portland.
Here is the equipment list: -1/2" starphire glass cube (30Wx30Lx24T) w/external overflow box -Two Vortech MP40W's for flow -Eheim 1260 return pump (currently on my 65G), probably plumbed through two 3/4" returns -Octopus CR140 calcium reactor (currently on my 65G) -Warner Marine AS-200 skimmer -Full sized Lumenarc III, 250W 20K Radium running on a Blue Wave HQI Ballast -18" VHO Actinic for dusk/dawn -20L sump for skimmer/return pump, AGA 5G fuge -Keep my DIY ATO setup -AC Jr. Controller (currently on my 65G) First up was building the hanging light fixture. I wanted to keep the box as small as possible so I opted for a 18" VHO actinic rather than 24" T-5's. The canopy is built from 1/2" Birch and will hang from the ceiling. 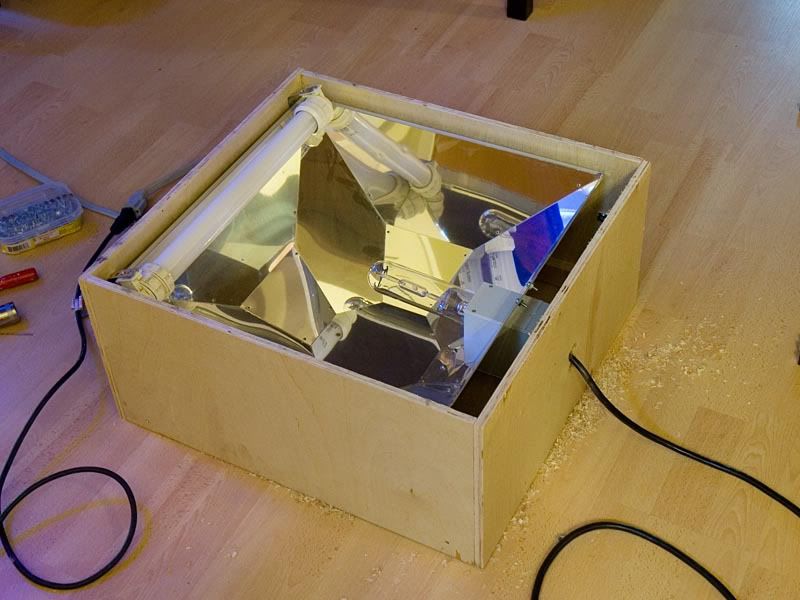 Here it is all trimmed and stained: 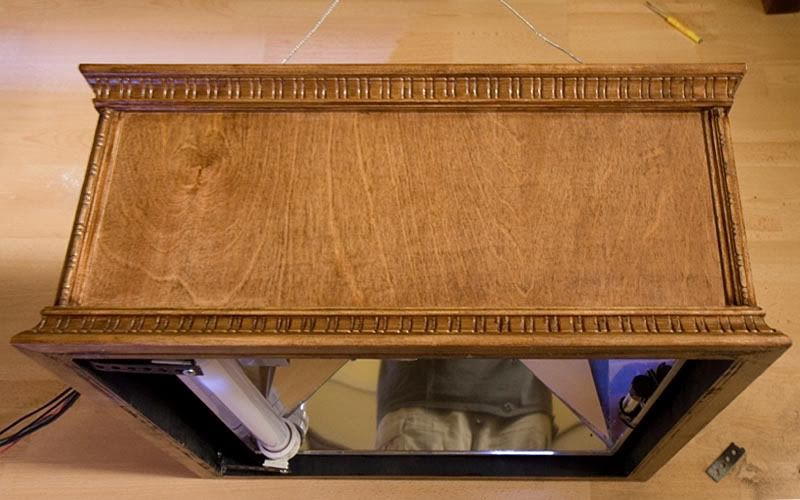 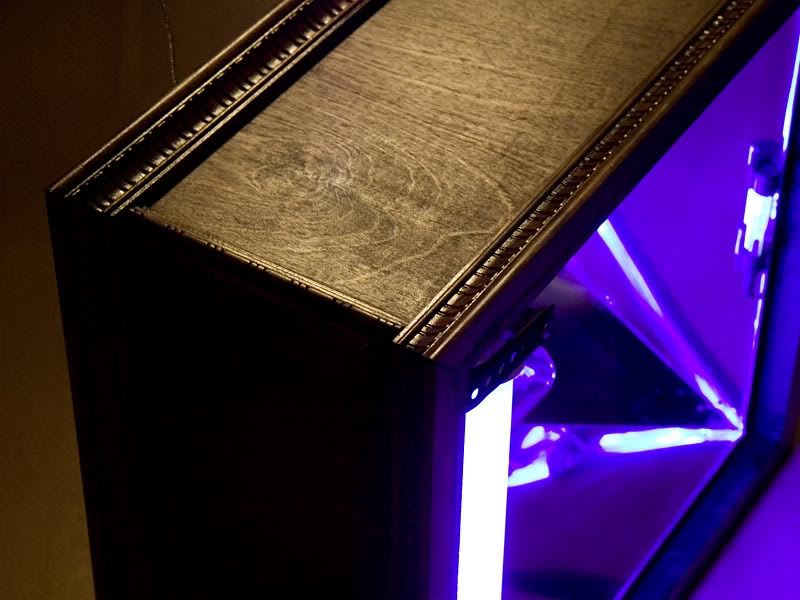 Here are some shots of the tank. 3-sided starphire with beveled edges and sitting in from of my current tank. 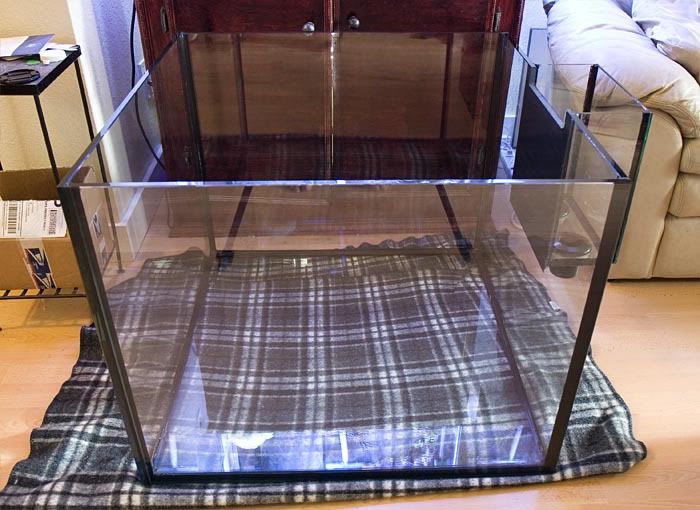 The silicon looks black in this picture but it's more of a gun metal gray color. 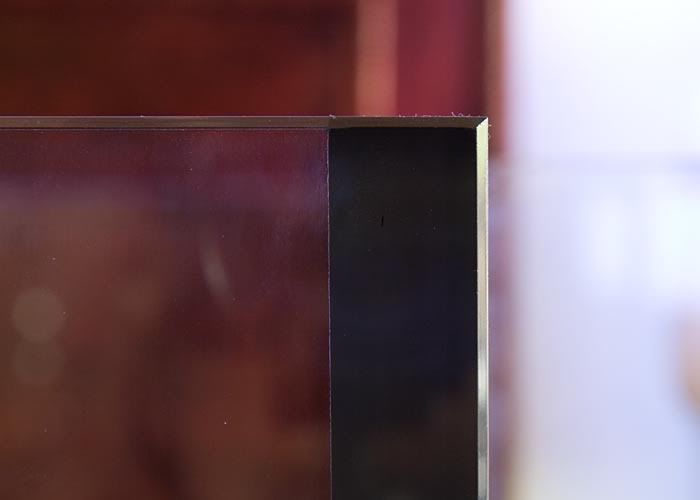 Skimmer in waiting  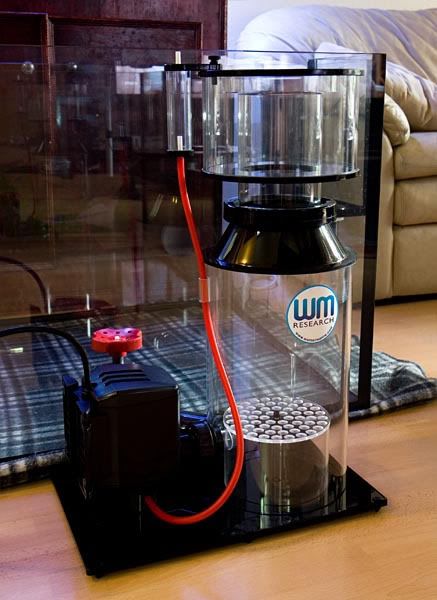 Up next was the stand. It wasn't quite finished in these pictures but you get the idea. The trim/stain matches the hanging canopy and the three "doors" are fully removable panels. I used the plans from RocketEngineer over on the DIY forum. I then had to set the trim 1/2" off the frame so the doors would appear flush once installed. 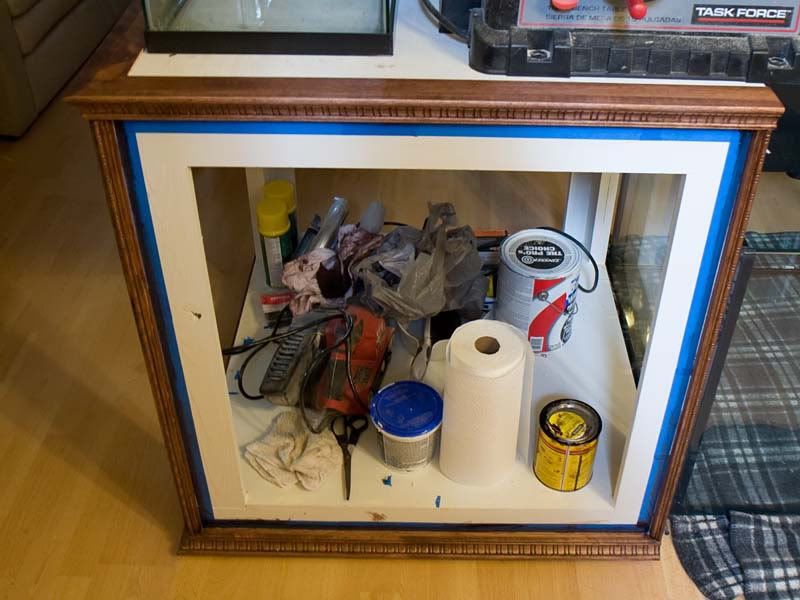 (no hardware yet) 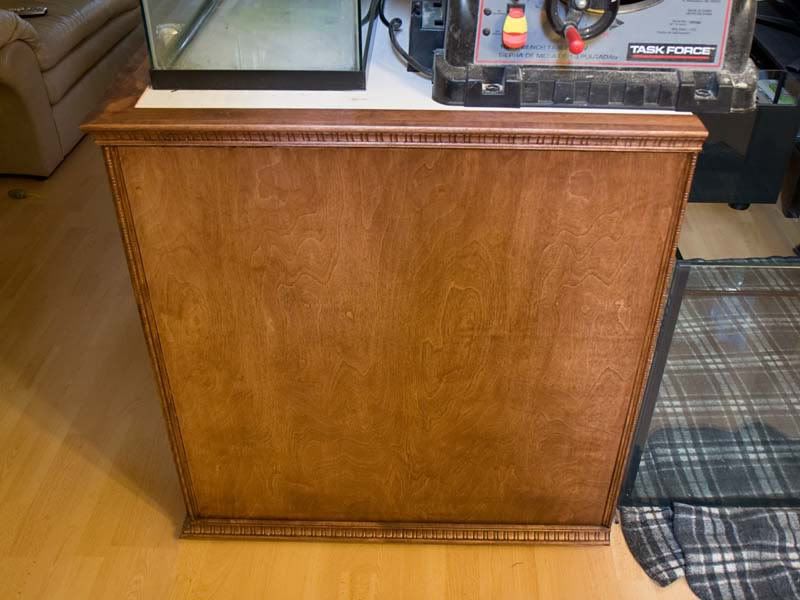
|

|

|
|
09/08/2008, 02:12 PM
|
#2 |
|
Premium Member
Join Date: Jul 2005
Location: Seattle, WA
Posts: 2,415
|
I spend this weekend working of the foam background and rock work. I ordered sixty pounds of rock from bulk reef supply and was quite pleased.
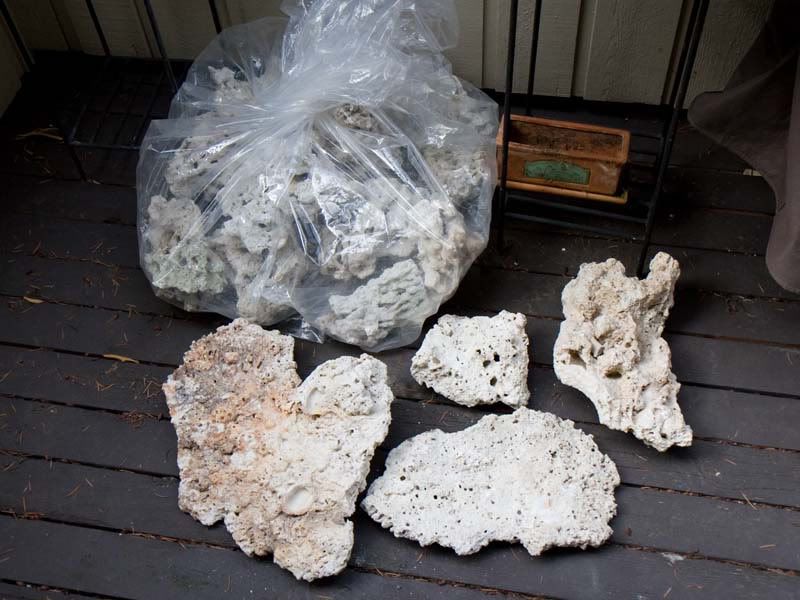 The tank is in a partial corner hence the two walls. The two openings are for the Vortech pumps. 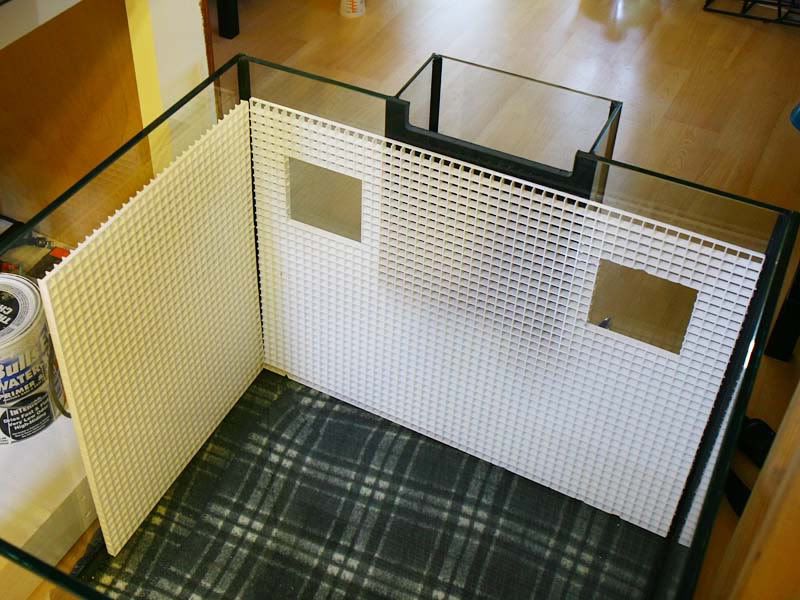 Getting everything zip tied onto the egg crating. 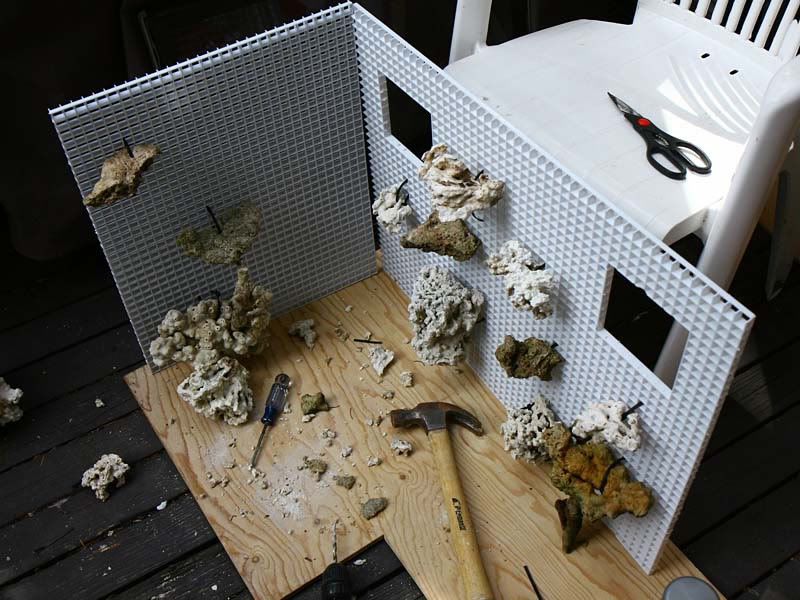 Applying the black pond foam. 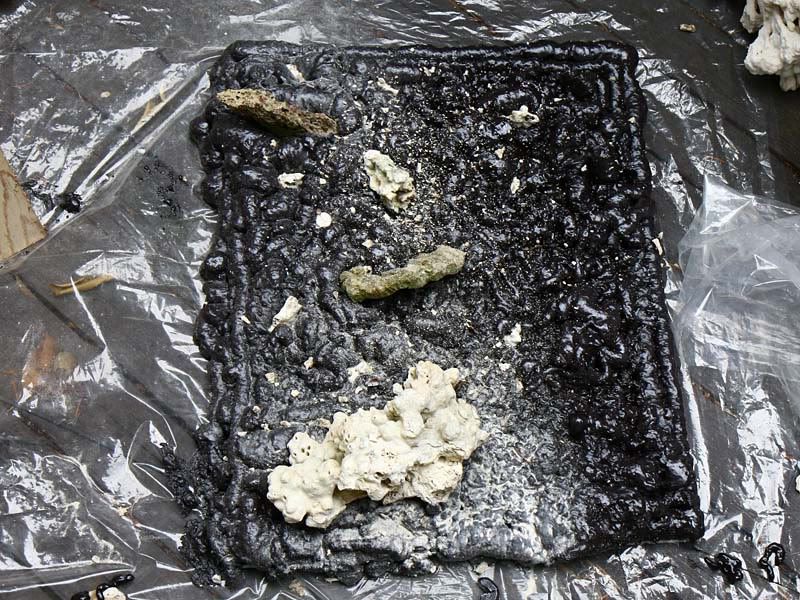 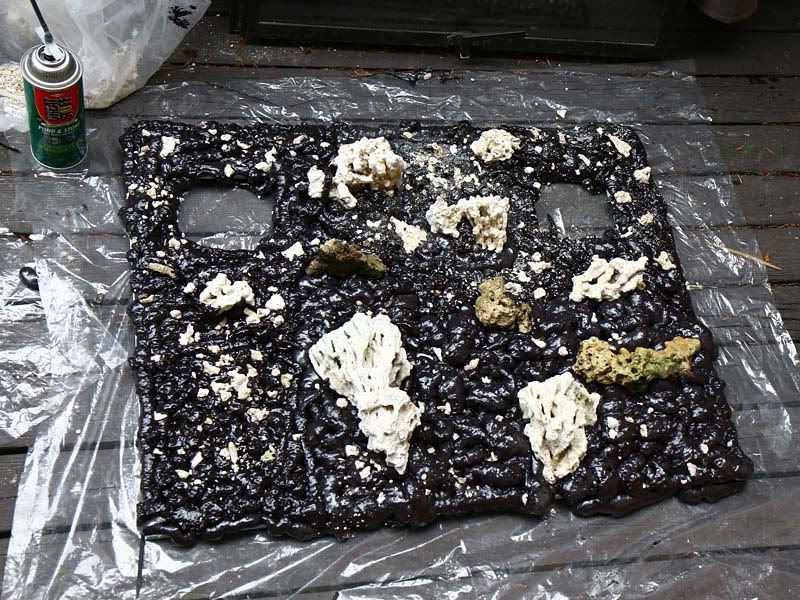 Here are the panels after the epoxy/sanding step and how they will be placed in the tank. 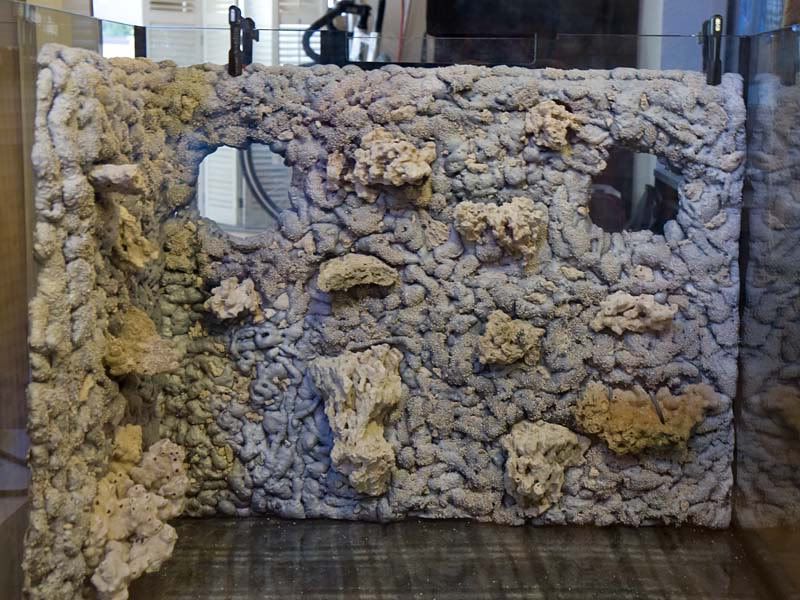 All of the rock was planned out before hand and drilled/attached with 3/8" acrylic rod and then foamed into place. The rock structure breaks down into 4-5 large chunks and is very stable. 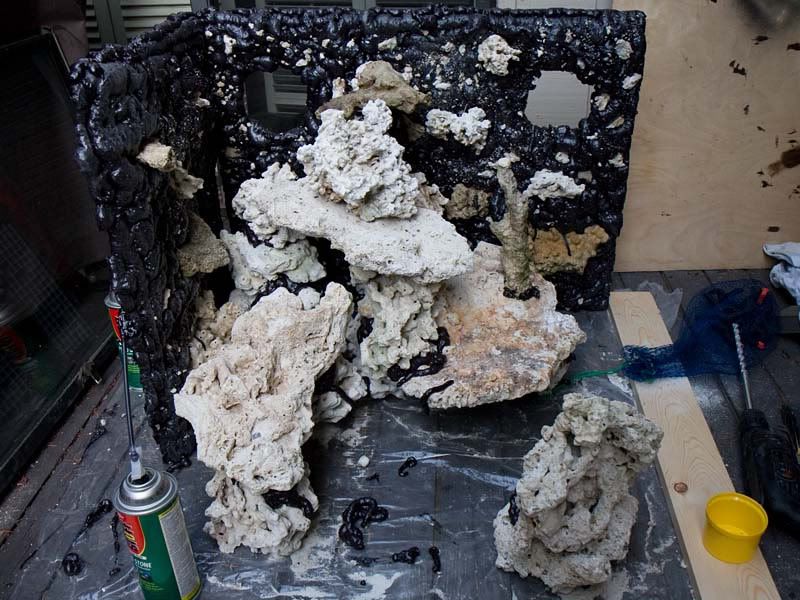 And here is the rock in the tank. I'll be using 3-4 rocks from my current tank to seed this new one. top-down 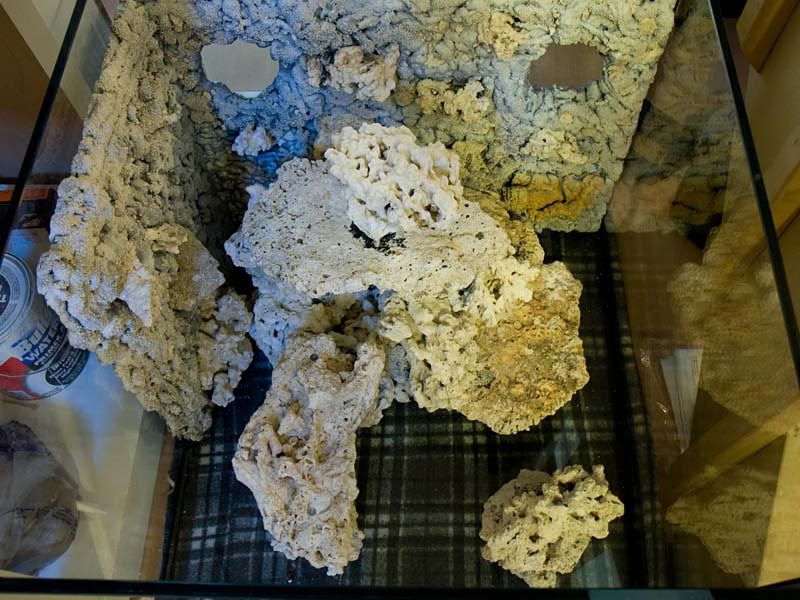 front 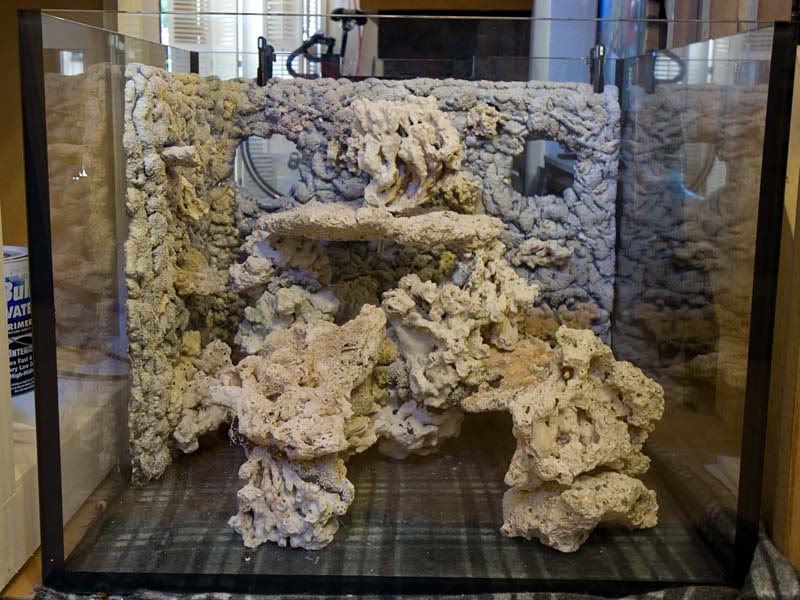 I'm working on the plumbing now and am hoping to make the transfer this weekend. I'll update as things progress. Thanks! |
|
|
|
|
09/08/2008, 02:22 PM
|
#3 |
|
Registered Member
Join Date: Feb 2001
Location: Monterey County
Posts: 6,442
|
Wow, very impressive! I really like the canopy and stand.
__________________
This space for rent... Current Tank Info: 36x36x16 A.G.E. tank. Lighting: ATI Straton. Circulation: 2x Vortech MP40wQd's. Skimmer: Red Sea 300. Controller: Neptune Apex. Doser: Neptune Dos. |
|
|
|
|
09/08/2008, 02:58 PM
|
#4 |
|
Registered Member
Join Date: Dec 2003
Location: Denver, Colorado
Posts: 9,579
|
Looks great, I can't wiat to see this thing come together. Keep up the great work.
Spleify
__________________
Make it a Great Day!!!! Current Tank Info: 60 gal SPS cube, with 25 gal refugium, 400W MH, DIY Lumenarc III, DIY skimmer, DIY stand and canopy. 40 breeder LPS with 40 gallon sump, DIY stand, 250W MH |
|
|
|
|
09/08/2008, 02:58 PM
|
#5 |
|
Registered Member
Join Date: Nov 2006
Posts: 3,715
|
Looks great so far! How do you plan to hang the "canopy" from the ceiling? I am planning on doing the same soon but have just not decided how to hang it yet. Mine will be a bit heavier than yours though, so a bit more of a challenge. I figure aircraft cable but I am not sure what to anchor it to the ceiling with.
Anyways, looks really great so far! Rock work is very nice. |
|
|
|
|
09/08/2008, 03:01 PM
|
#6 |
|
Registered Member
Join Date: Mar 2007
Location: Columbus
Posts: 2,949
|
looks great so far! Joel has gotten really good at building tanks!
__________________
August 2011 TOTM |
|
|
|
|
09/08/2008, 03:29 PM
|
#7 | |
|
Premium Member
Join Date: Jul 2005
Location: Seattle, WA
Posts: 2,415
|
Quote:
Thanks everyone for the comments! |
|
|
|
|
|
09/08/2008, 03:30 PM
|
#8 |
|
Registered Member
Join Date: Jan 2004
Location: Los Angeles
Posts: 308
|
that's truly impressive. I'll be watching your build...
The tank, the cabinetry, the panels... fantastic. Remember to leave lots of space for growth! jon
__________________
Jon To build a great reef... you need the right tools! The Home of ECOBAK! |
|
|
|
|
09/08/2008, 04:45 PM
|
#9 |
|
Premium Member
Join Date: Jul 2005
Location: Seattle, WA
Posts: 2,415
|
Hey Jon, I'm glad you came across this thread. One reason why I went with the rock walls was so I can attach frags and fill out the back, that should give me some more space. And I hope I can stock the tank enough to experience the true potential of the skimmer
|
|
|
|
|
09/08/2008, 04:47 PM
|
#10 |
|
Registered Member
Join Date: Aug 2007
Location: Mohnton, PA
Posts: 1,002
|
This is pretty cool. May I tag along?
__________________
Thanks! Jeremy Current Tank Info: 90 gal with 40 gal breeder sump / fuge, Octo skimmer, lights and some water. |
|
|
|
|
09/11/2008, 03:45 PM
|
#11 |
|
Premium Member
Join Date: Jul 2005
Location: Seattle, WA
Posts: 2,415
|
It looks like I'll be moving forward and making the transfer on Saturday afternoon. I just finished up the plumbing and gave it a fresh-water leak test. I have the output nozzles dumping right back into the overflow box as I didn't want to waste 90G of water, I was more concerned about my PVC not leaking, I'm sure the tank is just fine. I came across a thread on here about a "silent" overflow and figured this would be the perfect time to give the "Herbie" method a shot. I was running the Mag 9 (this is just a spare pump, I'll be using an Eheim 1260) wide open and I could only tell it was on because of the light hum from the pump. I was extermely impressed at how silent it was, I look forward to not hearing any gurgling.
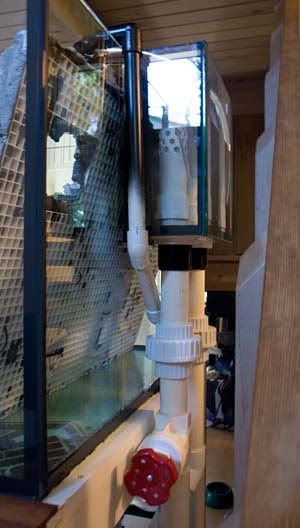  The only problem that I ran into was the plumbing to the 5G fuge. It was drawing air from that 1" PVC from the fuge and causing noise for the main drain. I think I'll just cut that line out and cap it near the 1.5" pipe and feed the fuge with a MJ400 or something from the sump. The less variables and changes in flow rate for the 1.5" overflow the better/more stable it will be. 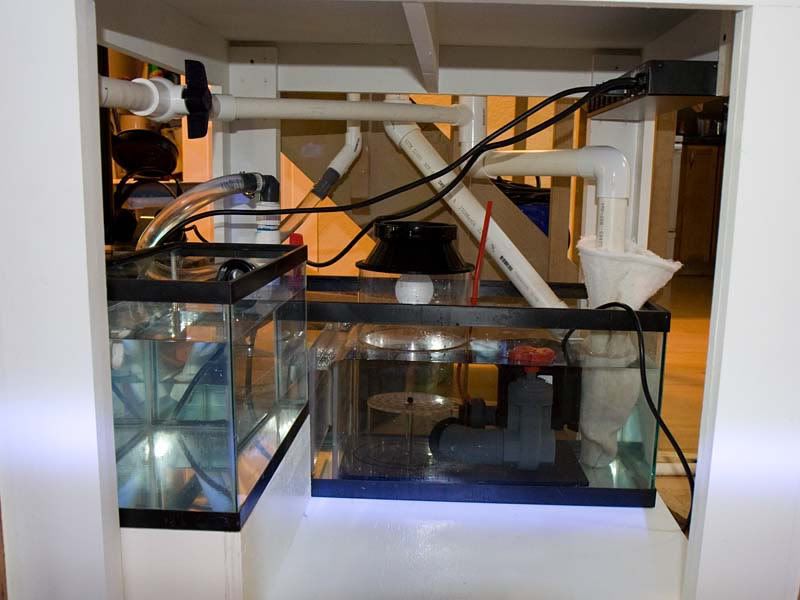 I also picked up one of these power strips from Musicians Friend. I bought two but I only think I'll be using one. I may need just a few more outlets (my AC Jr also has eight) and I don't to install another one of these panels for just an outlet or two that I'll probably never need to switch off (like the fuge light, etc). 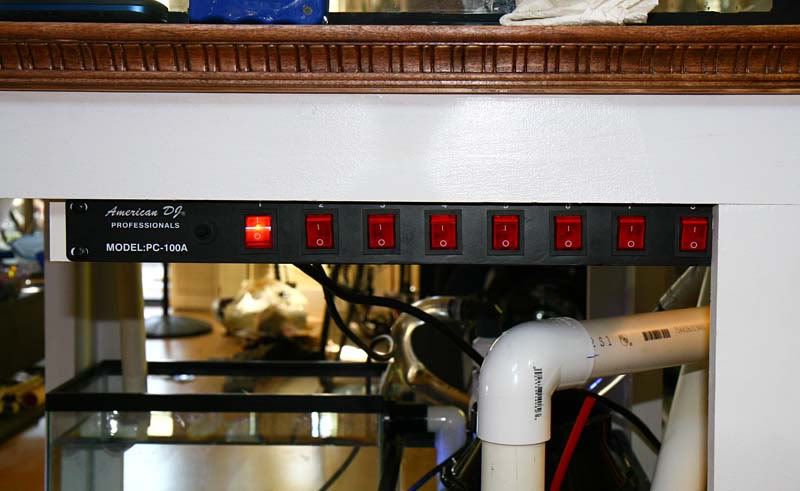 I have all of the dry rock in a 30G trashcan with a heater, salt, skimmer, and a few PH's. Hopefully that will help clean up the rock so there will be less impact once I make the transfer. Just a few more things to finish up on the stand and then I'll silicon the rock panels in place and start getting everything else ready for Saturday. |
|
|
|
|
09/11/2008, 05:34 PM
|
#12 |
|
Registered Member
Join Date: Apr 2003
Location: Chuck-town, SC
Posts: 140
|
Looks great im going to tag along cant wait to see it get stocked
|
|
|
|
|
09/13/2008, 12:01 AM
|
#13 |
|
Registered Member
Join Date: Jan 2003
Location: Sydney Australia
Posts: 142
|
Hi Blazer tank looks great;
I am planning a very similar tank, but only 18â tall rather than 24â. Would you be able to tell me how big your notch is on y our back wall? Have you filled the tank yet and are you happy with your water level? Cheers, Jason
__________________
Jason Current Tank - 800x800x500 (31" x 31" 19") Rimless Cuboid |
|
|
|
|
09/13/2008, 12:48 AM
|
#14 |
|
Registered Member
Join Date: Aug 2007
Location: Mohnton, PA
Posts: 1,002
|
I don't have a fuge, but I was thinking of making one. How are setting yours up with out it being in your sump? Are you splitting the lines? I can't tell if it's drilled or not.
__________________
Thanks! Jeremy Current Tank Info: 90 gal with 40 gal breeder sump / fuge, Octo skimmer, lights and some water. |
|
|
|
|
09/16/2008, 10:22 AM
|
#15 | ||
|
Premium Member
Join Date: Jul 2005
Location: Seattle, WA
Posts: 2,415
|
Quote:
Quote:
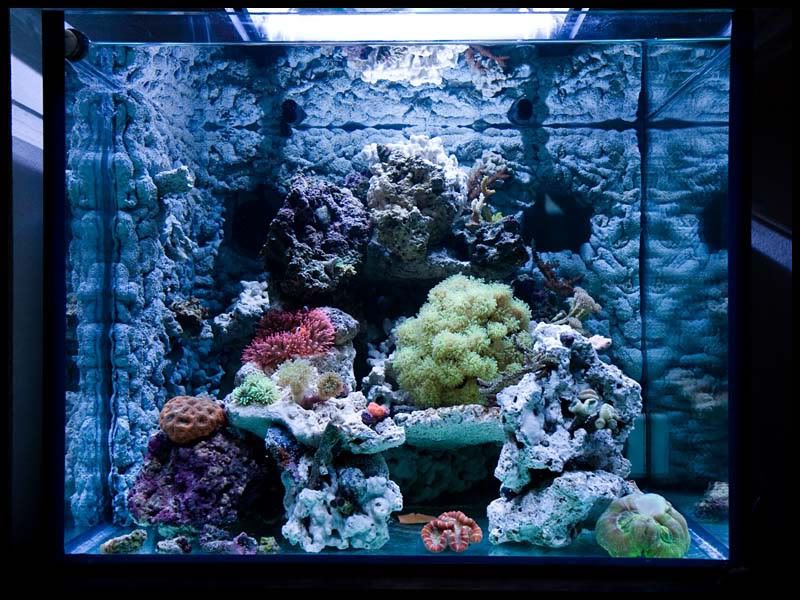
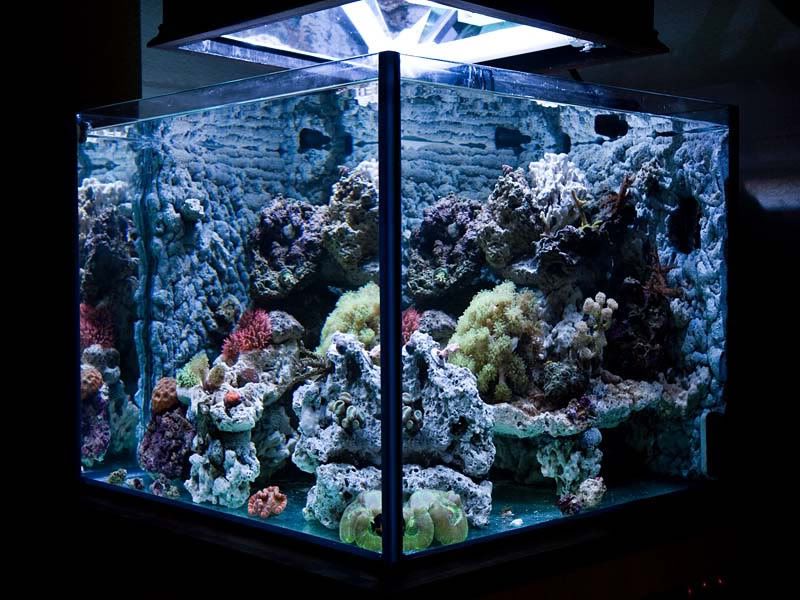
As for an update, I have to say the transfer was quite the pain. I unloaded the 65G into bins and setup the new tank only to have the back wall pop off and almost overflow the tank within a few hours of filling it. I had to drain the new tank and transfer everything back into the 65G to re silicon the back wall on. I didn't really know how buoyant this foam was so I didn't use very much silicon the first time, I was rather generous the second time and now I know it won't be moving anywhere. The fish/corals were without lights and got transferred 3 times between Saturday afternoon and Monday morning. But so far everything looks happy in the new tank and the fish were out and about. I also found my tailspot blenny is extremely hardy. I forgot to add him to the new tank the first night so he spend the night in a 5 gallon bucket with about 2" of water and no heater. The water temp dropped to about 65 degree but he seemed just fine yesterday as he was picking at the rocks in the new tank. So far all of the other livestock seems happy as well. Here are some transfer shots. 65G filled to the brim while the silicon had to cure for the back wall in the new tank. 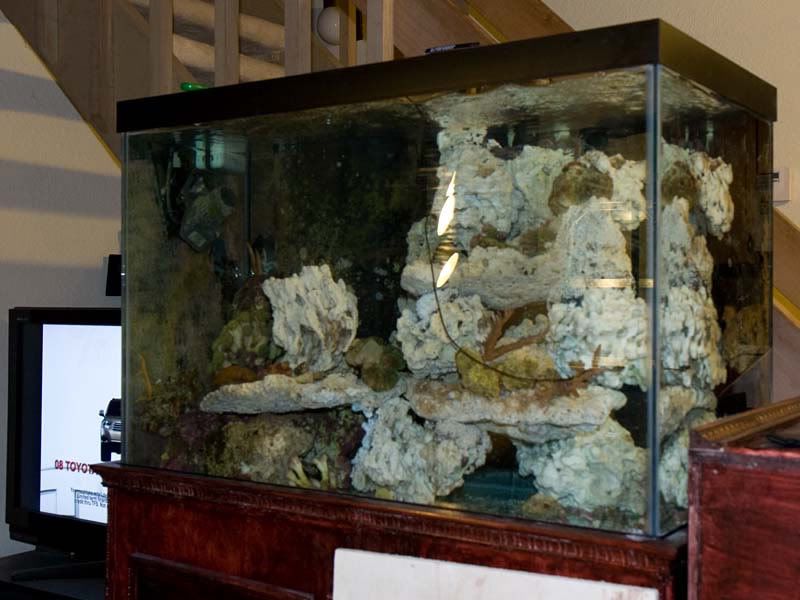 New tank in place: 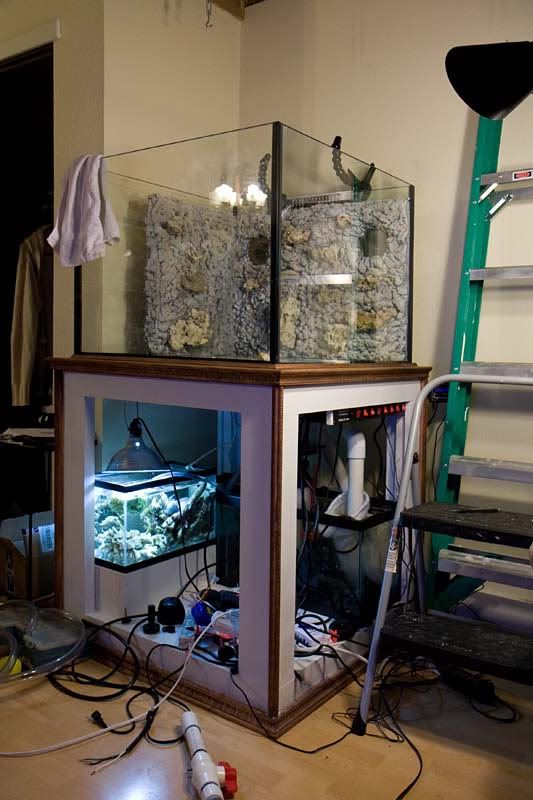 Filling it up and transferring the rock/livestock from the 65G. 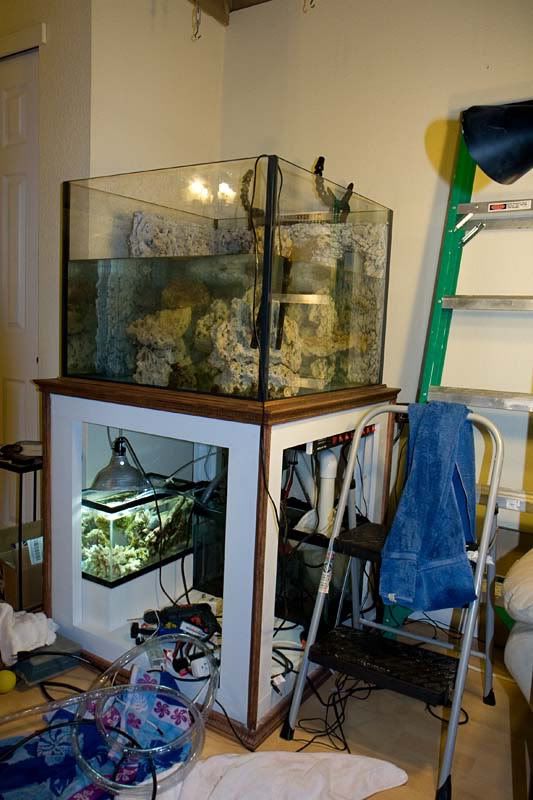 Filled, stocked, and running: 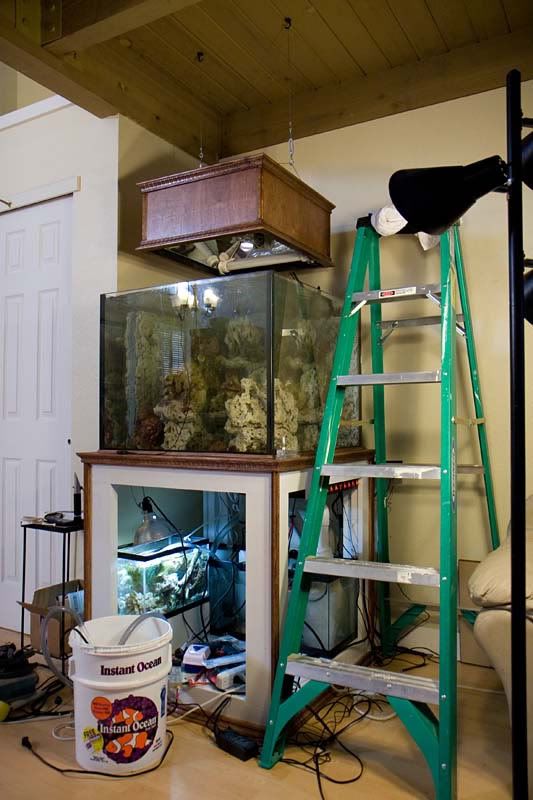 Some tank shots with just the Radium fired up: 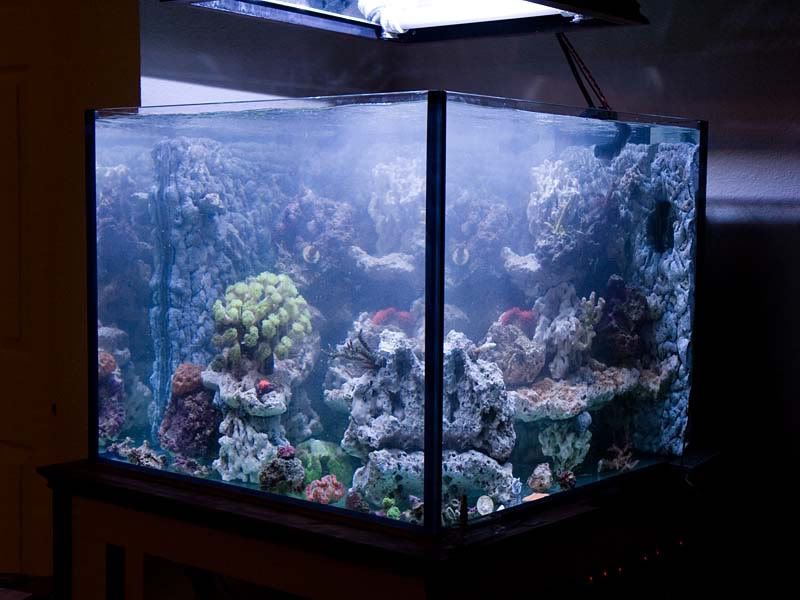 Front: 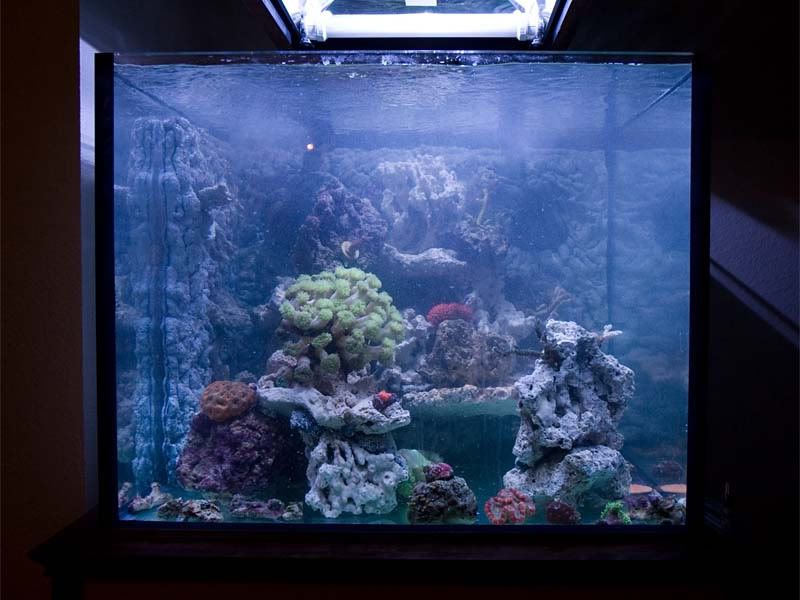 Side: 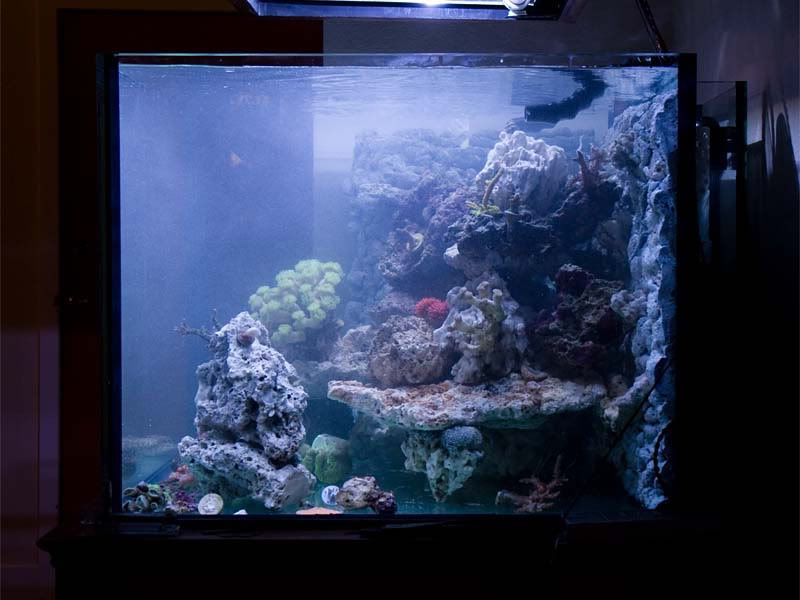 As you can see, I'm still have quite the micro bubble problem as the skimmer it filling my sump with bubbles. Hopefully it will break in sooner rather than later.  I also think there is too much rock in the display and I haven't added any of the sand yet. I plan to let the tank mature for a little while before I remove some of my older live rock to open up the aquascape a little bit. I'll also add the sand slowly to avoid clouding the water more than it already is. I got the AC Jr. all wired up and now I need to finish cleaning the wiring up and finish a bit of detail on the doors before they go on. I also lowered the canopy a few more inches than what is pictured and noticed it is about 1" off centered so I'll need to fix that. More updates as things progress! |
||
|
|
|
|
09/16/2008, 05:25 PM
|
#16 |
|
Registered Member
Join Date: Aug 2007
Location: Mohnton, PA
Posts: 1,002
|
Thanks for the info. Tank is looking good!
__________________
Thanks! Jeremy Current Tank Info: 90 gal with 40 gal breeder sump / fuge, Octo skimmer, lights and some water. |
|
|
|
|
09/16/2008, 05:46 PM
|
#17 |
|
Registered Member
Join Date: Nov 2006
Posts: 3,715
|
Looks great!
Can I ask what kind of epoxy you used to cover the foam? And what kind of sand did you mix it with (if thats what you did)? Basically would you be able to give me a better idea of how its done...or a link to a thread you followed...I know there are lots of them but I searched and still can't find them. Thanks! |
|
|
|
|
09/16/2008, 07:35 PM
|
#18 |
|
Premium Member
Join Date: Jul 2005
Location: Seattle, WA
Posts: 2,415
|
Hey Justin,
I used an epoxy from Bob Smith Industries that I found at a hobby store (Hobby town USA). I think most model train/RC/plane, etc stores would carry something very similar. It was a 30 minute cure time so that gave plenty of time to work it into the foam and then toss some sand onto it. I think it would have actually been easier to just apply the sand when the foam was wet. The sand I used was regular ol 1-2mm aragonite sand that I plan to use on the bottom as well. |
|
|
|
|
09/16/2008, 07:57 PM
|
#19 |
|
Mangroves are kool.
Join Date: Nov 2007
Location: Chicago
Posts: 5,246
|
Really sweet bro

__________________
-The Wiz Current Tank Info: Elos Mini Seahorse Tank, 2500 gallon Koi pond |
|
|
|
|
09/16/2008, 09:34 PM
|
#20 |
|
Moved On
Join Date: Aug 2007
Location: Milano, Italy (Tempe, AZ)
Posts: 623
|
love it!!!!! more pics

|
|
|
|
|
09/16/2008, 10:53 PM
|
#21 |
|
Registered Member
Join Date: Nov 2004
Location: Bay Area
Posts: 14,555
|
Nice
__________________
*** RETIRED FROM REEFING *** Just enjoying the box of water from afar |
|
|
|
|
09/16/2008, 11:37 PM
|
#22 |
|
Registered Member
Join Date: Mar 2008
Posts: 202
|
Nice build. Just curious why build a cube to only have 2 panes viewable?
__________________
"when your wife understand that if the acropora colonies thrive the sex is much much better." Martin_gruin |
|
|
|
|
09/17/2008, 09:24 AM
|
#23 | |
|
Premium Member
Join Date: Jul 2005
Location: Seattle, WA
Posts: 2,415
|
Quote:
|
|
|
|
|
|
09/17/2008, 01:51 PM
|
#24 |
|
Premium Member
Join Date: Jul 2005
Location: Seattle, WA
Posts: 2,415
|
Here are a few updated pictures from today. The anemone decided to move on me so I had to shift a few things around. I really like where he is at right now so hopefully he will end up staying there for good. But so far the corals are looking better each day and the fish seem normal as can be. Right now there are only a pair of clowns, Tailspot Blenny, Firefish, and a Cherub Angel in there. I plan to add some more in the next few weeks. Here are the shots.
  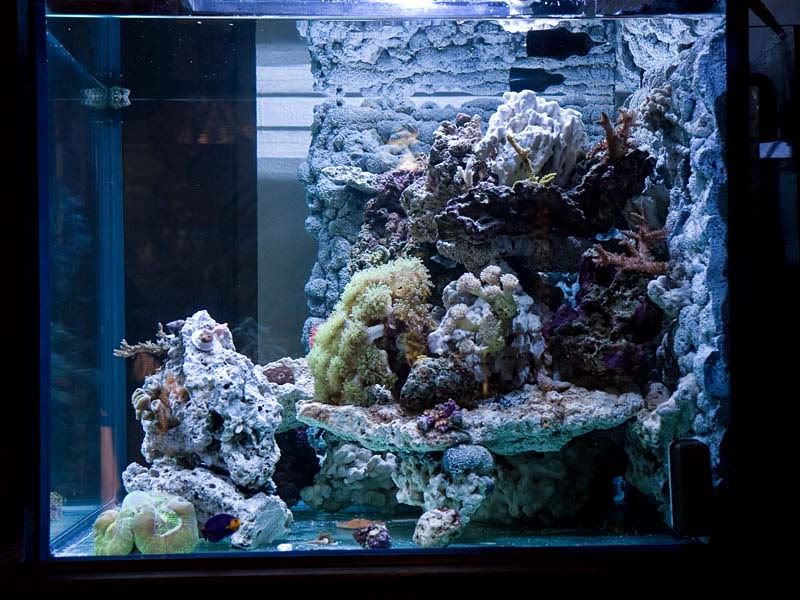 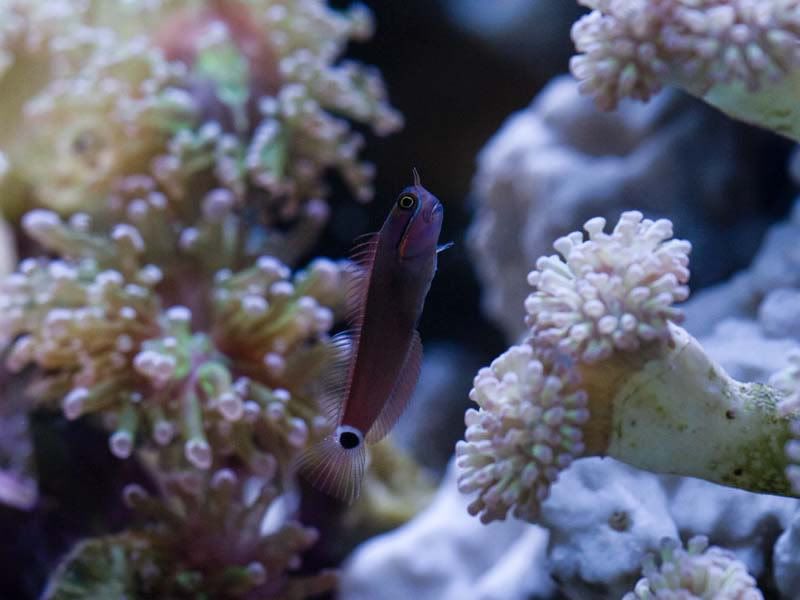 The second one was hiding  My frogspawn finally has some more room to grow 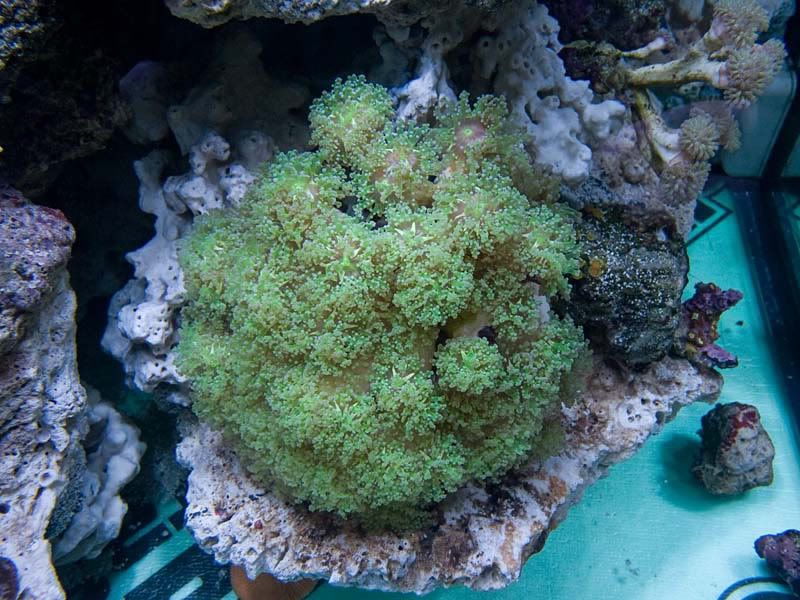
|
|
|
|
|
09/17/2008, 03:20 PM
|
#25 |
|
Registered Member
Join Date: Jan 2004
Location: Los Angeles
Posts: 308
|
wow...
looks great, and only a few days old! Can't wait to see the coralline cover the panels. So many places to put frags too...
__________________
Jon To build a great reef... you need the right tools! The Home of ECOBAK! |
|
|
|
 |
|
|


