
|
|
 10/09/2008, 10:33 PM
|
#1 |
|
Registered Member
Join Date: Aug 2008
Location: Boynton Beach, FL
Posts: 540
|
New Guy's Sage Continues: 100g build
Ok..so have posted a few times about my new found obsession, which you all share, and I figured I would build a thread about my first tank build. I will post a few pics from previous posts, then add the newest ones.
First I got a 100g tank from craigslist, I didnt have any clue how big a 100g tank was until I saw it in person. I was considering giving my dog a bath in it, but she would have most likely broke it trying to escape the evil water spraying device: 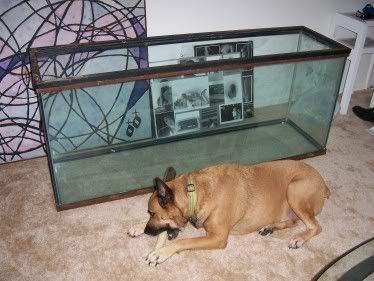 So I then begin to build a simple stand for it, but i wanted something nicer than the usual store bought stands. I way over engineered it, and mistakenly used pressure treated 4 x 4s, but I coated the heck out of them, and dont forsee them being a issue. Of course, nothing is simple for me, and the stand took ona whole new life, but it came out way better then i thought it would: 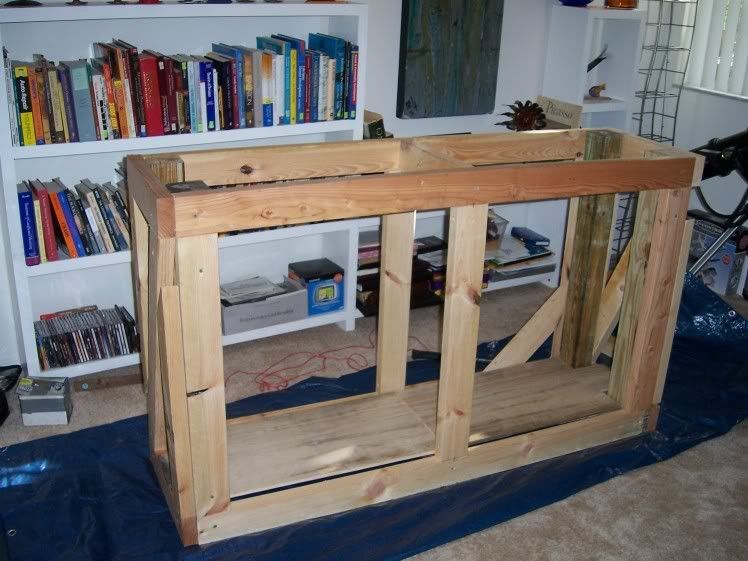  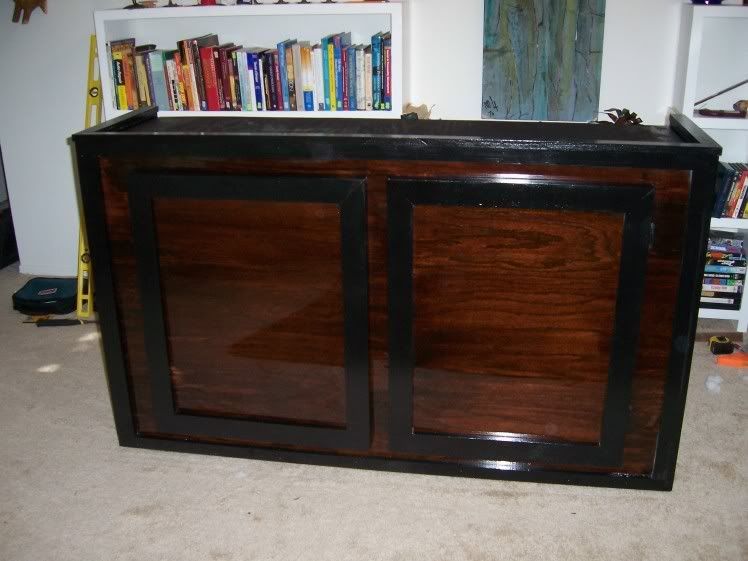 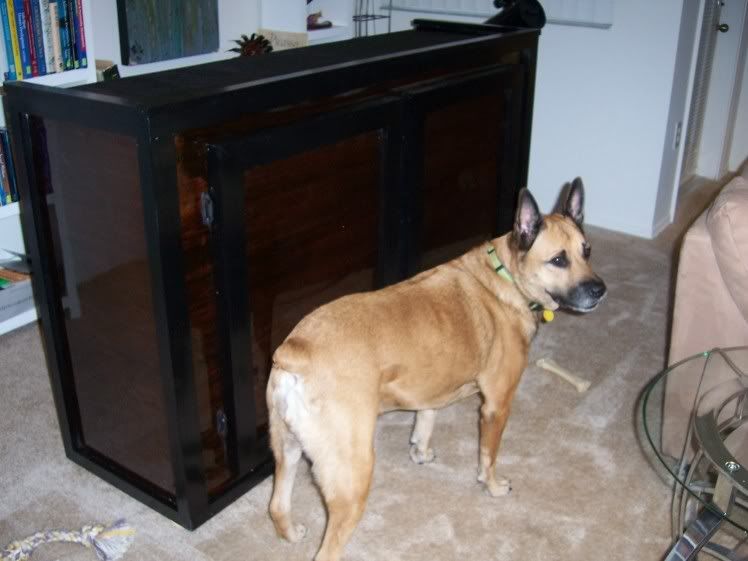 Next was the Canopy. I am making a change to this, as I can not find any supports that will work the way i want them too: 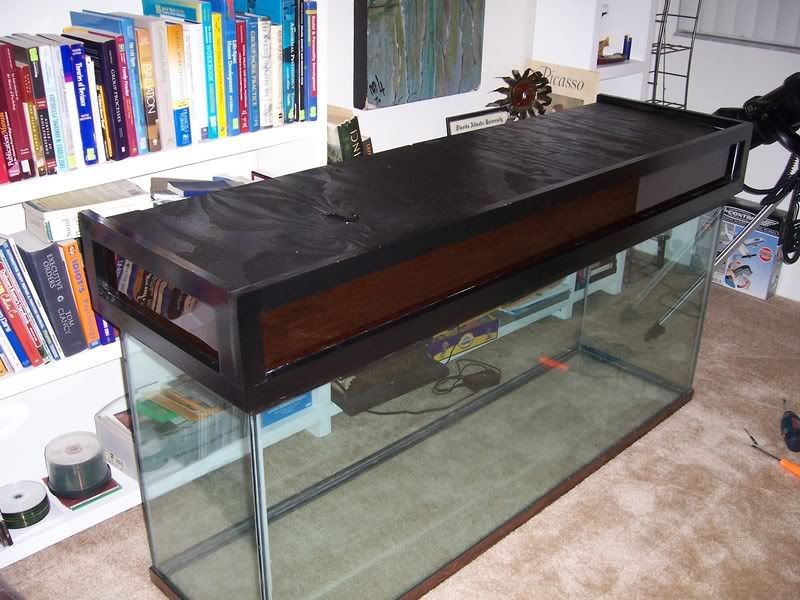 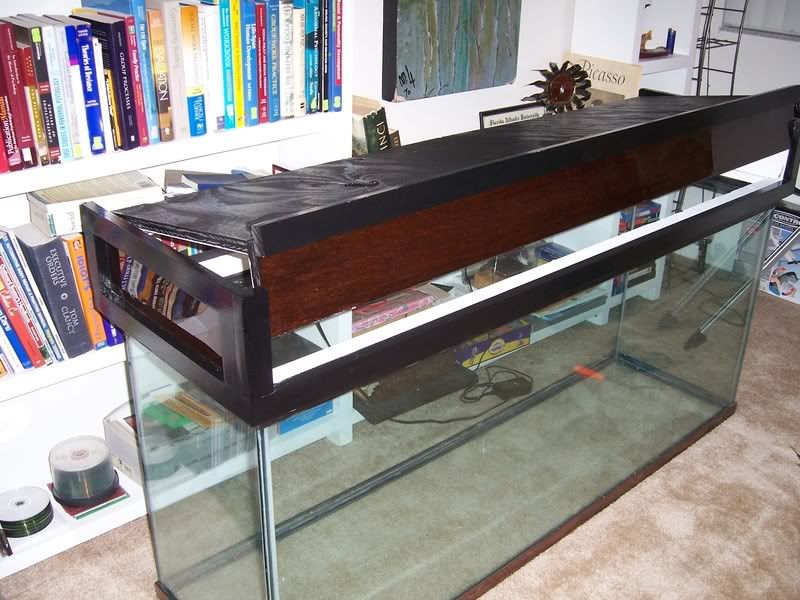 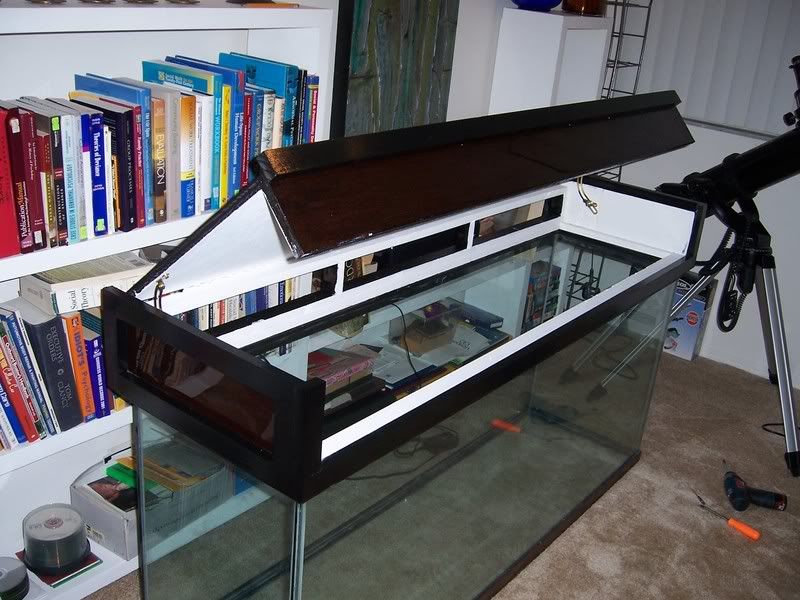 I bought a pair of 60" T5 with Icecap ballast, and a pair of 48" VHO's. 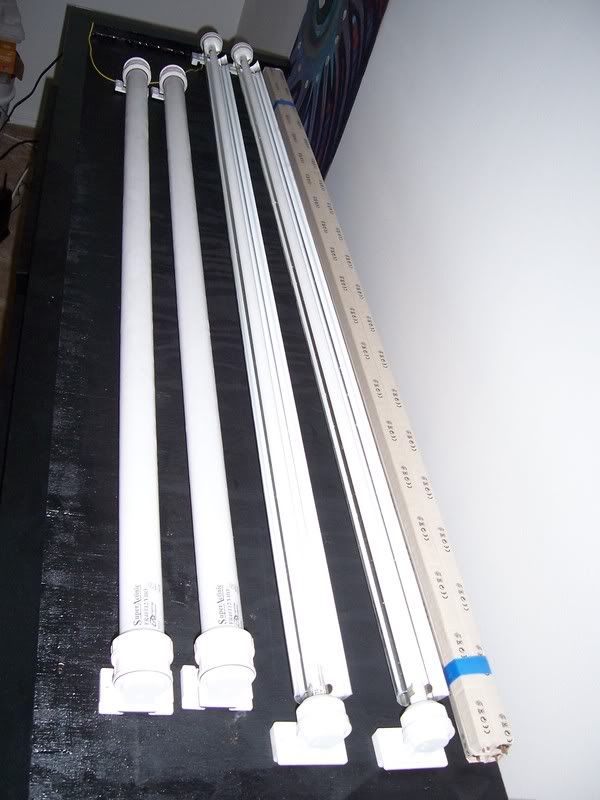 RO/DI kit, I have it hooked up in my laundry room now: 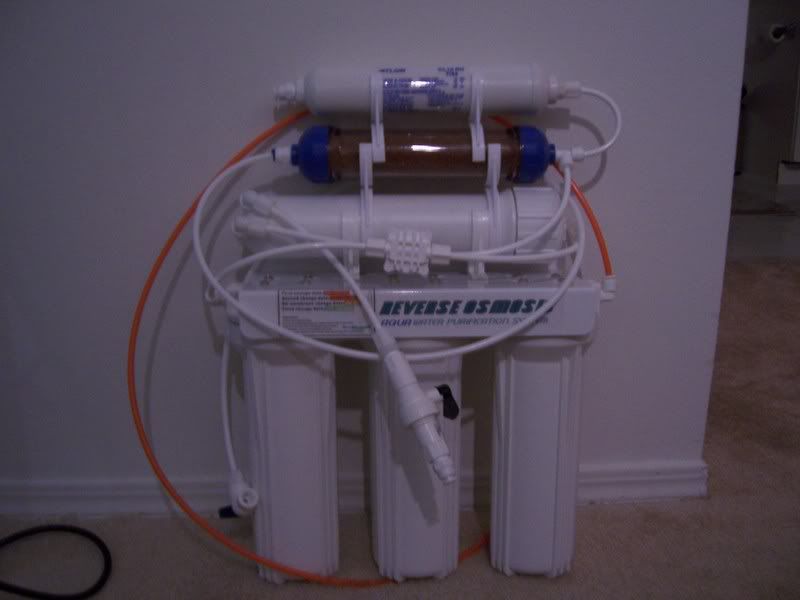
|

|

|
|
10/09/2008, 10:47 PM
|
#2 |
|
Registered Member
Join Date: Aug 2008
Location: Boynton Beach, FL
Posts: 540
|
Now onto the over flow box. I was going back and forth about what sort of over flow I wanted to use. I wasnt going to risk drilling the bottom of my tank, as I have no way of knowing if it was tempered, its an old tank with no markings. I was thinking of using a durso stand pipe (even bought all the stuff for it) but saw this over flow box from Glass-Holes.com. It was a complete kit to install, these guys, Mike and Scott are really cool to work with, talked me through alot of stuff. Their package came with all teh bulkheads, the box which flows 1500ghp, 90 degree fittings drilled, gaskets, drill bit, a t-shirt, and some candy to boot. Im not usualy one to promote a company, but Im very pleased with these guys. Drilling teh tank was way easier than I thought it was, just scary as hell at first.
The Kit: 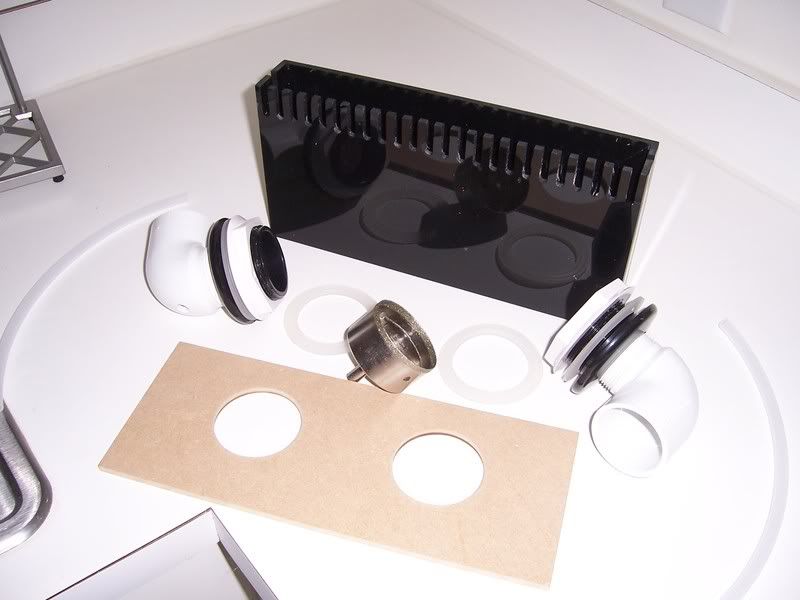 Template to drill holes: 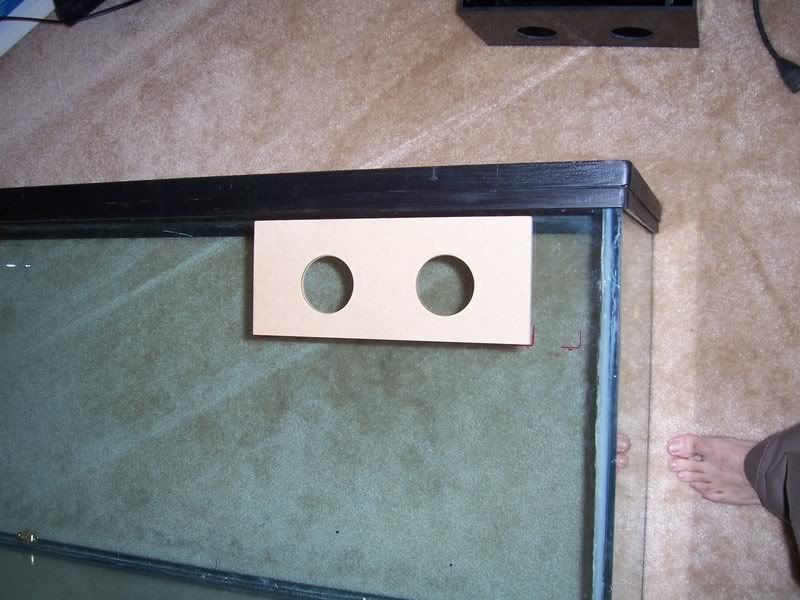 Putting plumbers putty down: 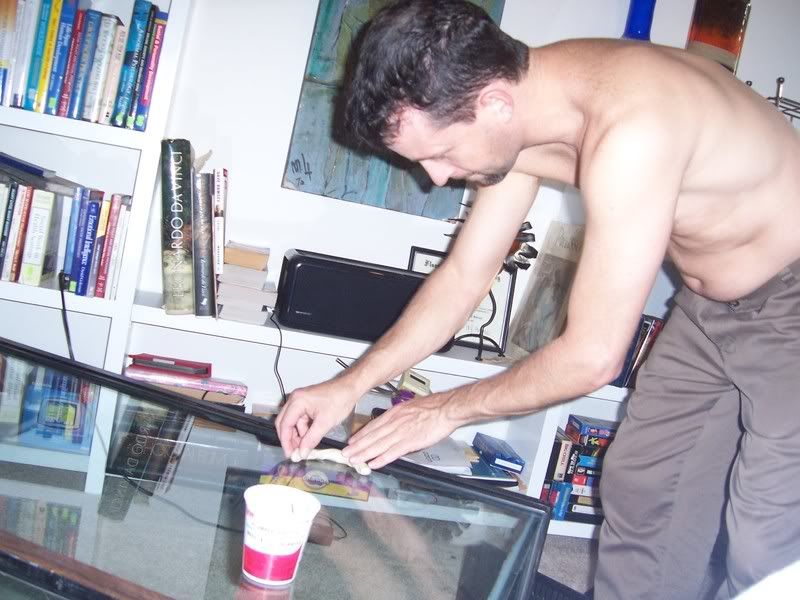 Drill bit: 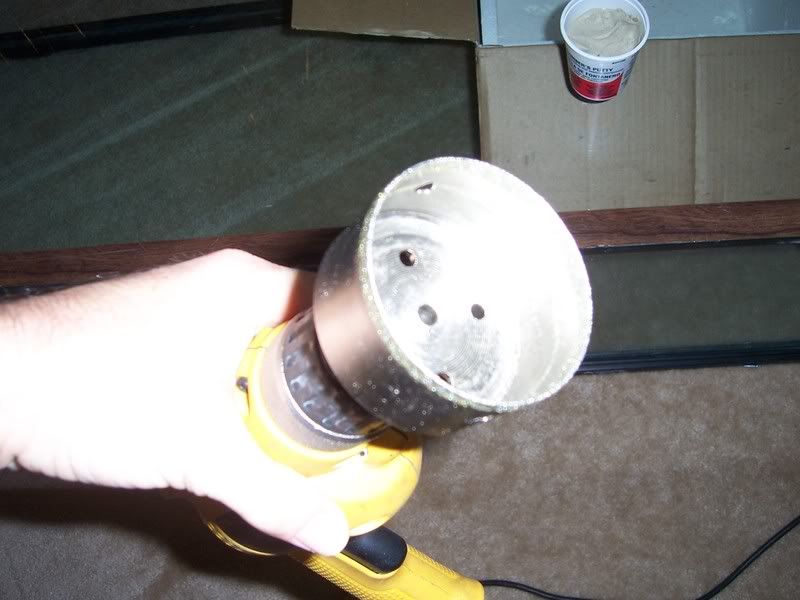 Drilling hole (water was poured into putty pool)  Cool Glass Round peices: 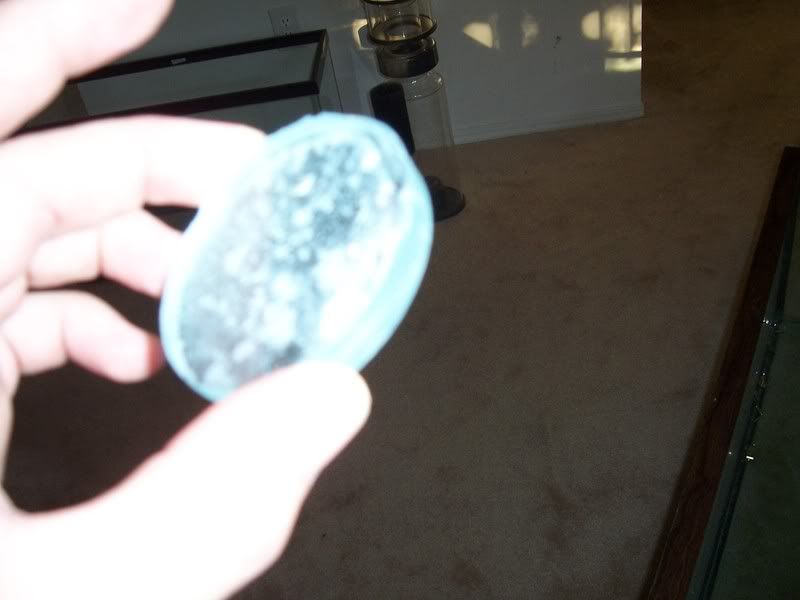 Box installed, back and front: 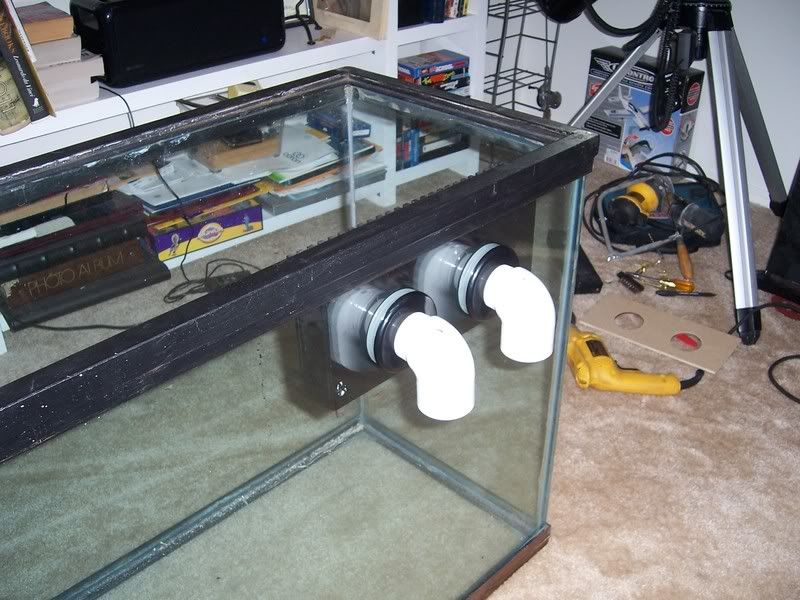 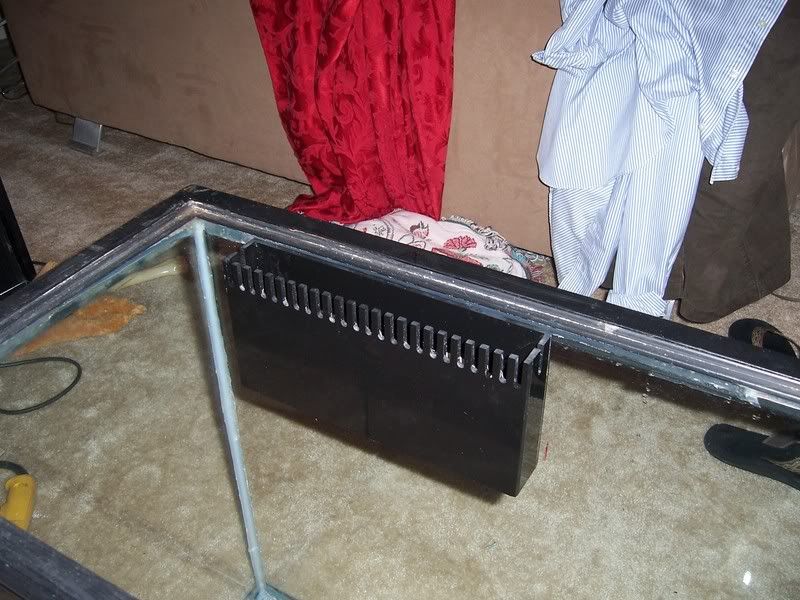
|
|
|
|
|
10/09/2008, 10:57 PM
|
#3 |
|
Registered Member
Join Date: Aug 2008
Location: Boynton Beach, FL
Posts: 540
|
Other 'Auqa'sitions (Ha!! I made that up myself! I copyright it now!!)
Skimmer, (Euro-Reef CS 6-2+) I got it from a fellow Reefcentral member Marvin (Nivram). Real stand up guy, offered to come up and help me out with my tank, thanks man! I called him up tonight bugged out because I hooked it up in my bathtub to test it, and it wasnt making bubbles. Turns out you need SALTWATER to make micro bubbles...now we know: 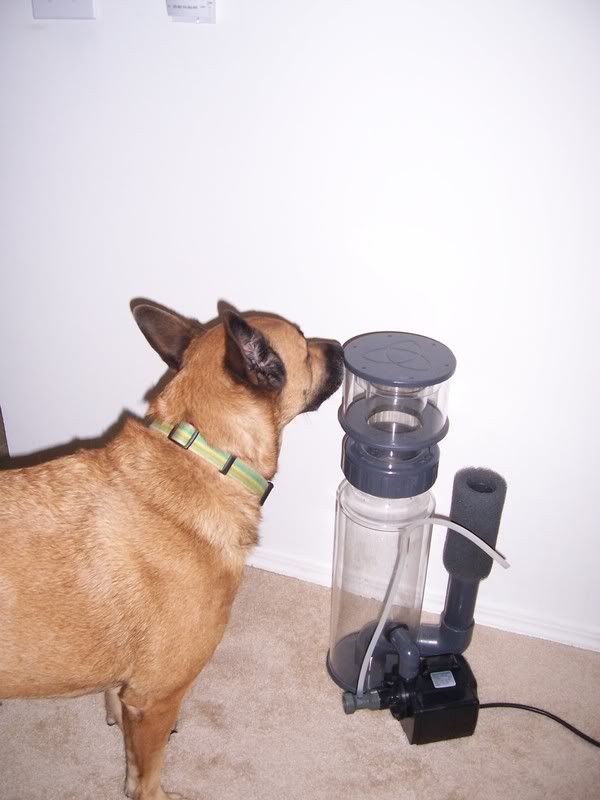 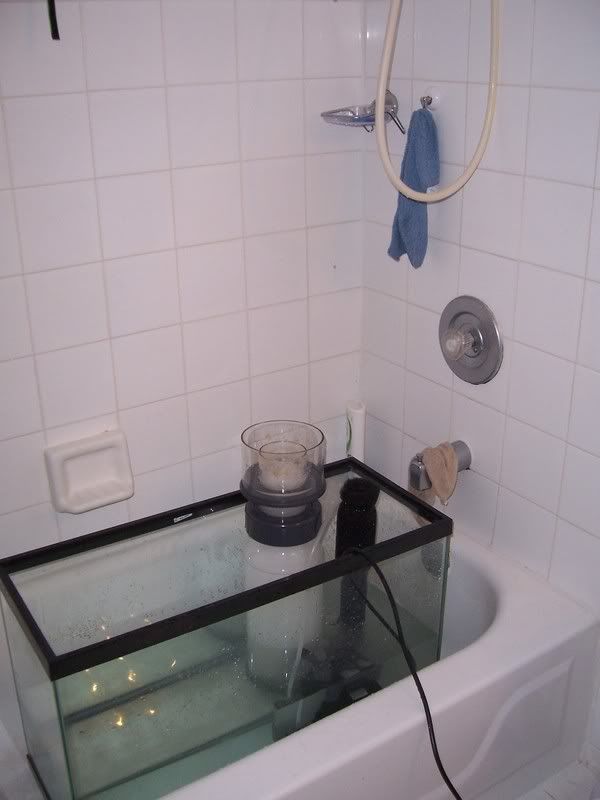 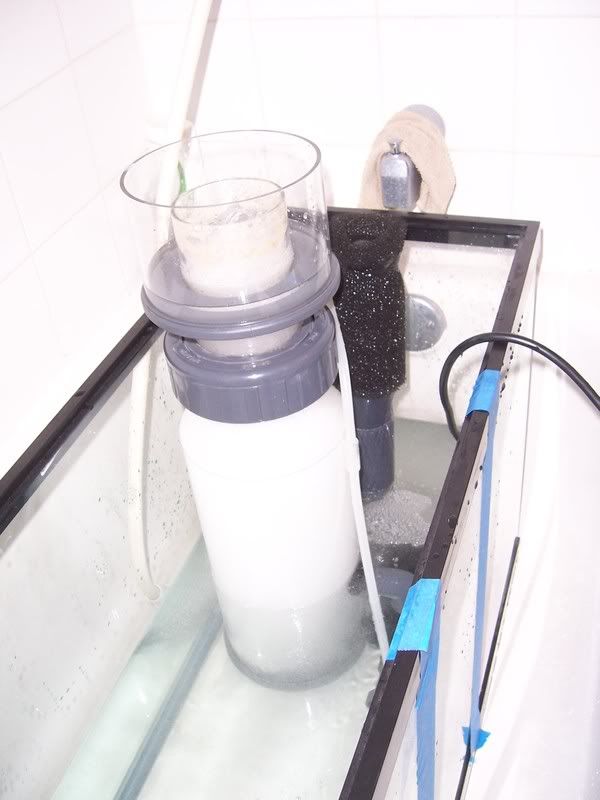 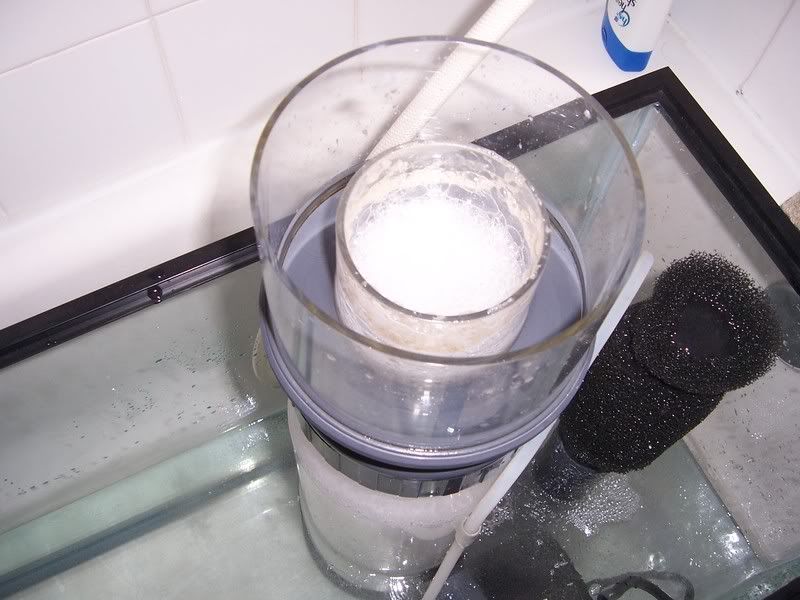 Also you can see the 30g tank I bought for 30 bucks which will act as my sump/refugium. I am still trying to decide on how I should lay the sump out. Another project is a foam rock wall for the background. Here is a teaser of what I am making... 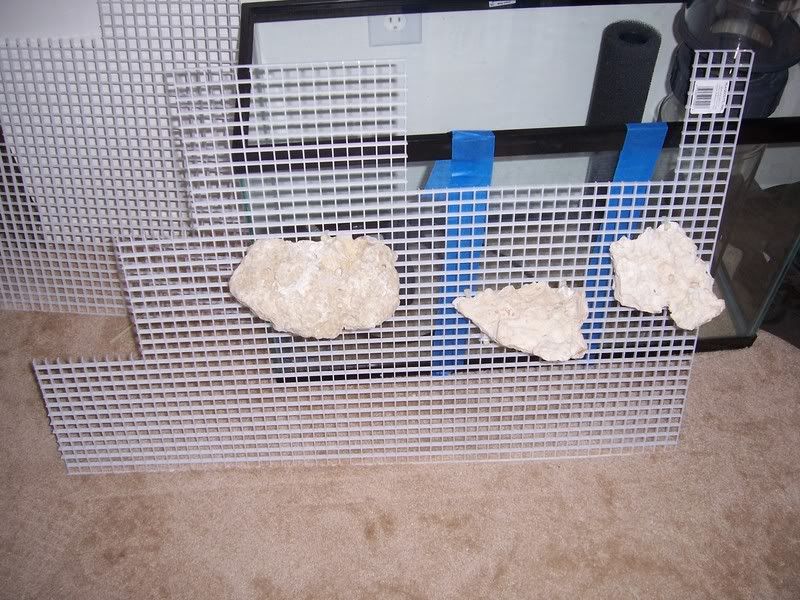
|
|
|
|
|
10/10/2008, 03:21 AM
|
#4 |
|
Registered Member
Join Date: Aug 2007
Location: Massachusetts
Posts: 328
|
good job on the stand and canopy!
so your a addiction therapist? youll get alot of patients here. heres comes help reef addicts 
|
|
|
|
|
10/10/2008, 03:48 AM
|
#5 |
|
Registered Member
Join Date: Apr 2007
Location: Pembroke Pines, FL
Posts: 1,068
|
Great Job!!!
Stand looks awesome! Congrats on taking on drilling glass ! only 1 thing, i think your bulkheads are in backwards? keep us posted Emilio
__________________
To Live is Life, to LOVE is to be ALIVE Emilio "Emilio, why can't you be more mature like me, Les, and Brian?" <~Phuzzy (yeah, i'll believe that when Les is the Mother Terresa) "whenever I see light at the end of the tunnel, I always assume it's a train headed my direction" <~ Bart Current Tank Info: None |
|
|
|
|
10/10/2008, 05:45 AM
|
#6 | |
|
Move Don
Join Date: Sep 2008
Location: Miami, FL
Posts: 1,210
|
Quote:
 Good work on your tank! Can't wait to see it up and running. |
|
|
|
|
|
10/10/2008, 06:47 AM
|
#7 | |
|
Registered Member
Join Date: Aug 2008
Location: Boynton Beach, FL
Posts: 540
|
Quote:
|
|
|
|
|
|
10/10/2008, 06:54 AM
|
#8 | |
|
Registered Member
Join Date: Aug 2008
Location: Boynton Beach, FL
Posts: 540
|
Quote:
Yes, I know I thought the same thing about the bulkheads, but they are in correctly. The guys at Glass-holes explained how they work to me, I didnt understand what the heck they were talking about, but basically they said it works like a Durso Standpipe, yet outside of the tank. If you look, on top of the 90degree PVC are small holes, which tubes that look kinda like drinking straws goes into. You move the straws up and down to adjust the noise level. I don't know, we shall see how it goes with water in it. I think this way they overflow box doesnt have to be so deep in the tank. Here I took a pic with the tubes in them: 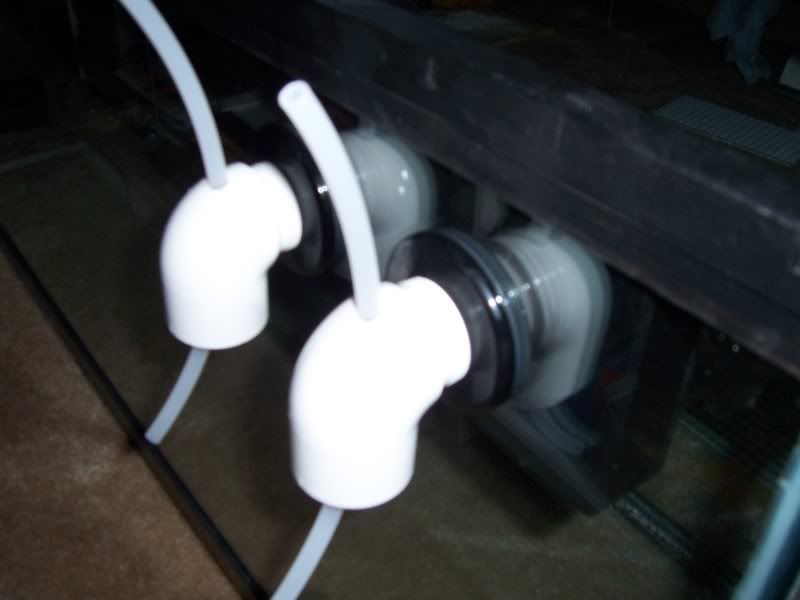
|
|
|
|
|
|
10/10/2008, 07:09 AM
|
#9 |
|
Registered Member
Join Date: Apr 2007
Location: Pembroke Pines, FL
Posts: 1,068
|
i know about the Durso pipes, i am actually building something very similar to what you are doing, however i am doing a very low profile intank durso pipe
BUT thats not what i was refering to, i think you have the actuall bulkhead itself in backwards? i am not sure of this particualr application, but from what i understand the rubber seal should be inside and the nut and thread should be on the outside? i guess the principal is the same??? although, i can understand why they would be on the outside since the actuall overflow box is right up against the glass, Interesting. did you do a leak test on it yet?
__________________
To Live is Life, to LOVE is to be ALIVE Emilio "Emilio, why can't you be more mature like me, Les, and Brian?" <~Phuzzy (yeah, i'll believe that when Les is the Mother Terresa) "whenever I see light at the end of the tunnel, I always assume it's a train headed my direction" <~ Bart Current Tank Info: None |
|
|
|
|
10/10/2008, 07:49 AM
|
#10 |
|
Registered Member
Join Date: Aug 2008
Location: Boynton Beach, FL
Posts: 540
|
I see what you mean but it looks backwards, but the nuts actually go on the inside of the box. There are two rubber seals, one between teh box and the glass, the other between the outside bulkhead and glass.
here is a youtube vid of theres...not teh same box as mine, but same set up with bulkheads... http://www.youtube.com/watch?v=GSYqSeW1mQg and here is one with a box running http://www.youtube.com/watch?v=sLEyKqLAnLg
__________________
Marcel Current Tank Info: Outside tank = 343,423,668,428,484,681,262 gallons of water..nick named "The Ocean". Inside tank 75g. |
|
|
|
|
10/10/2008, 11:39 AM
|
#11 |
|
Registered Member
 
Join Date: Sep 2005
Location: Astoria, NYC
Posts: 10,159
|
This build is looking fantastic. I love the overflow and other ideas. I'll definitely be keeping an eye out!
|
|
|
|
|
10/10/2008, 02:09 PM
|
#12 |
|
Registered Member
Join Date: Jan 2002
Location: Deerfield Beach, Florida
Posts: 1,983
|
We now bring our daily meeting of RAA (reefaholics anonymous) to order.....
HI I'm Andy and I'm a reefaholic.... its been 2 hrs since my last coral purchase and I am really feeling the need for another..... welcome to the hobby/addiction.. its fun and frustrating. I have been at it 25 yrs and love and hate it.... and always learning more...
__________________
{andy} saltwater since 1982..its such a love hate relationship |
|
|
|
|
10/10/2008, 02:18 PM
|
#13 |
|
Registered Member
Join Date: Nov 2007
Location: miami fl
Posts: 2,088
|
hey marcelft a friend of mine is about to do the same with Glass-Holes.com. good job on the cuts and welcome.
|
|
|
|
|
10/10/2008, 02:31 PM
|
#14 |
|
Registered Member
Join Date: Aug 2008
Location: Boynton Beach, FL
Posts: 540
|
Thanks guys...that is funny RAA!! But a healthy habit like this is way better than some of the others out there...I am "attempting" to do this on the cheep, buying things used or building them when I can, that way I feed my denial that it "it isnt really that expensive".
Tell your friend drilling his tank to just take his time and make sure he gets the holes lines up just right, as its tight tolerances...but he will love working with Glass-holes guys... I just foamed half my rock wall, going to take the dog to teh park, and come back and see how the foam expanded. So far it looks awesome.... |
|
|
|
|
10/10/2008, 03:31 PM
|
#15 |
|
Professional Stick Gluer
Join Date: Nov 2003
Location: NW Arkansas
Posts: 2,216
|
Bulkhead placement is moot as long as you have a gasket on the wet side. Doesn't matter if the nut goes on the inside, as long as the gasket goes on the inside as well.
Looks good. Look forward to more updates - and a lil free therapy....LOL Ron
__________________
Ronnie 60g cube - Ghost Overflow - ATI 8 bulb dimmable sunpower - Apex - MP10s - Synergy sump |
|
|
|
|
10/12/2008, 08:35 PM
|
#16 |
|
Registered Member
Join Date: Aug 2008
Location: Boynton Beach, FL
Posts: 540
|
I was going nuts trying to decide which color to paintg the back glass...blue?...black?..blue?...black?...Blue?....it was too much for me!!! Then I saw a post about foam rock walls...and I had to try it. I tend to be on the artistic side. I went and bought 50lbs of baserock, and built the wall. I arranged the rocks so I had shelfs for frags to sit on in the future. I used this guys method
http://reefcentral.com/forums/printt...readid=1375191 ...he made tunnels and stuff, but that was too much for me. I just wanted a good looking background other than glass...I put a side in the tank to make sure it fit. I tried to cover up the over flow box, but still left enought that I can see the teeth of it so I can see if something is getting clogged up there. And this is just one side of it, I have the other half done but didnt take pics..I will when I have it all installed in the tank.  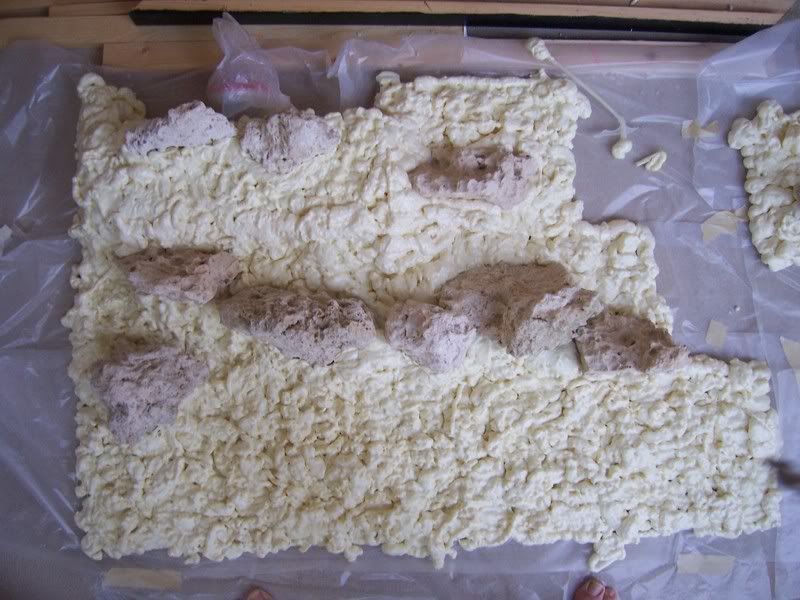  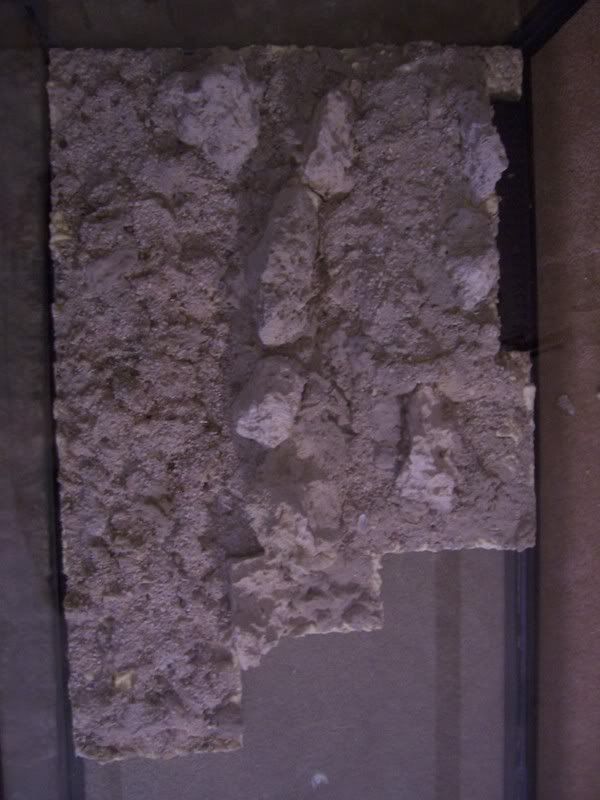 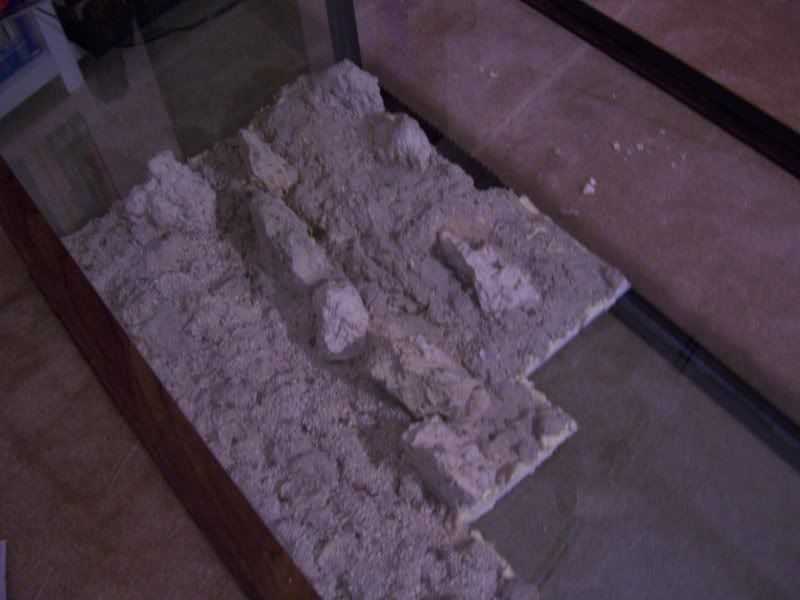
Last edited by marcelft; 10/12/2008 at 09:02 PM. |
|
|
|
|
10/12/2008, 10:36 PM
|
#17 |
|
Registered Member
Join Date: Dec 2006
Location: Boynton Beach
Posts: 597
|
pretty nifty so far with the background, you can use it to make some real nifty caves and pass throughs from what i've seen on other threads
__________________
My tank was electrocuted when the lights fell in, I'm only keeping Freshwater now Current Tank Info: Electrocuted my saltwater when lights broke, only fresh now |
|
|
|
|
10/12/2008, 11:20 PM
|
#18 | |
|
Registered Member
Join Date: Aug 2008
Location: Boynton Beach, FL
Posts: 540
|
Quote:
|
|
|
|
|
|
10/12/2008, 11:23 PM
|
#19 |
|
Registered Member
Join Date: Aug 2008
Location: Boynton Beach, FL
Posts: 540
|
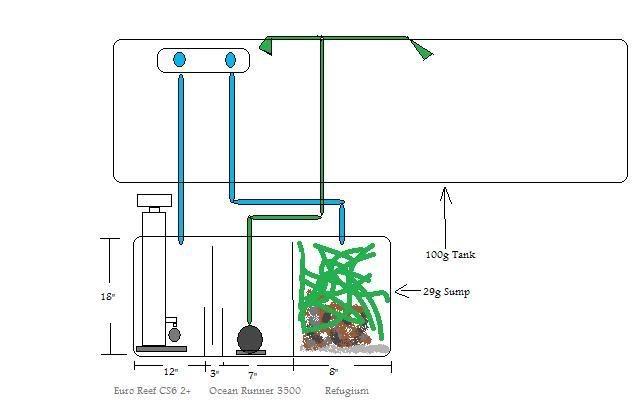
Hey, can I get feed back on this possible sump/fuge set up:
|
|
|
|
|
10/13/2008, 12:42 AM
|
#20 | |
|
Registered Member
Join Date: Dec 2006
Location: Boynton Beach
Posts: 597
|
Quote:
__________________
My tank was electrocuted when the lights fell in, I'm only keeping Freshwater now Current Tank Info: Electrocuted my saltwater when lights broke, only fresh now |
|
|
|
|
|
10/13/2008, 05:24 AM
|
#21 |
|
Professional Stick Gluer
Join Date: Nov 2003
Location: NW Arkansas
Posts: 2,216
|
You will want to tee off the drain going to your fuge. Send it straight down with the other drain, put a tee where you have the elbow going to the fuge and put a ball valve there to control the flow.
Also, if you have room, shrink the sump chamber up a bit, and make both your return and your fuge bigger (it looks like you have room to move the baffles over, but your skimmer may require 12" - drawing may not be to scale). Unless you have an auto-topoff, you want your return chamber to be as big as possible, otherwise, you may be topping off daily. Which isn't a problem as long as you are home everyday and don't mind doing it. You also want your fuge as big as possible, that way you can cram as much macro in there as possible, for nutrient export.
__________________
Ronnie 60g cube - Ghost Overflow - ATI 8 bulb dimmable sunpower - Apex - MP10s - Synergy sump |
|
|
|
|
10/13/2008, 05:51 AM
|
#22 | |
|
Registered Member
Join Date: Aug 2008
Location: Boynton Beach, FL
Posts: 540
|
Quote:
The tee makes sense, that way I can adjust the amount of water going to the fuge right?? Lost on some lingo, want to make sure im uderstandning. Sump=where water is coming down into the skimmer chamber?? When you say to shrink the sump chamber is that what you mean?? Oh, and I might have an extra inch, I put them needing 3", but you only need 1" between baffels right?? (would =2") |
|
|
|
|
|
10/13/2008, 06:32 AM
|
#23 |
|
The OG mad scientist
Join Date: Jul 2006
Location: SOFLA
Posts: 10,308
|
nice job there buddy!
__________________
There's a fine line between "hobby" and "mental illness". 1985-present Current Tank Info: Officially lurking! |
|
|
|
|
10/13/2008, 09:15 AM
|
#24 |
|
Registered Member
Join Date: Jun 2005
Location: S. FL
Posts: 6,194
|
Marcel, its looking pretty good.
I think FLAMRON is saying make the return pump section bigger (make the skimmer section smaller if you have room to accomplish this.) Eventually you may want to add a ATO and will place the float(s) that activate the ATO in the return pump section. |
|
|
|
|
10/13/2008, 10:09 AM
|
#25 |
|
Professional Stick Gluer
Join Date: Nov 2003
Location: NW Arkansas
Posts: 2,216
|
Oops, I meant skimmer chamber... Sorry about that.
One inch in between baffles would be fine (and about an inch or so under the middle baffle, too). I will try to get a picture of my sump setup to give you an idea. My sump is set up exactly like yours is drawn up. I made the fuge chamber baffle 13" tall and drilled a hole and put a bulkhead in it. I am running it back to the skimmer section, but only because I don't want microbubbles in the display. You will need to figure out what optimal height your skimmer runs in and make that first baffle that height. GL, Ron
__________________
Ronnie 60g cube - Ghost Overflow - ATI 8 bulb dimmable sunpower - Apex - MP10s - Synergy sump |
|
|
|
 |
|
|


