
|
|
 12/08/2008, 11:39 AM
|
#1 |
|
Registered Member
Join Date: Oct 2007
Location: Denver, CO
Posts: 1,544
|
runningstix 58 Oceanic Upgrade
I entered this hobby in October of '07 with a 46 gallon bowfront. We started on craigslist and approached it all wrong.
46 bowfront, with pc fixture, glass tops, canister filter. we eventually upgraded the lights and added a canopy but was still not happy with it. I will never buy another bowfront. Year to the day our second tank replaced the first. This time most DIY and a correct (to my standard) reef setup. Our first stab at saltwater, just before tearing down: 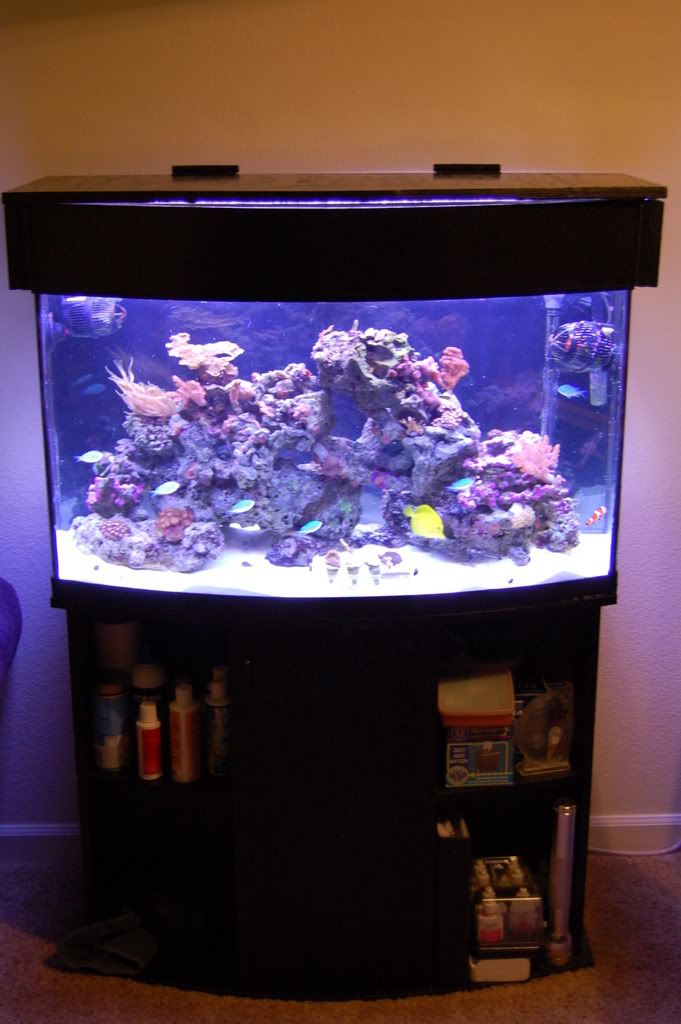 I originally decided on a 40g breeder as I liked the dimensions. However I got a scorching deal on a 58 Oceanic tank. Here is what I started with, sold the stand and canopy before I even picked up the tank. 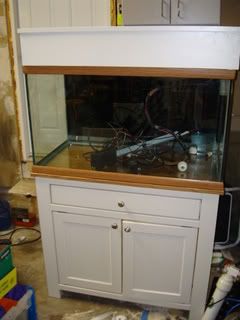
__________________
Go Buckeyes! Current Tank Info: tankless |

|

|
|
12/08/2008, 11:44 AM
|
#2 |
|
Registered Member
Join Date: Oct 2007
Location: Denver, CO
Posts: 1,544
|
The first matter of business was making this "reef ready" I explored all options and decided on an external overflow. A little tricky on a stock tank.
I cut off the trim in the area, marked it and took a dremel with a rotozip tile cutting blade and crossed my fingers. Fairly smooth and easy to do. Remove Trim: 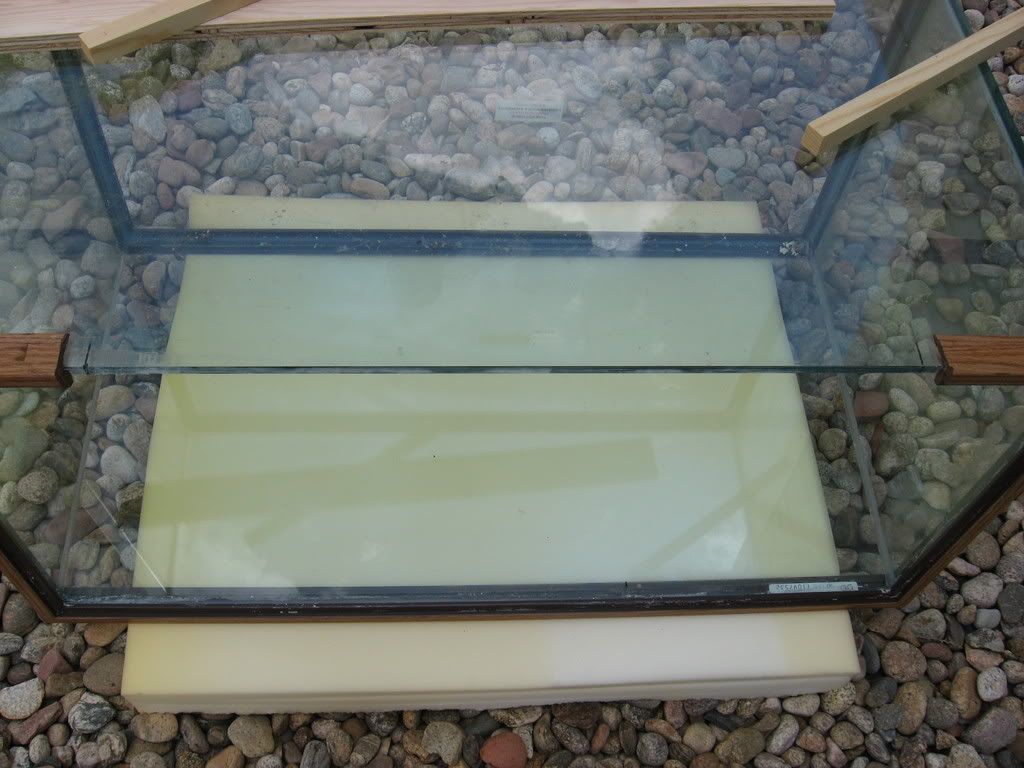 Dremel and rotozip bit: 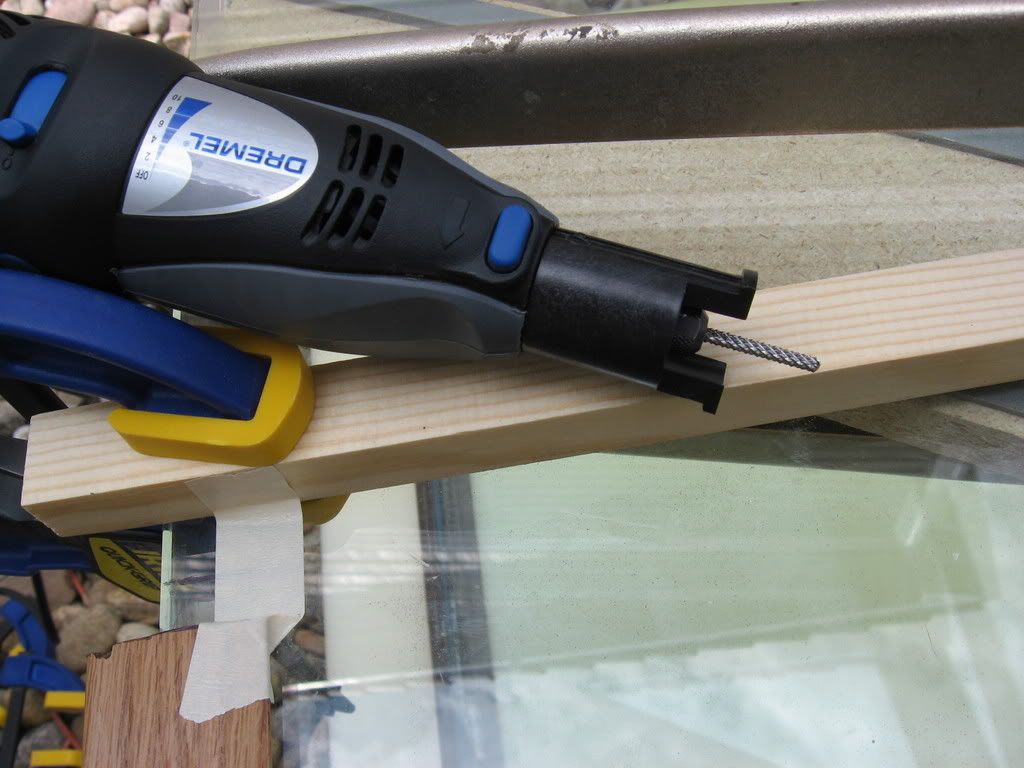 Clamp and guide: 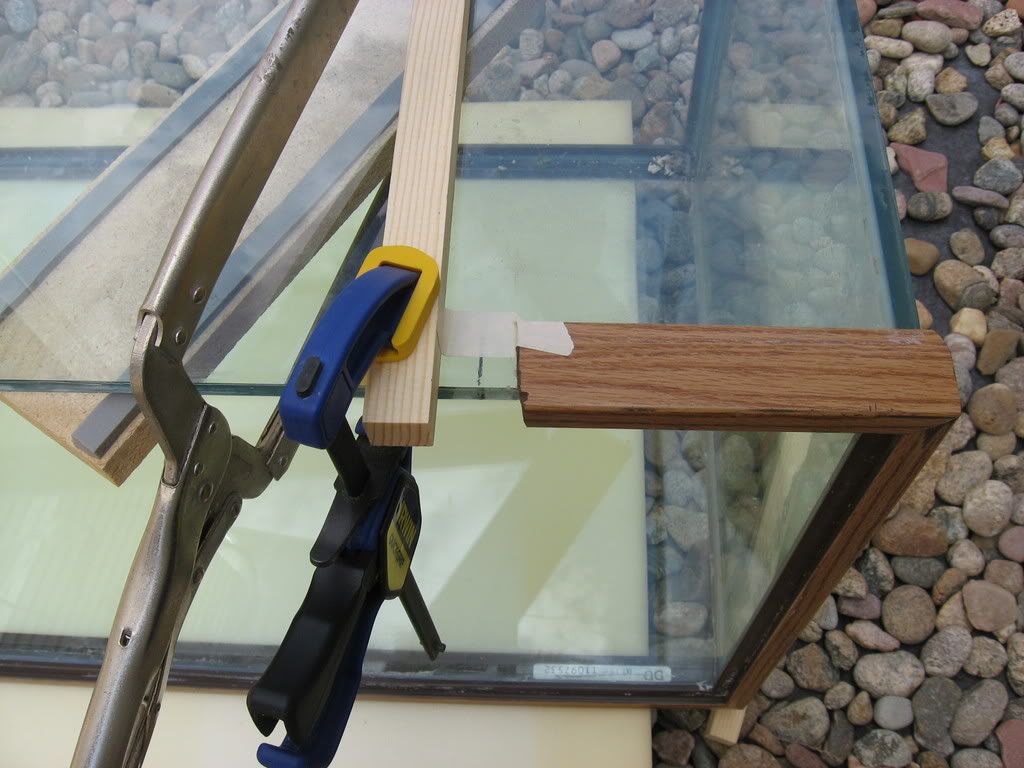 First cut: 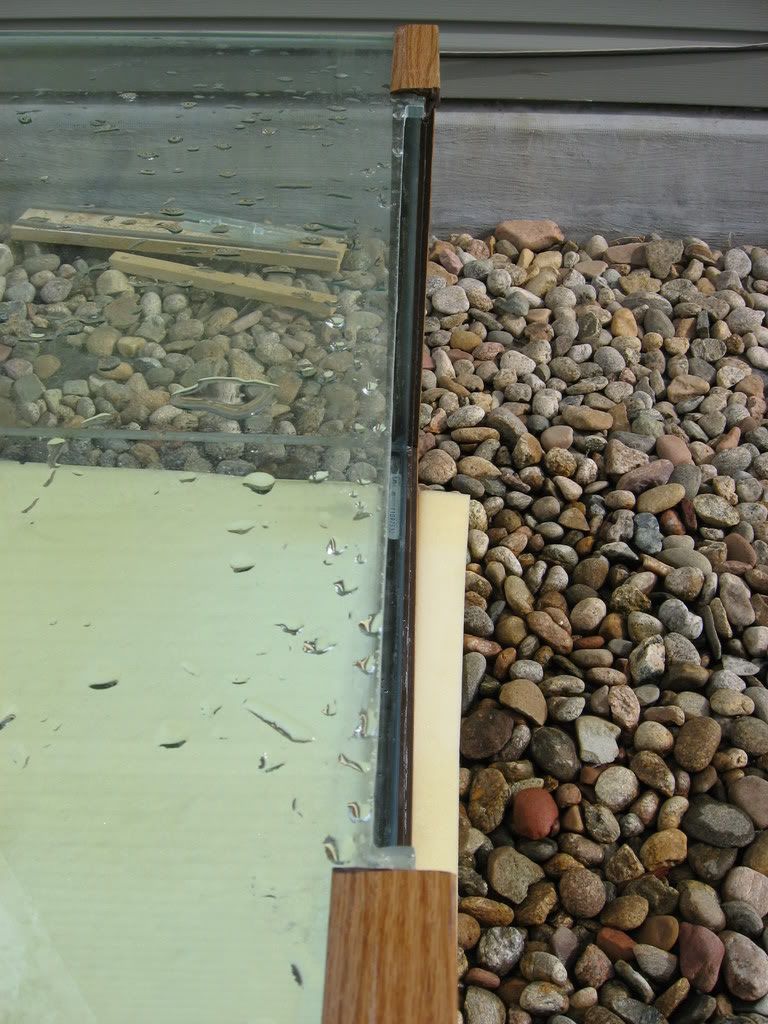 At this time I also drilled the hole for a closed loop, I went back and added another one after selecting my pump on the opposite side. 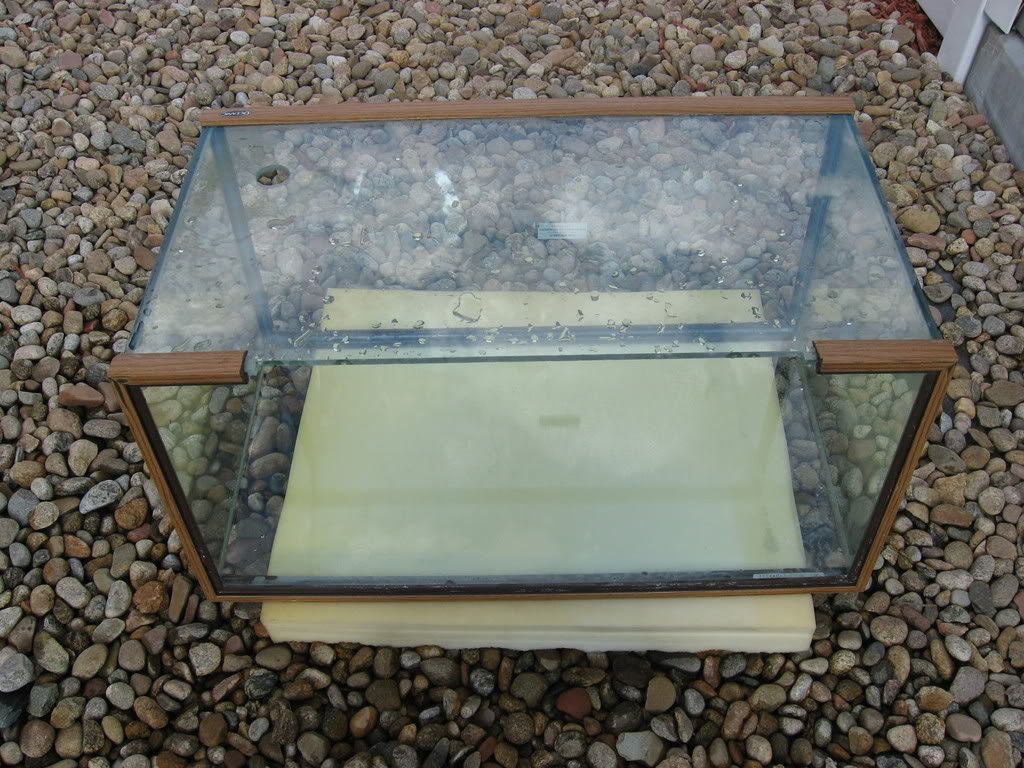 Next I ordered glass and constructed the overflow. I started with drilling the holes in the bottom then siliconing it together off the tank. Lastly I siliconed it to the tank and waited for 48 hours. My silicon job was not pretty but No leaks and it will hold. Tank painted and overflow attached. both closed loop holes drilled: 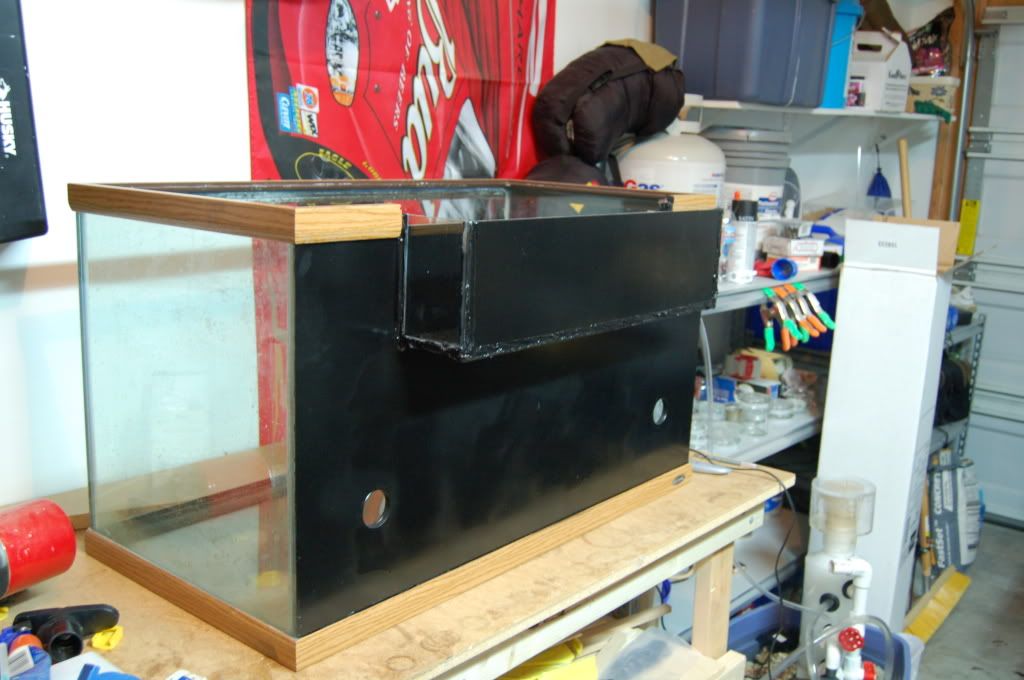
__________________
Go Buckeyes! Current Tank Info: tankless |
|
|
|
|
12/08/2008, 11:57 AM
|
#3 |
|
Registered Member
Join Date: Oct 2007
Location: Denver, CO
Posts: 1,544
|
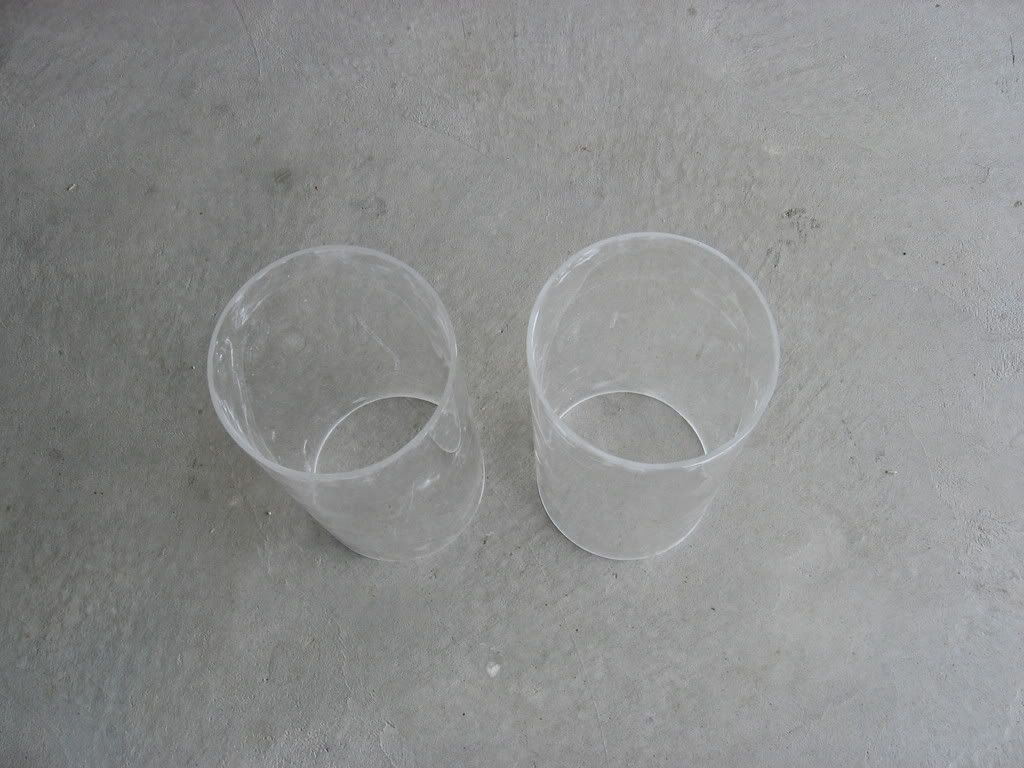
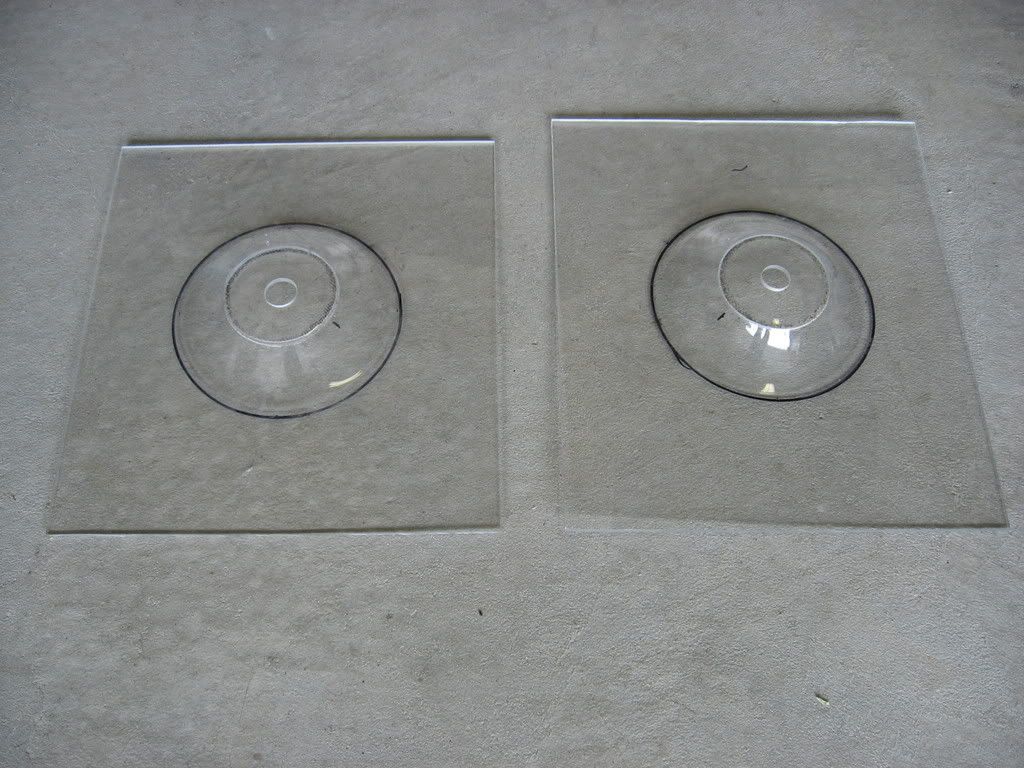
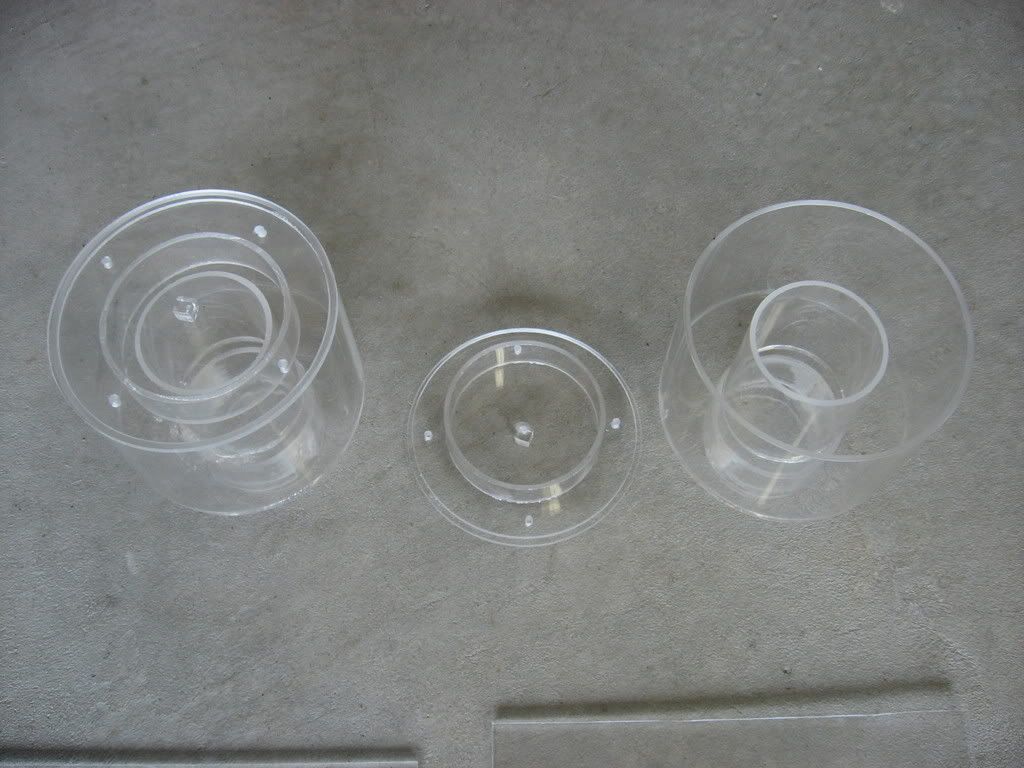
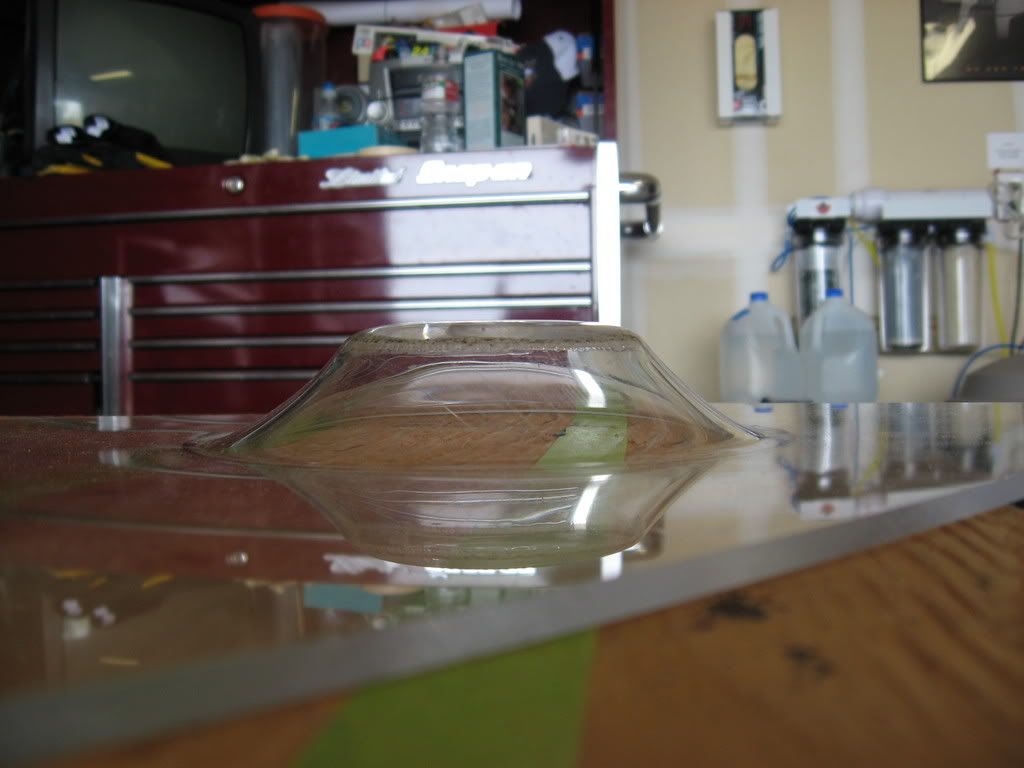
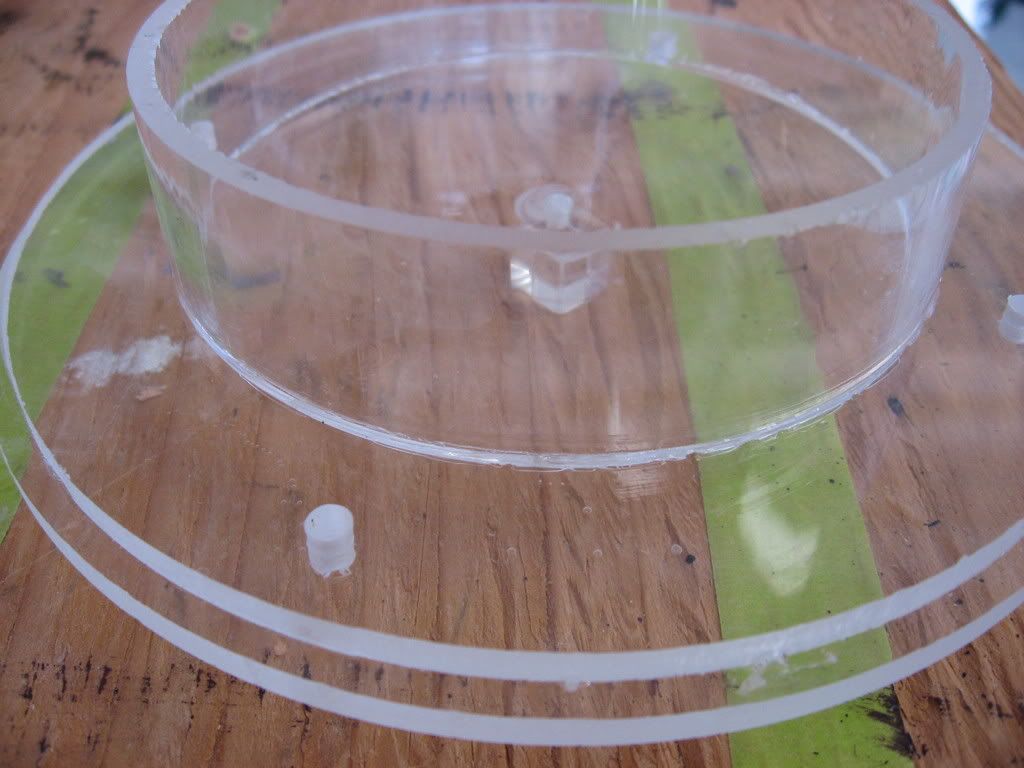
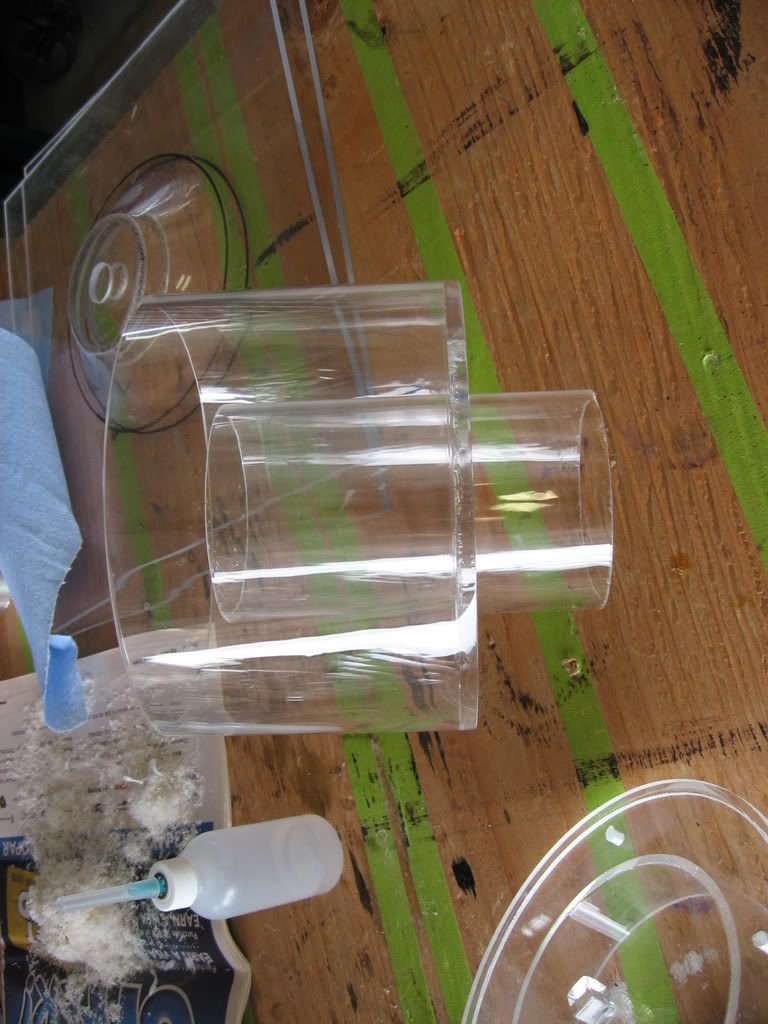
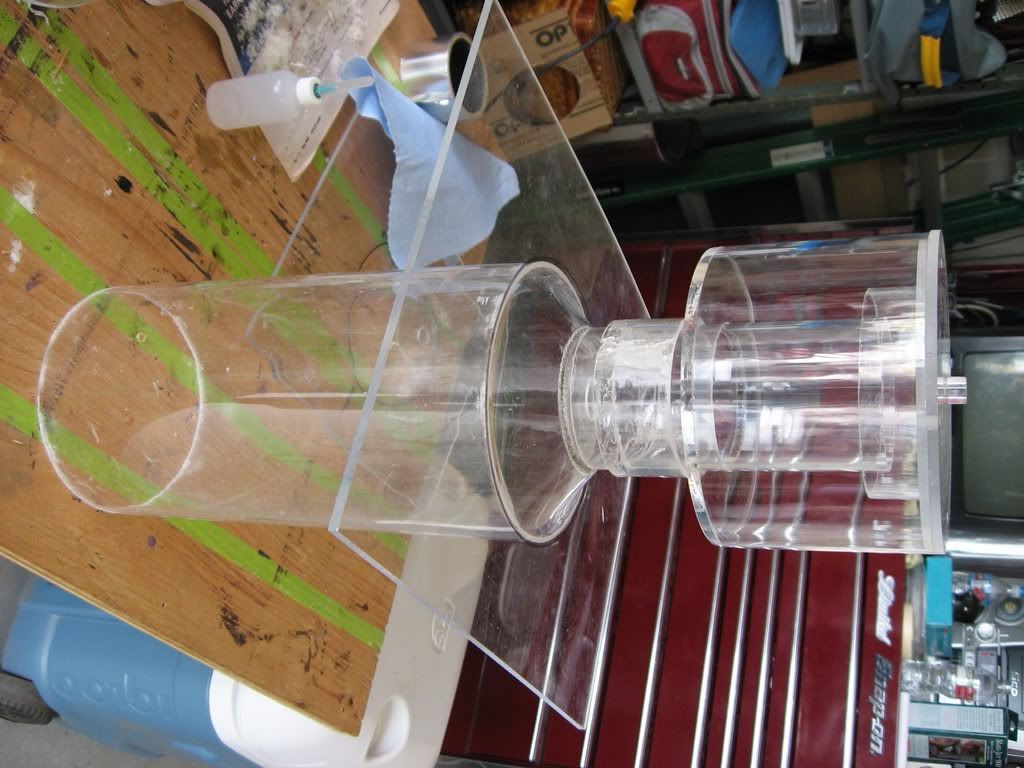
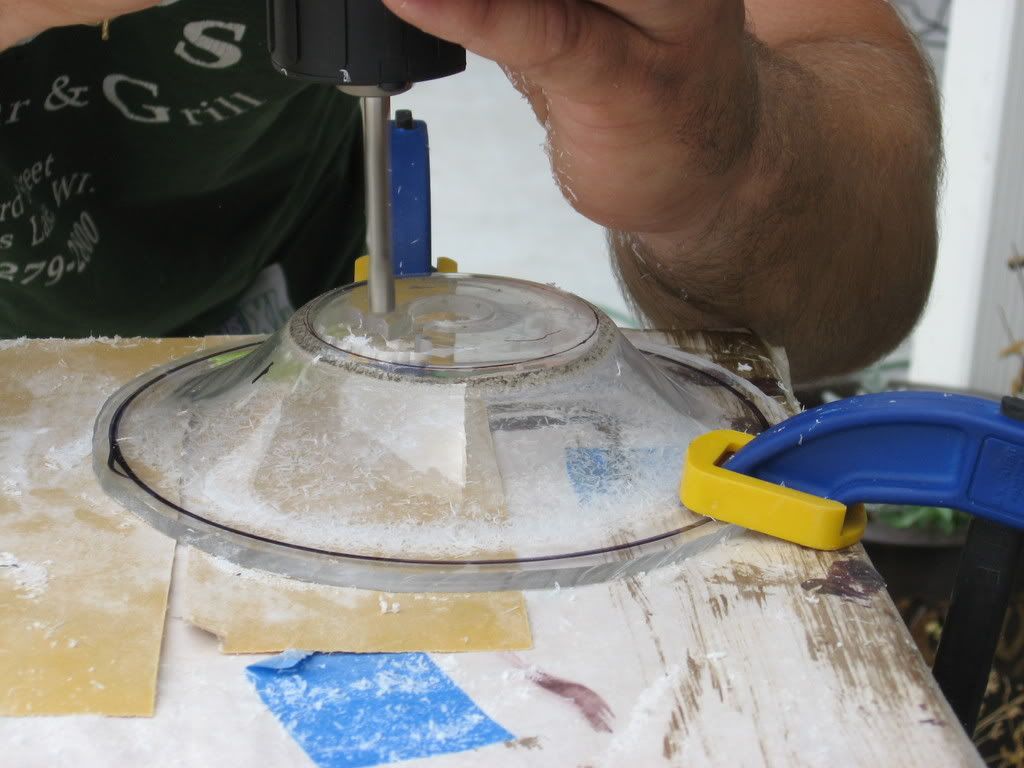
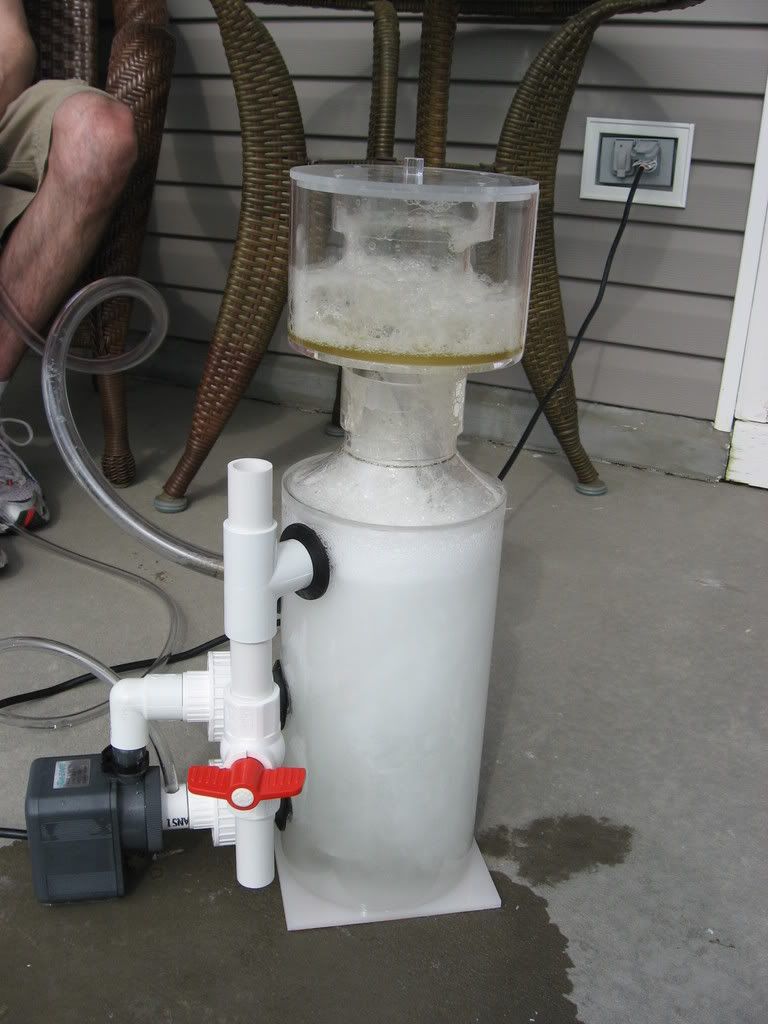
The next phase was a DIY Recirulating skimmer. Another local reefer (Spleify) and I made them together. Well I bought the acrylic and mostly played cheerleader.
__________________
Go Buckeyes! Current Tank Info: tankless |
|
|
|
|
12/08/2008, 12:01 PM
|
#4 |
|
Registered Member
Join Date: Oct 2007
Location: Denver, CO
Posts: 1,544
|
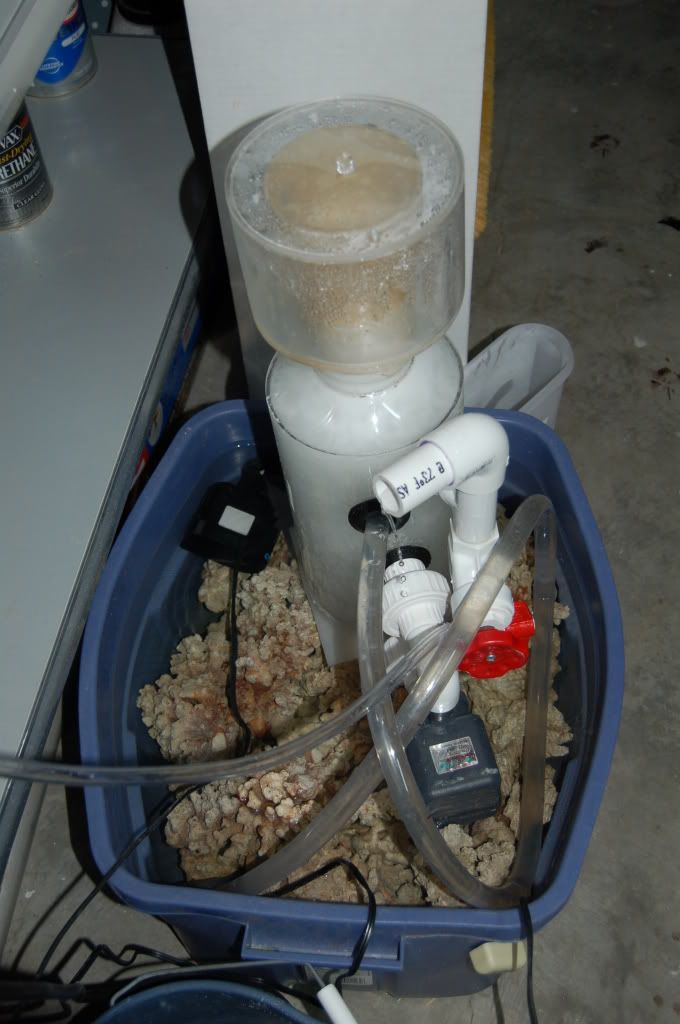
I had scored 60lbs of dry marco rock for $1/lb and was curing this in the garage, why not throw the skimmer on it!
__________________
Go Buckeyes! Current Tank Info: tankless |
|
|
|
|
12/08/2008, 12:05 PM
|
#5 |
|
Registered Member
Join Date: Oct 2007
Location: Denver, CO
Posts: 1,544
|
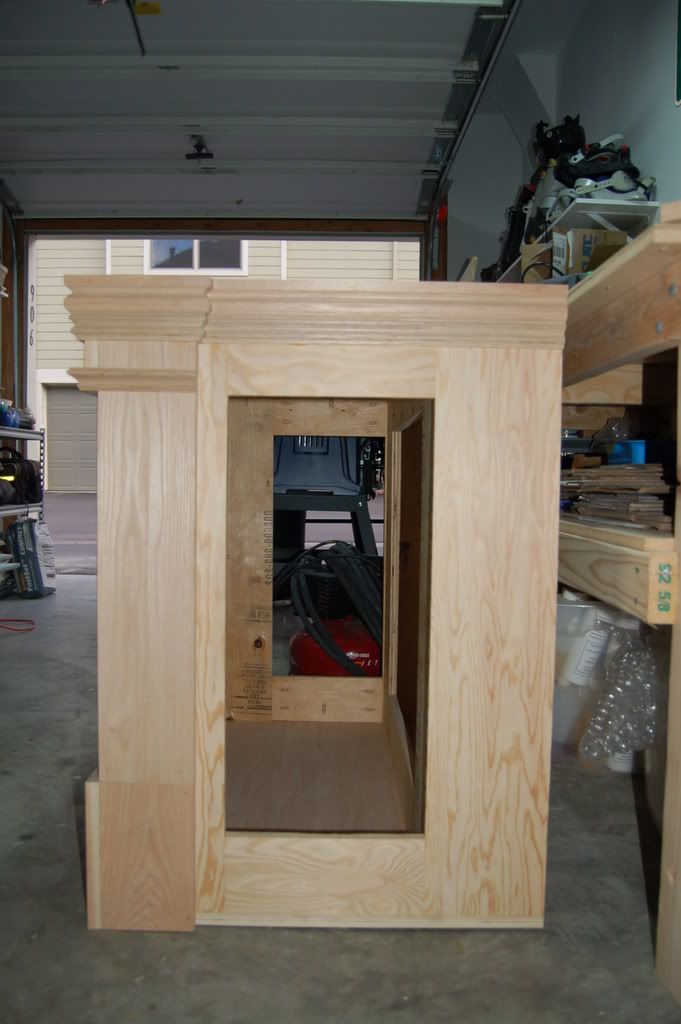
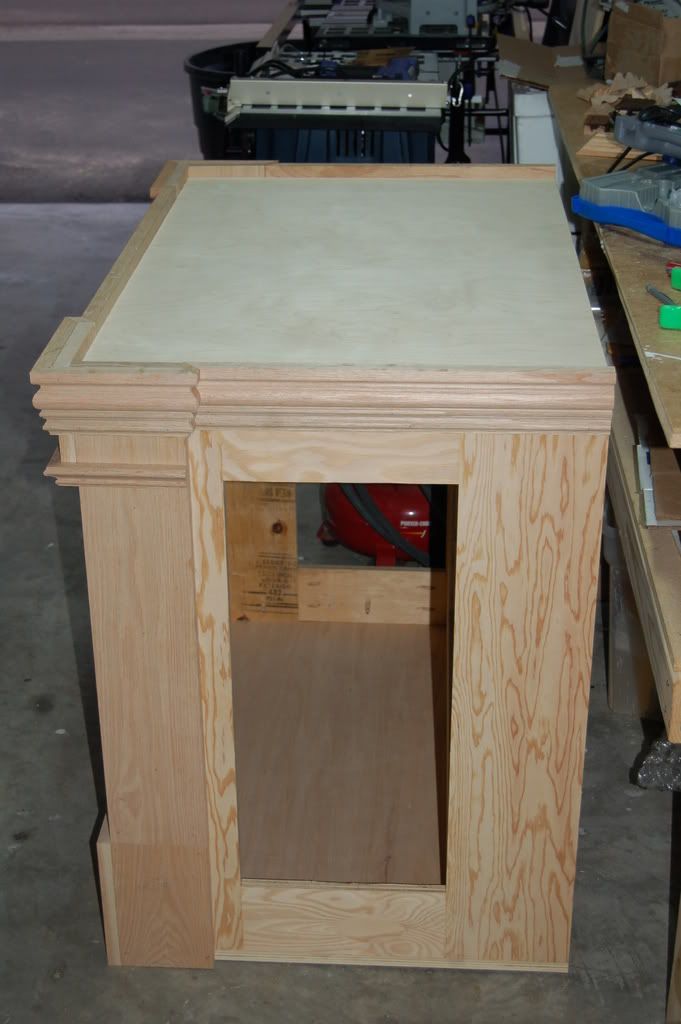
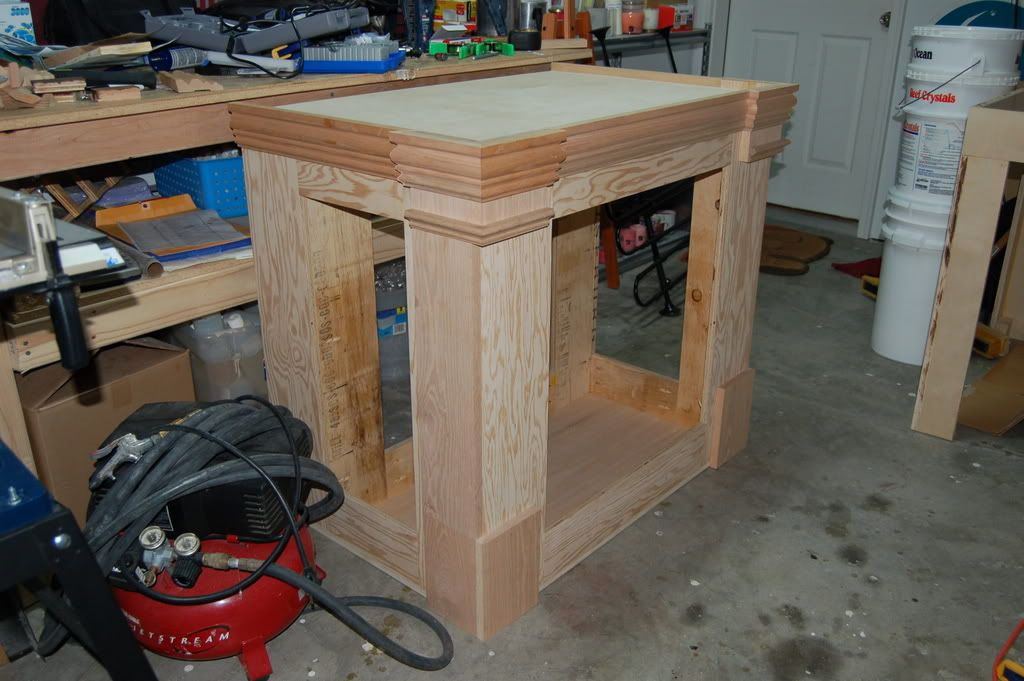
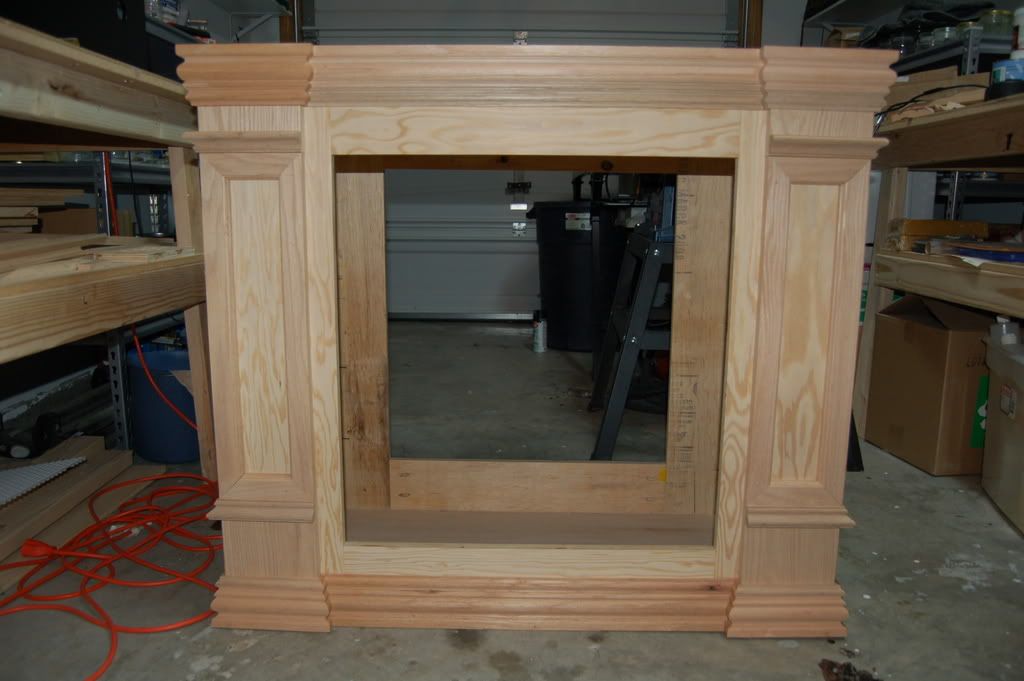
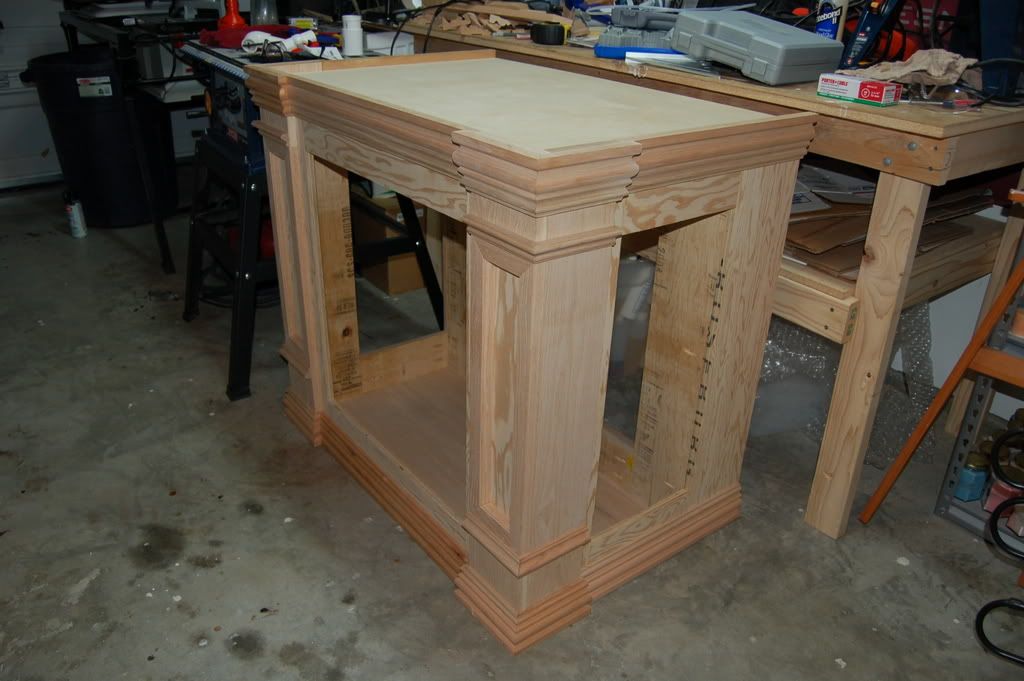
The next task was to build the stand. I used 3/4" oak plywood and trimmed it with oak casing. The pieces were all connected with the Kreg Pocket hole jig.
The base stand: 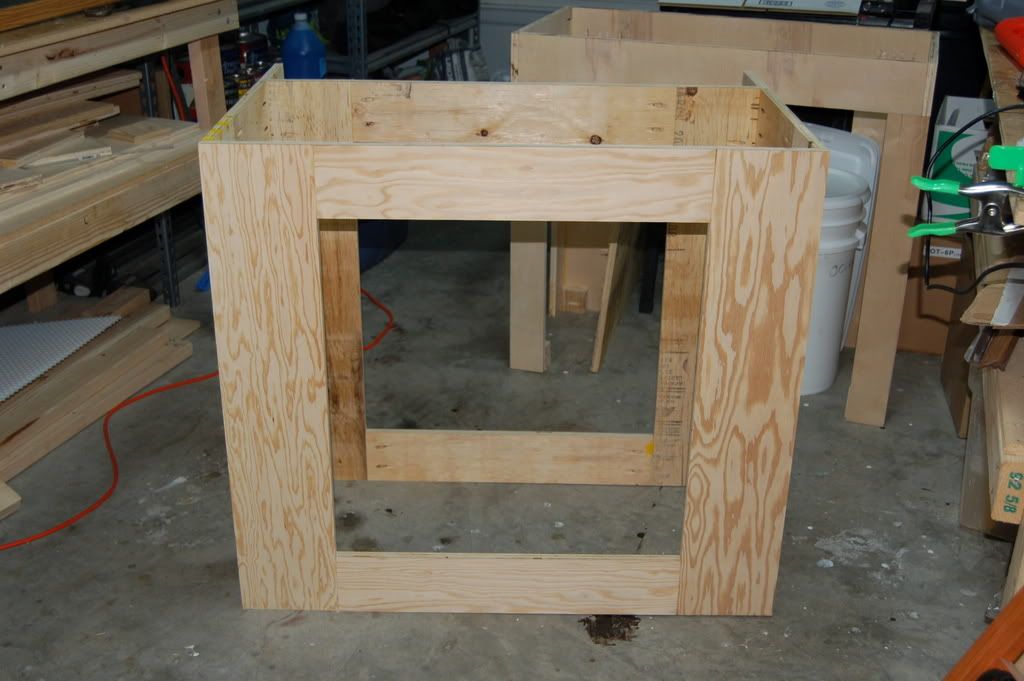 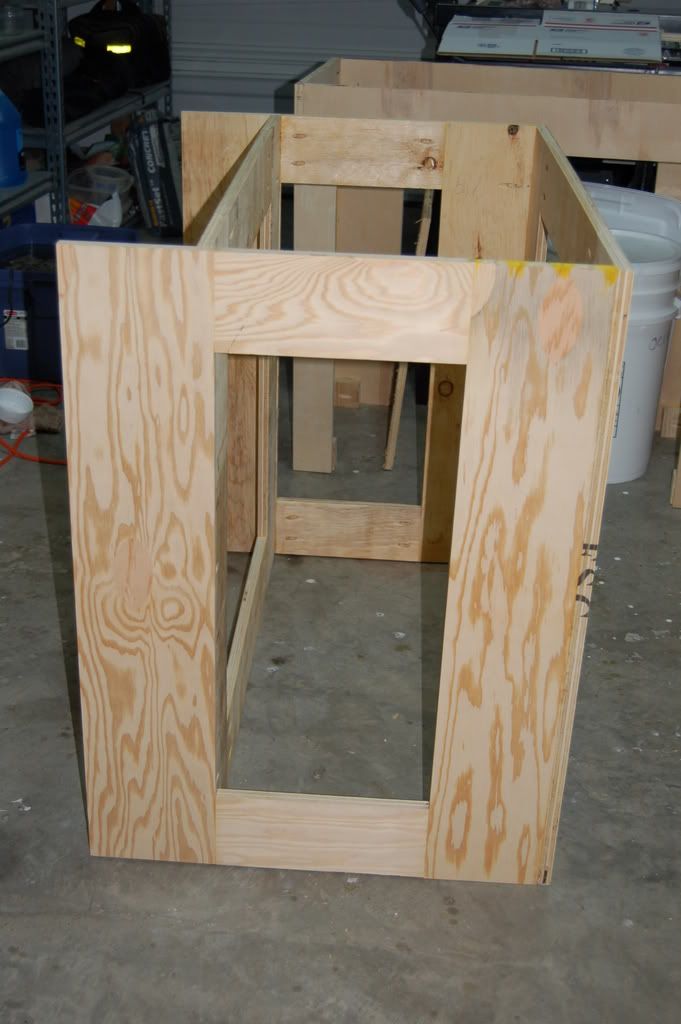
__________________
Go Buckeyes! Current Tank Info: tankless |
|
|
|
|
12/08/2008, 12:08 PM
|
#6 |
|
Registered Member
Join Date: Oct 2007
Location: Denver, CO
Posts: 1,544
|
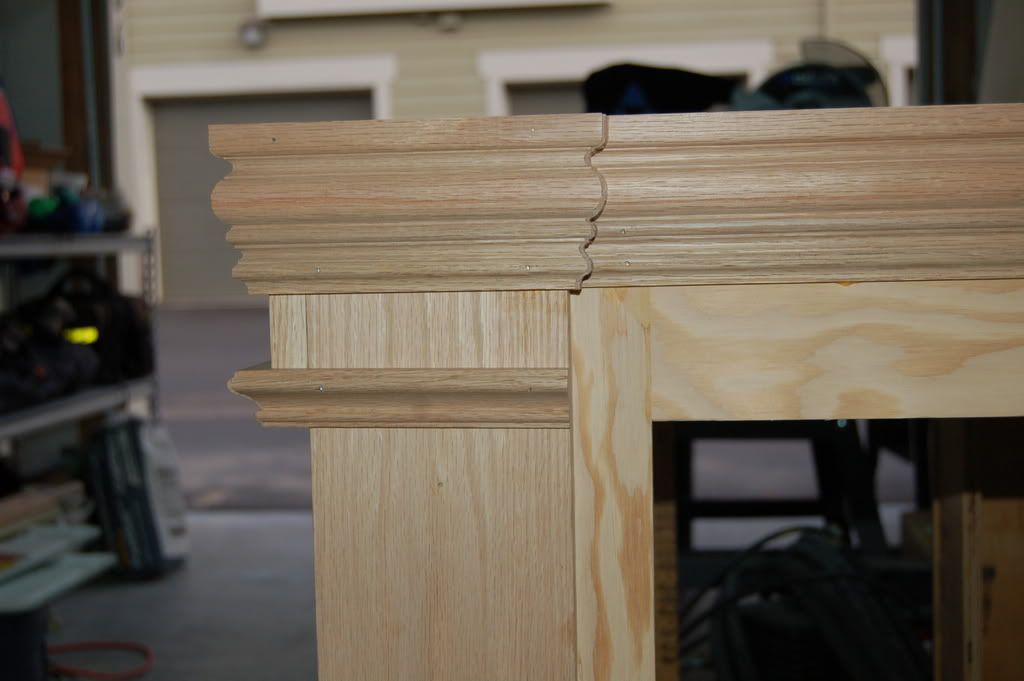
From here I copied and modified will16's trim work.
__________________
Go Buckeyes! Current Tank Info: tankless |
|
|
|
|
12/08/2008, 12:11 PM
|
#7 |
|
Registered Member
Join Date: Oct 2007
Location: Denver, CO
Posts: 1,544
|
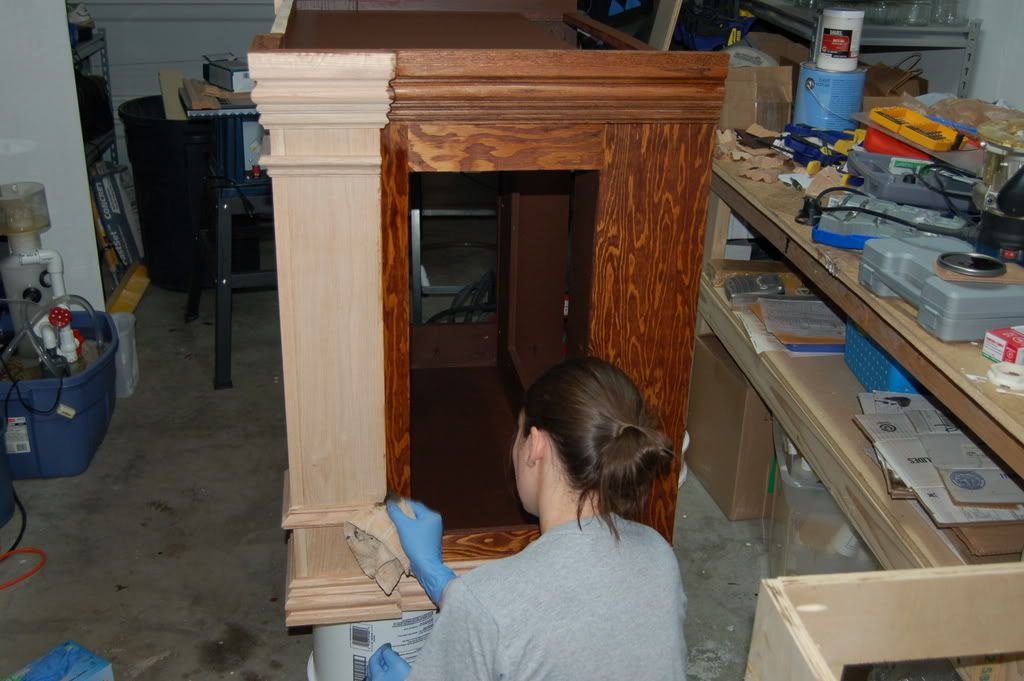
Once I had completed the stand it was time to stain. This I pawned off on my wife, Thanks Ashley.
One large problem was the plywood and real oak stained differently. I tested multiple ways and the best match was conditioning the plywood but not the hardwood. This was a pain. so the wife says! 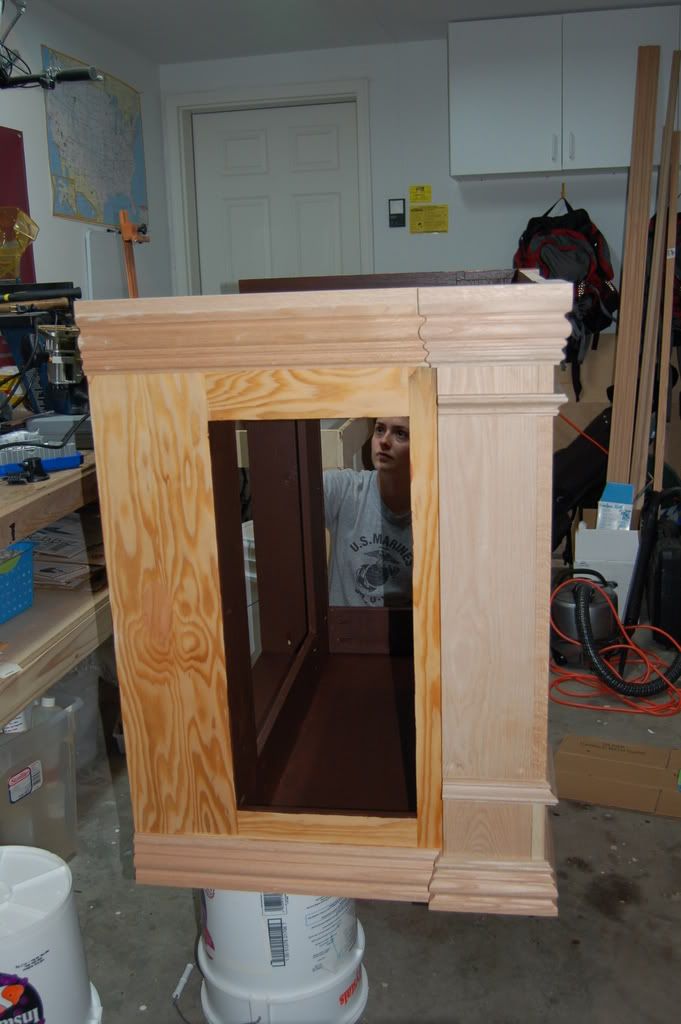 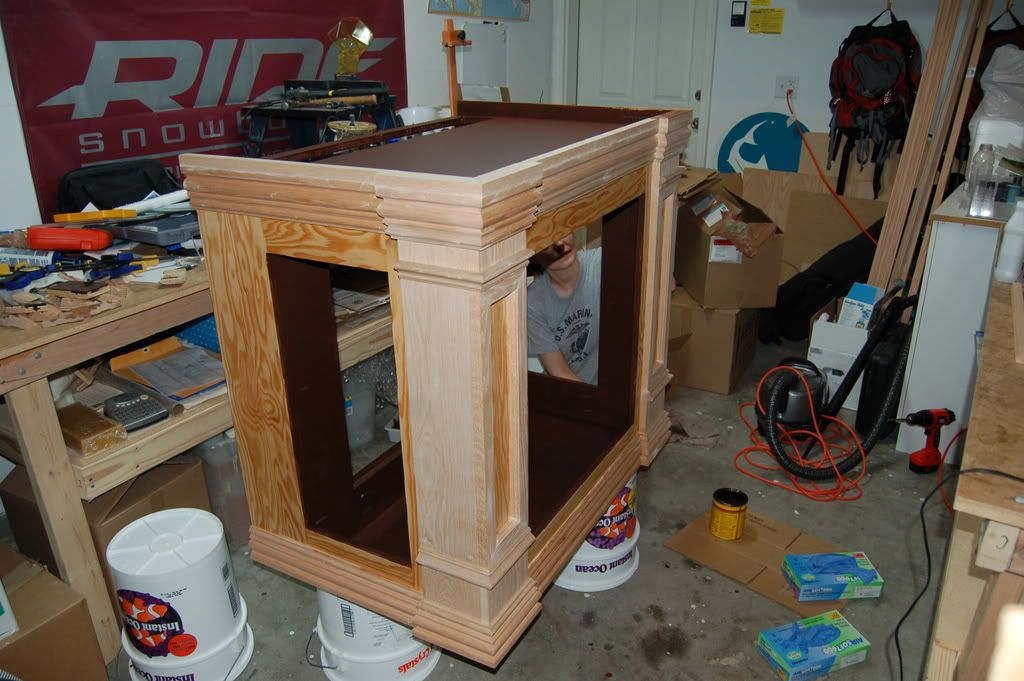 The difference after a coat of conditioner 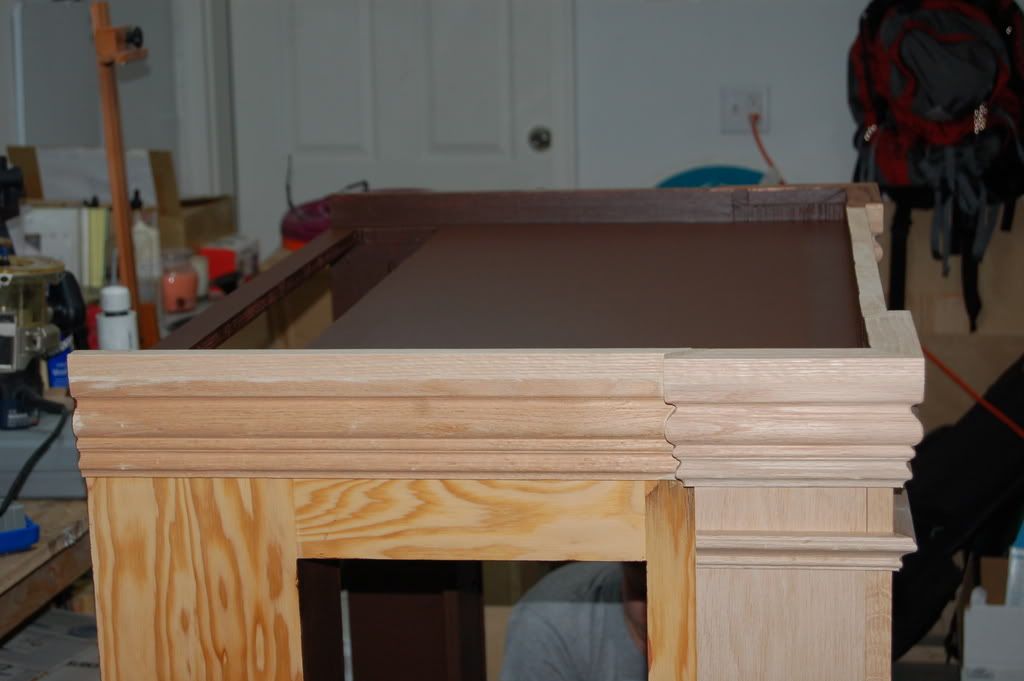
__________________
Go Buckeyes! Current Tank Info: tankless |
|
|
|
|
12/08/2008, 12:15 PM
|
#8 |
|
Registered Member
Join Date: Oct 2007
Location: Denver, CO
Posts: 1,544
|
Then on to the actual stain.
 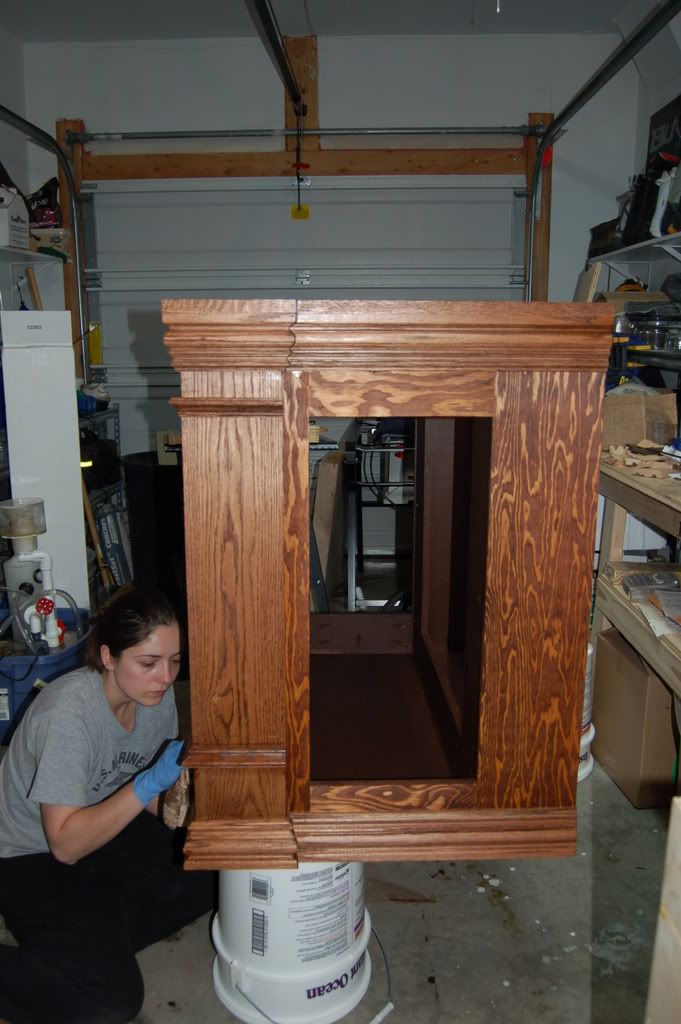 After 1 of 4 coats 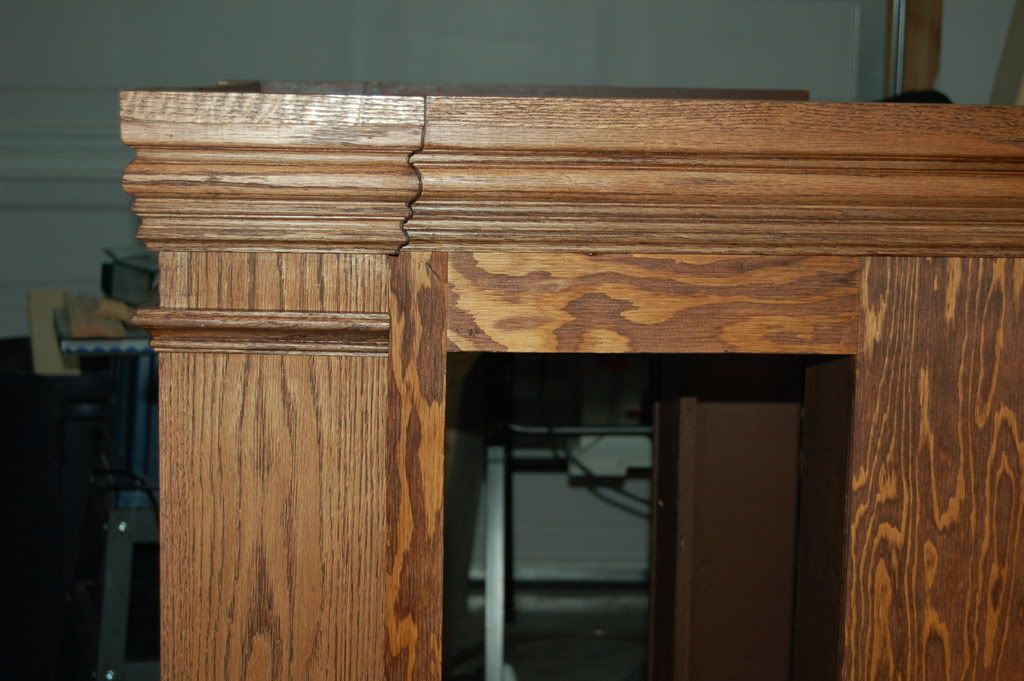 Completed: 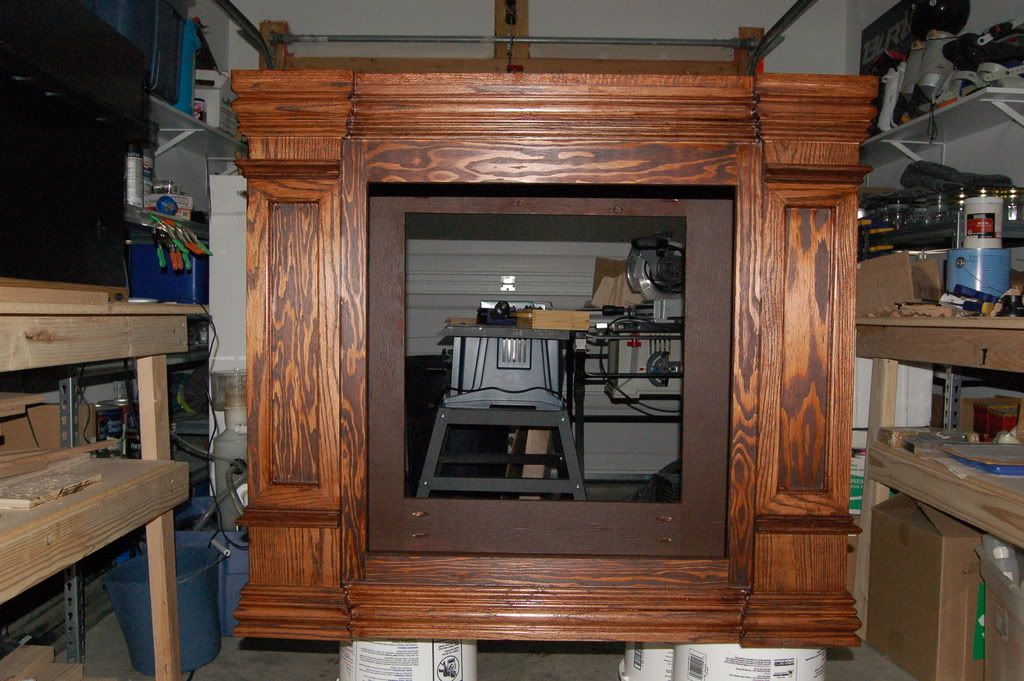 Moved into the house to start more messes: 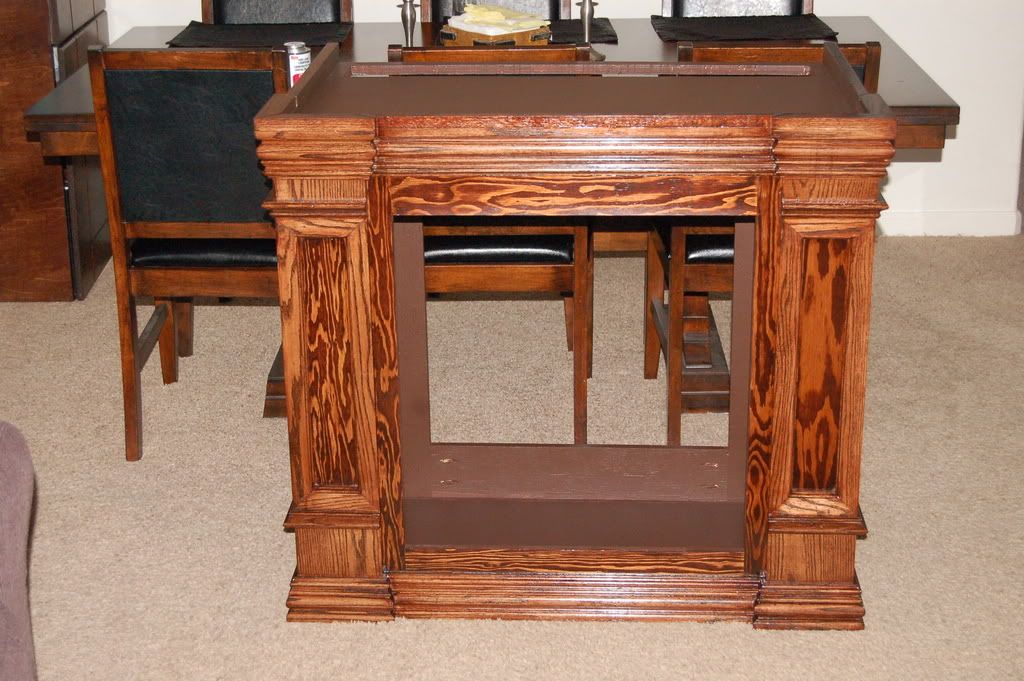 Size comparrison, much larger than the bowfront. 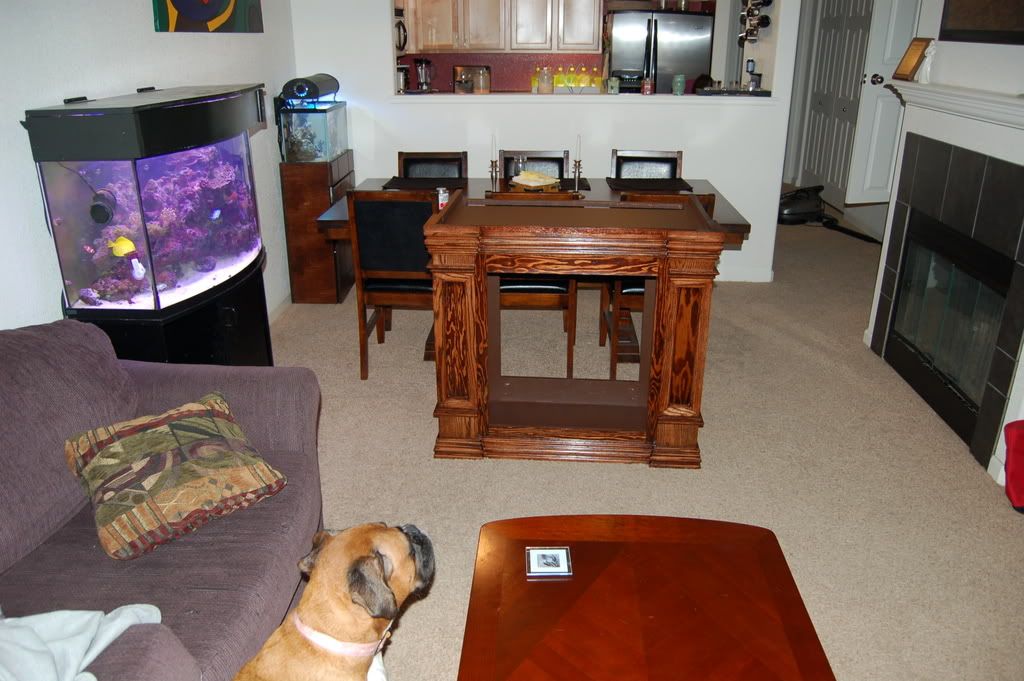
__________________
Go Buckeyes! Current Tank Info: tankless |
|
|
|
|
12/08/2008, 12:19 PM
|
#9 |
|
Registered Member
Join Date: Oct 2007
Location: Denver, CO
Posts: 1,544
|
Well I kinda got lazy of taking pics in the process as the wife gave me a deadline date.
Test run of the fit of the tank, stand, and canopy 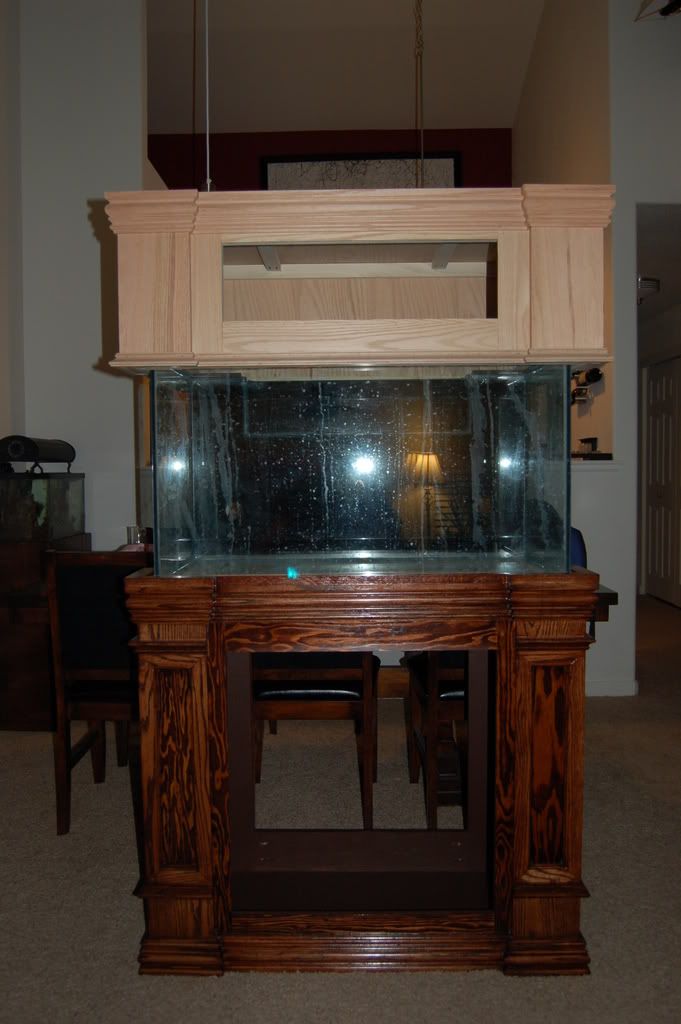 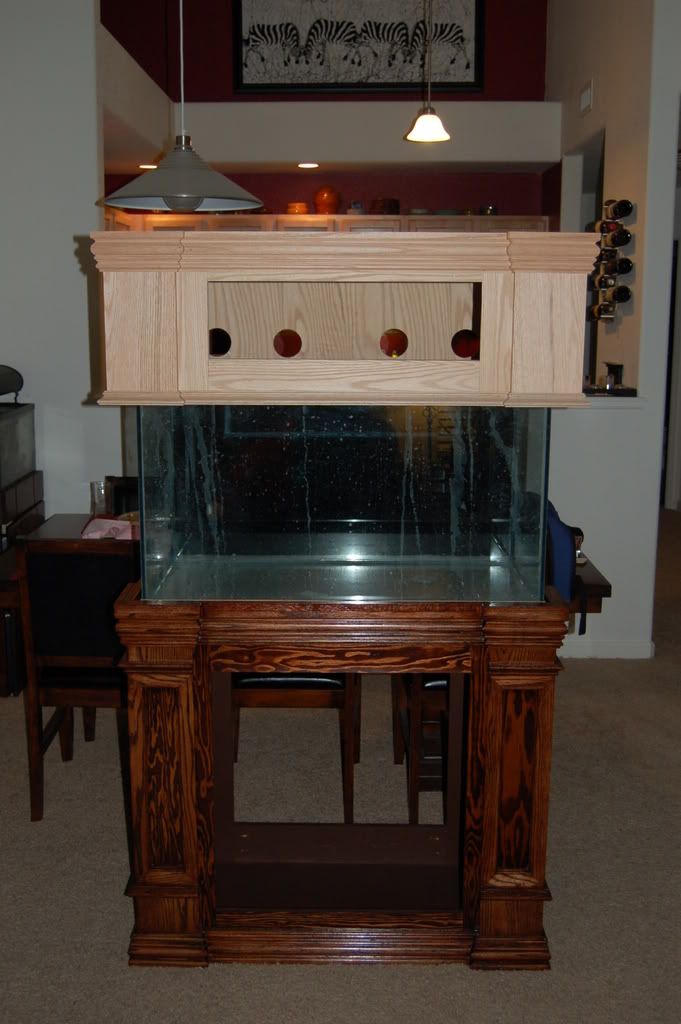 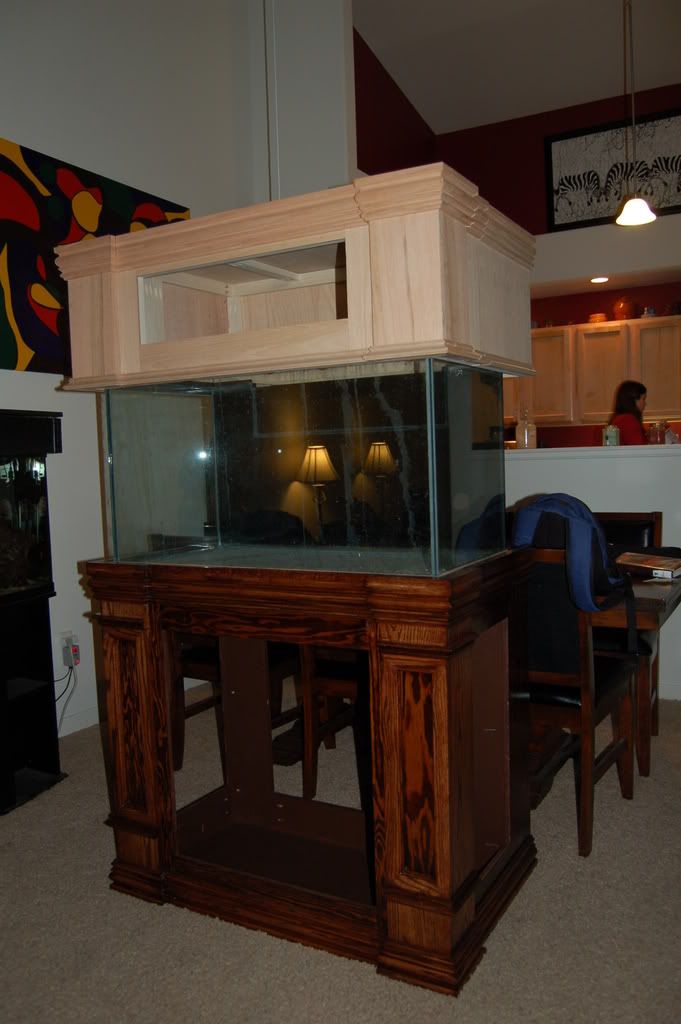
__________________
Go Buckeyes! Current Tank Info: tankless |
|
|
|
|
12/08/2008, 12:22 PM
|
#10 |
|
Registered Member
Join Date: Oct 2007
Location: Denver, CO
Posts: 1,544
|
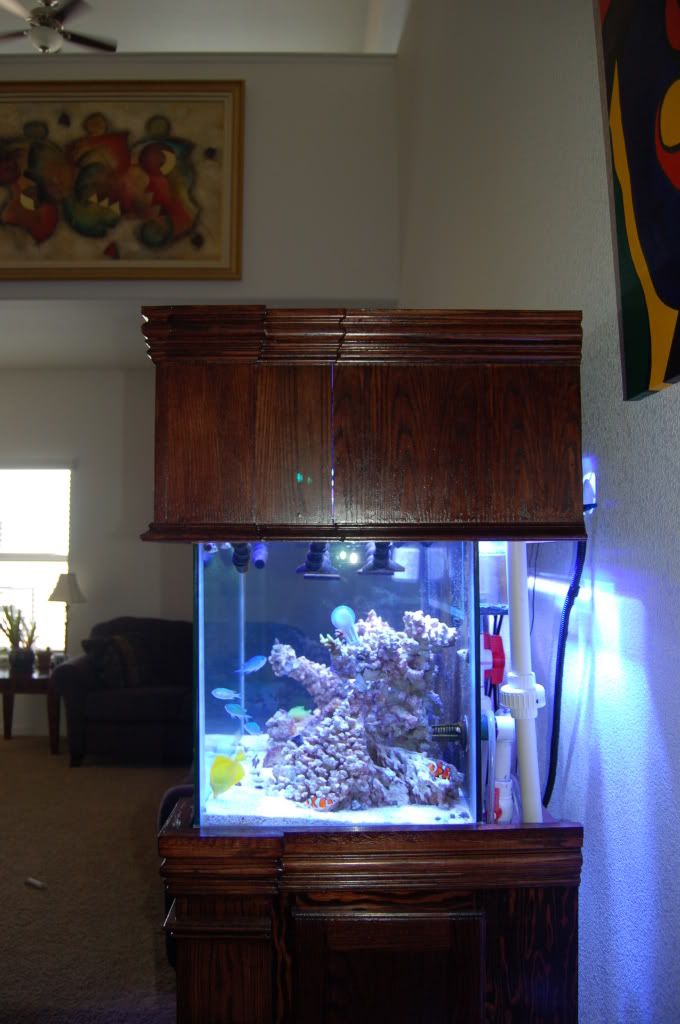
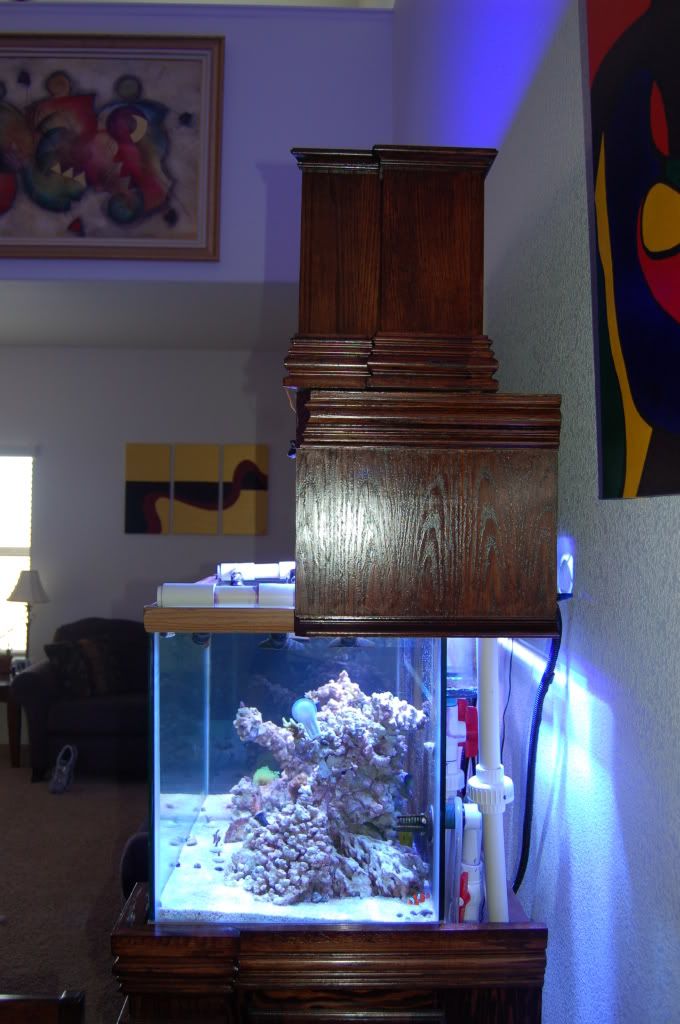
Canopy painted/ stained, added fans and mounted lights. the canopy has two doors on the front and the top hinged and will fold up when maintance is required. The halides are on drawer slides so I can push them back when getting in the tank.
 DIY lumenarc minis: again failed to take pictures of the progress. 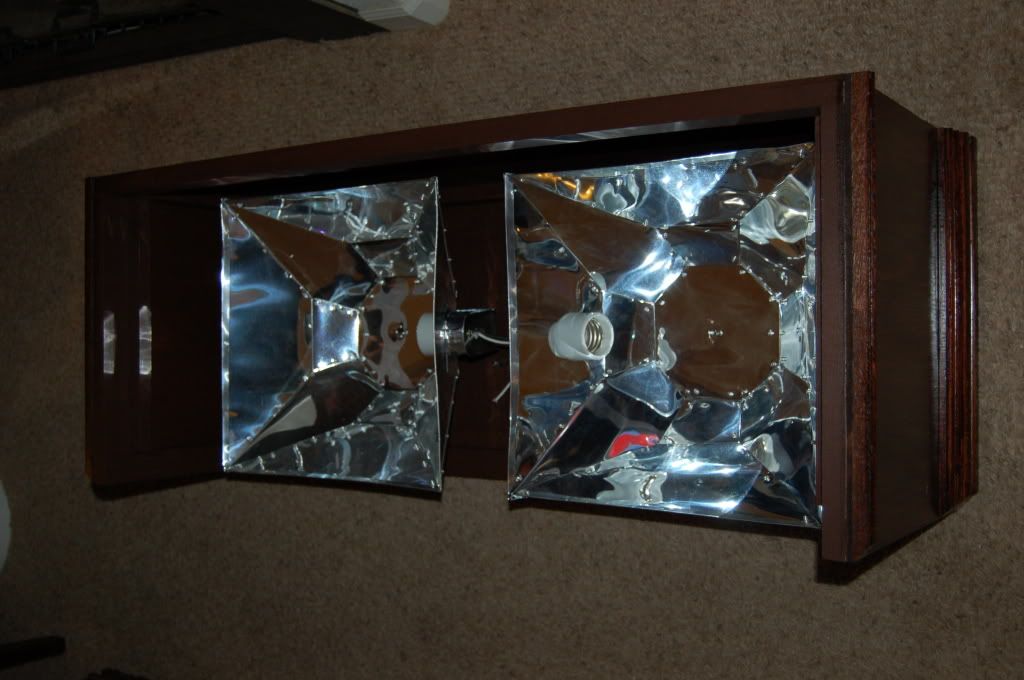 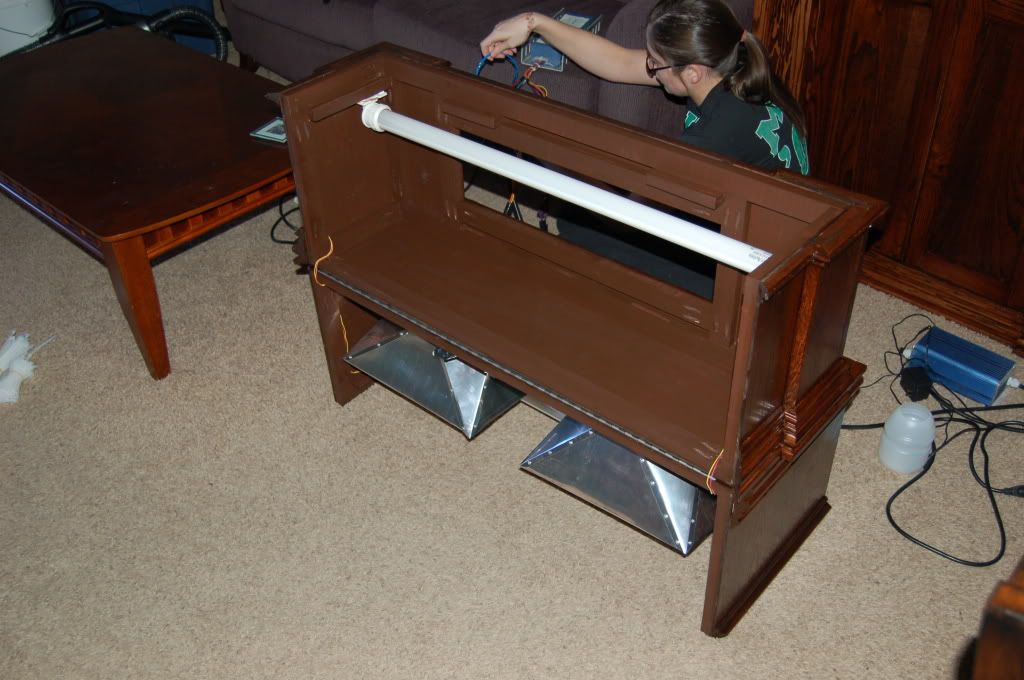 Icecap 2x250 ballasts + Icecap 660 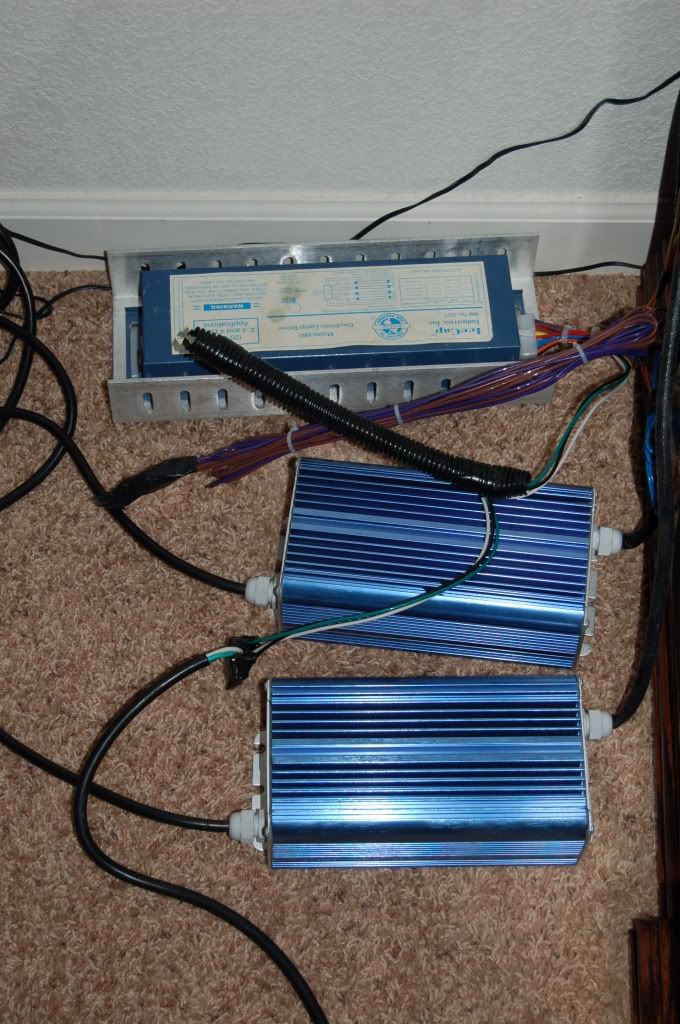
__________________
Go Buckeyes! Current Tank Info: tankless |
|
|
|
|
12/08/2008, 12:31 PM
|
#11 |
|
Registered Member
Join Date: Oct 2007
Location: Denver, CO
Posts: 1,544
|
Next started the craziness of plumbing. This was my first time plumbing anything so be kind.
I used two drains with Hofer Gurgle busters from my overflow to the sump, 1 return line through the overflow box. I had 2 holes to supply my dart closed loop, and ran the output up and over the tank to prevent swiss cheese effect on a little tank. 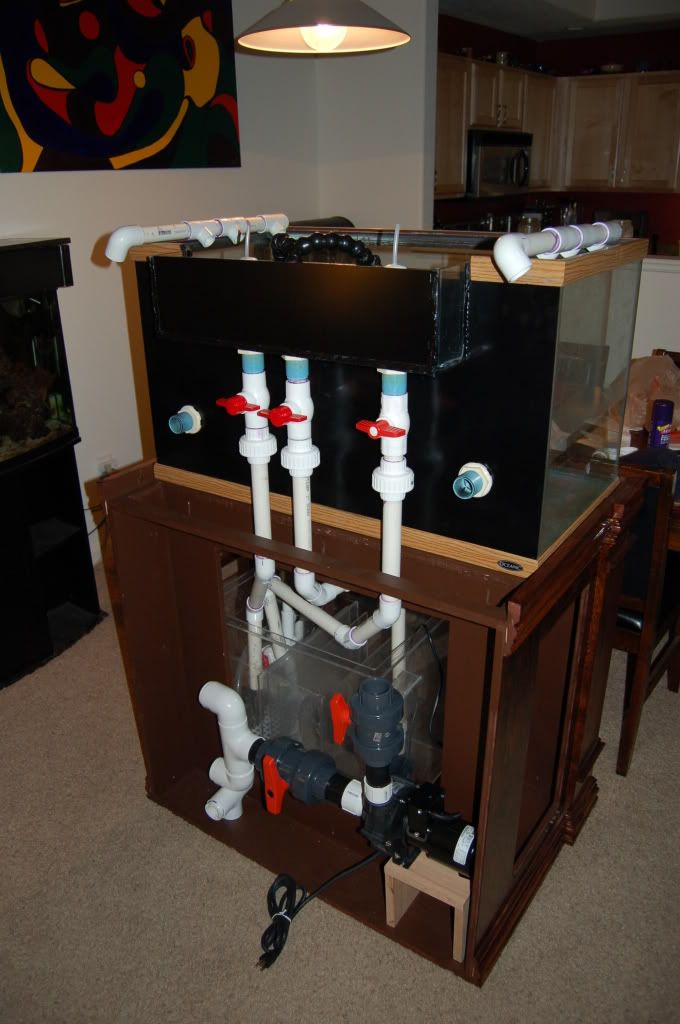 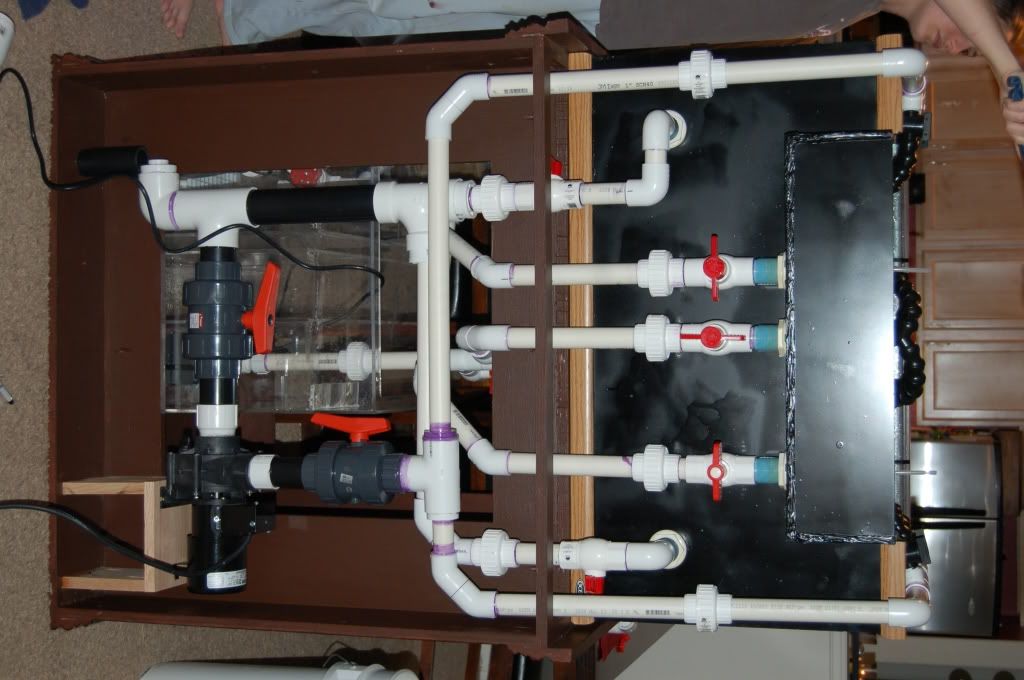 Leak testing the closed loop... it leaked in 1 place. someone forgot to glue one joint. oops 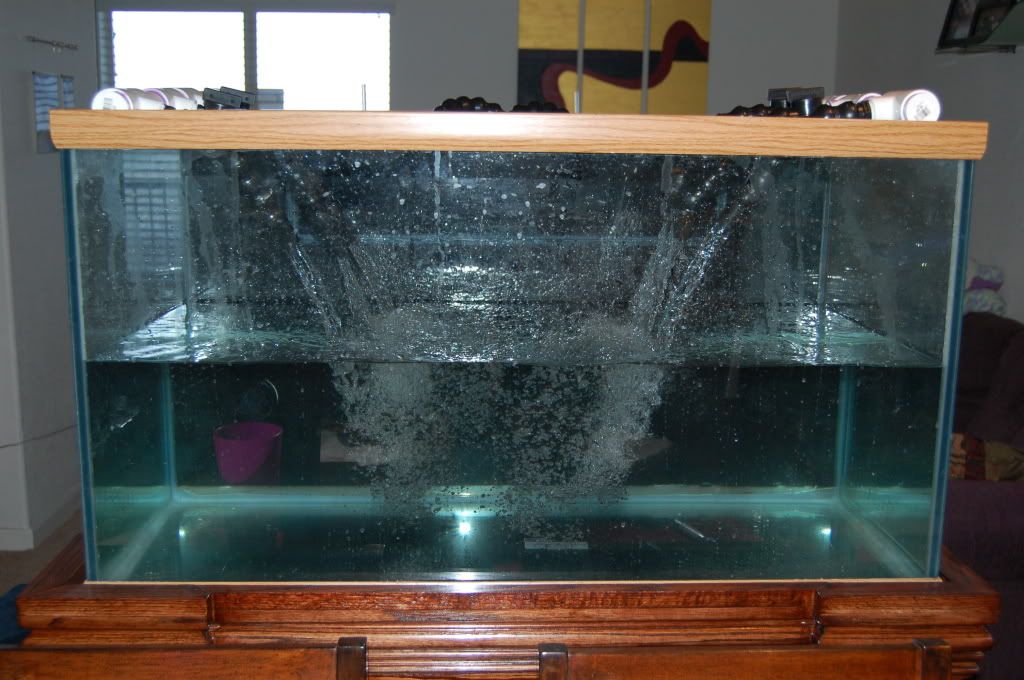 Well I hate admitting this but Im human: Midnight+ Freezing cold+ Naked+ pvc primer on Front Porch = lot of swearing Some genius didnt screw the lid on.   
__________________
Go Buckeyes! Current Tank Info: tankless |
|
|
|
|
12/08/2008, 12:36 PM
|
#12 |
|
Registered Member
Join Date: Oct 2007
Location: Denver, CO
Posts: 1,544
|
Finally we arrived at transfer day. Which started with me running around getting sand and the final odds n ends 10 home depot trips. Started at 9am ended at 1:30am.
Wife plays with rock arrangement. 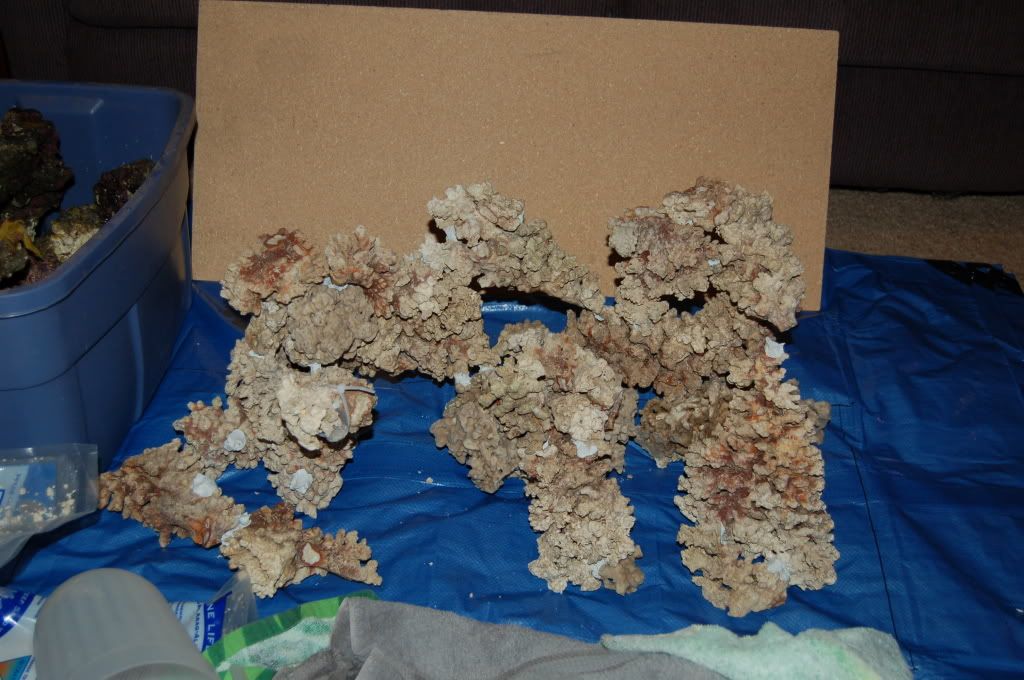 The mess that is transfer day! 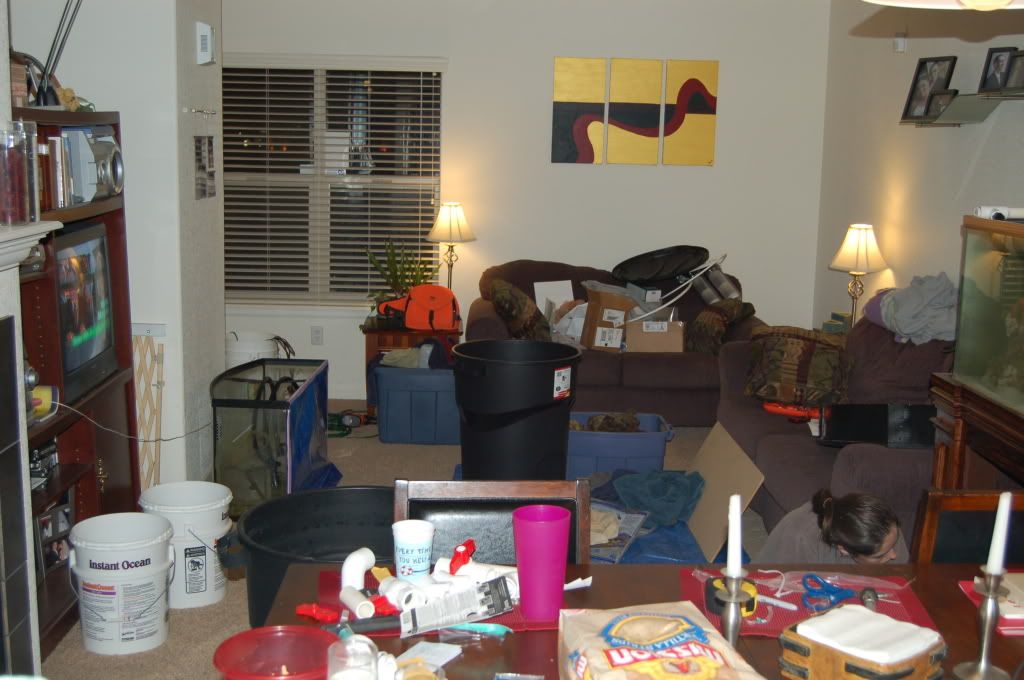 Here is the outcome, no losses in fish and no major issues. Testing halides, it was new for me. Shown is 2x250 14k hamiltons 1+ year old no actinic. Good Night! 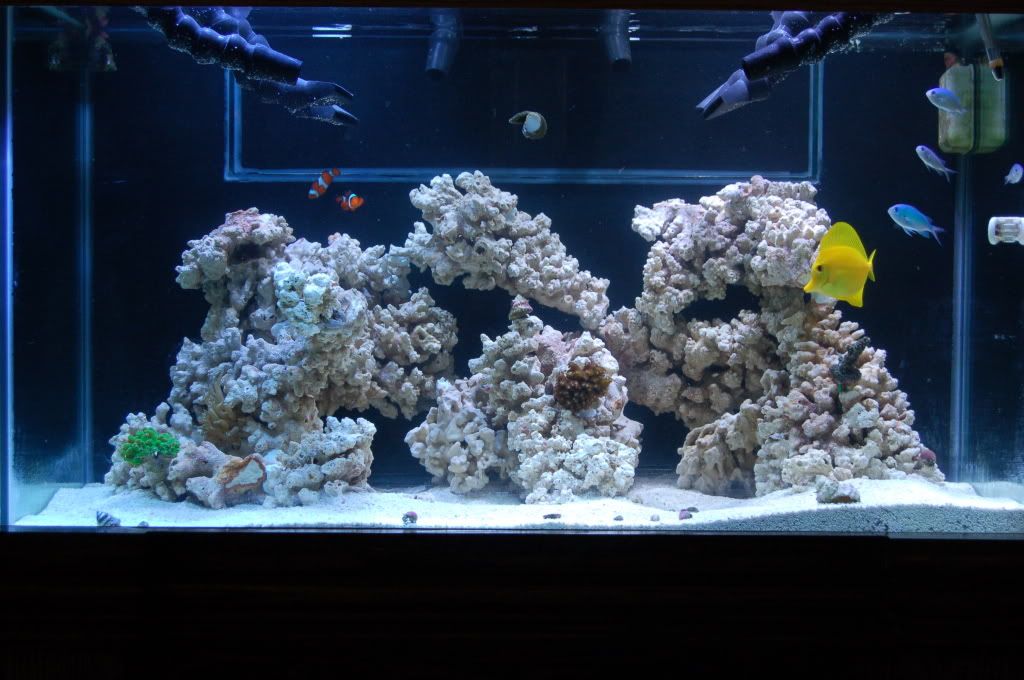
__________________
Go Buckeyes! Current Tank Info: tankless |
|
|
|
|
12/08/2008, 12:39 PM
|
#13 |
|
Registered Member
Join Date: Oct 2007
Location: Denver, CO
Posts: 1,544
|
Got my new bulbs!
2x250 Icecap 14k shown with no actinics 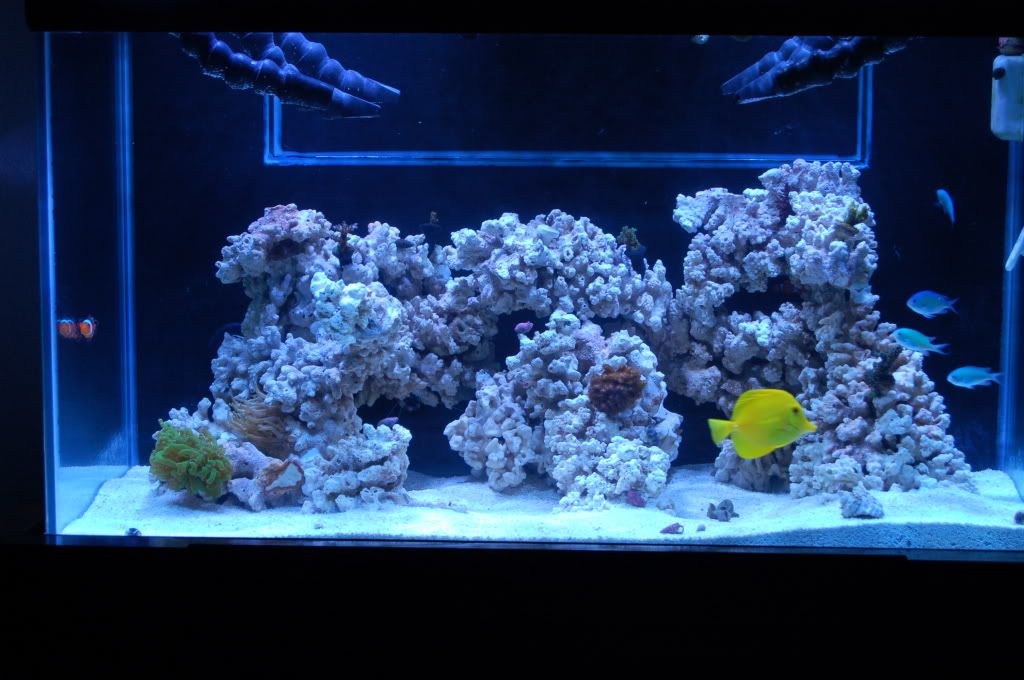
__________________
Go Buckeyes! Current Tank Info: tankless |
|
|
|
|
12/08/2008, 12:45 PM
|
#14 |
|
Registered Member
Join Date: Oct 2007
Location: Denver, CO
Posts: 1,544
|
Getting under the tank in line. This has since been cleaned, organized and an american dj strip added. DIY sump as well
In this picture you can see how I planned for water changes. Two ball valves on the return pump allow me to close the back one that goes to the tank, and open the front one which I add a piece of spa flex and empty the return portion of the sump into a bucket. 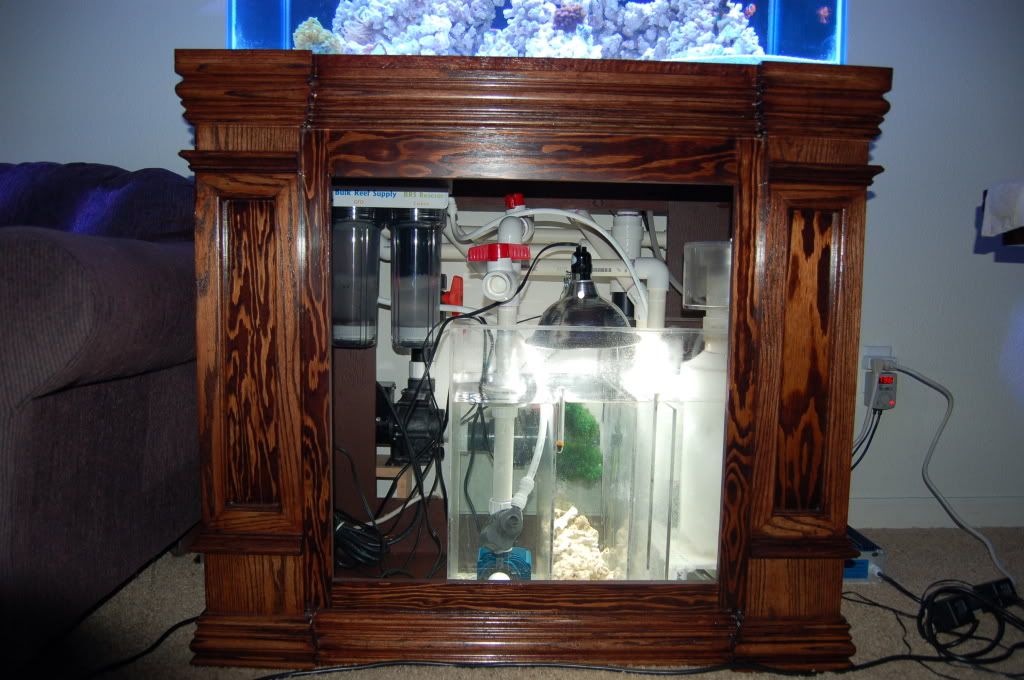 The doors arrived from advantage cabinet and doors: 2 small issues with common sense and dimensions, both taken care of! and 2 new doors arrived. 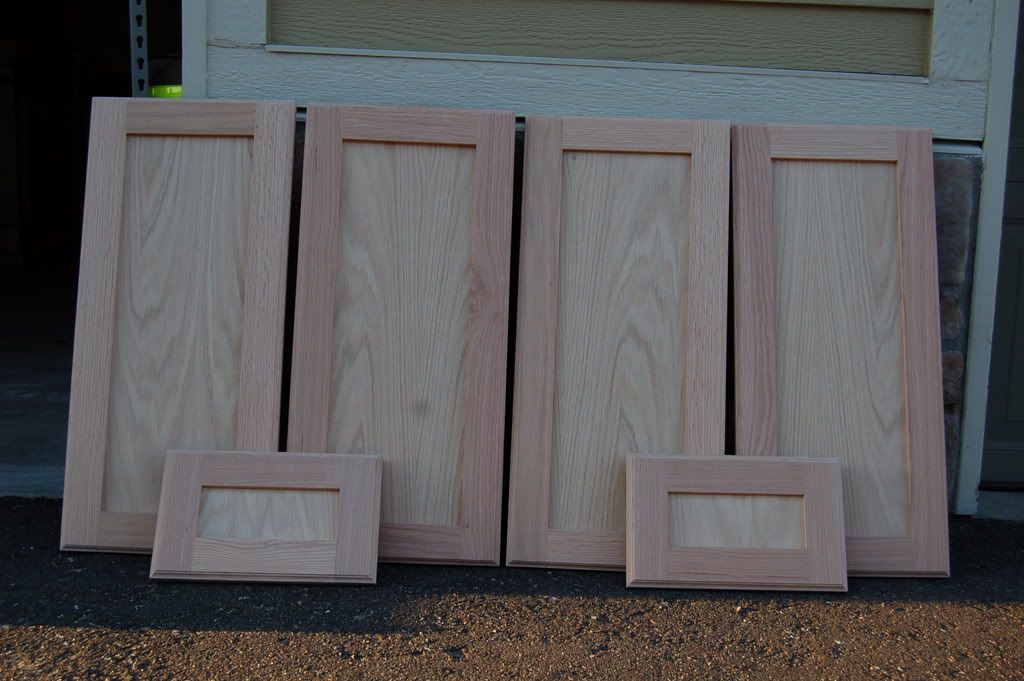 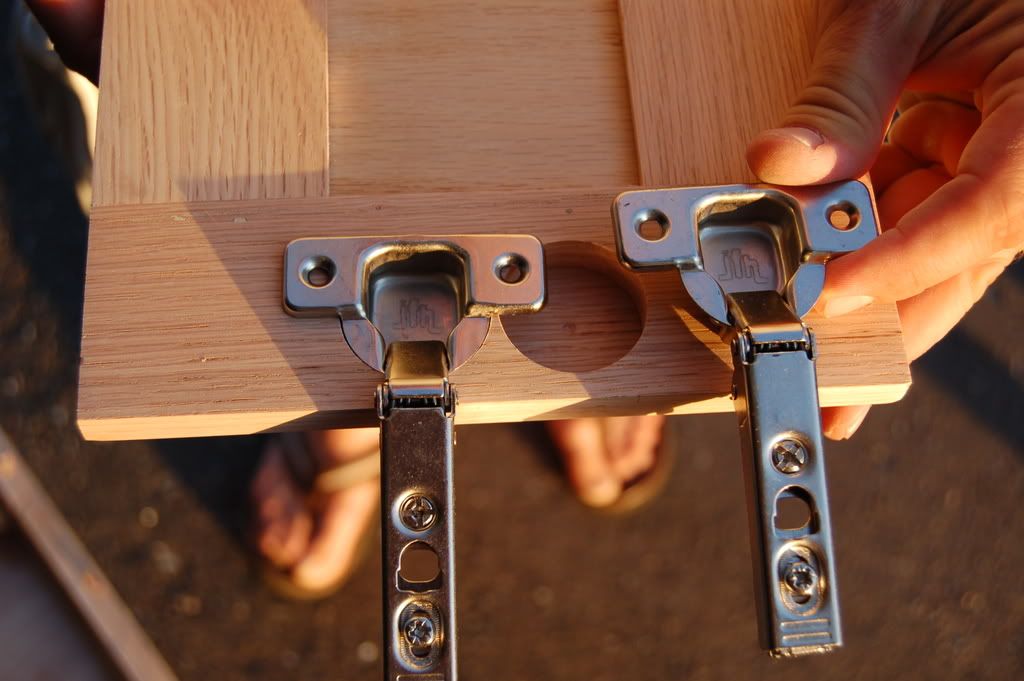 Installed doors and actinics, 2x95w UVI super actinic on an icecap 660 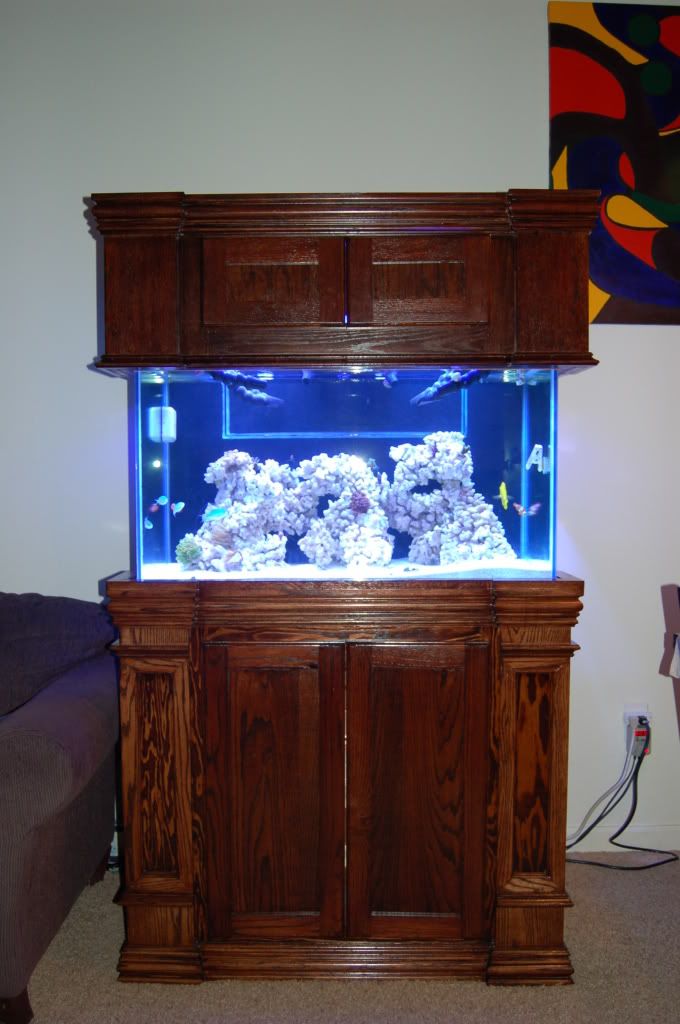 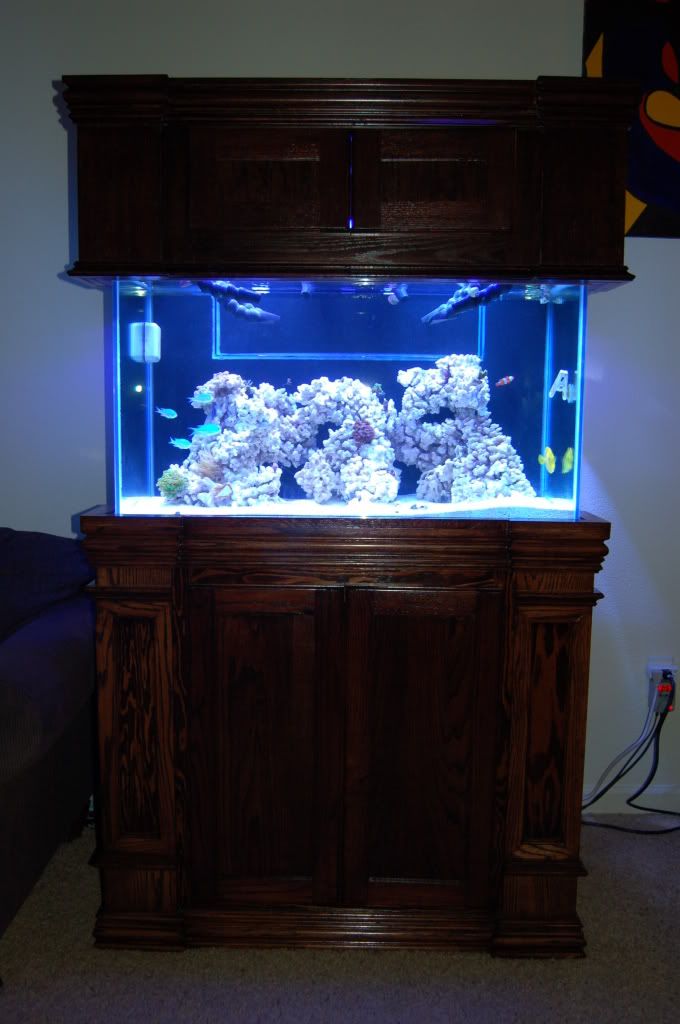 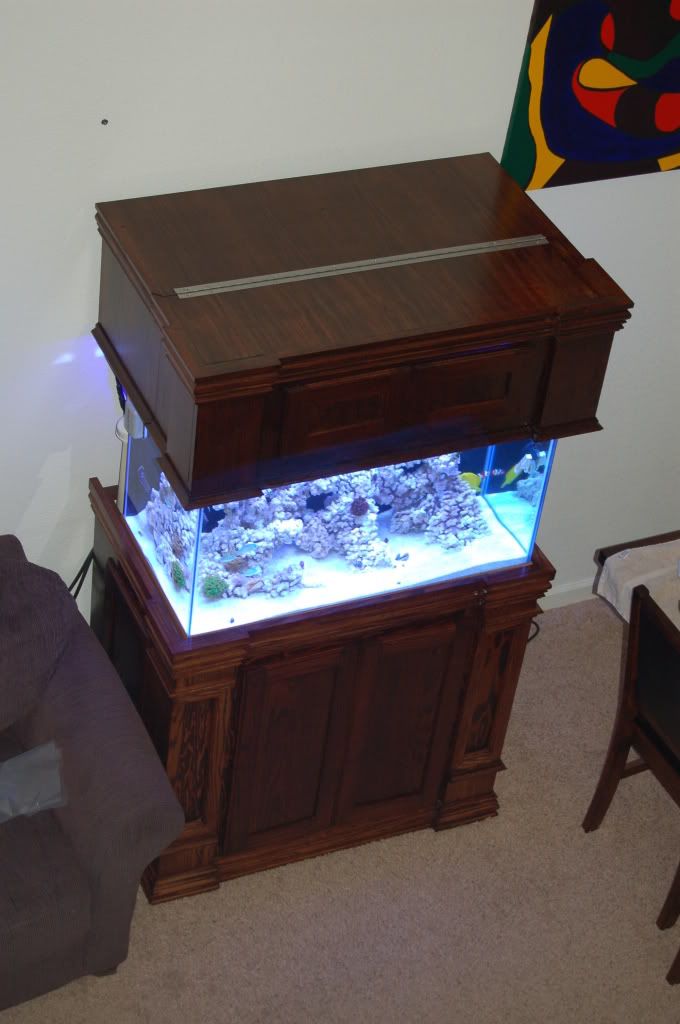
__________________
Go Buckeyes! Current Tank Info: tankless Last edited by runningstix; 12/08/2008 at 01:14 PM. |
|
|
|
|
12/08/2008, 12:46 PM
|
#15 |
|
Registered Member
Join Date: Oct 2007
Location: Denver, CO
Posts: 1,544
|
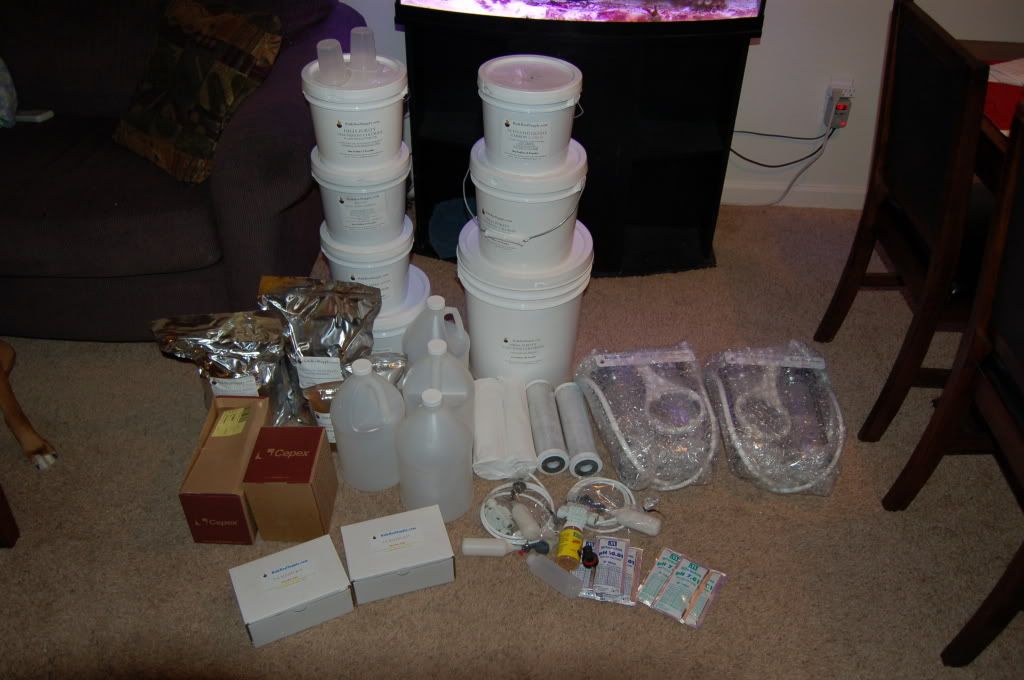
bulk reef supply group buy.
__________________
Go Buckeyes! Current Tank Info: tankless |
|
|
|
|
12/08/2008, 12:48 PM
|
#16 |
|
Registered Member
Join Date: Oct 2007
Location: Denver, CO
Posts: 1,544
|
The canopy from the side
 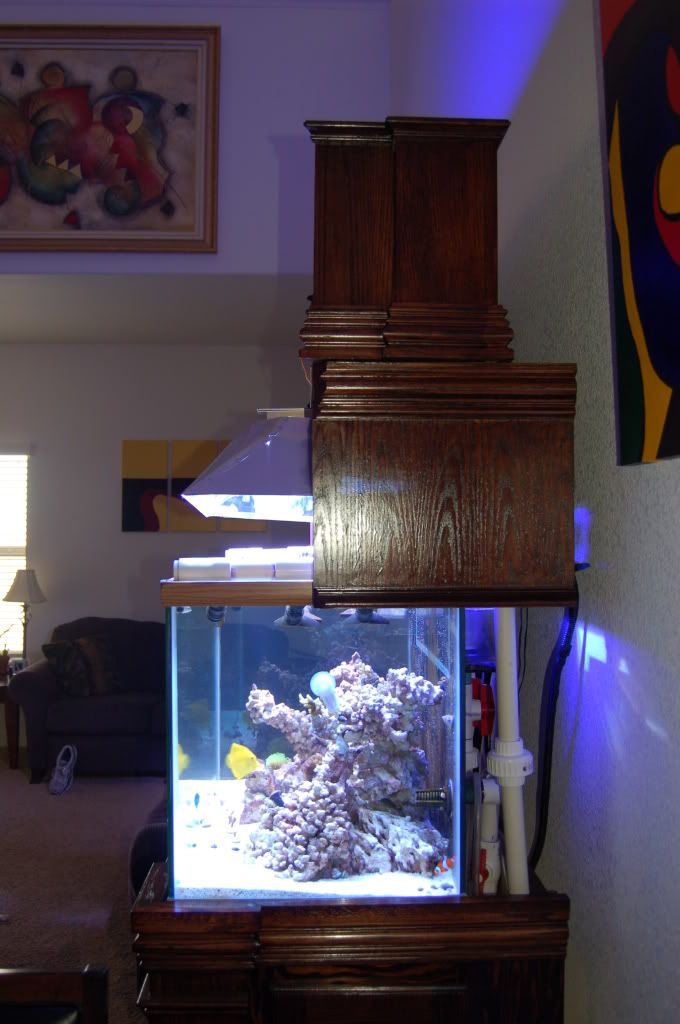  Removed some locline links so it was no longer visible. Current Pic as of 12/07/08 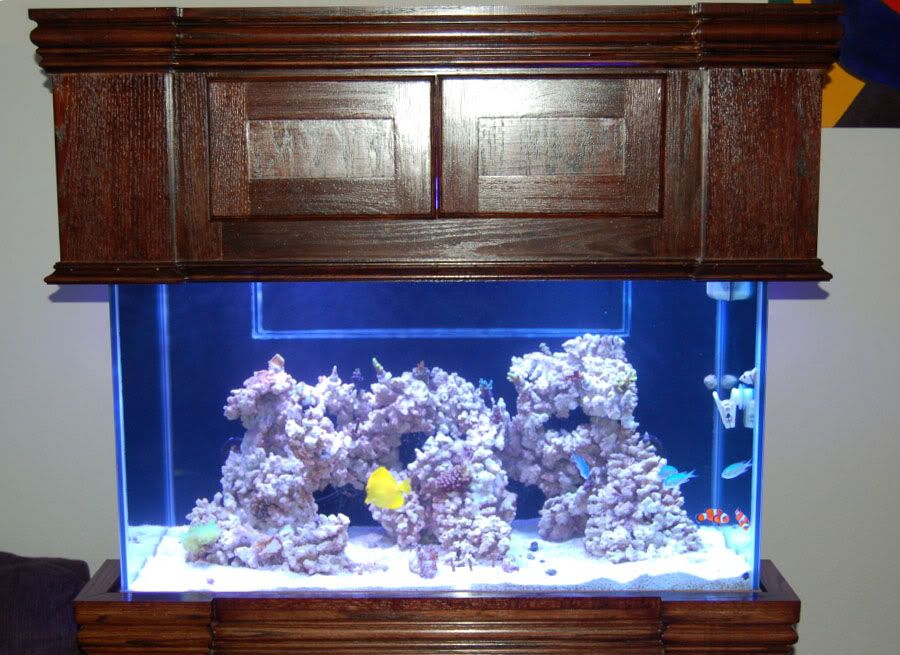
__________________
Go Buckeyes! Current Tank Info: tankless Last edited by runningstix; 12/08/2008 at 01:34 PM. |
|
|
|
|
12/08/2008, 12:53 PM
|
#17 |
|
Registered Member
Join Date: Oct 2007
Location: Denver, CO
Posts: 1,544
|
Tank Specs:
-58 gallon Oceanic tank. DIY external overflow -27 gallon DIY Sump -DIY Stand + Canopy -DIY Recirculating skimmer supplied with a mini jet 606 and recirc. rio 2500 with mesh mod -DIY Lumenarc Minis -2x250 Icecap metal halide running Icecap 14k bulbs -2x95w UVI super actinic VHO on Icecap 660 -Quiet One 3000 return pump -Dart 3600gph closed loop -Bulk Reef Supply dual gfo/carbon reactor supplied by maxi jet 1200 -JBJ ATO -American DJ powerstrip Tank has been running for just over a month. Fish: 2 Ocellaris Clownfish 4 Green Chromis Yellow Tang Inverts: 100 nassarius snails 25 red legged hermits Coral Banded Shrimp 3" Derasa Clam Coral: ORA Borealis ORA Blue Voodoo ORA Plum Crazy ORA Bellina ORA Pearlberry ORA Red Planet or very close lookalike. Superman Digi Spongodes Yellow Milli Green Milli Yellow Green Milli Blue with pink tip Milli Pink Poccilipora Unknown blue/green acro Frogspawn Special thanks to Leif(spleify) for so much help, and lending of tools. More to come!
__________________
Go Buckeyes! Current Tank Info: tankless Last edited by runningstix; 12/08/2008 at 01:17 PM. |
|
|
|
|
12/08/2008, 01:15 PM
|
#18 |
|
Registered Member
Join Date: Sep 2007
Location: tempe, az
Posts: 234
|
looks good, great start
|
|
|
|
|
12/08/2008, 01:39 PM
|
#19 |
|
Registered Member
Join Date: Oct 2007
Location: Denver, CO
Posts: 1,544
|
wow my wife would kill me if she saw herself in these posts looking her best. ha
__________________
Go Buckeyes! Current Tank Info: tankless |
|
|
|
|
12/08/2008, 03:57 PM
|
#20 |
|
Foaming Conehead
Join Date: Sep 2006
Location: CO
Posts: 1,002
|
Nice transformation, and nice coral list!!! I too hope to get a few of those within the coming weeks!
|
|
|
|
|
12/08/2008, 04:17 PM
|
#21 |
|
Registered Member
Join Date: Oct 2007
Location: Denver, CO
Posts: 1,544
|
Just scored this wysiwyg
AUSSIE ULTRA ACAN! RAINBOW MORPH WITH ORANGE AND GREEN MOUTHS 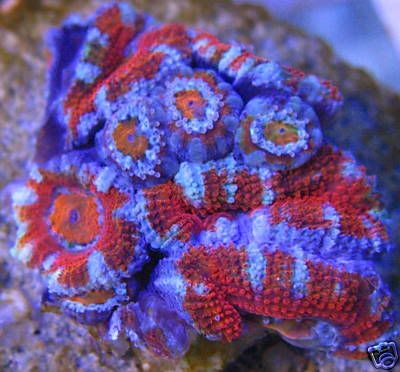 Im also picking up a nice purple favia tonight.
__________________
Go Buckeyes! Current Tank Info: tankless Last edited by runningstix; 12/08/2008 at 04:22 PM. |
|
|
|
|
12/08/2008, 11:30 PM
|
#22 |
|
Registered Member
Join Date: May 2008
Location: Northern Va
Posts: 1,068
|
I like what you did with the 58 Oceanic. I've got one and have been running it with an overflow box. Would love to have one that was reef ready, but it was given to me so couldn't pass it up. At least now I know it can be drilled. Unfortunately, I don't trust myself. I remember Spleify's build thread and admired the exquisite woodwork. So....my question is....who's responsible for the craftsmanship, you or him. Don't be shy.
Oh yea, I also copied one of your other ideas in another thread about T-ing the return to make water changes easier. Gotta say, it has made my water changes that much easier!!! |
|
|
|
|
12/08/2008, 11:49 PM
|
#23 |
|
Registered Member
Join Date: Jan 2006
Location: maryland
Posts: 6,923
|
Dang, You are one Handy dude. Awesome job !! Nice Pics.
__________________
I found a way to make a small fortune running a reef tank. Start with a large fortune. Unofficial President of the SEACLONE haters club Current Tank Info: 125 mixed reef 110 lbs LR, 1x250watt XM 20K MH 2x175watt XM 20K MH on Magetics 2X96 watt actinic PC, 220 watt VHO actinic, 30 gallon refugium, closed loop system powered by Sequence Dart MSX 200 skimmer 38 gallon sump, Oceansmotions squirt |
|
|
|
|
12/09/2008, 12:01 AM
|
#24 |
|
Registered Member
Join Date: Oct 2007
Location: Denver, CO
Posts: 1,544
|
Honestly I would say Spleify is responsible for the craftsmanship. I designed it and came up with how I wanted it. Without him I would have never have gotten there. Especially since most of the tools used were his. I think it also encouraged me to make it that much nicer.
I would say he was there for 95% of the stand build helping me out, giving up his valuable time. I tackled the canopy on my own in late night hours. I ran all my ideas and thoughts off him and went from there. I was very lucky. Im very thankful for his help. It turned out much nicer than if I would have just tried to make it on my own. I cant thank him enough!
__________________
Go Buckeyes! Current Tank Info: tankless |
|
|
|
|
12/09/2008, 12:17 AM
|
#25 |
|
Registered Member
Join Date: Oct 2007
Location: Denver, CO
Posts: 1,544
|
Here is an updated picture of below the tank.
I added the american dj panel and did a little organization. 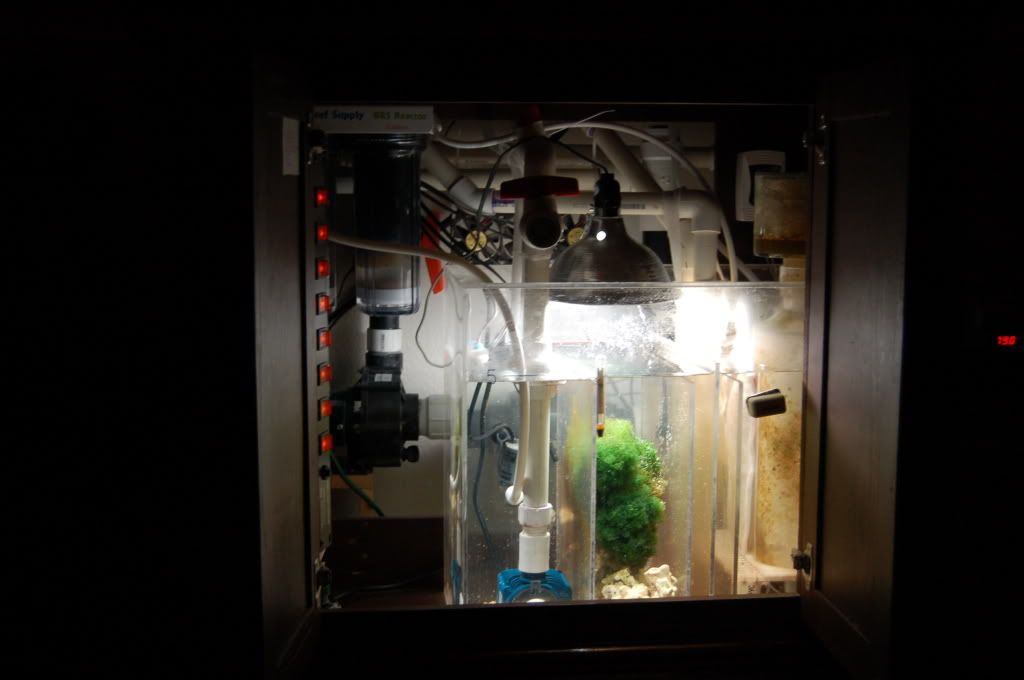
__________________
Go Buckeyes! Current Tank Info: tankless |
|
|
|
 |
|
|


