


|
 |
|
|
#1 |
|
Moved On
Join Date: Jun 2006
Location: pine hill
Posts: 554
|
40g Breeder build
Today I started my dream tank, a 40g BB breeder that is sps dominate with a few high end zoos, it will also have a 40g breeder sump and a 20g auto top off. This thread will be a diary of my dream tank so hopefully one day I will be able to look back on it and see where it came from. I have been into this hobby for about 2 years., but have recently taken the last year off. I feel as if my last tank, a 75g, that I kept for about 2 years was rushed into and not planned properly. So I learned from my mistakes which we all do in this hobby, and planed this one out very well.
My whole philosophy to this tank is to look clean. I want a tank that is also viewable by all three sides, because a breeder adds so much depth to a tank it allows more then just a bunch of rock's pushed nicely toward the back wall like most smaller tanks. So in doing this, I came to the conclusion I would want a external over flow to allow more room in the tank and it will be less viewable by the eye. Also, in doing this and making it viewable by three sides it allows me to bring all wires up one corner and it will be easer to hide. My circulation will start with what I think is called a gx-1, pushing 1,200gph to an ocean motion 4 way that will be on the 2 /2 drum. I will also have a 750gph pump or two maxi modded maxi jets on the back wall pushing down so all the debris is pushed along the bottom to the front of the tank. pending on how I feel about the flow I might add another mini tunzi on a controller and place it in the front of the tank on some sort of hang down contraption so no magnet is on the outside glass with the wiring up and across the top of the hood.. As for My lighting this is where Iâm testing the waters to try a little something new. I will be using two 250w mh with a 65k or 10k bulb on a light cycle of about 5.5 hours a day. I have been reading about this and decided I will try the shorter light cycle to see how growth goes. Along with the Mh I will be supplementing with two VHO's with a deep blue actinic for about 10 hours a day. When i first start i will be using the two 250w on one singe reflector but later will soon be upgrading to two two single reflecters. (another thing I will be looking into is starting the back light 30 mins earlier then the front light ,but shutting off 30 mins earler then the front light.) As for other equipment I will be using a MSX160 skimmer and a cal rex later in time. I will have ph,temp,cal,nitrate and salinity monitored all times of the day. Below my tank next to my sump I will also be placing a 20g tank that will be only for top off. My sump will be three main compartments. my first chamber will be the fudge with a 2 inch bed of sand and one pipe going into it that will flow into the middle chamber. This chamber will be drilled and draw the water to the external pump. Next, three baffles to the skimmer where you will also find the second drain line that will carry about 85% of the drained water from the main tank. Here is a few clicks of some work i put into today. just rough draft of the stand and lay out of how things will work out on the stand i build, then the drilling i did. i will drill the holes in the externiol over flow and glue it all together tomm. im also wanting to make sapports on the bottom of the overflow and the stand to add extra sapport. I will also soon add maple wood and stain it so the stand looks good. 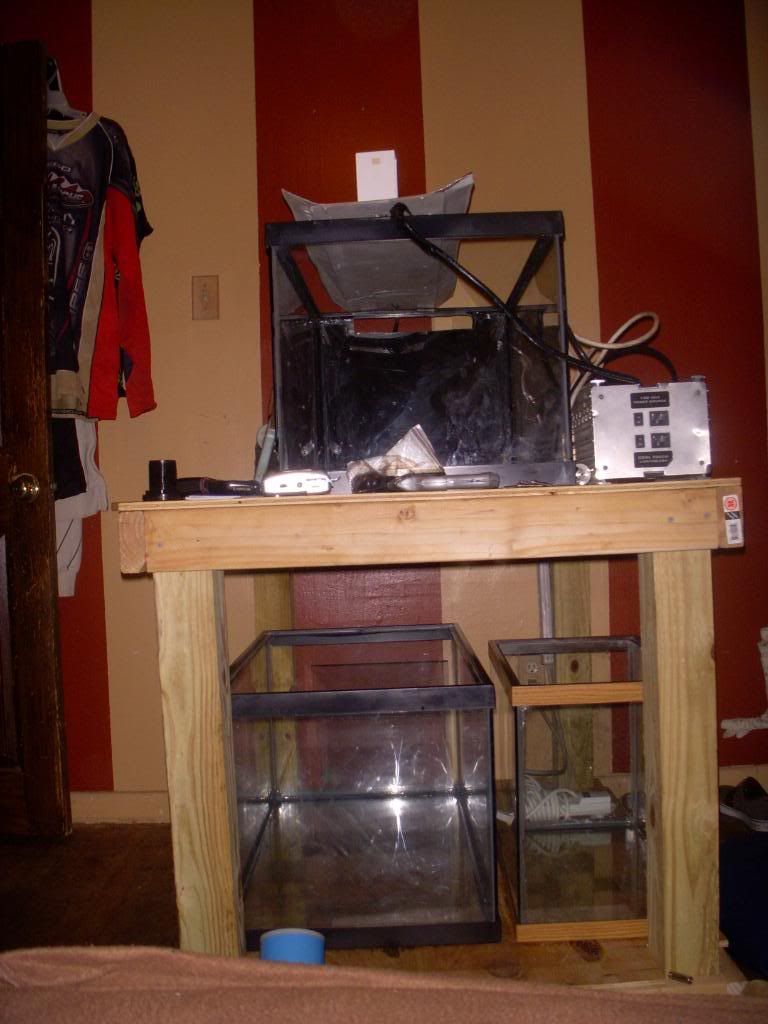 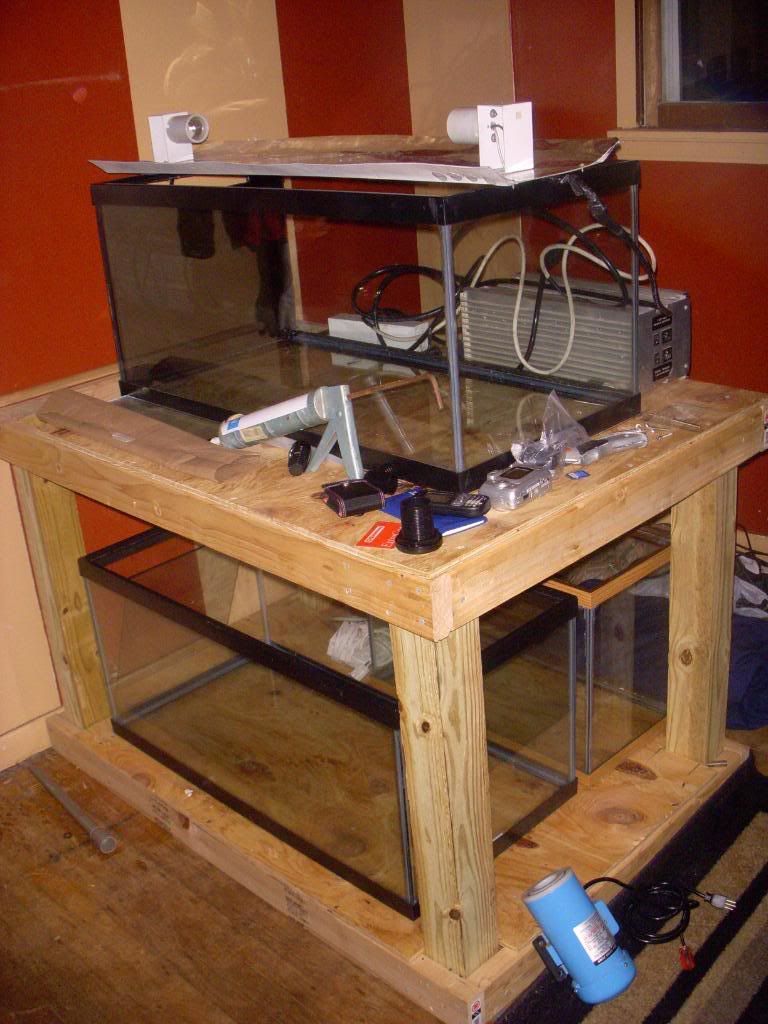 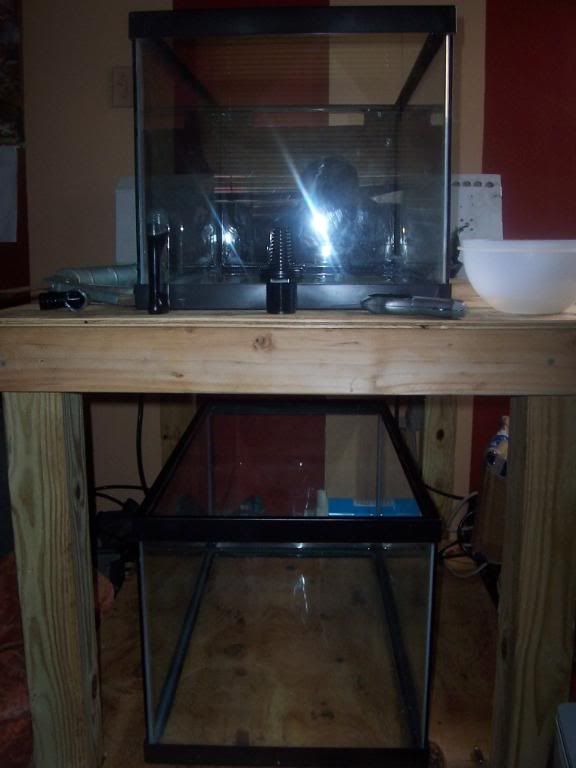 Here is the cuts in the tank for the externiol over flow. And the back of the tank where all the piping will go through. 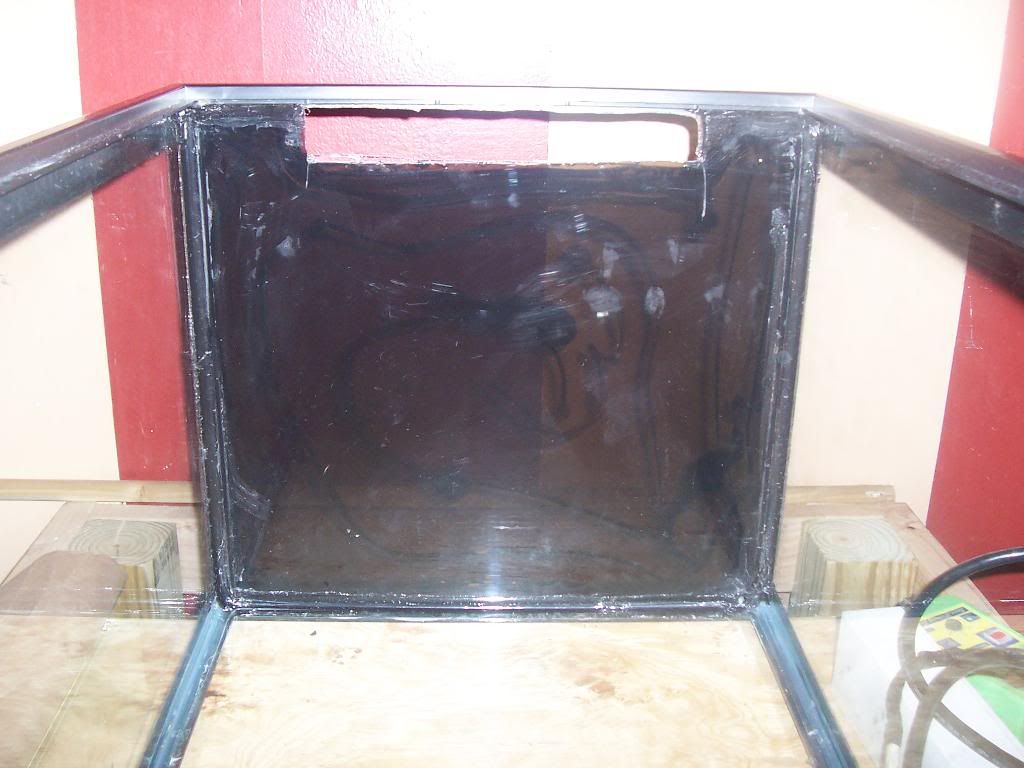 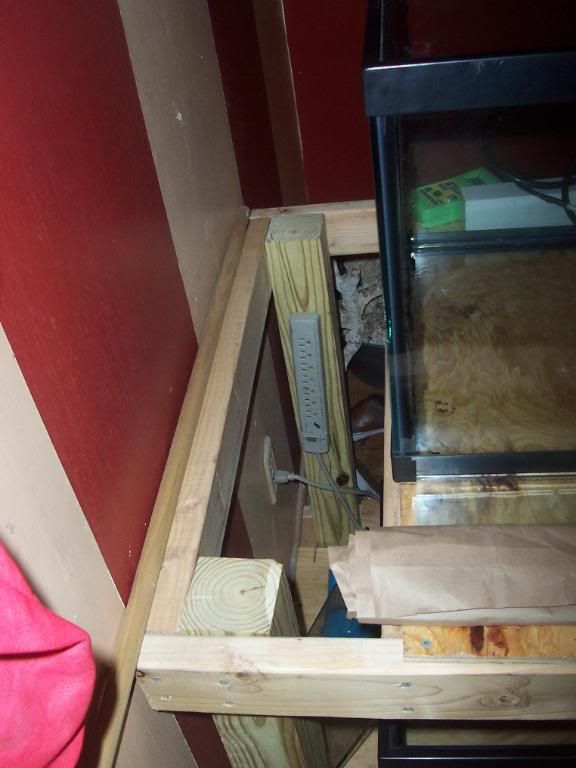 Now i have had a past tank where i cherry picked all the rock. My best freind also cherry picked his hole tank and parted his hole system and i kept the best rock from both systems in a box for later tanks. i will pick up a few more peices for seeding perposes only. Here are a few pic's of what i have kept and now going to cure. 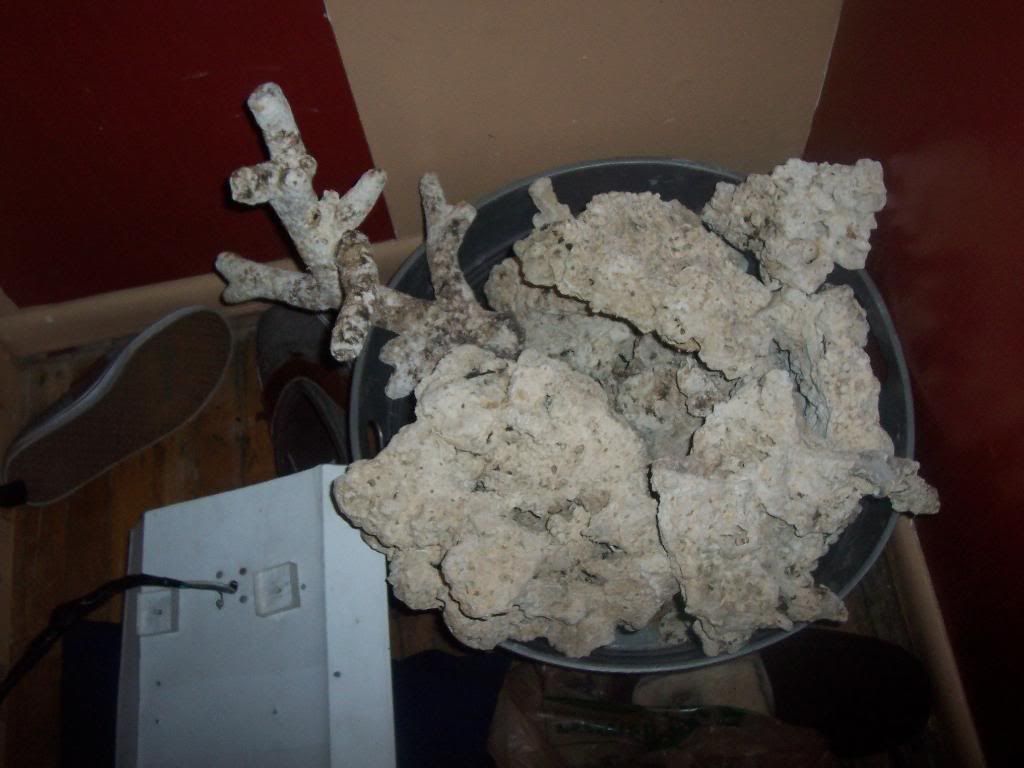 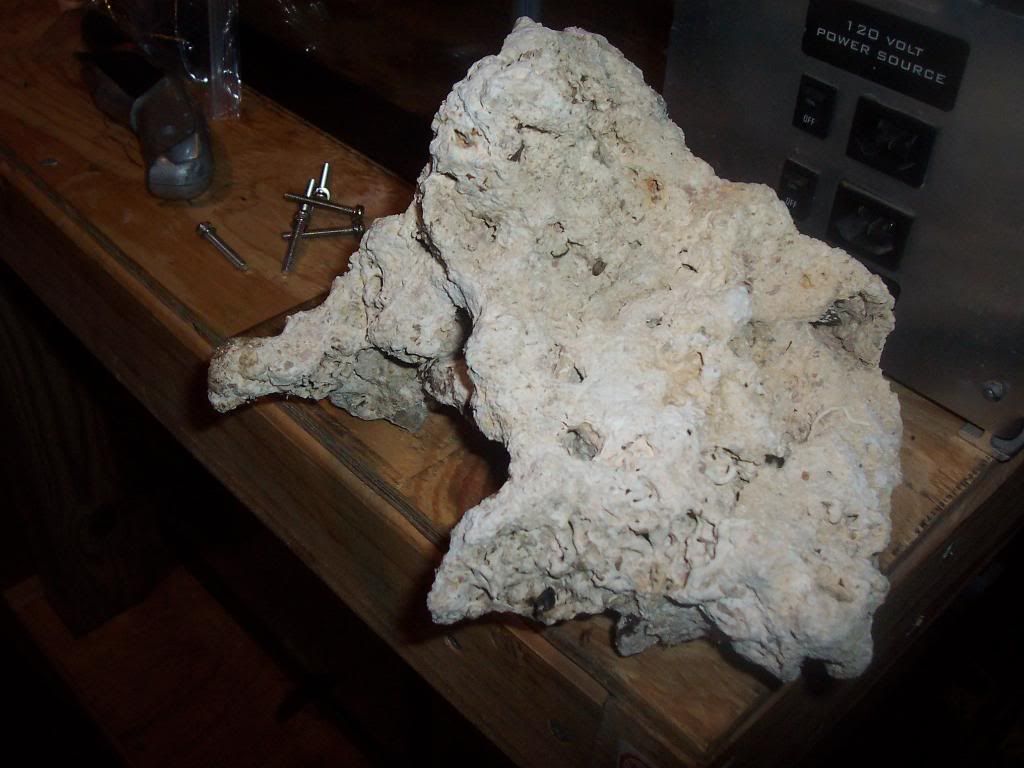 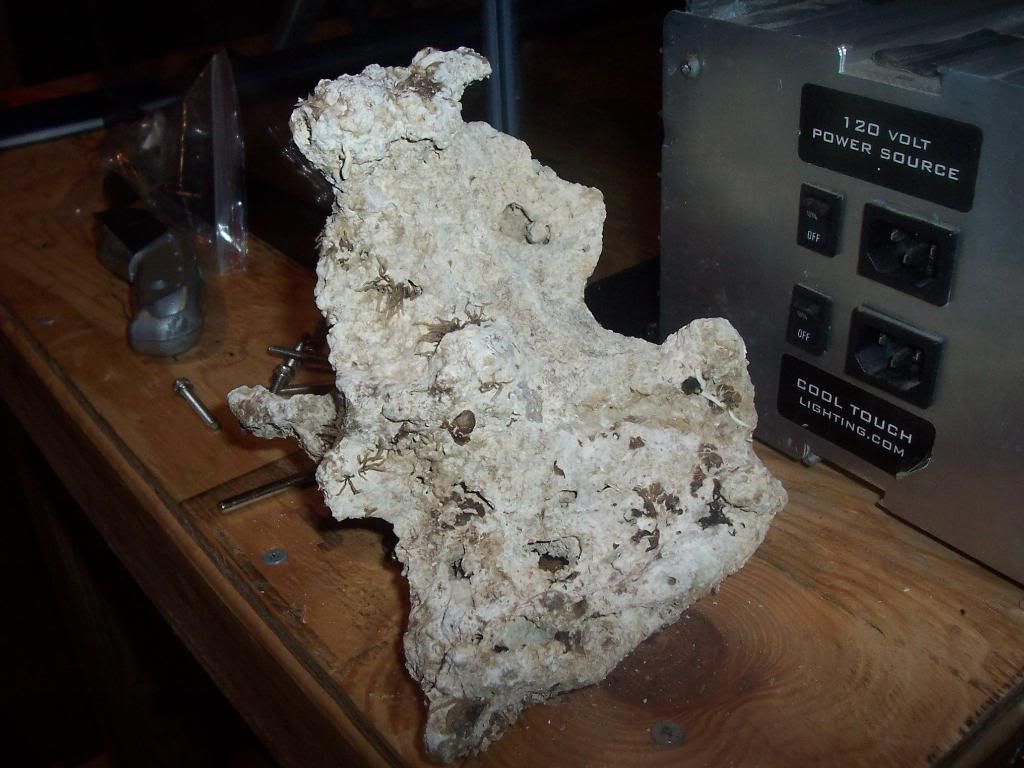 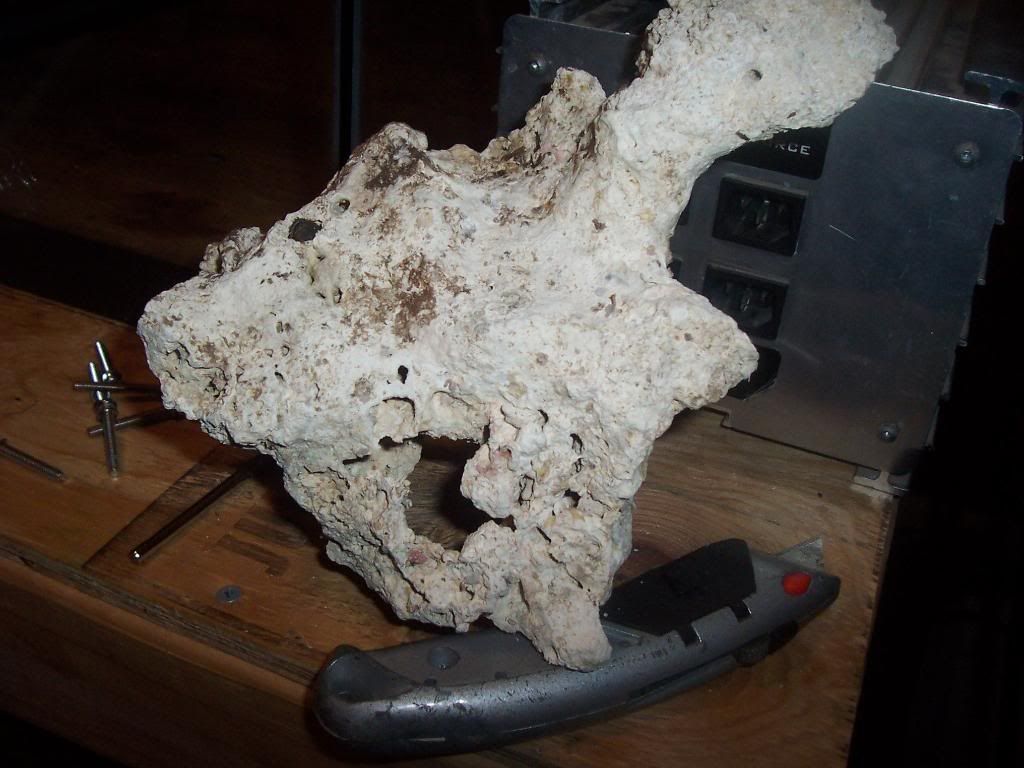 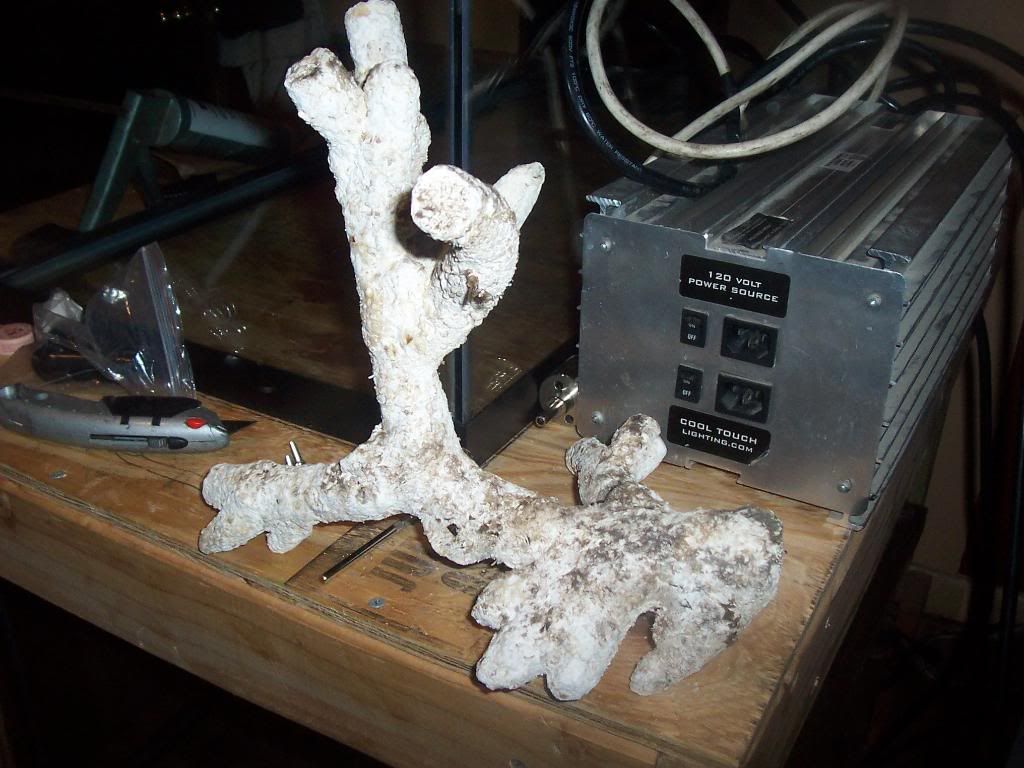 Tommarro if my drill bit come i will drill the sump and the overflow for two drain pipes. if the bit comes, May i add i have been at this tank for 1 year of planing and thinking what i want so if you HAVE ANY saggestions or critasize me at all please do. i want any help or any ideas that you think my dream will be better. Any help will also be GREATLY aprisheated. |
|
|

|
|
|
#2 |
|
Registered Member
Join Date: Jan 2008
Location: salt lake city, ut
Posts: 577
|
It looks like the entire weight of your display tank is going to be supported by only a few screws. Also 4x4s are prone to splitting. You may want to check a few stand build threads before you get too much further into it.
__________________
40 Breeder DIY external overflow, closed loop, skimmer, sump, dosers,.... Current Tank Info: 29gal reef w 20 gal sump/40gal reef w 20gal sump |
|
|

|
|
|
#3 |
|
Registered Member
Join Date: Aug 2007
Location: Virginia beach, VA
Posts: 1,709
|
your stand is totally going to fail
__________________
"You said it didn't bite!"......."Well"......"It didn't bite me." Current Tank Info: cool |
|
|

|
|
|
#4 |
|
Moved On
Join Date: Jun 2006
Location: pine hill
Posts: 554
|
I'm not done yet, this stand needs to be assembled in the room since i can't get it in the door. As you noticed i am not done the building of the stand. two 2x4 will be added to each big opening to, so i can make 2 swinging cabnet doors on each side and one in the front. there will also be a few in the inside of the sump area for direct sapport under the tank.
|
|
|

|
|
|
#5 |
|
Moved On
Join Date: Jun 2006
Location: pine hill
Posts: 554
|
just bought some more wood and pvp. hopefully i will get done a research paper and comp work so i can venture into it.
|
|
|

|
|
|
#6 |
|
Moved On
Join Date: Jun 2006
Location: pine hill
Posts: 554
|
Waking up early works wonders, i woke up about 4 hours b4 i do regularly and got all the drilling and some extra sapport to my stand done.
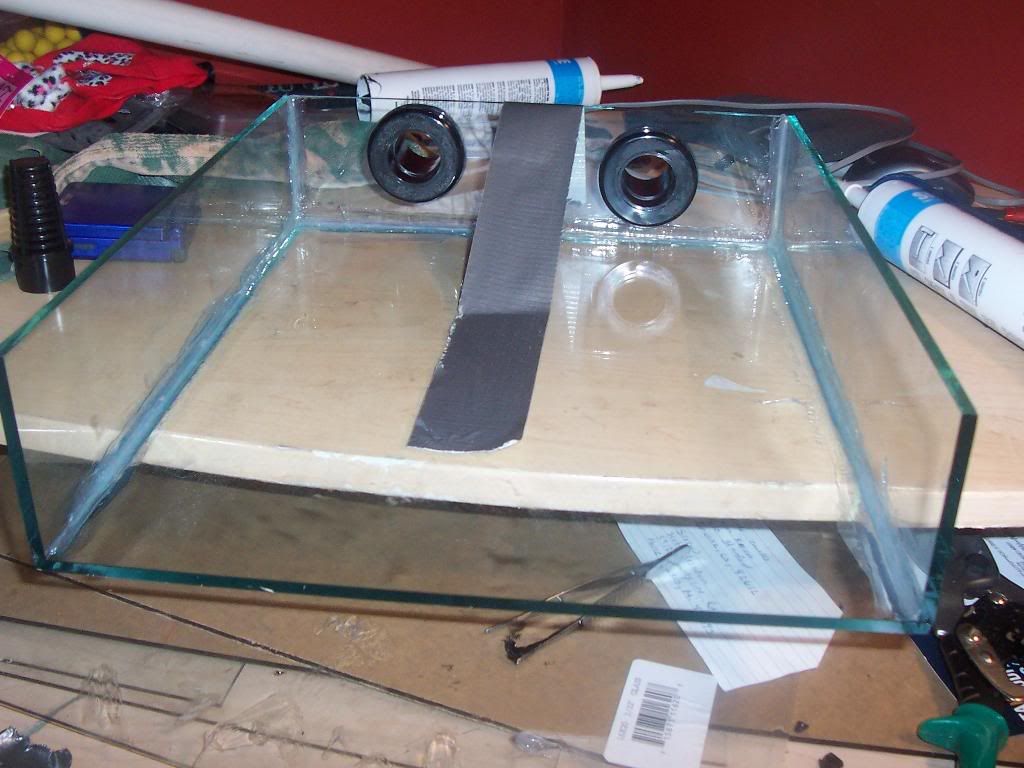 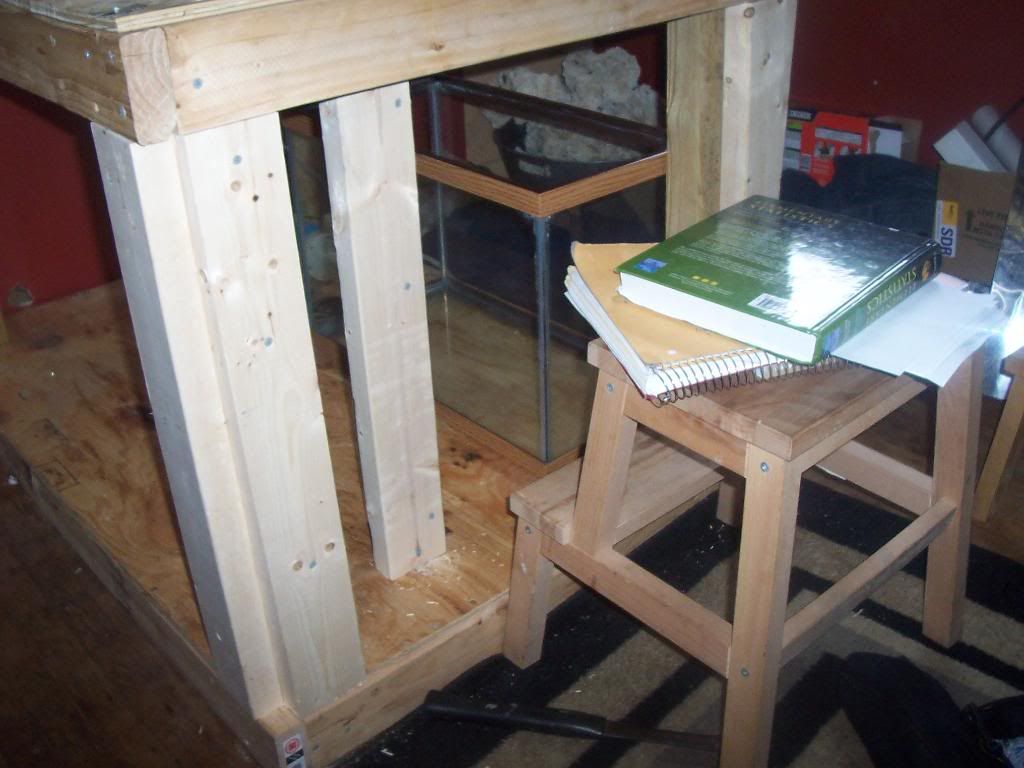 This is my sump 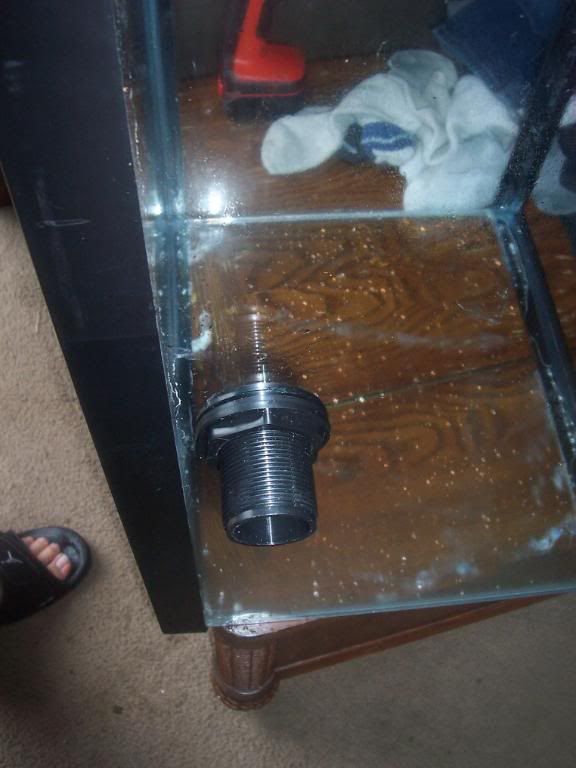 And i end up with this. 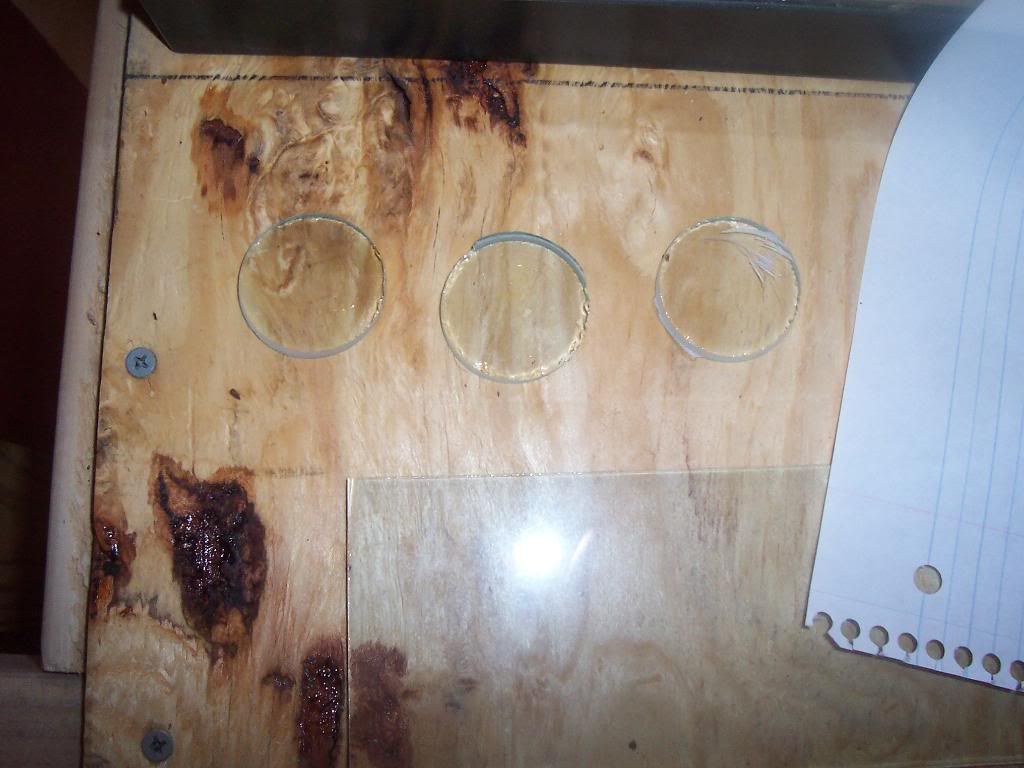
|
|
|

|
|
|
#7 |
|
Moved On
Join Date: Jun 2006
Location: pine hill
Posts: 554
|
Also for the people who said i didnt have enough sapport with what i added do you think i do now? i added two 2x4's on each corner.
|
|
|

|
|
|
#8 |
|
Registered Member
Join Date: Jan 2008
Location: Northern NJ
Posts: 1,812
|
Hard to tell from the pics but it looks like you still do not have any vertical supports directly under the tank? The additional 2x4's are in the corners but the tank is still sitting on the horizontal 2x4's that are only held in with screws? Or am I seeing it wrong? Looks like you may have one vertical in the middle but what does that connect to on the bottom? Just the 3/4" ply?
|
|
|

|
|
|
#9 |
|
Moved On
Join Date: Jun 2006
Location: pine hill
Posts: 554
|
The base has 6 2x4's laying under the plywood. The second level direcly under the main thank has been framed out with 2x4's meaning there is 2x4's direcly under the desplay tank. then all the corners are being held up by 4x4's and 2 2x4's on each corner.
Please let me know if you still think this is not enought, i mean i have had one thousand pounds on top of there standing and hoping up and down and everything is fine. 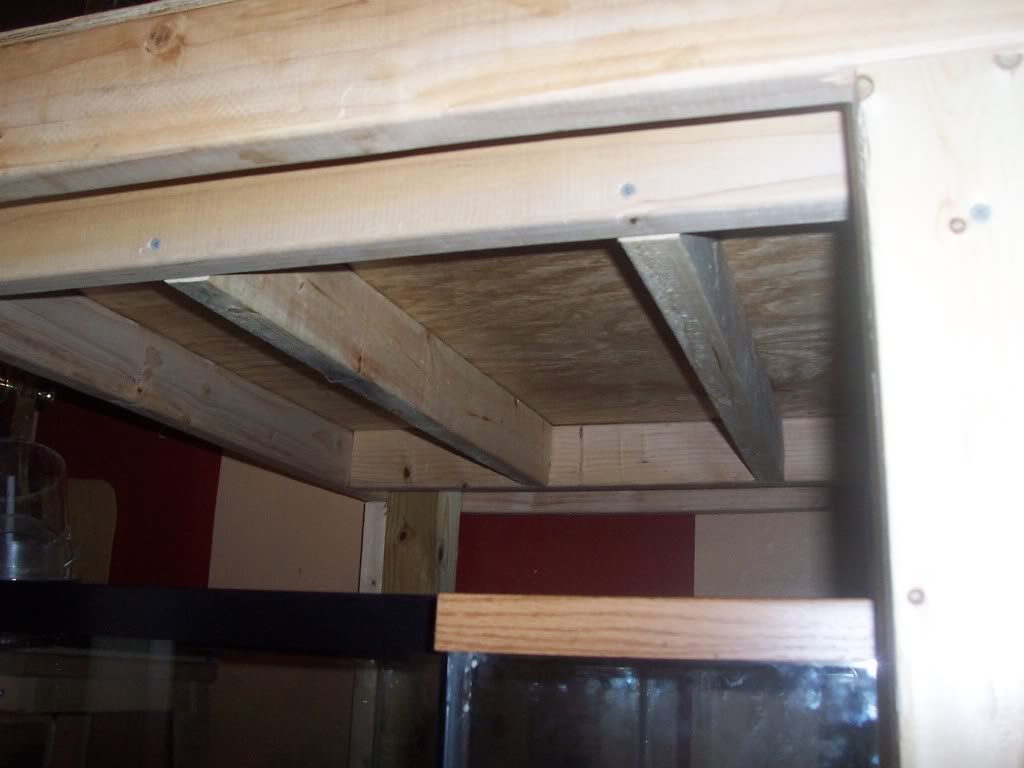 This has always been there since day one so please dont think i held them up there and screwed them in this hole frame was well build, well to what i think. i will also have half inch maple wood around all the outside to screwed into the frame to covor everything. |
|
|

|
|
|
#10 |
|
Registered Member
Join Date: Mar 2007
Location: Naples FL
Posts: 170
|
why such a large footprinted stand anyway? you need have your main supports under the edges of the tank. only other thing i would do is go out and get a 50 breeder before you get to far into it! lol i have a 50 and i love the size i dont think i would like it if it was any shorter. good luck my man. how are you going to cool that puppy?
|
|
|

|
|
|
#11 |
|
Registered Member
Join Date: Mar 2007
Location: Naples FL
Posts: 170
|
oh and after looking at the pics of the underside you def need to use joist hangers to hang your "joists". the two screws i can see will not be adequate.
|
|
|

|
|
|
#12 |
|
Registered Member
Join Date: Jan 2008
Location: salt lake city, ut
Posts: 577
|
Try posting a pic of this on rocketengineer's stand thread. I wouldn't feel good with this stand under my tank. The corner 2x4s helped a lot, and if your tank was on top of those it would be no problem. But your tank is sitting on plywood, not the 2x4s, and the boards under the plywood are only held in place with a couple of nails. Not trying to bash your stand, but it would really suck down the road if it failed. You will spend a lot of time and money on your tank, don't cut corners now.
__________________
40 Breeder DIY external overflow, closed loop, skimmer, sump, dosers,.... Current Tank Info: 29gal reef w 20 gal sump/40gal reef w 20gal sump |
|
|

|
|
|
#13 |
|
Moved On
Join Date: Jun 2006
Location: pine hill
Posts: 554
|
By joist hangers do you mean, and if so wont those rust do to them being right above the salt water.
http://www.hectorshardware.biz/shop/...23&sku=104176& Also there is no harm in bashing, you are helping provent a big boo boo. I couldn't find this thread you were talking about. so all in all you still think i need more sapport under there? And the cooling will be done buy toheavy duty fans inside the hood. along with a 1/5 chiller, sorry i never said anything about that in my first post. Right now im waiting on my plumbing and glass to get done. Last edited by mandm25254; 03/26/2009 at 09:13 PM. |
|
|

|
|
|
#14 | |
|
Registered Member
Join Date: Oct 2006
Location: Barrie, Ontario, Canada
Posts: 6,639
|
Quote:
it looks to me like you overflow notch is cut very low and on top of that it has square corners which will be prone to fail with the stress of the water on the tank...square holes in a glass pane are a booboo...i would try to reinforce the notch you cut...and use rounded corners..( silicone a new piece of glass to the backside of the existing one over the notch and re-cut the weir.... just my .02 |
|
|
|

|
|
|
#15 |
|
Moved On
Join Date: Jun 2006
Location: pine hill
Posts: 554
|
The over flow isnt cut low at all, and here is a guy with the same externiol over flow as me (cut corners and hasnt had any probs in four years)
http://reefcentral.com/forums/showth...&pagenumber=11 Also after those joist hangers do you think my stand will be fine or more reinforcment? |
|
|

|
|
|
#16 |
|
Registered Member
Join Date: Mar 2007
Location: Naples FL
Posts: 170
|
yep those are joist hangers and i believe they come galvanized so i dont know if rust would be a prob. plus just as long as you arnt running around spraying salt water everywhere you should be good.lol i would say you should prolly be ok if you get em hung right. but like that other cat said it is best if you have your vertical supports directly under the edges of your tank.
|
|
|

|
|
|
#17 | |
|
Registered Member
Join Date: Oct 2006
Location: Barrie, Ontario, Canada
Posts: 6,639
|
Quote:
either way...looks like a good start...i would still be hesitant about the square cut corners though...only time will tell...all the best i will be following the rest of your build... |
|
|
|

|
|
|
#18 |
|
Registered Member
Join Date: Mar 2008
Location: mn
Posts: 387
|
whats going to stop your fish from watersliding down into the box where you cant get them?
ive always used an internal overflow. use a black acryic one and paint the tank black and you never notice it. |
|
|

|
|
|
#19 |
|
Registered Member
Join Date: Apr 2006
Location: Palm Beach
Posts: 950
|
does look cut a bit low. your water lever would probly be 3/8 below the trim. not a big deal tho, if you want it higher up you can cut your acrylic backing up higher.
i just set up a 40b with an external overflow about a week ago. its my favorite tank size for someone thats not retired. 
|
|
|

|
|
|
#20 |
|
Registered Member
 Join Date: Feb 2008
Location: Toronto, Ontario
Posts: 1,038
|
How the heck did you cut a notch in the glass?
__________________
If you don't agree with me, that's fine... just go, think about it some more, and come back when you do. Current Tank Info: 120g Freshie, 55g salty with a 2/3 BeanAnimal. BA METHOD - TESTIFY! I am a DIY Disaster, but I am saving money! Damsel FREE since 07/08/09! |
|
|

|
|
|
#21 | |
|
Registered Member
Join Date: Oct 2006
Location: Barrie, Ontario, Canada
Posts: 6,639
|
Quote:
|
|
|
|

|
|
|
#22 | |
|
Foaming Conehead
Join Date: Sep 2006
Location: CO
Posts: 1,002
|
Yep I agree, I did the exact same thing on a 40 breeder, had it filled with a gallon of water and when I went to move it CRACK... split right in the corner of the overflow notch....
Quote:
|
|
|
|

|
|
|
#23 | |
|
Moved On
Join Date: Jun 2006
Location: pine hill
Posts: 554
|
Quote:
- Will be buying jiost either tomm or the next day along with all the baffels for the sump, plumbing and possably some 4x8 half inch thick sheets of maple wood. Which one will be put under the tank so that will help a little to, but i think ill put another cut out so you dont see the bottoms rim of the tank so the glass sits level. - To the cut of fish death comment, there is going to be a peice of clear Plexi glass cutand glued to the back, where i also might raise the water lvl to when i do this not 100% sure yet though. - Also i planed on making saport under the over flow with 2x4's just for a little extra help do you think i should inforce the back with to? ill be filling it with hose water out back to see what happins more fingers crossed. - To all the questions and help thanks alot, any help or advice is greatly appreciate. |
|
|
|

|
|
|
#24 |
|
Moved On
Join Date: Jun 2006
Location: pine hill
Posts: 554
|
Just another note, the cut is only 3/16 under the top trim i think it will be fine.
|
|
|

|
|
|
#25 | |
|
Registered Member
Join Date: Oct 2006
Location: Barrie, Ontario, Canada
Posts: 6,639
|
Quote:
|
|
|
|

|
 |
|
|