


|
 |
|
|
#1 |
|
Registered Member
Join Date: Mar 2014
Posts: 334
|
Building a custom cabinet for my 40 Gallon
|
|
|

|
|
|
#2 |
|
Registered Member
Join Date: Mar 2014
Posts: 334
|
I think I over did it on the stand. This thing could hold up my truck!
I left the back covered and just put a few holes for drain and return lines and electrical cord. Hopefully that will help keep the noise down. |
|
|

|
|
|
#3 |
|
Registered Member
Join Date: Jan 2011
Location: Florida
Posts: 1,366
|
Nice work. I built my own stand for my 65g that looks a lot like yours. I also think I overbuilt mine. It weighs a ton and could hold more than I could ever put on it. It has held up well over the past 4 years. I would be mindful of humidity in there with the back inclosed. The one thing that sucks about a tank with a small footprint you are really limited with sump size options.
__________________
24x24x12 Rimless RR * Apex * Reeflink * Radion Pro G2 * MP10wQD * JNS CO-1 Skimmer * Advance Acrylics Custom Sump * Jebao DC2000 |
|
|

|
|
|
#4 |
|
Got Sticks?
Join Date: Nov 2013
Location: Scriba, New York
Posts: 898
|
Looks nice. I did the same thing..but it's cheap and sturdy
__________________
Wife said Yes....and so the new build begins!! Current Tank Info: 90G RR - 30L Sump - SWC 150 Extreme Skimmer - 2x 175w 14K MH Lights w/ 2x VHO Actinics - SPS Focused, But Mixed :) |
|
|

|
|
|
#5 |
|
Registered Member
Join Date: Mar 2014
Posts: 334
|
Thanks guys!
I still need to make the doors, finish the trim and build the matching hood. Probably not going to get a chance to work on it more until next Saturday. I'm trying to decide on the type of finish for the inside? Like "EllisJuan" said the humidity is a concern. Thinking about a Latex gloss white so it will will be easier to see things in there. But if humidity becomes a problem I'll open up the back to allow more circulation. As of now the plan is to have a 20 gallon long tank as my sump. (Which I still need to build) Convert my fluidize bed unit into a Phosphate reactor, chaeto and 10 lbs. of miracle mud in the refugium. I also need to work on the tank. I'm installing 3/4" bulk head drain and 3/4" return into the back of the tank. I'm building a skimmer box out of the acrylic stand that came with the tank. (No sense in just throwing the stand away) Hopefully I can at least get water into the tank by next month. I didn't really realize the prep-work involved in doing a tank correctly. 
|
|
|

|
|
|
#6 |
|
Registered Member
Join Date: Mar 2014
Posts: 334
|
Why does my thread disappear from the main listing?
I had to search it to bring it up again? I just created it a few hours ago. Shouldn't it remain on the recent threads page for a while? |
|
|

|
|
|
#7 |
|
Registered Member
Join Date: Mar 2014
Posts: 334
|
I'm ordering a mini de-humidifer for the cabinet. Does anyone else use one?
|
|
|

|
|
|
#8 |
|
Registered Member
 Join Date: Apr 2008
Location: Grove City, Ohio
Posts: 10,806
|
You would be farther ahead to install a computer fan or two in the back blowing in to the stand with a couple other vent holes to allow the humidity to escape that way. I dehumidifier will waste a bunch of electricity and probably run 24/7, in addition to needing to be emptied daily (or more).
__________________
I'll try to be nice if you try to be smarter! I can't help that I grow older, but you can't make me grow up! Current Tank Info: 120 mixed reef with 40b sump, RO 150 skimmer, AI Sol Blue x 2, and a 60g Frag Tank with 100g rubbermaid sump. 2 x Kessil A360w lights, BM curve 5 skimmer |
|
|

|
|
|
#9 |
|
Registered Member
Join Date: Jul 2013
Posts: 165
|
A dehumidifier will be working constantly and cause increased evaporation from your sump. The dry the air in the cabinet, the faster water will evaporate, the more the humidifier will work, the more the humidifier works, the faster the water will evaporate etc. Never ending circle.
|
|
|

|
|
|
#10 |
|
Registered Member
Join Date: Aug 2013
Location: Atlanta
Posts: 2,497
|
|
|
|

|
|
|
#11 |
|
Registered Member
Join Date: May 2007
Location: Rochester, ny
Posts: 143
|
I built one very similar with a back all enclosed and while I haven't done it yet I will be installing a small fan in the back to circulate the air in and out. After having it running for a couple of months there is quite a bit of moisture on the inside. It's not terrible but it's enough to want air circulation.
|
|
|

|
|
|
#12 |
|
Registered Member
Join Date: Oct 2002
Posts: 52
|
I like the sturdiness. Since that aspect isnt visible why not make it extra strong. I am thinking of making a stand where the sides slope outward from the top just to make it look interesting.
|
|
|

|
|
|
#13 |
|
Got Sticks?
Join Date: Nov 2013
Location: Scriba, New York
Posts: 898
|
I purchased the steal frame one from petco for 45$ but now i think im gonna wrap it in a oak skin from home depot and add some trim and doors. Will never know looking at it. Just trying to see what would be best way to screw it to the frame....without being able to see the screws
__________________
Wife said Yes....and so the new build begins!! Current Tank Info: 90G RR - 30L Sump - SWC 150 Extreme Skimmer - 2x 175w 14K MH Lights w/ 2x VHO Actinics - SPS Focused, But Mixed :) |
|
|

|
|
|
#14 |
|
Registered Member
Join Date: May 2007
Location: Rochester, ny
Posts: 143
|
Industrial strength adhesive? Liquid nails type stuff? Lol
|
|
|

|
|
|
#15 | ||
|
Registered Member
Join Date: Mar 2014
Posts: 334
|
Quote:
Quote:
http://www.amazon.com/gp/product/B00...?ie=UTF8&psc=1 I have a few computer fans laying around. I might install one in the cabinet. I'm installing one in the hood to cool the lights, but I have about 4 high flow fans in my shop so I could install one in the cabinet. |
||
|
|

|
|
|
#16 |
|
Registered Member
Join Date: Mar 2014
Posts: 334
|
|
|
|

|
|
|
#17 |
|
Registered Member
Join Date: May 2007
Location: Rochester, ny
Posts: 143
|
Looks great. Nice job.
|
|
|

|
|
|
#18 | |
|
Registered Member
Join Date: Nov 2005
Location: San Diego, CA
Posts: 14,655
|
Quote:
I think it looks great, good job. Curious what you would have done differently? Did you add a center brace/mullion between doors, or is that attached to a door?
__________________
There's a fine line between owning your tank and your tank owning you! Current Tank Info: SCA 120g RR Starfire, Tunze silence 1073.02 return, 40g sump w/ fuge, SWC Extreme 160 cone skimmer,Geismann reflexx 4xT5, 2x Panorama Pro LED strips, Vortech MP40QD |
|
|
|

|
|
|
#19 | |
|
Registered Member
Join Date: Mar 2014
Posts: 334
|
Quote:
Next time I'd probably try to do better on preplanning. Every piece I made i needed to compensate for some mis-measurement. The choice of wood was limited. The mahogany ply that my local store had, was way too light in color so now it looks 2 toned. It was hard to visualize the scale of the hood. So it actual is a bit taller then I wanted. But I guess for my first aquarium cabinet it came out fairly good. I need to sand everything down and round the edges. Then I'm gonna try to stain it to a consistent color. (Wish me luck?) If it doesn't work out? I'm painting it black. |
|
|
|

|
|
|
#20 |
|
Registered Member
Join Date: Nov 2005
Location: San Diego, CA
Posts: 14,655
|
Well you did a good job on attaching that center to door and that is what I would have done for same reason.
Often they do ply w/ Phillipine mahogany which is much lighter and cheaper. Depending on stain color it may balance out more than you may expect, in fact don't be surprised if the light becomes darker. Even solid wood has variations in color flavor. The hood looks nicely balanced in pics, does not seem too tall to me. One of the hardest things to learn is remembering to take account for lumber thickness, it can be hard to precut everything as it looks or seems. If that is your first cabinet you did darn good! Make sure to do test strips on scrap lumber w/ stain before committing to your cabinet, and may want to use wood conditioner before staining.
__________________
There's a fine line between owning your tank and your tank owning you! Current Tank Info: SCA 120g RR Starfire, Tunze silence 1073.02 return, 40g sump w/ fuge, SWC Extreme 160 cone skimmer,Geismann reflexx 4xT5, 2x Panorama Pro LED strips, Vortech MP40QD |
|
|

|
|
|
#21 |
|
Registered Member
Join Date: Mar 2014
Posts: 334
|
|
|
|

|
|
|
#22 |
|
Registered Member
Join Date: Dec 2008
Location: Colorado
Posts: 505
|
What kind of wood did you use on the outside and trim? I'm wondering cause the stain looks like it almost matches but from the bare pics looks like two different types of wood
|
|
|

|
|
|
#23 | |
|
Registered Member
Join Date: Mar 2014
Posts: 334
|
Quote:
|
|
|
|

|
|
|
#24 |
|
Registered Member
Join Date: Mar 2014
Posts: 334
|
Drilled the back of the tank and installed the bulkheads. Did most of the plumbing. Now starting to build my refugium.
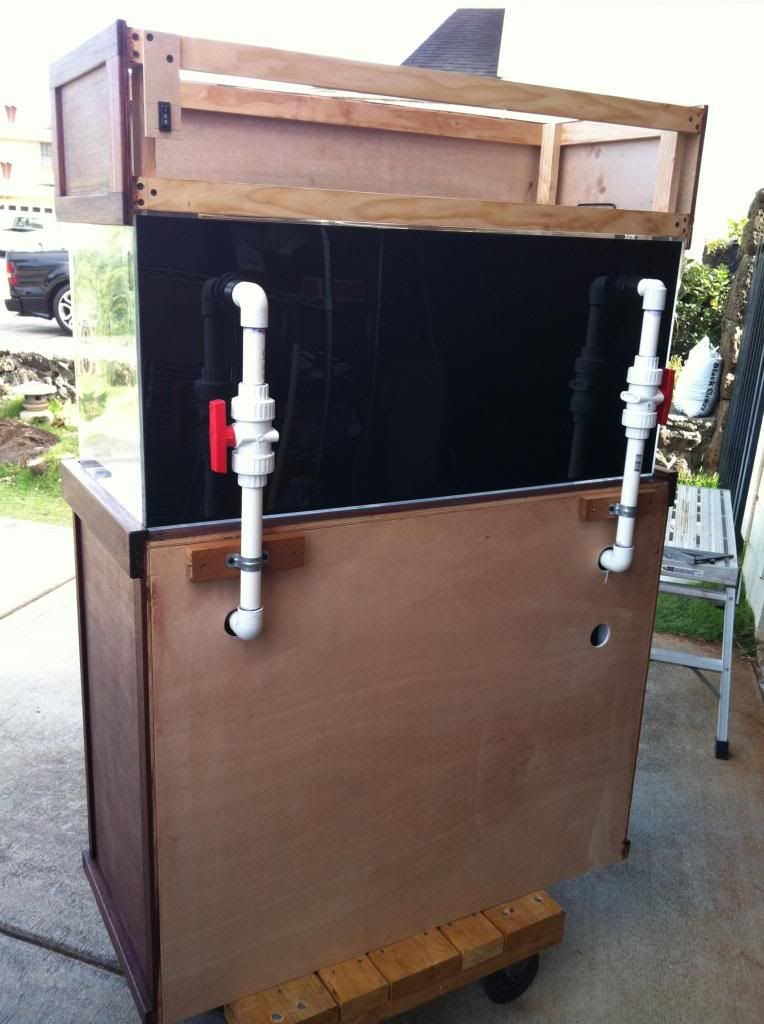 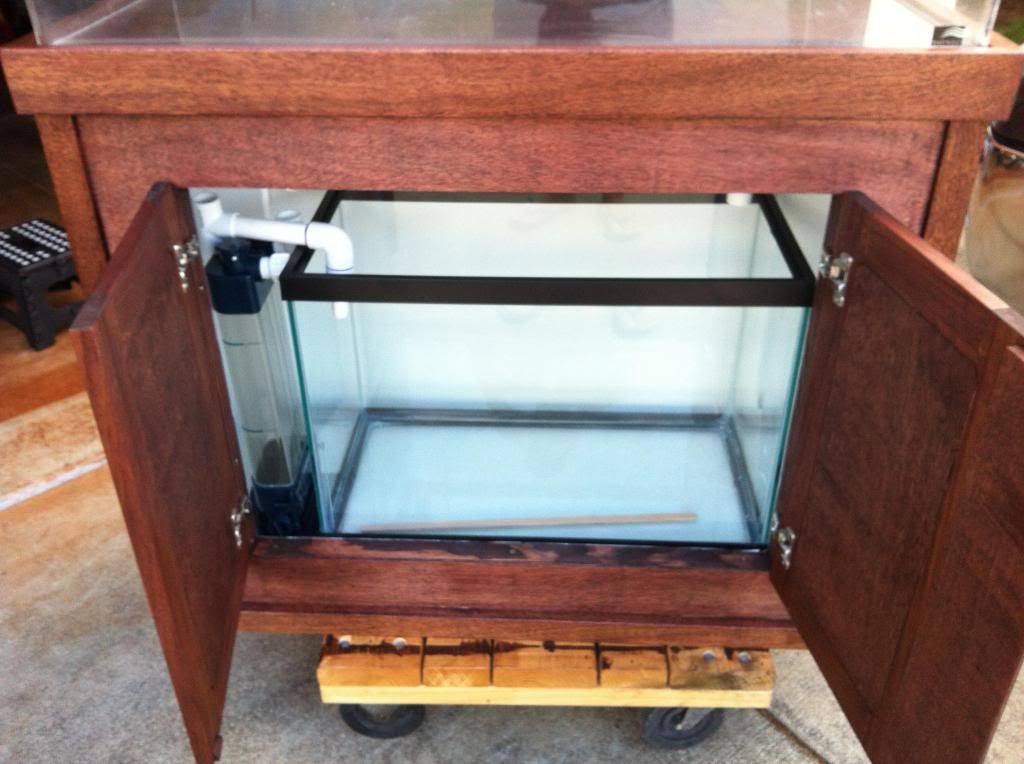 Refugium design: 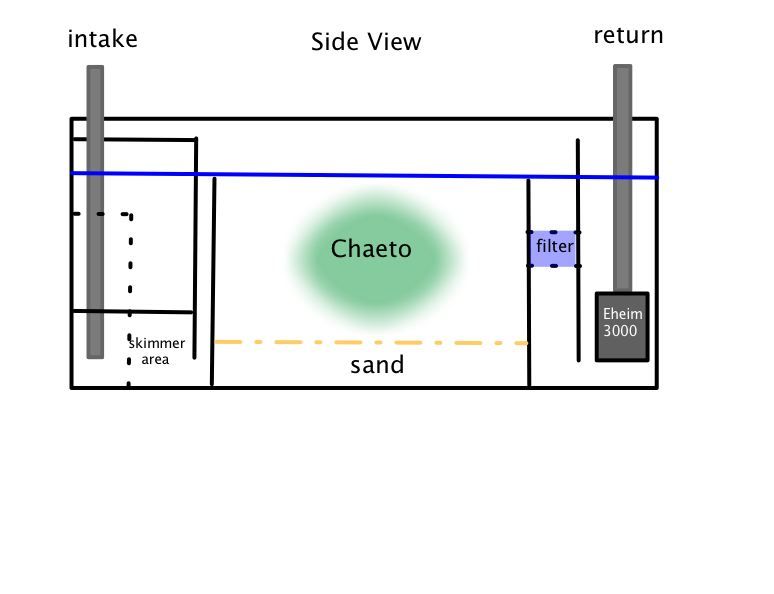 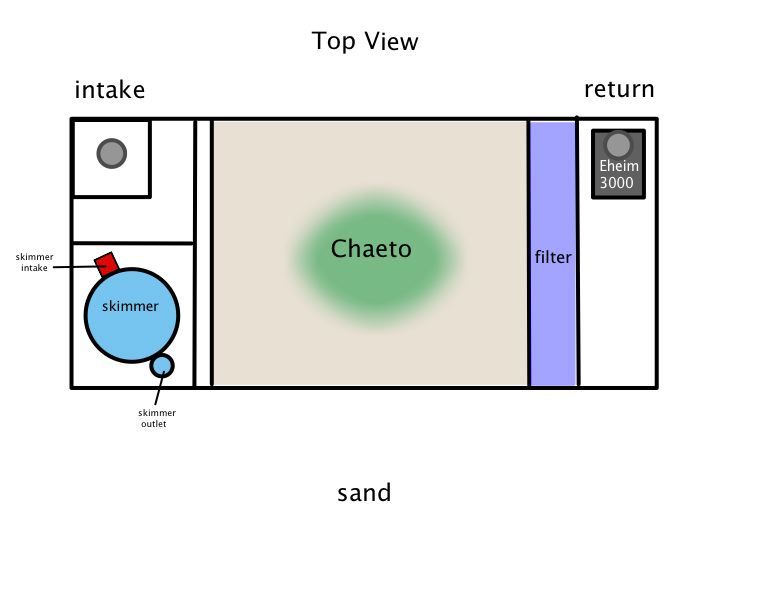  Wish I had more room for a bigger refugium. But it is what it is?! Also relocated the switch from the LED light I got from Ebay. 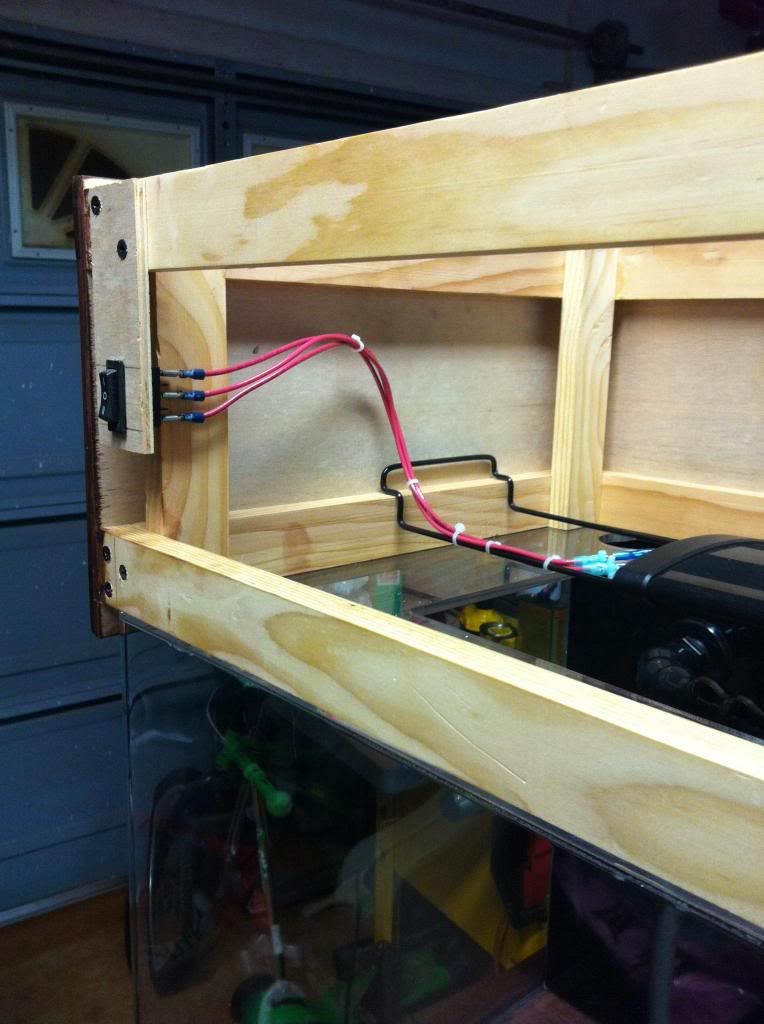
Last edited by toku58; 03/23/2014 at 10:51 PM. |
|
|

|
 |
|
|