


|
 |
|
|
#1 |
|
Registered Member
Join Date: May 2009
Location: Sugar Grove IL
Posts: 136
|
340 Gallon in-wall build
New 340 gallon in wall build.
I'm not new to the hobby but I am new to forums. I plan to post progress on my custom in wall build and solicit the incredible knowledge and advice this community collectively shares. This lady is excited for this upgrade!  Purchased tank from fellow reefer: http://www.reefcentral.com/forums/pi...ictureid=62383 This 340 is my first acrylic tank: http://www.reefcentral.com/forums/pi...ictureid=62382 This is the wall selected: http://www.reefcentral.com/forums/picture.php? albumid=9032&pictureid=62379 Will be set on a 45 degree angle: http://www.reefcentral.com/forums/pi...ictureid=62381 We're enclosing the fish room in green board. I'm converting a 80 gallon acrylic show tank into a custom sump below. Now to get busy with some PVC! |
|
|

|
|
|
#2 |
|
Registered Member
Join Date: May 2009
Location: Sugar Grove IL
Posts: 136
|
(anyone willing to teach me how you post pictures in the thread versus links?)
|
|
|

|
|
|
#3 |
|
Registered Member
Join Date: Jan 2010
Location: Canadia
Posts: 4,276
|
Do you have a Flickr, Photobucket or similar image account somewhere on the web? Best to post your photos there and then use the Direct URL there with the blue Link icon here on RC (just above the Reply window in Edit mode).
Dave.M
__________________
My Gawd! It's full of corals! Current Tank Info: None. Nil. Zip. Nada. |
|
|

|
|
|
#4 |
|
Registered Member
Join Date: May 2009
Location: Sugar Grove IL
Posts: 136
|
Thanks!
|
|
|

|
|
|
#5 |
|
Registered Member
Join Date: May 2009
Location: Sugar Grove IL
Posts: 136
|
Let's try these images again.
http://www.pinterest.com/pin/113434484338762021/ Looks like my pinterest posts won't work. I'll setup another photo sharing site. Last edited by angela1; 04/22/2014 at 05:30 PM. |
|
|

|
|
|
#6 |
|
Registered Member
Join Date: Jan 2010
Location: Canadia
Posts: 4,276
|
I don't see how you intend to get in behind the tank in your triangular closet space. Cutting out a few large cardboard boxes and taping them together into the size and shape of your tank and stand will help you visualize what the tank will really look like in the space. From there you can think about what you will need to work on the actual tank once it is in place.
Dave.M
__________________
My Gawd! It's full of corals! Current Tank Info: None. Nil. Zip. Nada. |
|
|

|
|
|
#7 |
|
Registered Member
Join Date: May 2009
Location: Sugar Grove IL
Posts: 136
|
Thanks for the lesson on posting images Dave! Youre right that my fish room will be small but it does seem functionally accessible. Ill keep you posted when tge tank is in place. It is larger than i had visualized!
|
|
|

|
|
|
#8 |
|
Registered Member
Join Date: Mar 2005
Location: Wisconsin
Posts: 617
|
__________________
Andy Current Tank Info: 280 reef |
|
|

|
|
|
#9 |
|
Registered Member
Join Date: May 2009
Location: Sugar Grove IL
Posts: 136
|
I gotta ask, how did you resize? I've been searching how to fix them. *New to forums* thanks for your patience and help.
Can you also tell me if there's a way to edit/remove earlier posts in the thread? I'd love to get rid of those giant pics I posted 
|
|
|

|
|
|
#10 |
|
Registered Member
Join Date: Mar 2005
Location: Wisconsin
Posts: 617
|
I saved your pics to my desktop, opened them with paint, and then resized them. I resized them to 20%. Then used photobucket to re-post. You can edit your own post by clicking the edit button at the bottom of your post
__________________
Andy Current Tank Info: 280 reef |
|
|

|
|
|
#11 |
|
Registered Member
Join Date: Jan 2010
Location: Canadia
Posts: 4,276
|
I hope you have a plan for venting your fish room behind the tank to the outdoors.
Dave.M
__________________
My Gawd! It's full of corals! Current Tank Info: None. Nil. Zip. Nada. |
|
|

|
|
|
#12 |
|
Registered Member
Join Date: May 2009
Location: Sugar Grove IL
Posts: 136
|
Yes, we ran a vent outside and will be installing an exhaust fan. The plan to seal the room with green board and run the exhaust is in hopes of protecting the furnace etc that sits just on the other side of the fish room.
If there are any other precautions I should take please do let me know. |
|
|

|
|
|
#13 |
|
Registered Member
Join Date: May 2009
Location: Sugar Grove IL
Posts: 136
|
Okay I'm finally back on track and building. Here's a draft of our custom sump plans.
Specs: Sump was an acrylic display tank that we are converting into a sump. Dimensions are 48" L x 24" W x 16" H Submerged MRC MR-2 Skimmer Refugium Return RO Top off Reservoir with float We bought and cut acrylic baffles but have not installed yet. Thought we'd better safety check this plan here first  Skimmer will be submerged up to the first hole in the beckett. 
Last edited by angela1; 05/31/2014 at 12:30 PM. Reason: Photo orientation |
|
|

|
|
|
#14 |
|
Registered Member
Join Date: May 2009
Location: Sugar Grove IL
Posts: 136
|
Stand is in. Reinforced frame with steal beams.
[IMG] 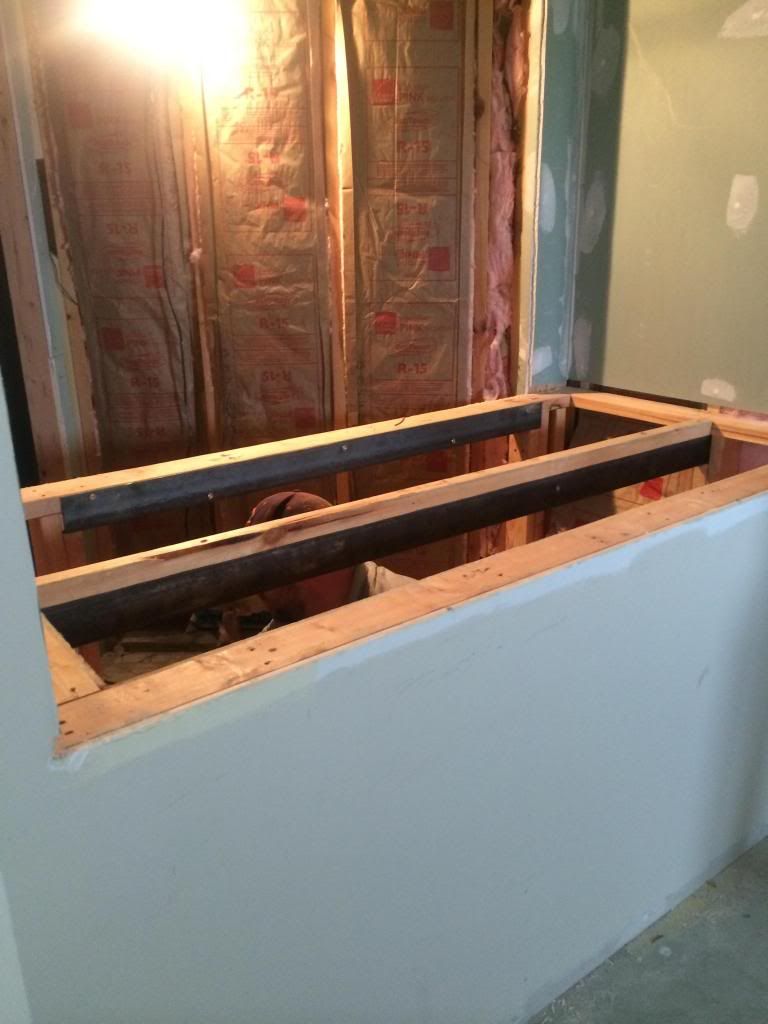 [/IMG] [/IMG]Protected the stand wood/steel with waterproofing material -- RedGard [IMG] 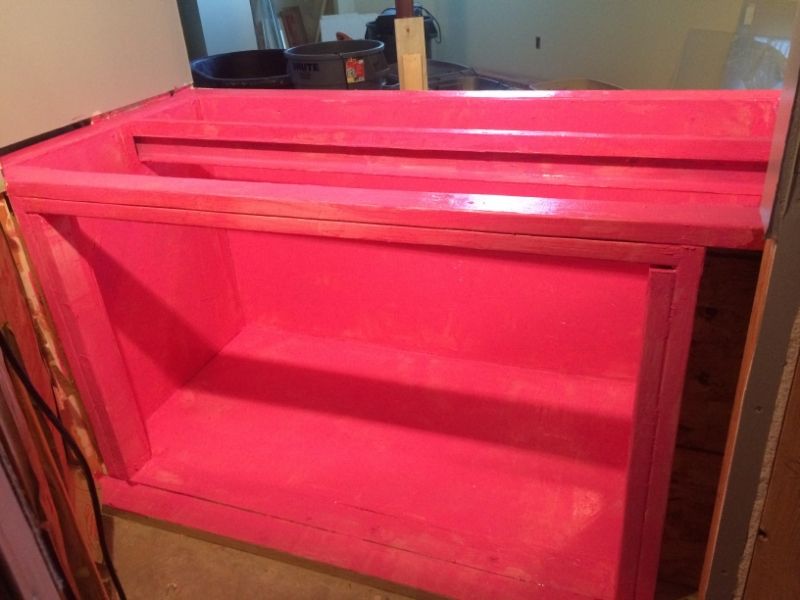 [/IMG] [/IMG]It took four guys with a lot of muscle [IMG] 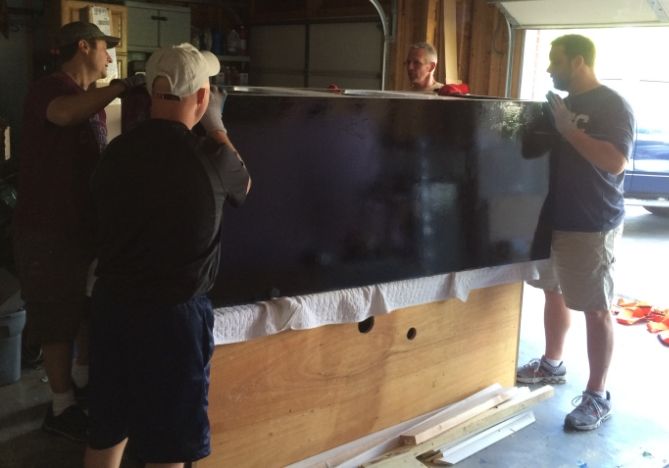 [/IMG] [/IMG]And now it's IN THE WALL! [IMG] 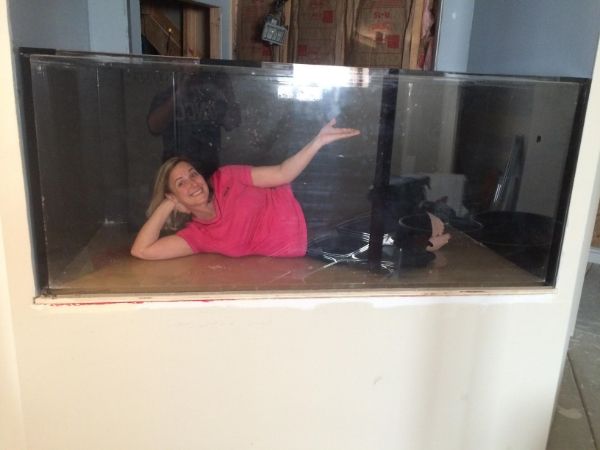 [/IMG] [/IMG]Now comes the technical work of getting it running. Looking forward to getting the plumbing and equipment plans underway. |
|
|

|
|
|
#15 |
|
Registered Member
Join Date: May 2009
Location: Sugar Grove IL
Posts: 136
|
Any thoughts on the sump plans? I'm an absolute novice when it comes to the sump. Any feedback is appreciated (we're cutting baffles today)! Thanks

|
|
|

|
|
|
#16 |
|
Registered Member
Join Date: Jan 2005
Posts: 148
|
I don't think you need two bubble traps but if you do keep them both then I would make the middle glass taller than the outside glass pieces. The bubbles would just float on top of water and go over into the refugium the way you have it set up.
|
|
|

|
|
|
#17 | |
|
Registered Member
Join Date: May 2009
Location: Sugar Grove IL
Posts: 136
|
Quote:
Last edited by angela1; 06/01/2014 at 06:36 PM. Reason: I misunderstood original reply. |
|
|
|

|
|
|
#18 |
|
Registered Member
Join Date: Jun 2009
Location: so_cal
Posts: 52
|
Looking good and getting there quick. This will be good
|
|
|

|
|
|
#19 |
|
Registered Member
Join Date: May 2009
Location: Sugar Grove IL
Posts: 136
|
Going to weld the baffles in the sump tonight. Any other feedback on the sump plans (pic above) is welcome. Hoping my design will function as intended
|
|
|

|
|
|
#20 |
|
Registered Member
Join Date: Aug 2008
Location: Mount Juliet, TN
Posts: 4,528
|
I agree on a single bubble trap.
Any reason you can't have a completely separate top off container? |
|
|

|
|
|
#21 |
|
Registered Member
Join Date: May 2009
Location: Sugar Grove IL
Posts: 136
|
Okay we had several hurdles delay our progress including a major leak in our basement unrelated to the tank. I will post an update with pics very soon!
|
|
|

|
|
|
#22 |
|
Registered Member
Join Date: May 2009
Location: Sugar Grove IL
Posts: 136
|
Between camping, kids and work we've finally made significant progress!
Returns are plumbed: Herbie overlfow, 2" pipe with gate valve and durso pipe to sump [IMG] 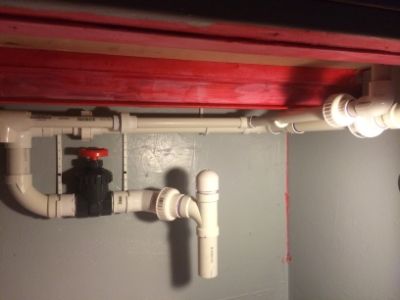 [/IMG] [/IMG]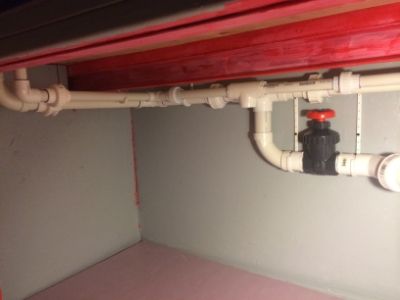 Stand has been coated with water proofing material and then painted. I placed a piece of insulation under the sump to help reduce noise/vibrations. Sump design and build is complete (thanks for the feedback gang!). I re purposed a display tank. Right side will have a sock filter where the overflow was. I need to buy a smaller filter or modify the sock filter I have. We cut out the bottom half of the overflow box and will have the drain dump into this opening. 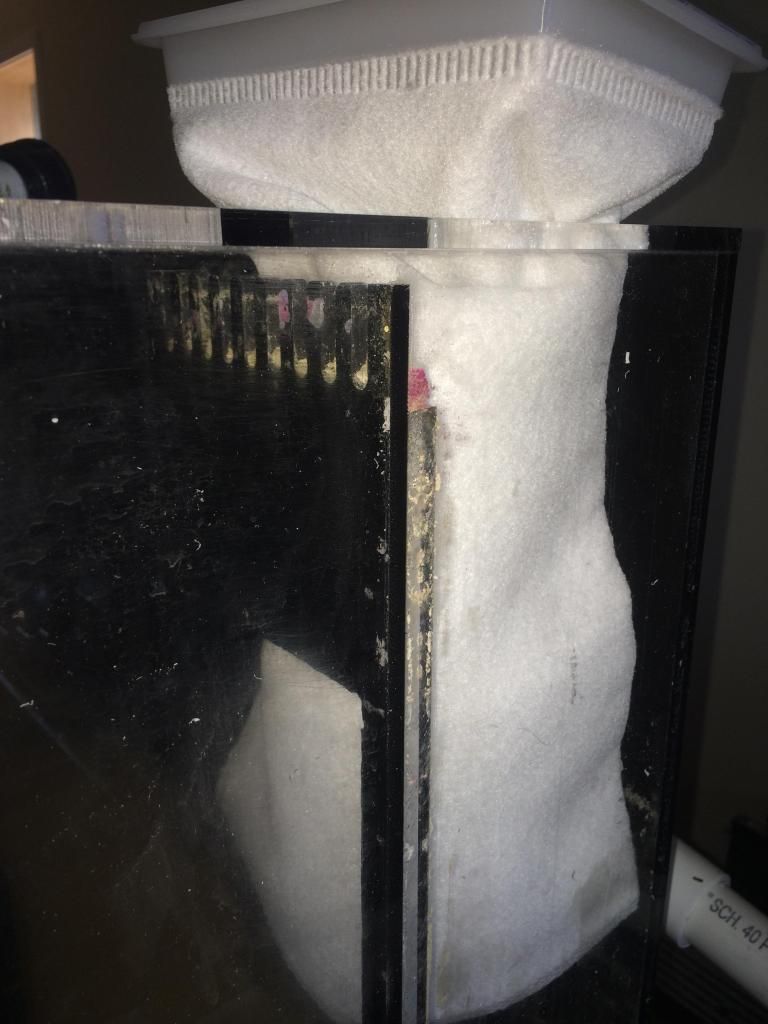 Drain will go to the sock filter in right compartment. Skimmer will run here. Over the bubble traps and into the return. We mad the left compartment the fuge. I purchased a Pan World 250ps pump for the return and will run a line to provide flow to the fuge. Skimmer is MRC II 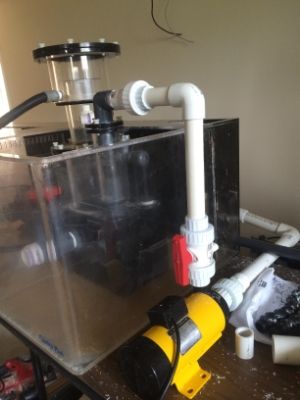 Return will be 1" in wall over the top through two 3/4" pipes. I'm adding a Jabao WP-60 wavemaker for flow Crossing my fingers that I haven't made any grave mistakes as of yet!! Feedback is welcome. Thanks for your help and interest in this build. 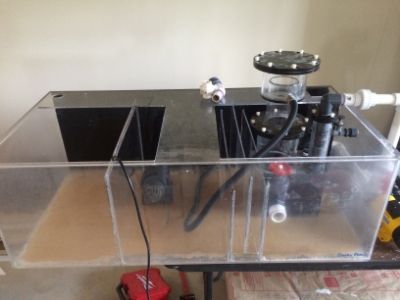
|
|
|

|
|
|
#23 |
|
Registered Member
Join Date: May 2009
Location: Sugar Grove IL
Posts: 136
|
|
|
|

|
|
|
#24 |
|
Registered Member
Join Date: May 2009
Location: Sugar Grove IL
Posts: 136
|
|
|
|

|
|
|
#25 | |
|
Registered Member
Join Date: May 2009
Location: Sugar Grove IL
Posts: 136
|
Quote:
If it was 2' smaller on both sides it would have been a no-go. |
|
|
|

|
 |
| Tags |
| custom build, in wall, new build |
|
|